How to Make a DIY Photo Mat (Using Simple Materials)
Discover how to craft your own photo mat for any photo and frame size, adding a personal touch to your cherished photographs.
Learn | By Ana Mireles
Shotkit may earn a commission on affiliate links. Learn more.
Have you ever thought about making your own photo mats to add a personal touch to your photos?
Maybe your photo is too small for the frame, or maybe you want a pop of color to highlight your black-and-white photos.
Whatever the reason, this easy DIY project will spruce up your home decor!
Here are some more fun DIY photo projects for you to try:
Materials
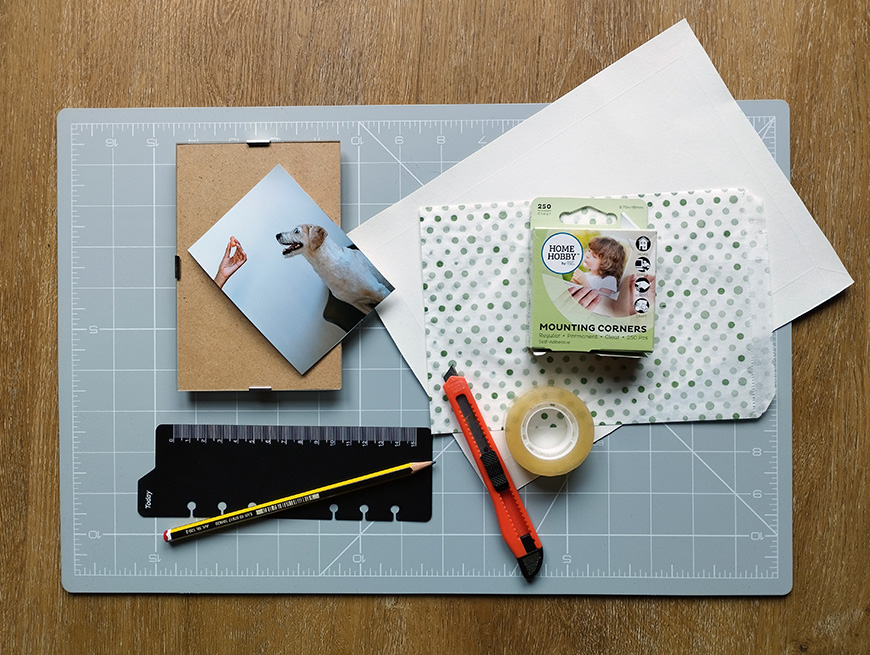
- Cardboard/Fabriano paper
- X-acto knife or cutter
- Colorful paper
- Ruler
- Cutting mat
- Scotch tape
- Mounting corners
- Pencil
- Photo
- Photo frame
Process
You can follow these steps regardless of your photo and frame size. I’m using a 15.2 x 10.2 cm (4×6″) photo frame and a 10.5 x 7.5 cm photo.
Step 1

The first thing you need to do is cut the cardboard to the same size as the frame. You can use Fabriano or an acid-free paper traditionally used to mount photos.
However, I suggest using regular cardboard because we will wrap it with fun or colorful paper that’s not archive quality. So, you would be spending extra money to lose the advantages of that material.
Not only is it OK to use regular cardboard, you can repurpose any package you have around the house – for example, a cereal box. Make sure it’s easy enough to cut and the thickness fits your frame.
I’m using the envelope from FreePrints, where I recently ordered some prints.
So, place the glass or the base of the frame on top of the cardboard. Then, trace the edge around it with a pencil and cut it.
Step 2

You’ll have to cut a window inside the cardboard piece you just cut to showcase the photo. Obviously, the window needs to be centred.
To find the centre, trace an X connecting the corners. Then, do the same on the back of your photo – make sure you’re using a pencil rather than a pen.
Step 3
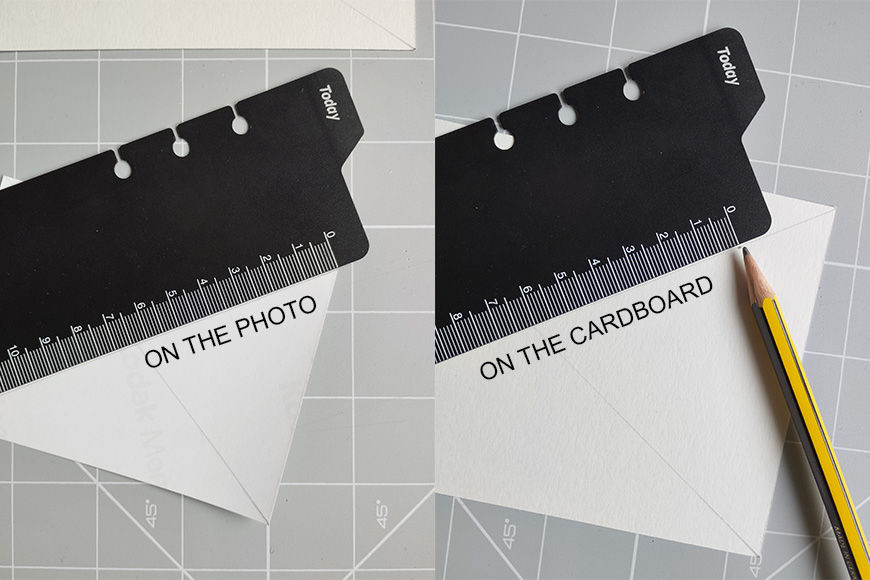
Next, measure the line length from the picture’s centre to one of the corners. In my case, it’s 6.4 cm, but this will depend on the size of your print.
Since I want the window to be slightly smaller than the photo (otherwise, it will fall) I marked 6 cm on each diagonal line of the cardboard.
How much smaller you make it depends on your frame and print size. It will also depend on whether there’s much information towards the edge of the photo.
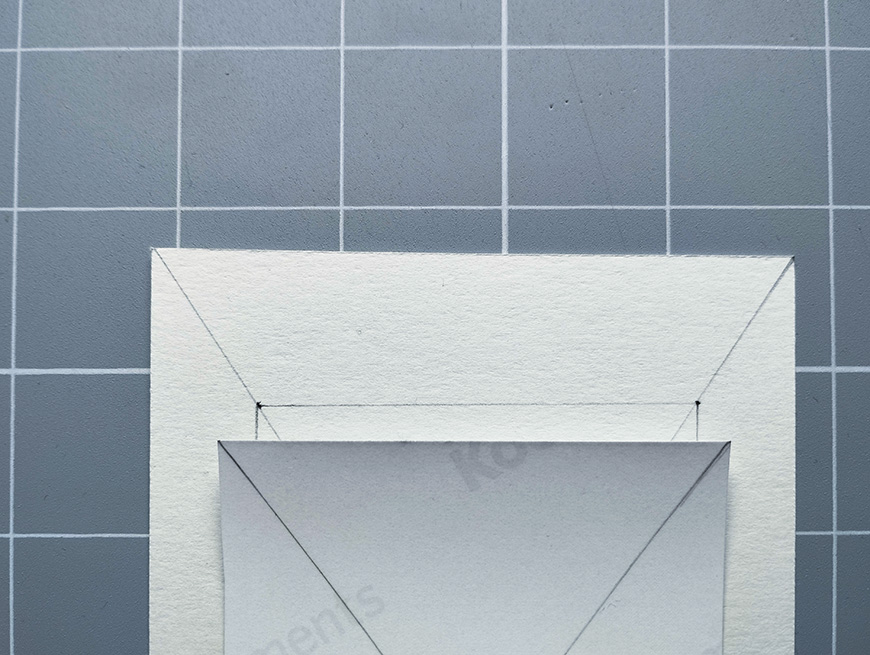
Then, connect the dots to trace a rectangle on the cardboard. Make sure the rectangle you traced is, in fact, smaller than your photo.
Step 4
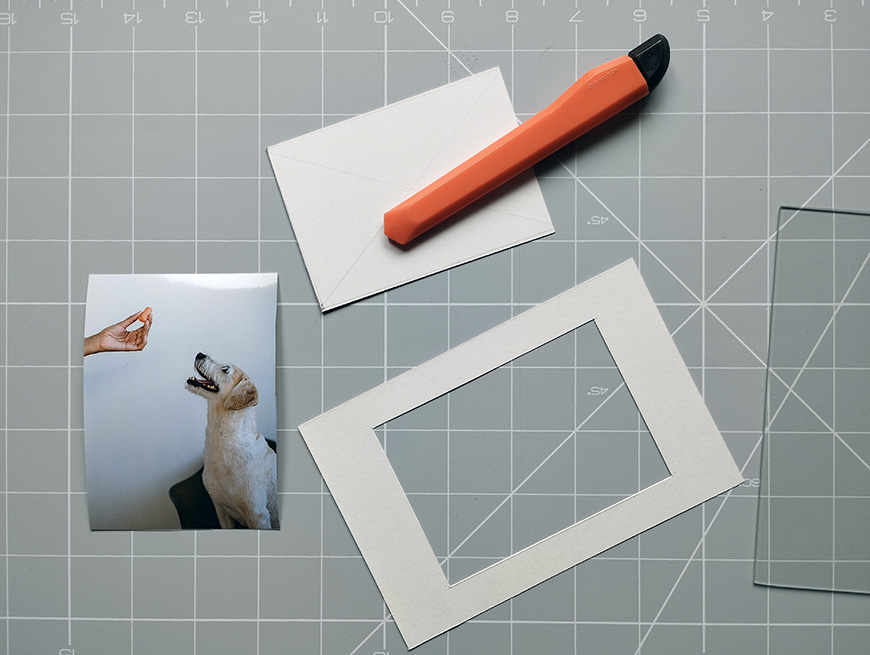
Using the cutter, cut the rectangle you just traced.
Now, you can erase the diagonal lines you traced if you want. If the color paper you’ll use is thick enough to cover them, you won’t have to worry.
Step 5
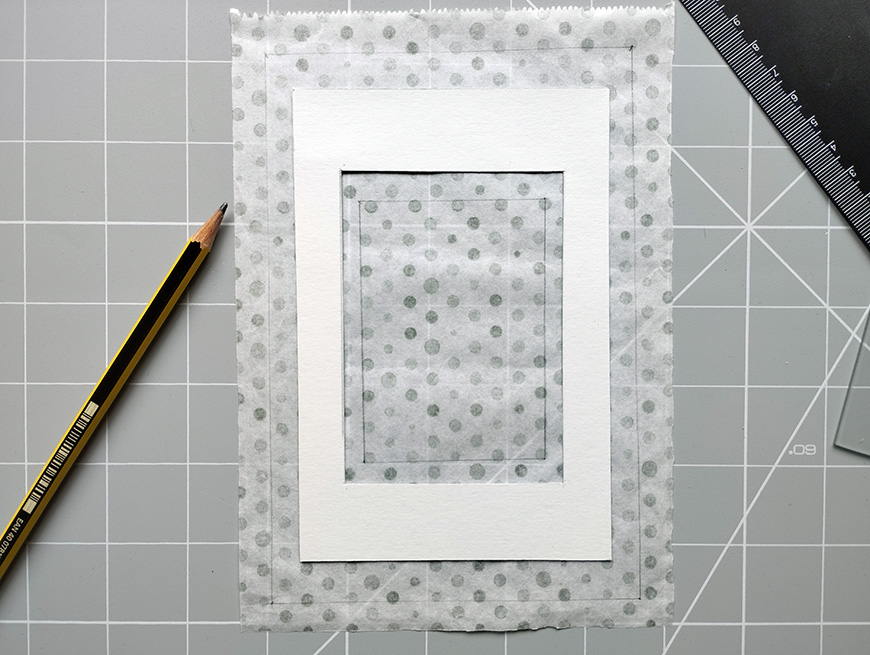
On the back of the color paper, trace a rectangle that’s slightly bigger than the cardboard frame. In my case, I drew it 1.5 cm bigger on each side.
Then, trace the cut-out window so that the internal rectangle is smaller than the one on the cardboard.
Step 6
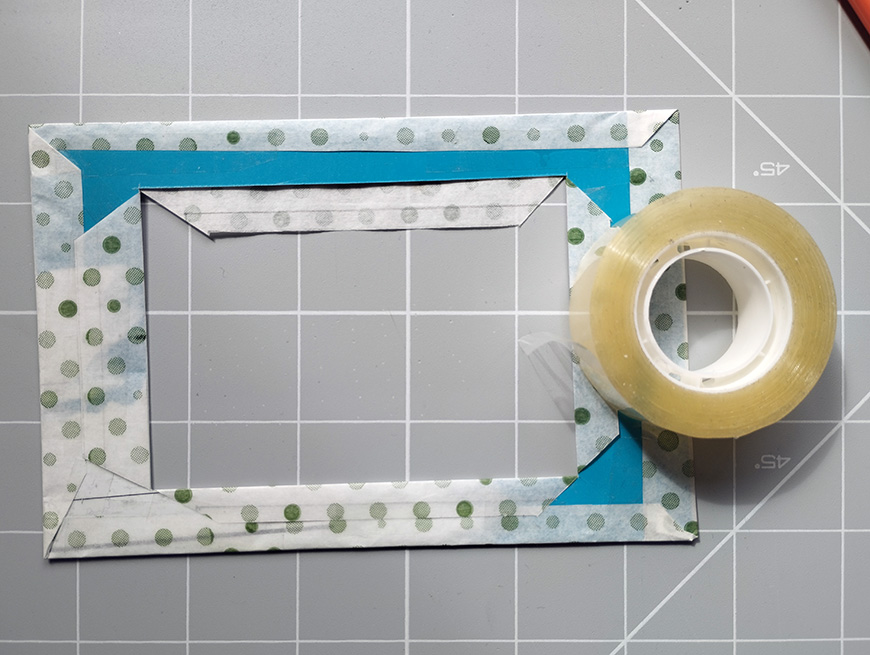
Now, place the cardboard paper on top of the color paper. Then, start folding it so that you wrap the cardboard and use the Scotch tape to fix it on the back.
How Much Do You REALLY Know About Photography?! 🤔
Test your photography knowledge with this quick quiz!
See how much you really know about photography...

You can make diagonal cuts at the internal angles to make it easier to fold.
Step 7
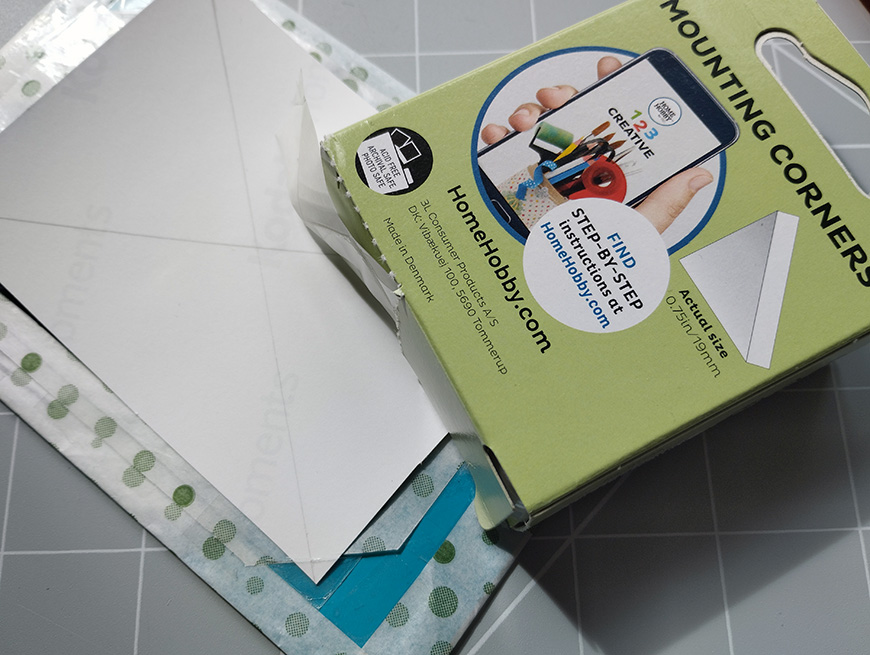
Now, paste the mounting corners on the back of the photo mat. You can also tape the photograph directly to the mat using scotch tape, which would damage the mat if you ever want to change the picture.
Using mounting corners, you can change the photo as often as you want without damaging the mat or the photo.
Step 8
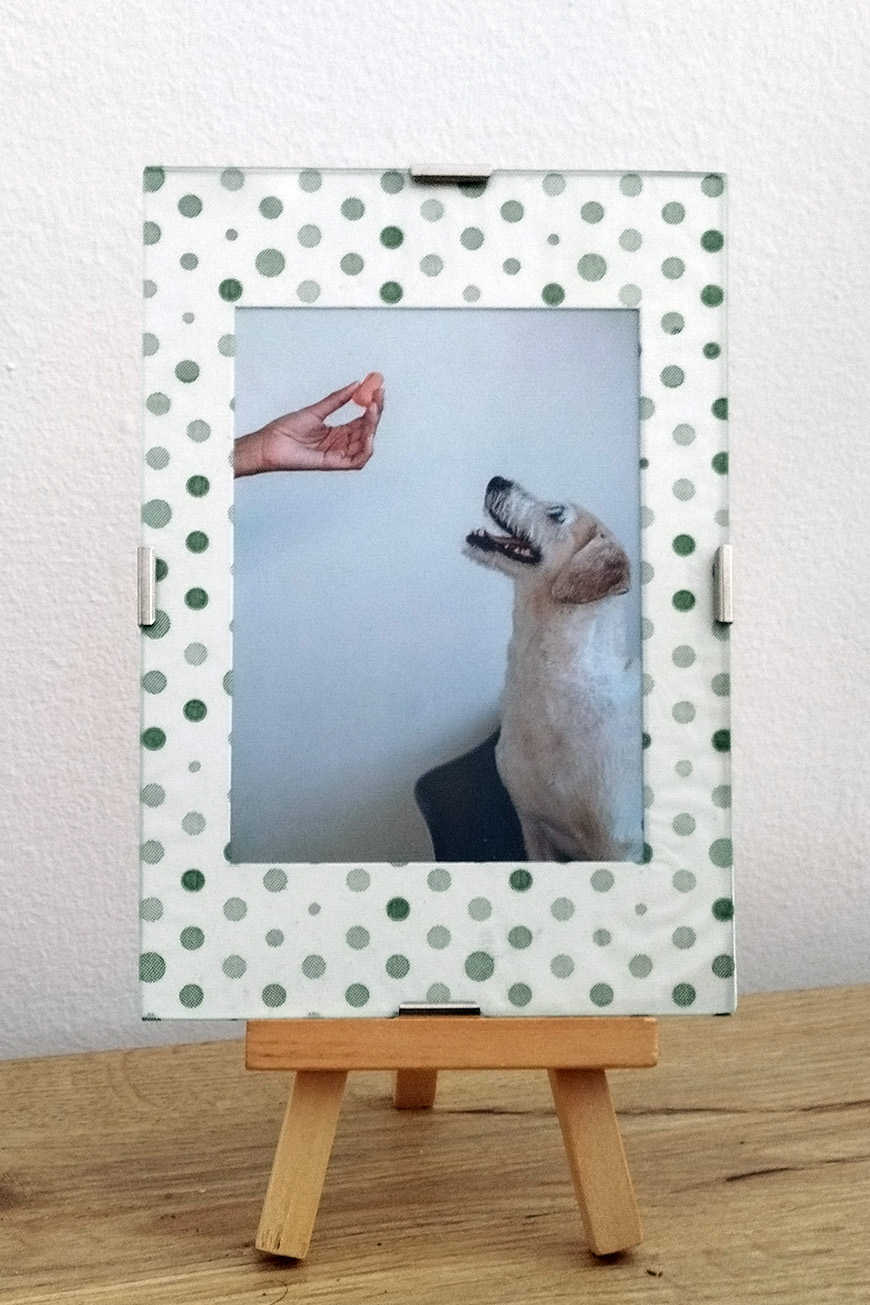
That’s it; your photo mat is ready!
Simply mount the photo and assemble the frame back. Now, it’s ready to be hanged or displayed.

Check out these 8 essential tools to help you succeed as a professional photographer.
Includes limited-time discounts.


