


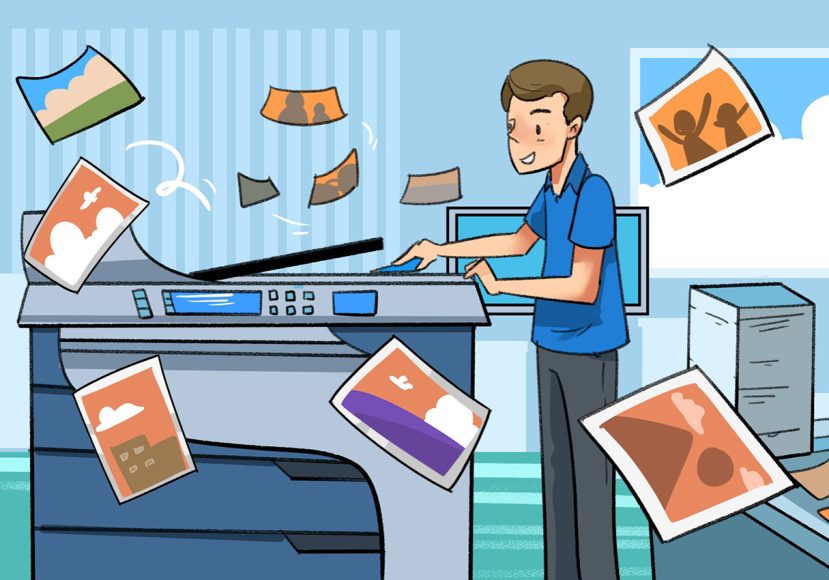
How to Scan a Document (Mac, PC, iPhone, and Android)
Want to know the easiest ways to scan documents? Whether you're using Mac, Windows, iPhone or Android we've got you covered!
Learn | By Jeff Collier
Shotkit may earn a commission on affiliate links. Learn more.
Do you have a document needing to be scanned and wondering how to scan it?
Do you know how to scan documents into your computer (Mac or PC), iPhone, or Android?
Several features on your computer, phone, or tablet make it possible to scan documents directly into your device quickly.
As a photographer, I've needed to scan many documents and images to create digital copies, and I've discovered some tips and tricks when using different devices.
Continue reading for our tips to help you learn more about the different methods of scanning a document using a computer, phone, mobile device, or tablet:
How to Scan a Document Into a Computer: Mac
By scanning documents into a computer, such as a Mac, you can easily share the documents and collaborate with others using a digital copy without needing a paper trail or mail copies of documents.
Continue reading to learn how to scan a document into your Mac:
Step 1: Place the Document Face Down
Place the page or photo you want to scan face-down in your scanner and turn the scanner on.
Make sure the scanner is connected to your device before proceeding.
Step 2: Open the Apple Menu
Tap on the Apple logo on the top-left corner of the computer screen to have the drop-down menu appear.
Step 3: Check Preferences
Verify and check the preferences on your computer to ensure it is set up correctly and prepared to scan pages into PDF files.
The preferences are located at the top of the drop-down menu.
Step 4: Click Printers and Scanners
Tap the printer-shaped icon on the right-hand side of the System Preferences window to select the option for printers and scanners.
Step 5: Select the Scanner
Select the scanner’s or printer’s name in the left-hand column in the drop-down menu.
If your scanner or printer is not showing in the menu, tap the “+” icon on the lower left hand side of the screen.
Then, select your scanner or printer and click on “Add.”
Step 6: Tap the Scan Tab
The Scan tab is set at the top of the window. Click on it, then tap Open Scanner atop the Scan window.
Step 7: Click Show Details
In the lower-right side of the window, click on Show Details.
Step 8: Select File Type
It is time to select the file type you want to save the necessary documents.
First, click “Format” from the drop-down box and then click on the file type, such as PDF or JPEG, that you want to use to save your file.
JPEG works best when scanning photos; when scanning anything else, it is best to select PDF.
Step 9: Decide on Color
Once you have decided on a color to scan the image, such as full color or black and white, you will select the color choice from the drop-down menu at the top of the page by choosing “Kind.”
Then, select if you want full color or black and white.
Step 10: Select a Storage Location
When you are ready to scan the document, click the “Save To” option in the drop-down menu and then click on the folder where you want to save the documents.
Step 11: Change Options on the Page
Depending upon the type of file you are scanning, it might be best to change the Resolution value or Orientation value in the options menu.
Step 12: Click Scan
Found in the bottom-right-hand corner of the window is the Scan button. Tap this icon, and the document will begin scanning into your computer.
When the scanning process is finished, you can find it in the selected save location.
Related: What is the best photo scanning software for multiple photos?
How to Scan a Document Into a Computer: Windows
The Windows Scan application is the best way to scan pictures or documents into your computer.
Files can be uploaded and saved as bitmap, PNG, PDF, or JPEG files.
Step 1: Open the Windows Scan App
Open the app by clicking on the icon that looks like a white scanner with a blue background.
If you don’t already have Window Scan pre installed, you’ll need to download the app onto your computer from the Microsoft Store.
Step 2: Connect the Printer/Scanner to Your Computer
Check to ensure the printer/scanner is plugged in and connected to your computer, and turned on.
To scan documents, you must have a printer with a built-in scanner.
Step 3: Select the Scanner
If you have more than one printer/scanner connected to your computer, you’ll need to click the Scanner field and choose the printer you want to use before scanning the documents.
If the scanner is not shown, you must navigate to Windows Settings → Devices → Printers & Scanners → Add a printer or scanner. When the computer finds the printer, click “Add Device.”
Step 4: Select the Source
Choose the source of the document for scanning – Flatbed or Feeder.
The feeder allows you to scan multiple pages simultaneously, while the flatbed option only lets you scan one document at a time.
Step 5: Select the File Type
Select the file type you want to save the document as. You can choose from PNG, JPEG, TIFF, Bitmap, XPS, OpenXPS, or PDF files.
If you are scanning anything other than a photo or image, choosing the PDF format to save your documents is best.
Step 6: Adjust Additional Settings
Click “Show More” to adjust additional settings before scanning the image.
Select “Resolution” to change the resolution or DPI to 150, 300, 0r 600. If the document has many small details, such as a photograph or image, choose a higher DPI.
Remember, a higher DPI will take longer to scan, but the details of your scanned document will be much clearer.
Step 7: Place the Document In the Scanner
If you’re using a flatbed scanner, place the document face down.
If you’re using a feeder, place items in the correct order and direction (face up or face down), depending upon the printer/scanner model.
Step 8: Click the Scan Icon
On the Windows Scan page, click the scan icon in the open scanner at the bottom of the scan options menu.
Once clicked, your printer will begin scanning the document, and when it’s completed, you’ll see a pop-up notification.
Step 9: View Your Scanned Document
When scanning is complete, click “View” to view the documents or search for the destination folder for saved documents.
Related: What is the best photo scanner?
How to Scan a Document Using an iPhone or iPad

With technology advancements, it is possible to scan documents using an iPhone or iPad and save the materials to your device’s files, DropBox, or other locations.
Step 1: Open the iPhone Notes App
The Notes App is the icon with the yellow notepad and can be tapped on to open.
If you don’t already have iPhone Notes, it can be installed from the App Store.
Step 2: Create a New Note
Click the pencil and note icon on the top right or bottom right corner (depending upon the iOS version) to create a new note.
Step 3: Tap the Camera Icon
Open your device’s camera by tapping the camera icon and selecting “Scan Documents.”
Step 4: Scan the Document Using Your Device’s Camera
Set the document on a flat surface and position your camera over it.
Compiling multiple documents in a single PDF file is possible if you scan them in the same session.
To ensure the best quality, scan your documents in a well-lit area with steady hands or a tripod.
When the document or photo is detected, the camera will automatically snap a picture, or you can also press the white camera button to snap the image manually.
If the scanned documents did not turn out, you can click on them in the bottom left corner and then click Retake on the top right of the scan to retake it.
Step 5: Click Save
When you’ve completed scanning documents, click save.
If more than one document is scanned, a number will appear in parenthesis in the saved file, indicating the number of successful scans.
Scanned pages automatically save in a PDF format; if you scanned multiple documents, they would be placed together in the same PDF file.
Step 6: Click Scanned Document on the Notes Page
Click the scanned image on the Notes page to pull up the document options.
Select the scanned document and not the Note. Then, at the top, it will say Scanned Document(s).
Step 7: Tap the iPhone Yellow Share
Find the iPhone Yellow Share in the top-right corner of the screen and tap it.
Step 8: Save Your Scanned Document
Select the option to save your scanned documents, and you can choose to Save to Files, Save to Dropbox, Mail, or other saving options.
How to Scan a Document Using an Android Smartphone

Are you wondering how to scan a document using an Android smartphone?
Continue reading to learn more about the steps and how to create digital text documents using your Android device easily.
Step 1: Open the Google Drive
On your Android device, open the Google Drive app and then log into your Google account to access the drive.
You can easily create an account if you don’t already have one, and if needed, the Google Drive app is available in the Google Play Store.
Step 2: Navigate to Your Homepage
By default, your homepage should appear when the app is opened.
If the homepage doesn’t automatically appear, tap “Home” on the bottom left-hand corner of the screen.
You’ll find options to add files or store photos on your homepage.
Step 3: Tap “+”
A “+” symbol is in the screen's bottom-right corner.
Tap the symbol to make a pop-up menu appear.
Step 4: Tap Scan
In the pop-up menu, tap the camera-shaped icon to open the device’s camera.
If this is the first time using the camera for the app, you will receive a pop-up asking if you want to use the camera “While Using the App” or “Only this Time.”
Select the option you prefer and do not select “Don’t Allow” because the app needs permission to use the camera to scan the documents using your Android phone.
Step 5: Point the Phone’s Camera at the Document
Place the document in the middle of your device’s screen and make sure it’s flat and entirely visible on-screen before continuing.
Step 6: Tap the “Capture” Button
At the bottom of the screen is a blue and white circle, also known as the Capture button.
Tap this button to start the scan of your document.
If you want to retake the photo, tap “Retry” or click “OK” if you are satisfied with the image.
Google Drive automatically converts the photo into a scan, and if there is any whitespace, the app will locate the borders of your document.
Step 7: Tap Save
On the bottom-right corner of your Android device’s screen is a Save option, and tapping on it saves your scans.
If needed, you can crop your scans by tapping and dragging any of the spheres found around the outer edge of the scan to the desired position.
To add additional pages to your saved file, tap “+” and follow the instructions to scan another page.
Step 8: Save Your Scanned Document
When satisfied with all scanned images, save the documents to your phone.
Tap the three dots icon in the upper right-hand corner and then tap Download.
If desired, you can send a copy of the scans via email.
5 Tips for Scanning Documents
Tip 1: Scan Items As You Go
If you are organizing your filing cabinet, take a moment to scan in the documents before moving to the next pile of paperwork to sort through.
Additionally, scanning items as soon as you receive them helps eliminate the possibility of creating piles of paperwork needing to be scanned.
Tip 2: Save Everything as a PDF File
When scanning documents, save everything as a PDF unless it is a photograph, which you will want to save as a JPEG file.
Saving all documents in PDF format creates a universal file that will last a lifetime and can be read using PDF reader programs.
Tip 3: Back Everything Up
Keep backup files of your scans, and back up the device you store the photos and documents every few months.
Using the cloud, a drive, or a USB stick, offers options to safely and securely save backup files of your scanned documents.
Tip 4: Use Cloud Storage Options
Cloud storage systems provide a place for you to store your documents online.
If you are comfortable storing your papers online, cloud storage systems are a great option; however, keeping a physical backup in your possession is still best.
Tip 5: Mass Scanning Scanners
If you have a bunch of paperwork, use a printer/scanner with an automatic document feeder to help you work faster, and you do not have to scan each document one by one.
Document Scanning Services
Document scanning services are offered by companies dedicated to helping consumers with the conversion of paper documents into digital files.
If you are converting many documents, hiring a document scanning service may be your best option.
Scanning services are equipped with the technology and staffing to scan your documents, and if desired, they can offer a shredding service to destroy paper files after saving.
FAQ
What is the best resolution for scanning documents?
The best resolution for scanning documents is 300 DPI, which makes the document easy to read and share with others.
How do I get my HP printer to scan to my computer?
Open the HP Printer Assistant from the start menu, go to the Scan section, select Manage Scan to Computer, and click Enable.
How do I get my Canon printer to scan to my computer?
On the Windows desktop, click the Canon MF Toolbox 4.9 icon, then click on one of the scanning buttons, specify settings, and click scan.
How do I scan documents to PDF?
When saving your scanned items, there should be an option for which format you want to save the document, and PDF is typically one of the options.
You can also check your device's settings and set PDF as the default file option for scanned documents.
How do I scan to PDF for free?
Use Adobe Scan, a free app available on mobile devices, to scan files to PDF format.
How do I scan a document to Microsoft Word?
First, you need to scan the document by following the above instructions and recommended instructions for your scanner. Then, save the file on the computer as a .pdf.
Next, open Microsoft Word and the “File” menu, then click “Open.”
Find the location where you saved the PDF and open the file, then click “Ok” to allow Microsoft Word to convert the PDF to an editable Word document.
Final Words
Now that you have the information needed to scan documents using your computer, tablet, or phone, you can start clearing up the clutter by creating digital files of your paperwork.
If you still have questions about scanning documents, do not hesitate to reach out. We are here to help you with your photo and computer-scanning questions.

Check out these 8 essential tools to help you succeed as a professional photographer.
Includes limited-time discounts.

Jeff Collier is an experienced film photographer who enjoys experimenting with modern digital photography equipment, software and apps. He’s also an ex-world champion triathlete and avid cyclist, clocking hundreds of km each week in the beautiful Tweed Valley of northern NSW, Australia.
👋 WELCOME TO SHOTKIT!
🔥 Popular NOW:
