


How to Use the Portrait Tools in Luminar Neo
We take you through Luminar Neo's portrait editing tools, including what they are and tips for using them, plus a step-by-step portrait editing example.
Luminar | Software | Paid Partnership | By Ana Mireles | Last Updated: June 24, 2026
Shotkit may earn a commission on affiliate links. Learn more.
Do you spend hours editing portraits, or have a portrait you love that still feels like it's missing that extra oomph?
Whether you're a professional photographer looking to speed up your workflow or a casual user just looking to fix that one photo without having to learn complicated software, Luminar Neo is the answer.
Neo has a set of portrait tools designed to save time and deliver professional-looking results.
In this article, I'll cover everything you need to get started with portrait editing tools in Luminar Neo, including what they do, how they work together in a real-life example, and how to make the most of them with best practices and common mistakes to avoid.
By the end, you'll know how to achieve natural, authentic-looking portraits in just a few minutes, and with hardly any learning curve.
What Are the Portrait Tools in Luminar Neo?
Luminar Neo‘s Portrait tools are AI-powered features designed specifically for portrait enhancement.
They're collected in a single panel for easy access, and they let you work on faces, bodies, lighting, depth of field, and other portrait characteristics.
You can use them individually or in combination to achieve a professional-quality result.
Here's a list of them with a brief description of what you can do with them. After that, I'll show you an example of a portrait editing workflow so you can see the tools applied to a raw file.
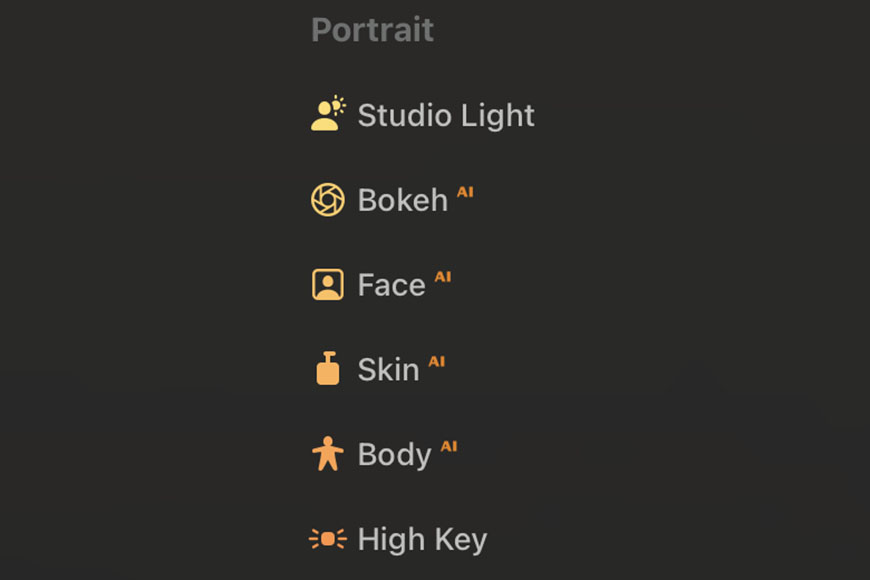
Studio Light

Studio Light lets you recreate the look of a professional portrait session without needing expensive lighting equipment.
You can add up to five light sources and adjust their positions, intensities, color temperatures, and distances from the subject. You can even introduce textures and patterns that mimic the effect of photographic gobos in more creative lighting setups.
Bokeh AI
Portrait Bokeh AI simulates the shallow depth of field typically achieved with fast lenses and long focal lengths, helping separate the subject from the background.
This is a quick way to create a more professional-looking portrait by adding realistic background blur and even changing the bokeh shape.
Face AI
Face AI brings together a variety of tools designed to enhance your model's facial features quickly and naturally.
Face Light can brighten the model's face when the subject is backlit or when there's an unflattering shadow cast on them. This way, you can correct uneven lighting or direct the viewer's attention.
You'll also find face-shaping controls that can help you compensate for distortions caused by wide-angle lenses, along with dedicated tools for the eyes and mouth.
You can adjust the eye color, remove red-eye, reduce dark circles, refine the eye shape, and even improve eyebrow definition.
For the mouth, you can fine-tune the redness and saturation of the lips, as well as whiten the teeth for a brighter smile.
Skin AI
Skin AI helps you streamline one of the most time-consuming parts of portrait retouching. You can smooth both facial and body skin, reduce unwanted shine caused by lighting, and remove blemishes that can be distracting.
Overall, you can create a polished look without spending hours manually retouching the skin, achieving highly realistic results.
Body AI

Body AI lets you control the subject's overall body shape, either adjusting the entire figure or focusing on the abdomen. While it can be used for aesthetic refinements, it's especially helpful for correcting distortions introduced by camera angles or wide-angle lenses.
For the most believable results, use it with a light touch.
High Key
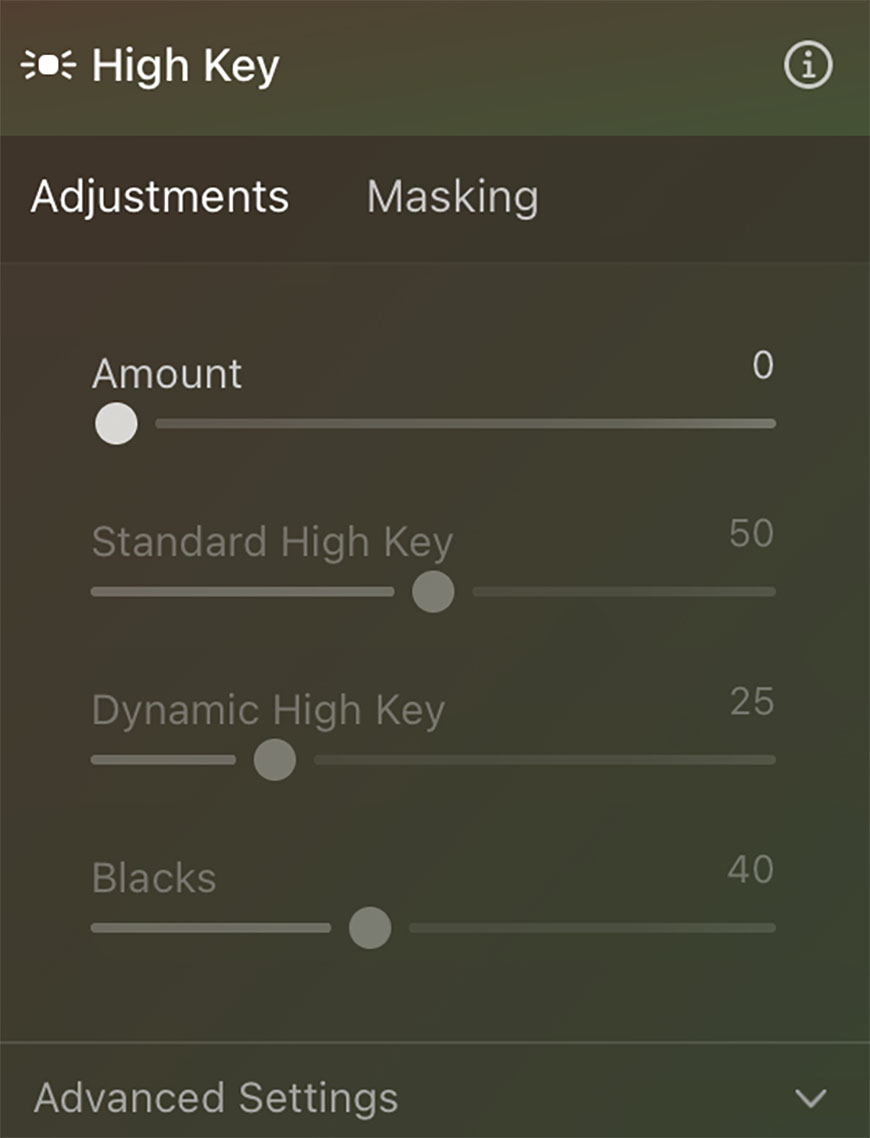
High Key lets you recreate the bright, airy look of high-key lighting without a studio setup. Using a few simple sliders, you can increase brightness and soften the contrast.

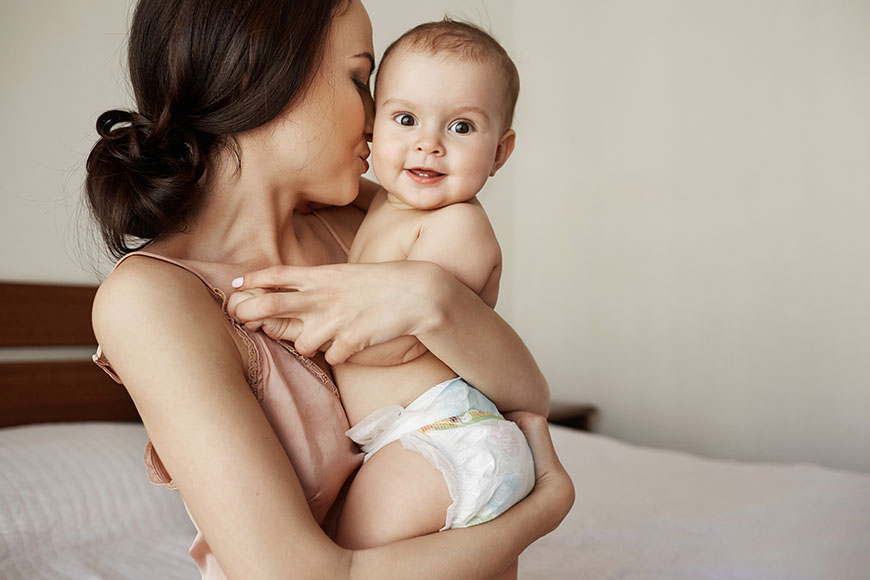
It's a particularly useful tool for maternity and newborn photography, but you can also use it for bridal shots or children's portraits. I love how it looks in black-and-white photos. Give it a try on your next editing session and see if you like it too.
A Step-by-Step Portrait Editing Workflow Example in Luminar Neo
Every portrait is different, so there's no single formula I can give you that will fit all your editing needs. It's also important to remember that your edits should reflect your personal style as a photographer.
Now that you're familiar with the Portrait tools available in Luminar Neo, you'll know exactly where to look when a portrait needs specific edits.
That said, seeing these tools in action can make it much easier to understand when and why to use each adjustment.
In this example, I'll walk you through a step-by-step portrait editing workflow you can use to enhance a photo taken outdoors on an overcast day.
Flat lighting, muted colors, and a lack of contrast are common challenges in these weather conditions. This makes it a great opportunity to see how the Portrait tools can help bring a dull image to life without using lighting equipment during the shot.
You'll also see how these tools can make your subject look as though they were styled by a professional before stepping in front of the camera.
Let's get started.
Step 1: Basic editing
Before using the Luminar Neo Portrait tools, you should develop your raw file or do some basic edits if you're using a JPEG file. This will give you a good base to start working on.
I'm not going into this process, as I want to focus on the Portrait tools. However, if you're new to Luminar, you'll find everything you need in the Essentials panel.
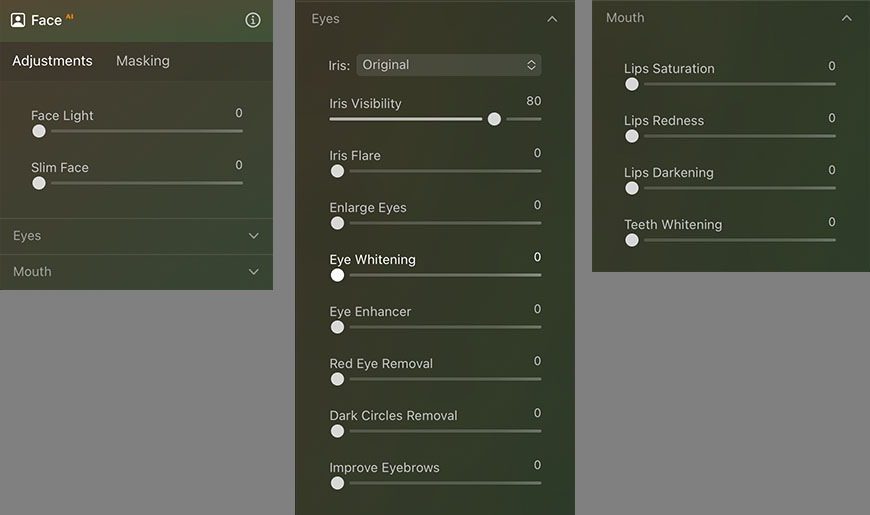
Step 2: Face AI adjustments
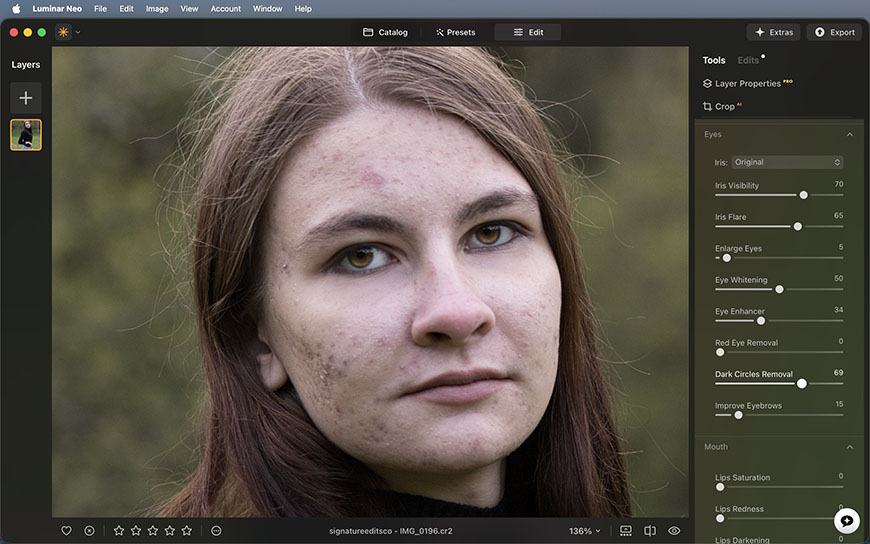
I like to start with the Face AI tool because the face is objectively the central part of any portrait.
In this case, the face doesn't need any more light, so I'm heading straight to the Eyes and Mouth section. I decided to bump the Eyes visibility to 70 and the Iris Flare to 65.
I increased the Eye Whitening to 50, not more, to avoid them looking artificial, and reduced the dark circles under the subject's eyes by moving the slider to 69.
For the mouth, I added a touch of Lips Saturation (30), Lips Redness (18), and a hint of Lips Darkening (5).
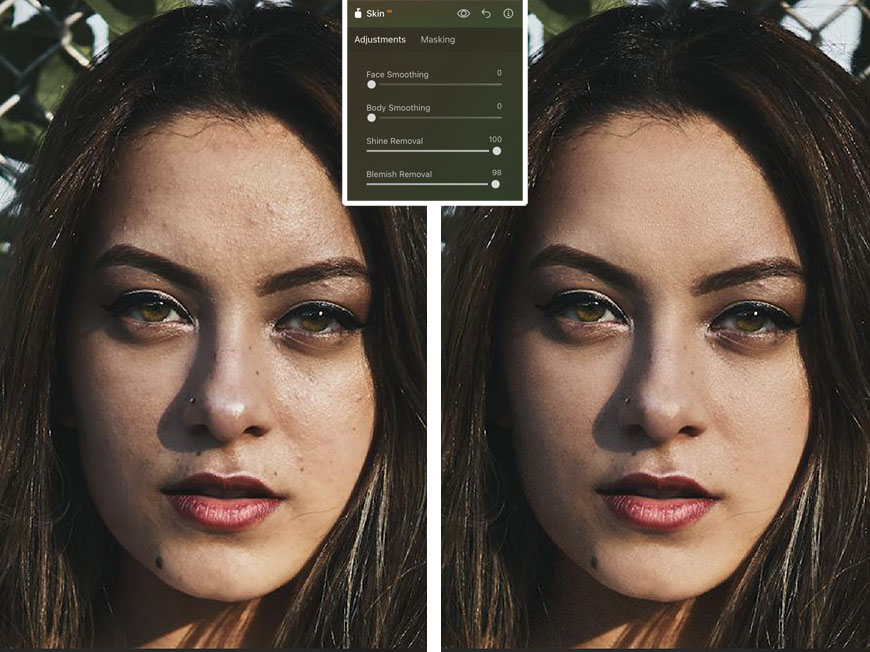
Step 3: Skin AI retouching
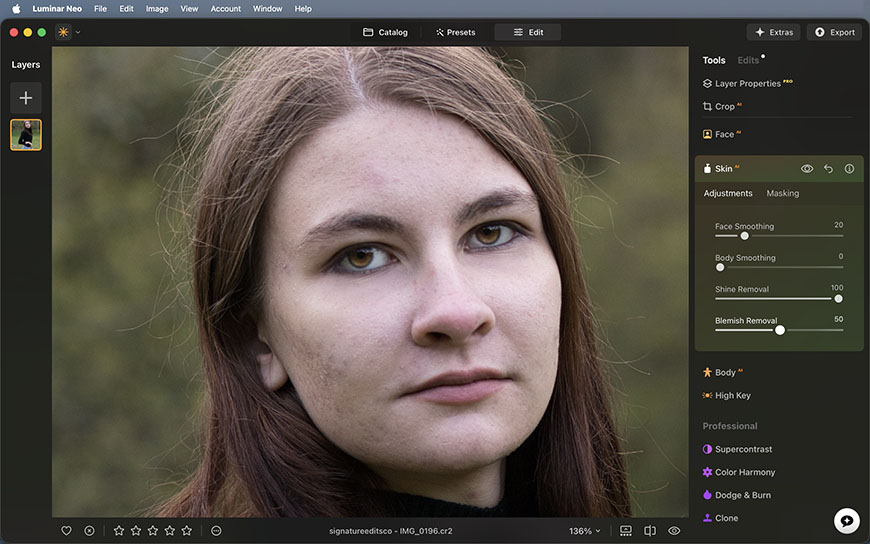
Next, I moved on to Skin AI. She's not showing much of her body, so I'm only focusing on her facial skin. I kept the Face Smoothing conservative at 20, but I did push the Shine Removal to the maximum to avoid any distracting highlights.
The Blemish Removal is always trickier. It's OK to remove temporary blemishes, but completely changing how someone looks is a different thing. So, after trying different settings, I settled on 50.
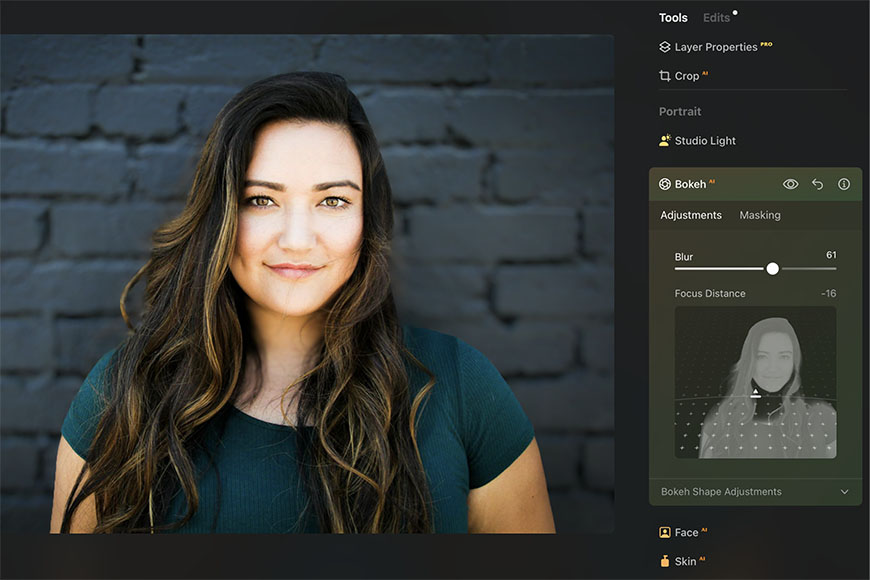
Step 4: Bokeh AI with masking
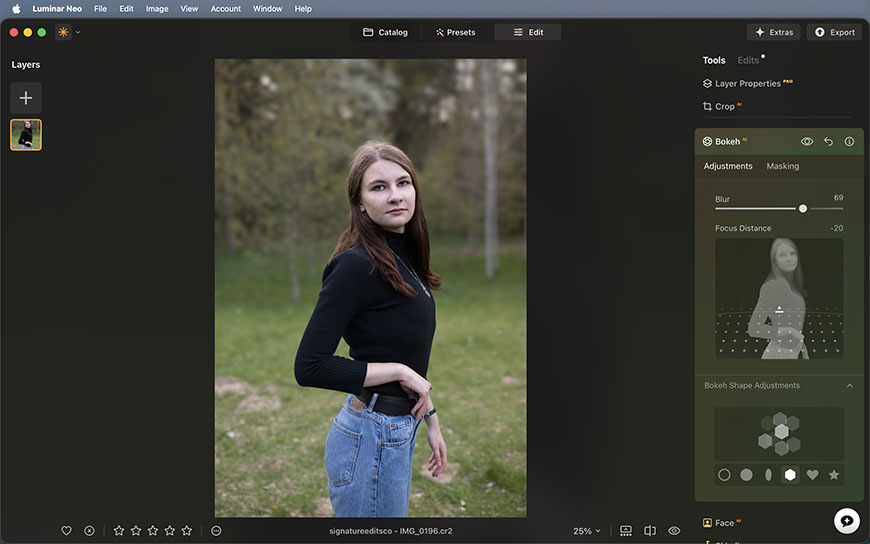
While this photo already has a blurred background, it's nothing particularly special. So, I decided to intensify the effect by using Bokeh AI.
To do so, I needed to place the focal point closer to the camera, which was affecting the sharpness on her face, so I used a mask.
Then I also changed the bokeh shape for a nicer look.
Step 5: Studio Light for depth

Lastly, I used the Studio Light to add depth to the picture as the overcast day made the portrait quite flat.
I added a light source coming from the top right with a warm tone. I also added a tree shadow texture and a striped pattern to make it more interesting and keep things natural.
To make the new lighting feel more intentional, I darkened the background.
The final result makes for a more compelling image. Her eyes are expressive and clear, the skin looks polished without looking like plastic, and the background melts away as she stands out in the foreground.
Again, this is just one possible set of edits – it all comes down to your creative vision.
Portrait Retouching: Enhancing Without Overdoing
One of the biggest advantages of Luminar Neo's portrait editing tools is how easily and quickly you can transform your photos.
However, just because an adjustment is available does not mean you should push it to its limits.
Good portrait editing is about nuance; it's important to work with sensitivity and intention. Features such as blemish removal and face and body shaping should be used sparingly and, whenever possible, discussed with your subject beforehand.
The goal should be to help people look their best while still looking like themselves.
As photographers and retouchers, we have a responsibility to promote positive body image and avoid reinforcing unrealistic beauty standards.
Rather than changing a person's appearance to fit a stereotype, use these tools to refine distractions, correct lens distortions, enhance natural features, and support the creative vision of the image.
With that in mind, here are a few tips and best practices that can help you get the most out of Luminar Neo's portrait tools while keeping your edits natural, authentic, and respectful.
Tips for natural-looking edits
Less is more. Small adjustments often have a big impact. So, increase the sliders gradually, and stop before you reach the point where it no longer looks natural.
Preserve skin texture. Healthy skin has pores, lines, and texture. If you smooth out too much of this natural texture, your subject will end up looking like a plastic doll.
Consider the subject's age and personality. Retouching should complement the person in the photo, not erase what makes them unique. So, don't add makeup to someone who doesn't wear it in real life, don't erase all the wrinkles of a sixty-year-old, etc.
Take control of AI. AI tools are excellent at doing the heavy lifting and can save you a great deal of time and effort. However, it's important to fine-tune the adjustments to achieve the result that matches your style and creative vision.
Toggle the before and after view. Keep checking the before-and-after versions so you're sure you're staying on the right track. If you feel you went over the top, don't be afraid to go back; all edits in Luminar Neo are non-destructive.
Common portrait editing mistakes to avoid
Excessive teeth whitening. There's so much advertising for teeth whitening products that we forget teeth aren't actually white in real life. If you're a millennial like me, you'll remember that Friends episode where Ross throws off his date with his freakishly white teeth.
That's exactly the kind of effect you want to avoid. It can also happen by over-brightening the eyes, so beware of that too.
Unrealistic face slimming. Changing the subject's proportions is a delicate matter and should be done very slightly. Overdoing it can easily go from a natural enhancement to an unnatural distortion.
Ignoring the overall image balance. Always evaluate the entire picture because you can't just adjust the subject if it won't match the environment. Any adjustment you make has to make sense in relation to the scene's lighting, depth, and color.
Not looking back. Remember that Luminar Neo editing is non-destructive, so don't be afraid to go back and modify or even remove something you did at any point in the workflow.

Ana Mireles is a Mexican researcher that specializes in photography and communications for the arts and culture sector.

👋 WELCOME TO SHOTKIT!
🔥 Popular NOW:
