


How to Mask in Filmora (Objects and Background)
Masking gives you the freedom to let your creativity run wild. Read on to learn how to mask using Filmora's video editing software.
Filmora | Software | By Judyth Satyn
Shotkit may earn a commission on affiliate links. Learn more.
Are you ready to learn one of the most creative video editing effects out there? Yep, we're talking about masking.
Masking gives you the freedom to let your creativity run wild, from footage of flying rhinos to ships sailing with you in your bathtub.
Your video clip will only be limited by your imagination.
Read on to learn how to mask using Filmora's video editing software.

Download the latest version of Wondershare Filmora to follow along with this simple tutorial.
Start a free 7-day trial today
How to Mask in Filmora
So what is masking? Masking is when you cut a section from the top layer video so you can see the video beneath.
When played, the two video clips run at the same time, giving the illusion that they are one video.
Masking is one of the most innovative editing tricks there are.
It's used when editing music video clips and marketing ads, grabbing audience attention by creating otherwise impossible scenes and situations.
You can add multiples of the same people, flow a waterfall into a cup, anything you think of that you can film is possible.
In this tutorial, we're going to create a video of a cartoon dog running with a cake towards the front door of a mushroom house. Because, why not!
So let's get started.
Download and Launch
First, head over to the Filmora website to download and launch Filmora's video editing software. It's super quick and easy to do.
You won't regret it as there's an endless number of editing tricks you can utilize in Filmora, plus the editing software is simple and quick to learn.
Upload Media or Use Stock Media
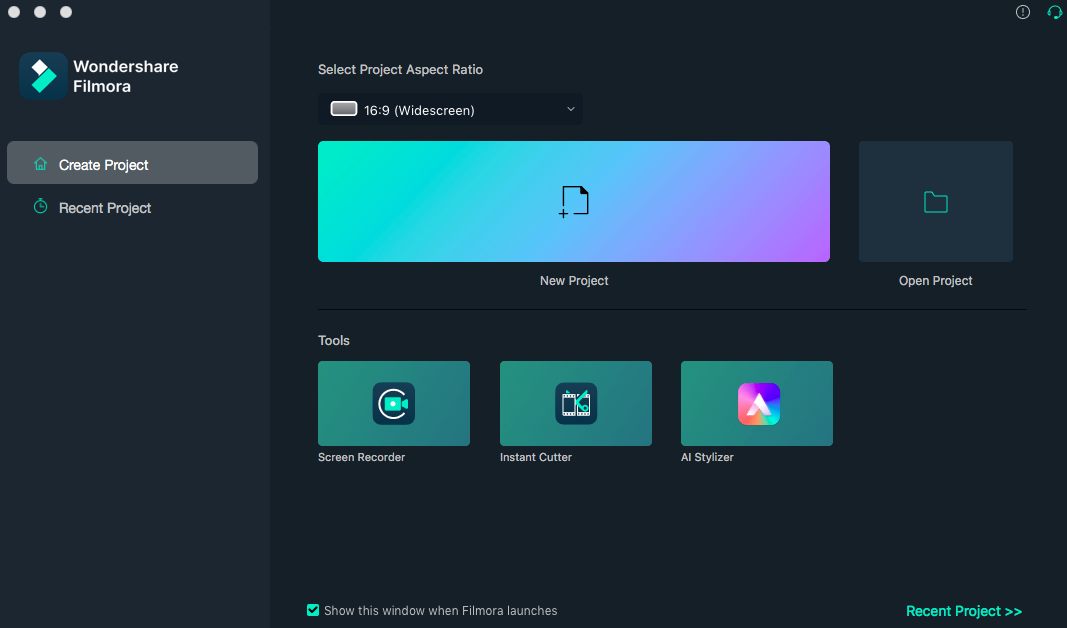
Once Filmora is opened on your desktop, click New Project.
In the top left of the video editing workspace, select either My Media or Stock Media.

If you chose My Media, locate and upload your media into the project folder.
If you want to use Stock Media, use the search bar to find appropriate media (e.g. enter “house” if you're looking for a house or “dog” for a dog).
Add to Timeline Track
Once you have the media ready in the project folder, drag and drop the background video clip onto the video timeline track.
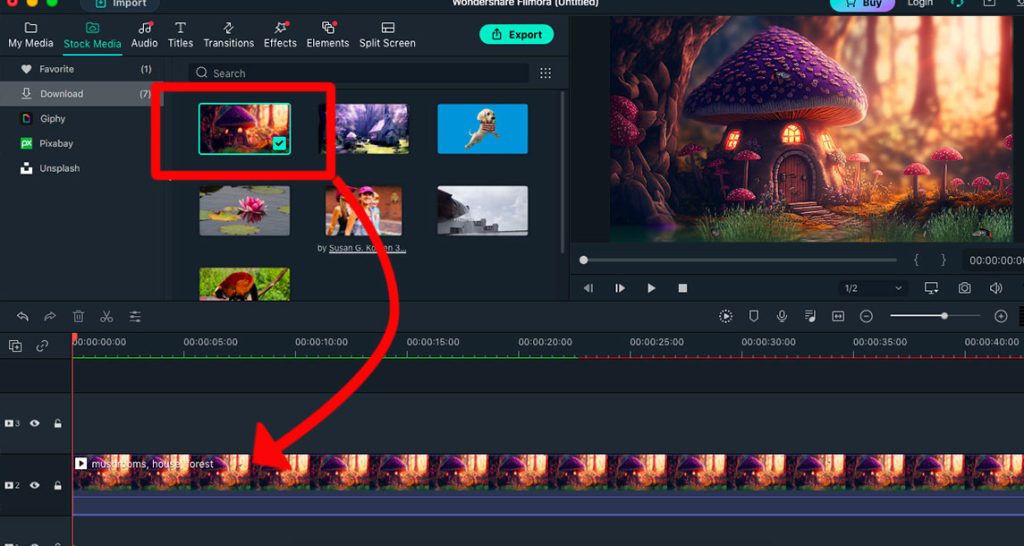
In this example, the background video is a mushroom house.
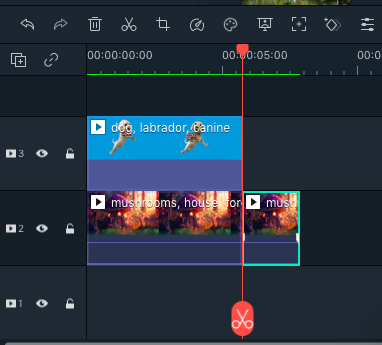
Add another timeline track by clicking on the Add Timeline button on the left above the timeline track.

Another timeline will be added above the background timeline.
Drag the second video clip onto this track. Now you have the two videos placed on top of each other.
Press Play in the preview window. Only the top video (the dog video) will be displayed; the bottom video will be hidden from sight.
Trim to Length
Trim your videos to the desired lengths by moving the Trimming tool (the red line with scissors) to the spot you wish to trim.
Once the Trimming tool is in place, click on the scissors and the video clip will be snipped.
Click on the section of the video you wish to delete until it is surrounded by a green outline, and then click Delete.
- Read more: How to Crop in Filmora
Your videos will now be cut to the correct length (ideally, they'll be the same length).
Add Mask
To create the visual of the dog running to the front door, we will need to place the mushroom house video on the top layer.
To add the mask layer, click the Effect button at the top of the workspace.
Once clicked, a panel will appear to the left of the workspace. Scroll down and select Utility. The mask effects will appear.
For this project, we'll select the mask shape closest to the shape of the mushroom house door – Shape Mask.

Ensure the video clip you wish to add the mask to is activated in the timeline and surrounded by a green border, then drag the mask onto the video's timeline.
Adjust Mask
You will need to adjust the size of the mask to make it fit the door shape and invert it so you can see the layer below.
Double-click the masked video clip to open the editing options and scroll down to find the mask editing options.
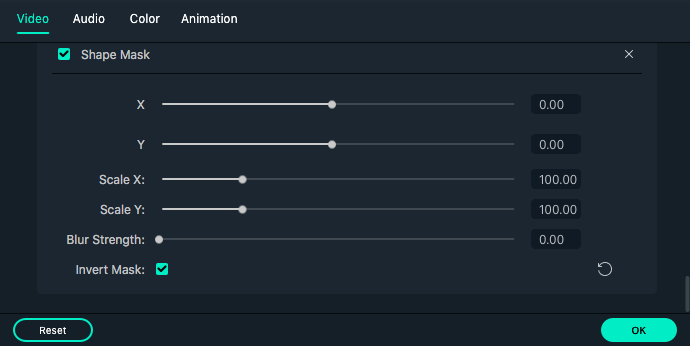
Click the inverted box and adjust the size, either by using the sliding bars or by dragging the corners of the bounding box in the preview window.

When the mask is the correct size (in this case, we want it to fit the door), click OK.
Scale Image
The background image will most likely either be too big or small. To adjust the size, double-click the video clip to open the editing options.

Adjust the background video's size (in this case, the dog) to the correct size and click OK.
And viola – the dog is now in the doorway of the mushroom house.
Click Play in the video window and watch the wonders of masking at work.
Render and Export
Now you've finished masking your videos in Filmora, it's time to render and export your clip.
To render, click the Render button above the timeline track (the dotted circle with the play button inside).
Rendering ensures your video is compressed and will play on other devices without staggering.
When the rendering is complete, click on the green Export button at the top of your workspace and export your clip.
- Read more: How to Export in Filmora to Save or Share
How Do You Mask an Object in Filmora?
To mask an object using Filmora, you will need to follow similar steps to the tutorial above.
First, plan your video to decide what part of the object you wish to mask.
Do you wish to create a mask inside the object which will look through to a video below? Or do you wish to mask the object so you can place it on top of a background video?
When you've decided which section of the object you wish to mask, you can select the appropriate mask from the Image Mask effects.
Select and drag the Image Mask effect onto the object's video clip.

Double-click the video clip to open the editing options and scroll down to the image mask options.
Here you can select the best shape for your object by clicking on it.
Although slightly cumbersome and time-consuming, it is possible to add more than one shape, piecing them together to mask the entire object.
Once you have masked your object, click OK.
Preview your video to make sure you're happy with your masked object.
Want to continue your journey to Filmora mastery? Check out this tutorial on How to Blur in Filmora.

Judyth is an experienced studio photographer and glass artist. When she isn’t Photoshopping comedians into the bellies of sharks, you can find her cooking delicious treats for her guests.
👋 WELCOME TO SHOTKIT!
🔥 Popular NOW:
