


How to Export in Filmora (Save or Share)
Learn how to export your video from the Filmora so you can save it to your device or share it with the world.
Filmora | Software | By Judyth Satyn
Shotkit may earn a commission on affiliate links. Learn more.
Once you've finished creating your masterpiece video clip, you'll want to export it either to save it onto a device or to share it with the world via the web.
Let's take a look at the best way to export your video from the Filmora video editing software.

Download the latest version of Wondershare Filmora to follow along with this simple tutorial.
Start a free 7-day trial today
How to Export in Filmora
When exporting a video, you'll want to ensure that all the edits are perfect and finalised and that your video is rendered.
Before you export your video, do some research and find out what the best format and resolution are for your video's purposes.
Step 1. Preview and Render Clip
Prior to exporting your clip, make sure to preview it.
Simply press the play button below the preview panel and correct any unwanted edits.
You don't want to export a video and then later realise that all the edits are not up to scratch.
To render your video, simply press the Render button on the right-hand side above the timeline track (a play icon inside a dotted circle).
Rendering your clip will ensure there will be no lag when it is played on another device.
- Read more about How to Render in Filmora
Step 2. Click Export
There are three ways to select Export.
- For the keyboard shortcut, press CTRL + E (for Windows) or Command + E (for Macs).
- Head to the top menu bar and click on Export.
- Click the centrally placed green Export button at the top of the Filmora workspace.
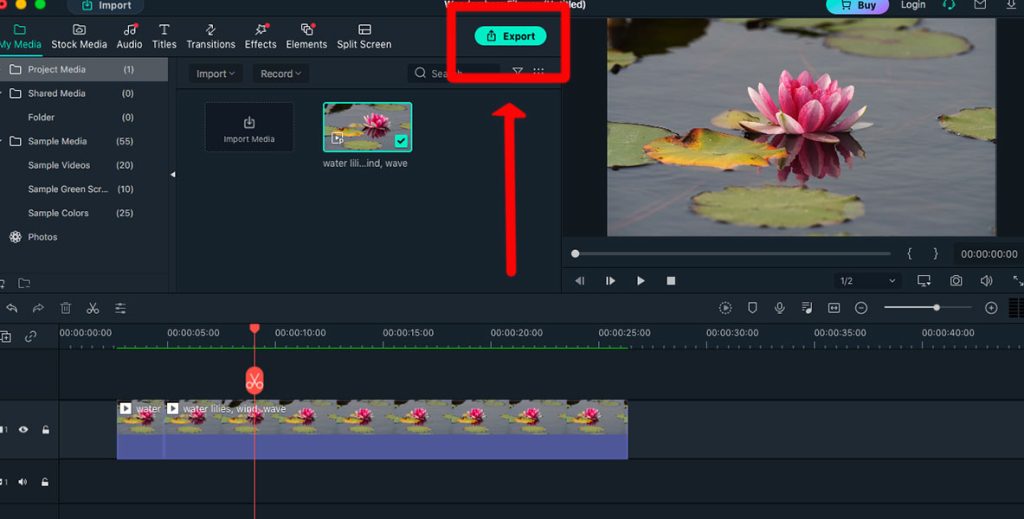
When any of these options are clicked, the Export pop-up window will appear.
Step 3. Select Format
In the left-hand side panel of the pop-up window, there will be a list of video file format options.

Which format option you choose will depend on what you intend to use the video for in the future.
Select the format option best suited to your project's needs.
Step 4. Select Where to Save to
In the drop-down box beside Save to: select the location you wish to save your video clip to.

Step 5. Advanced Settings
For more advanced settings, click the Settings button. Once clicked the settings pop-up window will appear.
At the top of the window, there is a quick and easy option to pick between Best, Better, or Good Quality.
Or you can customize the settings below.
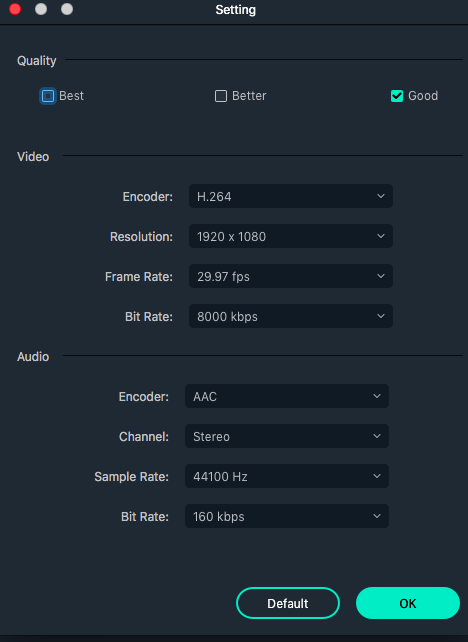
For video, you can specify the settings for Encoder, Resolution, Frame Rate, and Bit Rate.
For audio, enter the settings for Encoder, Channel, Sample Rate, and Bit Rate.
If you're unsure of what settings you need, it's best to leave them set as the Filmora default settings.
- Read more: How to Overlay Videos & Effects in Filmora
Step 6. Share on Web Platforms
You can select to share straight to social media or Youtube, Vimeo, or burn to DVD. To do this, click the platform you wish to share to.
When selected, you will be asked to log in to your account.
Some people like the hassle-free quick-sharing option. The bonus is you don't have to burden your computer with extra data.
But you might prefer to save your video to your device first and then share it later. This means you don't have to log in to your social media or website platforms through Filmora.
Step 7. Filmora Watermark Remover
Filmora video editor might be free, but here is the hidden catch: the Filmora watermark.
When you are using the free version of the Filmora video editor and hit Export, a pop-up window will appear asking if you want to buy a Filmora plan to remove the Filmora watermark.

It doesn't matter if it's a stock video or your own personal video, the Filmora watermark will be firmly placed across your screen.
The only option to delete the Filmora watermark is to upgrade from the free version to a paid subscription.
Either press “Export with Watermark” or “Buy Now”.
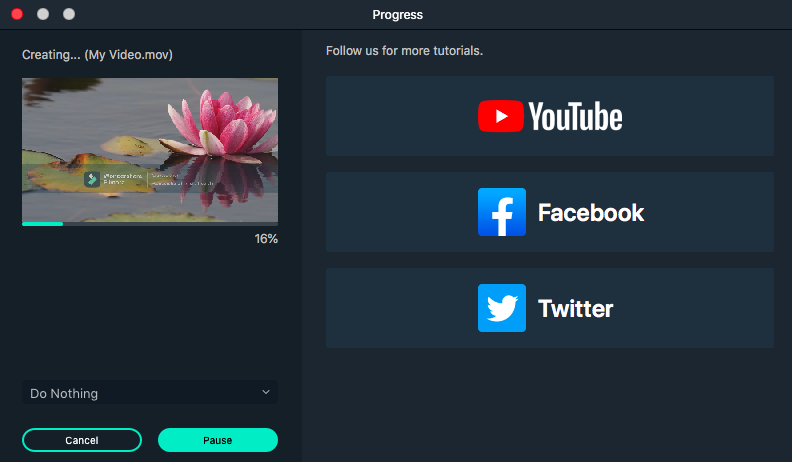
Once clicked, your video will be exported, ready for you to share and watch.
Where is the Export button in Filmora?
There is more than one Export option to choose from in Filmora.
The easiest to find is the green Export button centrally positioned in the middle at the top of the video editing workspace.
The other Export option is placed in the top menu bar between “View” and “Window”.
If you are struggling to find either of these options, don't worry; you can use the keyboard shortcut by hitting CTRL + E (for Windows) or Command + E (for Macs).
How do I export from Filmora to MP4?
To export your video clip in the MP4 format, simply click the Export button.
When clicked, a pop-up window will appear. In the left-hand side panel you will find the option to export as MP4.
Select MP4 and enter the location for your video clip, then click Export.
- Want more Filmora tutorials? Try this one on How to Zoom in Filmora.

Judyth is an experienced studio photographer and glass artist. When she isn’t Photoshopping comedians into the bellies of sharks, you can find her cooking delicious treats for her guests.
1 Comment
Leave a Comment
👋 WELCOME TO SHOTKIT!
🔥 Popular NOW:

I tried to export a video in Filmora and after entering the parameters and clicking the export button, it displayed ” authenticating video…wait a while
This will remain for a very long time. Very unusual even when am export less than a minute videos.
What should I do?