


How to Use the Slice Tool in Photoshop
Learn how to effectively use the Slice Tool in Photoshop with our easy-to-follow guide, perfect for segmenting images and designs for web and graphic projects.
Photoshop | Software | By Judyth Satyn
Shotkit may earn a commission on affiliate links. Learn more.
This guide will give you the easiest ways to use the slice tool in Photoshop.
I’ve been using Adobe Photoshop for many years, and the slice tool is invaluable when slicing images for projects.
Using the Slice tool to create graphics for print or websites streamlines the editing process.
Let’s dive into the tutorial.

Download a free copy of Adobe Photoshop to follow along with this simple tutorial.
How to Use the Slice Tool in Photoshop in 3 Steps
The Slice tool allows you to save or export an image as exactly that: slices.
Using the Slice tool, you can slice an image into sections. Unlike the crop tool, the slice tool allows you to save the cropped image's clipped sections to use later.
Web and graphic designers use the Slice tool. The magic of the Slice tool is that it can create code for the individual slices.
To piece the image back together as a whole, yet keep each section independent.
The generated code can isolate the sliced section from the entire image to display on tablets or mobile devices.
So it is as if the Slice tool is creating jigsaws for web designers to smoothly create graphics, which can
The image will be cut like the pieces of a jigsaw puzzle, and it is possible to piece it back together as one image. Only all the lines will be straight.
It is useful when you want to save only a portion of an image, not the entire image.
It allows you to cut up an image non-destructively.
People often use the crop tool without considering the Slice tool. When you crop an image, you cut the pixels away.
You can select a section of an image and save it using the slice tool. When saved, the other sections of the image will be saved together.
This action is useful for web designers and people who want to use just a section of an image but need to save the other cut pieces.
You can extract and export a section of the image into a new PSD file without cutting it.
Step 1 – Open an Image
Open your image in Photoshop. Head to the top menu bar and select Edit > Open.
Then, locate and click on your image to open.
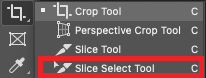
Step 2 – Select the Slice Tool
From the toolbar, select the Slice tool. It is in the drop-out menu beside the Crop tool.
Alternatively, hold down the Shift key for the keyboard shortcut and hit C repeatedly until the Slice tool appears.
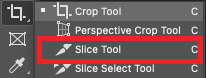
When the Slice tool is activated, the Slice tool's options bar will be above your canvas workspace.
Step 3 – Set the Slice Size
In the drop-down menu, you will be presented with three choices.
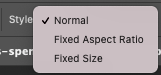
The default setting of the Slice tool is set to Normal. You can also select Fixed Aspect Ratio or Fixed Size.
Using the Normal style mode, you can create the custom size you wish with no restrictions.
You will need to enter a value in the boxes beside Width and Height when you choose Fixed Aspect Ratio or Fixed Size.
Set the Style to Fixed Aspect Ratio, and you can dictate a set ratio for each slice.
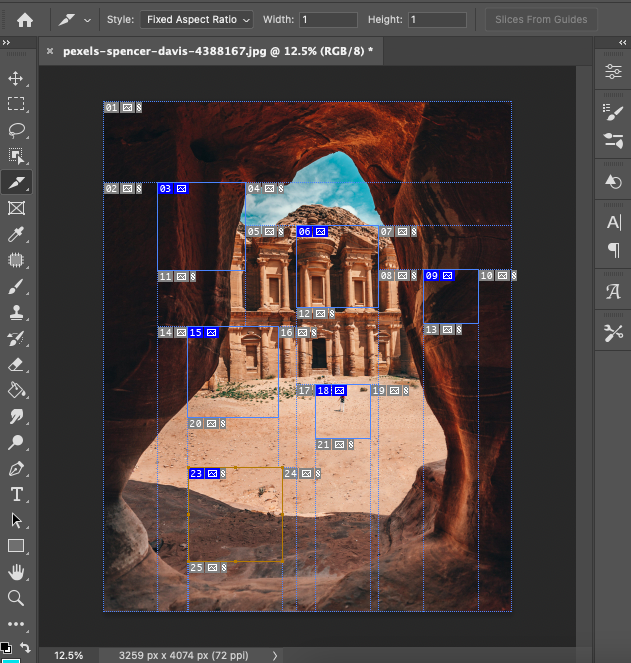
If the Fixed aspect ratio is set to a Width value of 1 and a Height value of 1, as shown below.
Every slice you make on the canvas will be restricted to this ratio. The slices can be of any size. Only the ratio will be restricted.
![]()
Below is an example of an image sliced when the Fixed Aspect Ratio was set to Width 1 and Height 1.
You can set the Style to Fixed Size. Enter the value for the fixed size in the value beside Height and Width.
![]()
This style is useful when you have a predetermined size you have to stick to. For instance, when uploading images to the web.
When slicing the canvas, you can change the slice tool's style or size.
Step 4 – Make the Slice
You can start to create your slice or slices when you have set your desired ratio or size.
To do this, click on the canvas to create the first point of the slice, then drag your cursor to create the slice.
Release the cursor when you have finished the slice.
To create more slices, repeat the process.
You can fill the entire canvas with slices and make as many slices as you like.
You can also slice over slices.
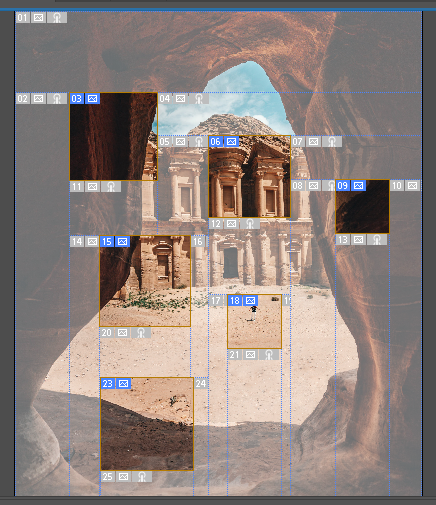
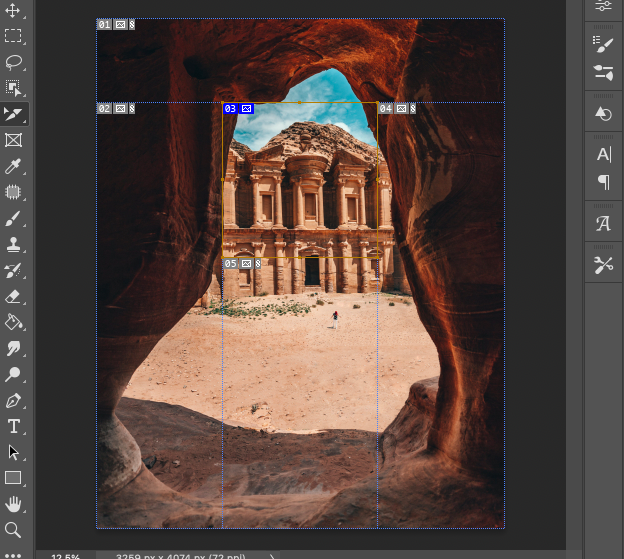
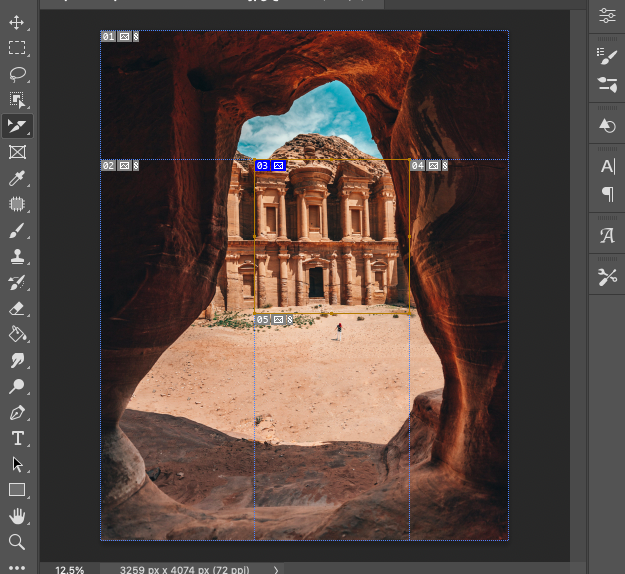
As you can see in the image below, the square numbered 6 six was sliced through the square numbered 3.
Photoshop won't make any shaped slice other than a rectangle or square. Therefore, when number 3 is cut, it will be divided into two sections, numbered 3 and 5.
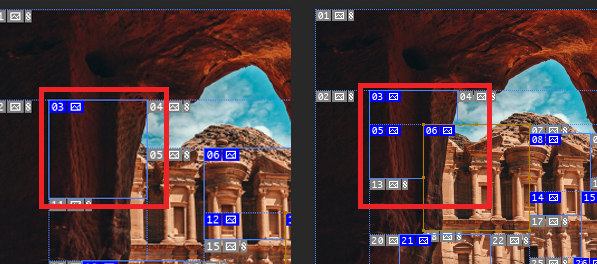
All the squares numbered in blue indicate slices that were created using the slice tool.
The squares numbered in grey are the excess that remains of the image.
Step 45 – Save the Slices
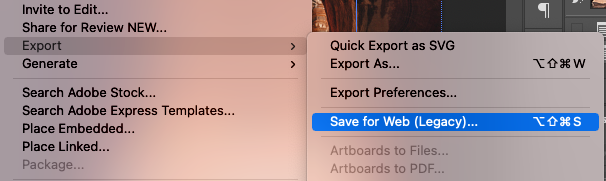
To save all the slices of the image, head to the top menu bar and select File > Export.
In the drop-down menu that appears, select Save for Wbe (Legacy)…
Once selected, the Save for Web dialogue box will open.
In the preview window, you can view your sliced image.
You can zoom out to see the image in the preview window if you need to.
Hold Command and hit the minus key (for Macs), or hold Ctrl and hit the minus key (for Windows).
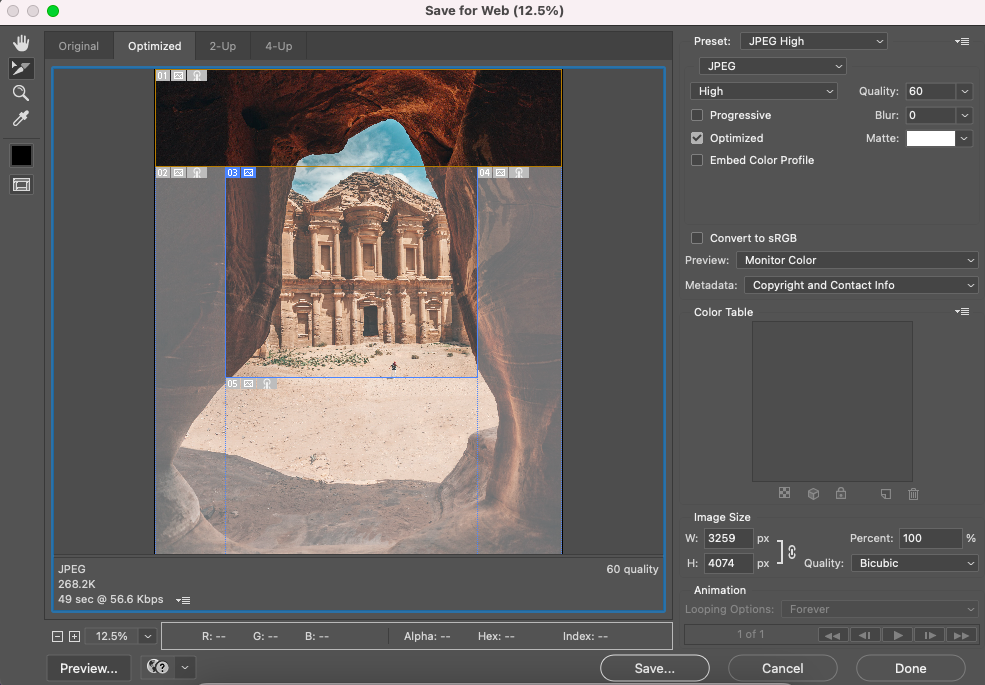
To select the slices you wish to save, hold the shift key and click on the slices you wish to save in the preview window.
In the image below, only the sliced sections of the image have been selected to be saved.
Decide which format you would like to save your slices in. If unsure, set the format to JPEG.
Now click the Save button at the bottom of the dialogue window.
When you click Save, the ‘Save Optimized As', dialogue window will pop open.
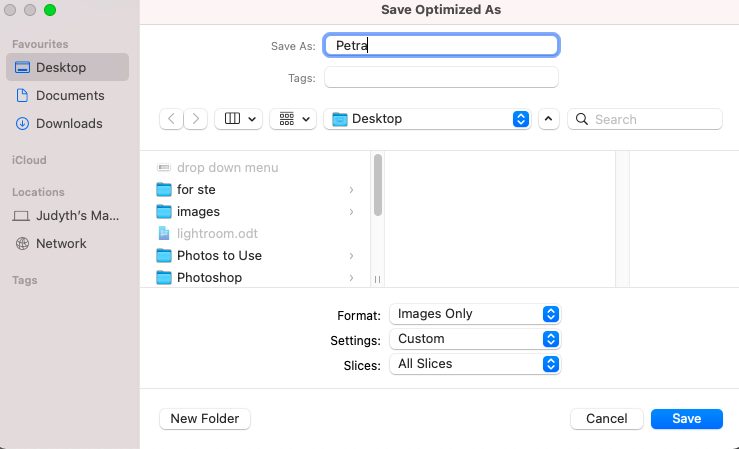
Here, you can set the name and location of the images.
Click on the arrow beside the Slices value box. Here, you can choose to save All Slices, All User Slices, or Selected Slices.
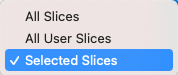
When you choose All Slices, all the slices of the image will be saved.
Choose Selected Slices, and only the slices you have selected in the preview window will be saved.
Now, hit the Save button in the bottom right-hand corner.
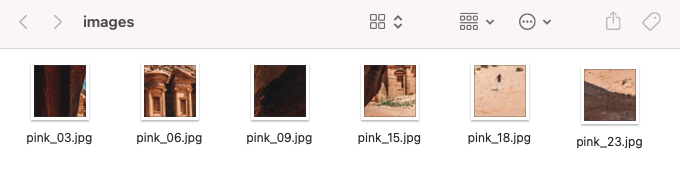
When you hit save, the slices will be saved to a folder named ‘Images' on your desktop or in a location of your choice.
Open the folder, and you will find your sliced jigsaw puzzle pieces inside.
The pieces will be numbered, just like they were in the preview window.
The numbering dictates their position in the image, from left to right, top to bottom.
Now you know how to use the Slice Select tool.
Happy editing!
If you liked this tutorial, make sure to check out – How to create a pattern in Photoshop.
How to Use the Slice Select Tool
Once you have mastered the Slice tool, you will want to learn how to use the Slice Selection tool.
These tools go hand in hand.
The Slice tool cuts the image into slices, while the Slice Select tool allows you to move, tag, and organize the slices.
The Slice Select tool is particularly useful when creating web pages, graphic design, and mobile apps.
Step 1 – Select the Slice Select Tool
The Slice Select tool resides in the toolbar below the Slice tool. From the toolbar, select the Slice Select tool.
Alternatively, hold down the Shift key for the keyboard shortcut and hit C repeatedly until the Slice Select tool appears.
There is another handy shortcut to use when using the Slice tool. You can access the Slice Select tool by hitting Command (for Macs) or Ctrl (for Windows).
This will allow you to switch momentarily to the Slice Select tool when using the Slice tool.
Once selected, the Slice Select tool options bar will open.
Step 2 – Reposition Slices
When the Slice Select tool is active, you can reposition slices.
In the image below, the slice numbered three is the active slice.
Click on the slice with your cursor when you wish to reposition it and drag it into its new position.
The image below shows the repositioned number three slice.
Step 3 – Customize Stacking Order
The stacking order is the first option in the options tab for customizing slices.
When you create a slice, the last slice will be placed on top of any that were created before it.

The stacking order of the slices can be changed by clicking on a slice and then clicking one of the stack options.
The first stacking icons will push the slice up to the top, as shown below.
When a slice is selected, its borders change to yellow. The selected slice, numbered six, is placed on top of the other slices. Cutting into them. This means that slice number three will not be a complete
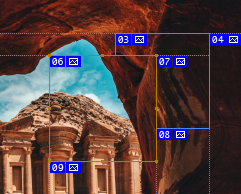
The last icon will move the slice beneath the other slices, as shown below.
Now, the number six slice is below the slices numbered three and five.
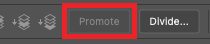
Step 4 – Customize Promote
There are two types of slices: User and Auto Slices.
To edit an Auto Slice, you must change it to a User Slice.
To do this, use the Promote button and change an Auto Slice to a User Slices.
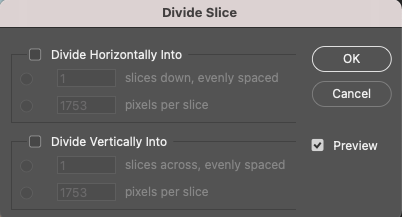
Step 5 – Divide
Hit the Divide button to divide a selected slice into sections.
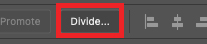
When you click the Divide button, a dialogue window will open.
Here, you can choose if you want to divide horizontally or vertically and how many rows you want the slice to be divided by.
You can select to divide a slice both horizontally and vertically by ticking both boxes.
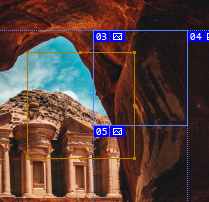
Below, you can see the slice numbered three slice has been divided into three. Each division has been given a new number.
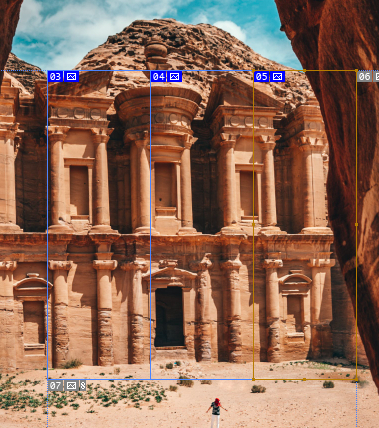
The new divisions are now independent slices that can also be repositioned.
As you can see below, slices number three and five have been dragged above.

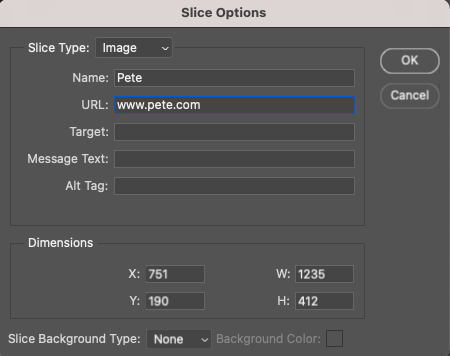
Step 6 – Add the Name and URL
Select a slice by clicking on it in the canvas window.
Click on the Options icon on the right-hand side of the Options tab.
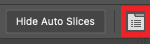
Once clicked, the Slice Options dialogue window will open.
Here, you can enter the name of the selected slice and a URL, Target, Message Text, and Alt Tag.
Step 7 – Save Slices
Save the Slices to your desktop. Head to the top menu bar and select File > Export > Save for Web (Legacy).
The Save for Web dialogue window will open.
Here, you can select if you wish to save all slices or a select few.
Click Save, and the Save Optimized As dialogue window will pop open.
You can rename the images and select the location you wish to save them to.
Click on the arrows beside Slices, and you will be presented with three choices: All Slices, Selected Slices, or All User Slices.
Choose if you wish to save all or selected slices.
Now click Save.
A folder named “Images” will appear in the location you selected.
Open this folder, and you will find your slices inside. Ready to be used.
When you master the Slice and the Slice Select tools, you will find them invaluable when creating graphics.
We hope you have fun using this tool when you are creating your next design.
If you are keen to learn more graphic design editing tricks, check out this Photoshop tutorial – How to Wrap Text in Photoshop.
FAQ
How does the Slice tool work in Photoshop?
The slice tool slices your image into sections.
Instead of deleting any excess areas of your image, you can save them with the sliced section.
How do you make a slice effect in Photoshop?
To make a slice effect in Photoshop, there are a few different techniques.
The most popular is layer mask the image. Using the layer mask, you can split the image to create a slice effect.
How do I slice and save an image in Photoshop?
To slice and save an image in Photoshop, use the slice tool.
Select the Slice tool from the toolbar and create the shape of your slice or slices on the canvas.
When you have finished, select File > Export > Save for Web ( Legacy) and save your slices to a location on your computer.
How do I split an image evenly in Photoshop?
To split an image evenly in Photoshop, you can use the Slice tool in conjunction with the Slice Select tool.
First, select the entire image as a slice using the Slice tool.
When a slice of the image has been created, click the Divide button in the Slice Select options bar.
A dialogue window will appear. Choose if you wish to divide the image vertically or horizontally and enter a value for the number of divides you wish to create.
What does slicing an image mean?
Slicing an image means you are cutting or dividing the image into smaller sections.

Judyth is an experienced studio photographer and glass artist. When she isn’t Photoshopping comedians into the bellies of sharks, you can find her cooking delicious treats for her guests.

👋 WELCOME TO SHOTKIT!
🔥 Popular NOW:
