


Guide to Posing People in Photographs
Ever wondered how to improve at people posing? A pose can make or break a portrait, so here are 13 tips to help you direct your subject into a great pose.
Learn | Photography Guides | Posing | By Teryani Riggs
Shotkit may earn a commission on affiliate links. Learn more.
For many new photographers, posing people can definitely be one of the most challenging aspects of creative portrait photography.
With some people, you can get away with just having them move naturally and hope for the best, but most often your subjects are going to need a bit of help from you.
What’s more, they’ll be looking to you for direction, especially if they're not a model and are not used to being in front of a camera. People don't usually know how to pose for pictures without guidance.

111 illustrations of amazing poses you can use as guidance when posing and directing men. Print the cards to keep in your pocket, or add them to your smartphone for quick reference.
That's why it’s important to have a few go-to poses at the ready, as well as a basic understanding of what poses look good and what looks downright unflattering.
Whether you’re just getting into portrait photography or already have a few portrait poses under your belt, this article will get you well on your way to learning how to pose people in front of the camera.
13 Tips for Successful People Posing
Person posing doesn't need to be overcomplicated. There are easy techniques that you can use to start posing clients like a pro. Here is our posing guide for photographers.
We'll begin with tips on how to pose the body and then move onto the broader elements of bringing out the best in your model.
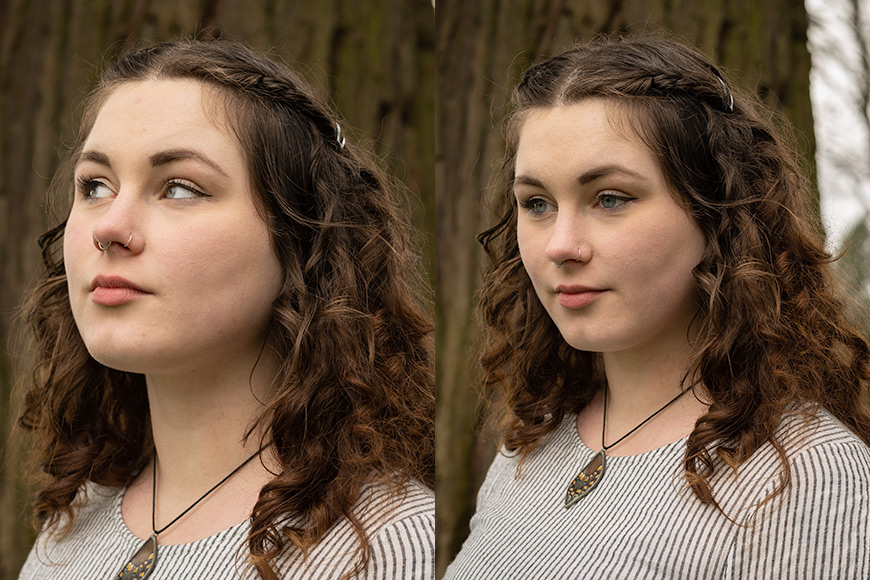
1. Angle the shoulders
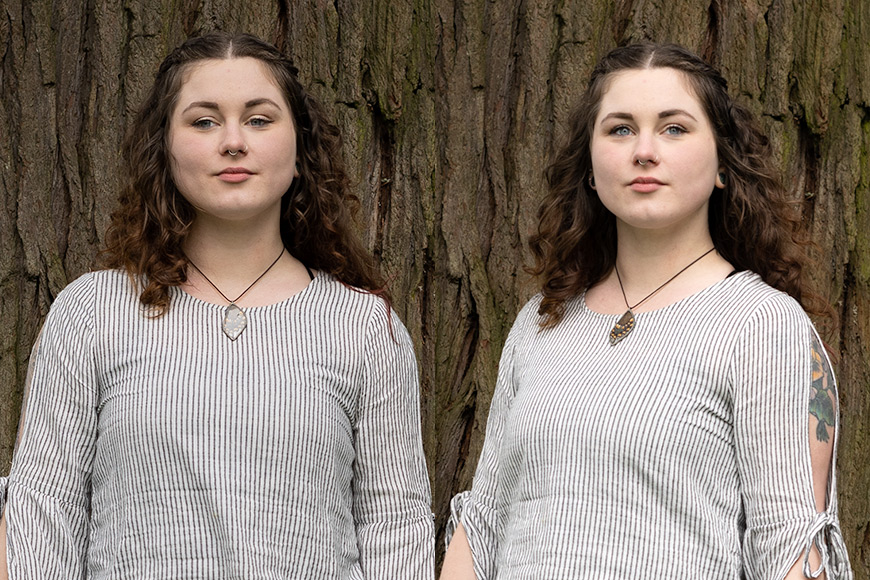
Standing straight to the camera (left) can create a square, blocky appearance. Whenever possible, angle the shoulders and/or body slightly away from the camera (right).
The shoulders are the widest part of the body and can make people look square and boxy if you shoot them straight on. Turning the shoulders slightly (or even the entire body) will give your subject a slimmer, more natural look. This is particularly relevant when posing females.
The exceptions are when you want someone to appear big and powerful – perhaps even a little confrontational. (Think athletes or a CEO of a large company.) That's when having your model face the camera straight on with their entire body can be an advantage.
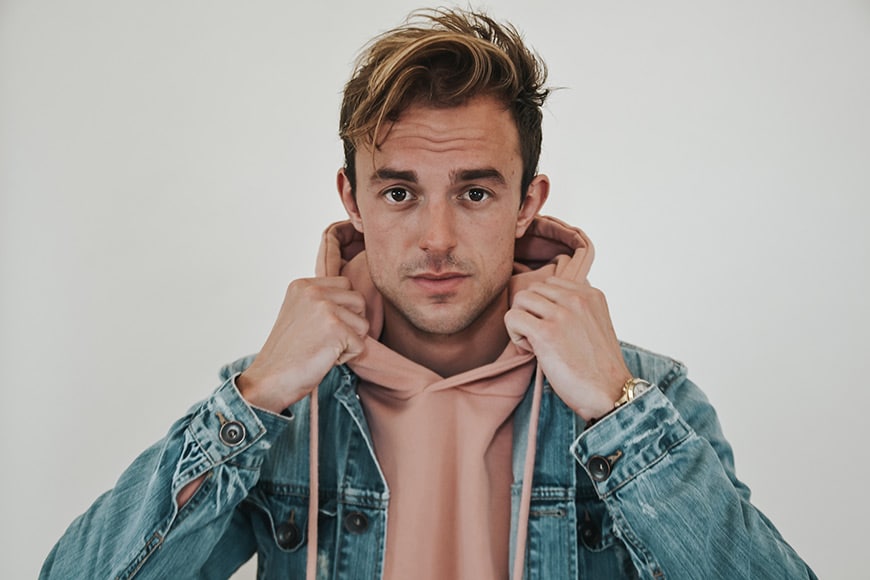
2. Push the chin forward and slightly down
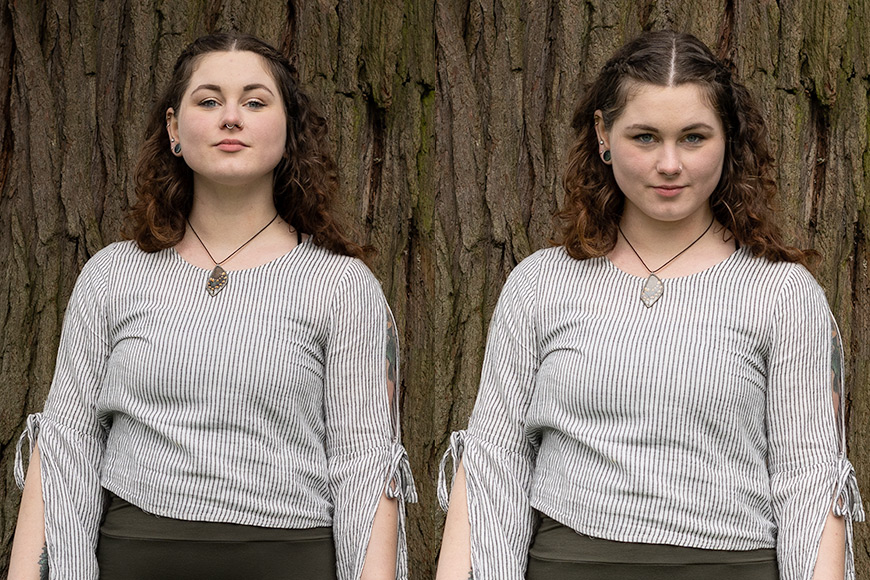
With the head-up (left), one can always see the extra flap of skin under the chin. Pushing the chin forward and slightly down (right) minimizes any chance of having a double chin. It also gives a more open, inviting appearance.
Believe it or not, even slender and trim subjects can end up with a double chin in your images if you're not careful. To avoid this, have them push their chin forward.
It might feel a bit unnatural, but it will elongate the neck and reduce or hide that little bit of extra skin under their chin.
When giving directions, it's best to ask your models to bring their ears forward. If you ask them to bring their chin forward, they're more likely to lift it rather than push it forward. The result? A good nostril shot! Asking them to bring their ears forward generally avoids this bit of confusion.
Also, many people lift their chin when facing a camera, making them look a bit defiant and, again, showing off their nostrils. If they do this, direct them to lower their chin instead.
If it's too late and you realize during the editing stage that your subject had their chin pushed down, you can use Photoshop to remove a double chin too.
3. Create space between the arm and the waist
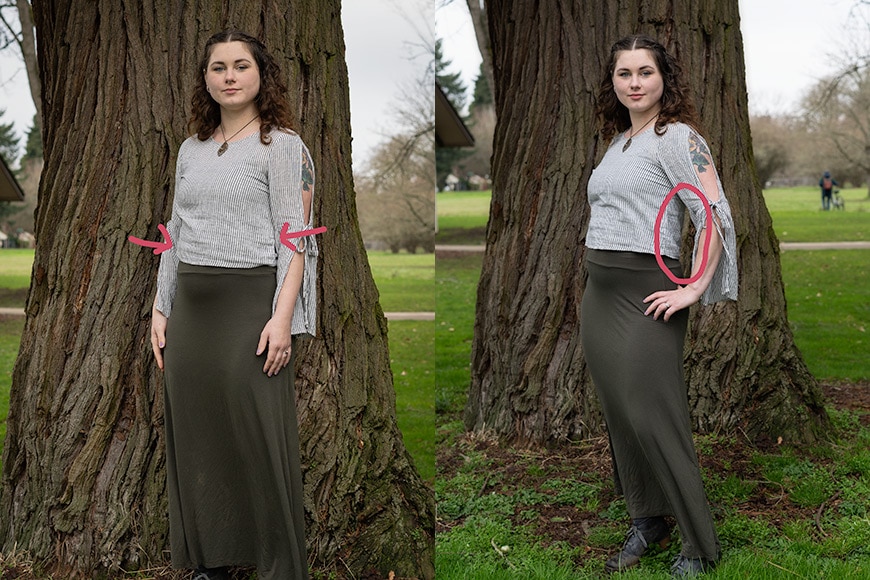
The image on the left has no space between the arms and the waist. Bending the arm a bit puts a bit of space between the waist and the arms, making the waist and arms seem slimmer.
When people stand naturally, they often stand with their arms by their sides. Unfortunately, if there's no space between the arm and the waist, the arm will look like it's an extension of the torso.
This can make the arm “disappear” a bit into the body and/or make the waist look bigger than it actually is. It can also have the opposite effect of making the arm look larger, depending on your camera angle.
To avoid this, have your model bend their arm. It doesn't have to be much – just enough to create some space between their arm and the body.
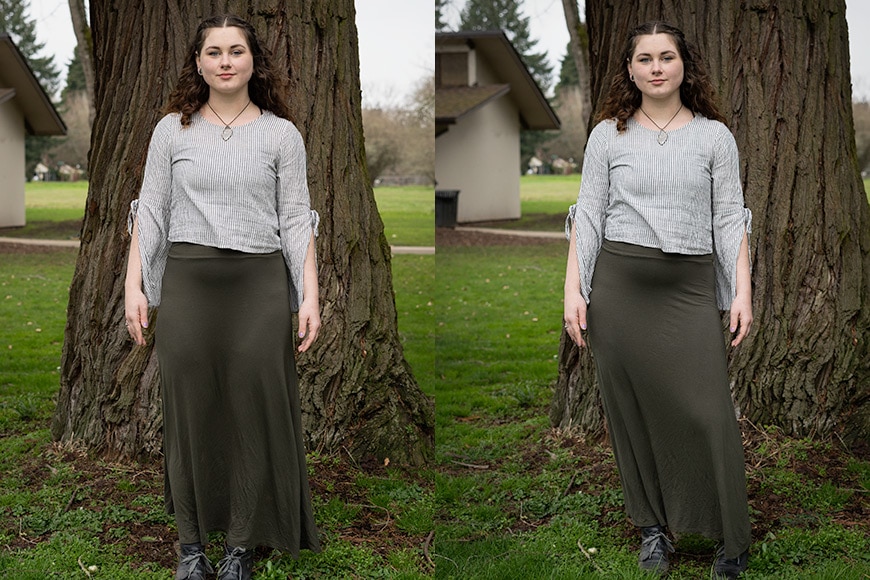
4. “If it bends, bend it.”

The more bends and curves you can put in the body, the more pleasing and dynamic it will appear.
This is a good rule of thumb when posing for pictures. Posing for a picture can be pretty awkward for some subjects. This can result in an unnaturally stiff posture.
Shooting a model with straight arms, legs, or torso will generally result in flat, stiff-looking photos. That's why there's the old portrait photographer's adage, “If it bends, bend it.”
A slight tilt of the head, tuck of the leg, and/or bend in the arm can make all the difference between an unnatural-looking photo and one in which both the model looks and feels much more natural.
5. Put more weight on one leg
Shifting the weight to one leg more than the other (usually the back leg) creates a nice curve at the waist.
Another way to prevent a “blocky” stance is to have your model place more weight on one foot than the other. This will create a pleasing s-curve in the waist.
6. It's all about the eyes
Avoid having too much of the whites of the eyes showing (left) by directing your model to look at something just beyond you (right).
When you pose for a picture, the eyes are the first part of a portrait a person sees, which makes them one of the most important elements in a photo.
If you're shooting a portrait that includes the eyes, ensure that you capture the iris as well as the whites of their eyes.
It's fine to have your models look away from the camera for a thoughtful or dreamy photo, but if you do, give them something specific to look at so you can control the eye-line.
7. Avoid the “Pinocchio” effect
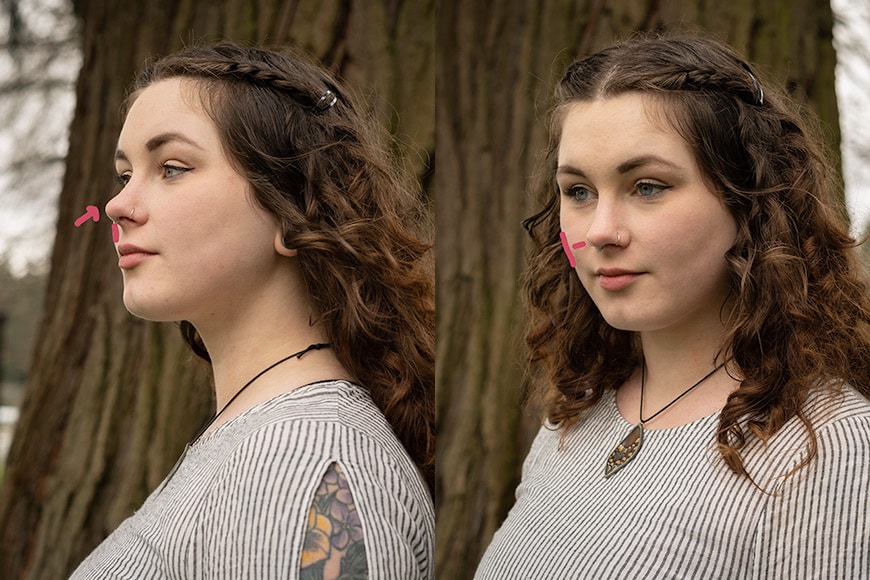
In profiles, make sure the nose doesn't break the line of the face in profiles (left). Instead, have the model turn a bit more towards you so there is space between the line of the face and the nose (right).
When shooting profiles where you have both sides of the face showing, make sure that the nose doesn't extend over the line of the face. That will create a “Pinocchio” effect, making it look longer than it is.
To avoid this, simply direct your model to turn back towards you a bit. Once you can see a bit of space between the nose and the far edge of their face, you're good to go.
8. Be intentional with the hair
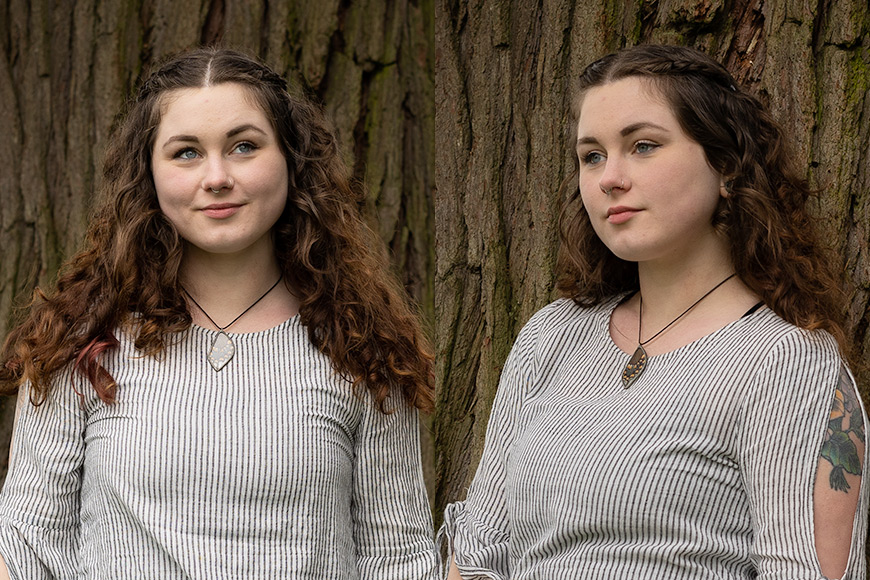
Avoid having the hair lie directly on the shoulders (left). In front of or behind is best (right).
If you're working with a subject with long hair, how it lies will be one of the first things that get noticed.
The good and the bad news is that there are next to no rules as to how the hair should look – everyone's different in that regard.
Luckily there are a few guidelines to follow regarding the hair.
- Avoid letting the hair sit on the shoulders. It looks sloppy and unprofessional.
- Have the part in their hair face the camera so that more of their face is included in the photo.
- Shooting with hair on both sides of the face will allow one side of the face to look better than the other.
- It's fine to have hair hanging in front of both shoulders, behind, or in front of one and behind the other – just not resting on the shoulders.
9. Watch your camera angle

While many photographers counsel against shooting from below, it works sometimes. Just make sure it doesn't make your model look larger than they should.
Camera angles can make or break a portrait.
Some portrait photographers swear by shooting their photos from below. Others say you must always shoot pictures from above. If you're not sure which to do, try both.
Shooting from below can make your model appear longer. If this makes your subject look bigger than you'd like, shoot at eye level or just below.
Shooting from just above your model works best when doing close-ups. This will help your subject look slimmer and if you're shooting indoors, will make it easier to fill the eyes with light.
When trying to project a feeling of power or confidence in your model, avoid shooting them from above – this is particularly the case if you're posing males who may not appreciate the sense of inferiority or weakness that comes from this particular angle.
10. Find something for your model to lean on

Asking your model to lean against something can make for an easy, natural pose.
Leaning poses generally make it much easier for a subject to relax and find a natural-looking pose. There are plenty to choose from, both in terms of sitting and standing.
11. Use props
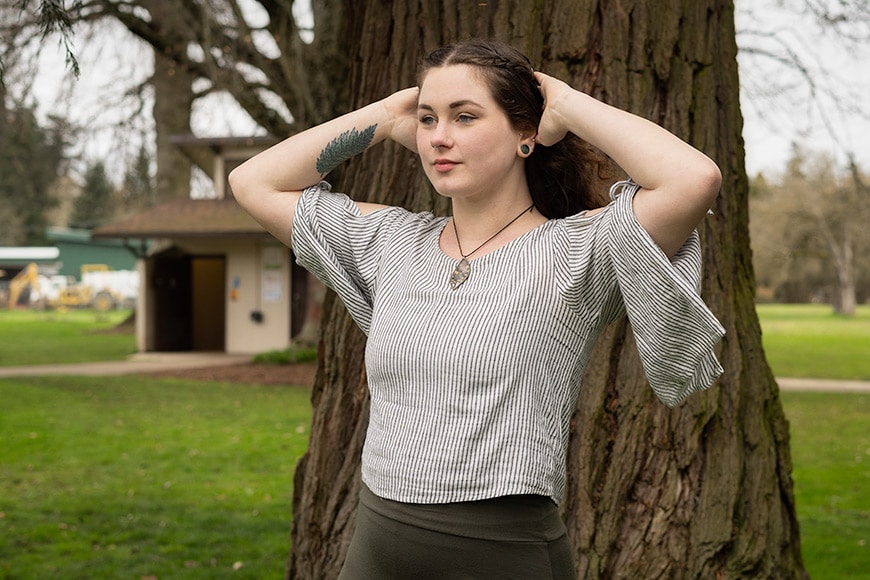
If you don't have any props, try asking the model to play with the hair.
Posing for photography sessions doesn't have to be just the model doing their thing.
Often a model won't know what to do with their hands. That's where having a bag full of props can come in handy. A handbag, basket, car keys, hat, or small backpack all work nicely – see our article on hand poses.
You can also ask them to bring their own accessories so they can match their outfits.
If you don't have anything with you, consider having your models run a hand through or play with their hair.
Now we'll talk about a couple of general people-posing tips that are good to keep in mind.
12. Build rapport
Creating a connection with your models will help them relax and put more energy into their looks.
Simply telling your subjects how to pose in pictures won't cut it. You have to build rapport to help them relax which translates well into the photos.
Having a good connection with your subject is the secret sauce to getting amazing portraits.
Get to know your subject a bit. Ask them questions about their life. These can be photography related, lifestyle-related, what they're passionate about in their career, etc. Whatever works to break the ice and make things feel casual.
The more approachable and laid back you seem, the easier it will be for them to relax.
13. Give plenty of positive feedback
Give your client lots of positive feedback.
Having an upbeat session where the subject feels like they're doing well will yield far better results than a session where they're not sure how they look or feel like they're getting things wrong.
Your subjects won't be able to see themselves from the outside – they'll be depending on you to tell them what poses look good.
Be sure to give plenty of positive feedback. When they do something that looks great, let them know. If they move into a pose that looks awkward, find encouraging ways to have them change positions.
Final Words
Posing people in a way that will make them look their best isn't all about memorizing a bunch of poses. The best images will come from the rapport and connection you achieve with your model.
If you're having fun together, odds are you'll get some fantastic photos!
As a portrait photographer, inspiring ease in your subjects will get easier with lots of practice. If you don't have a lot of clients, practice on your friends.
If you're tired of working with your friends, put out a search online for models willing to work in exchange for some portfolio shots – Model Mayhem is a great resource for this.
The more experience you gain, the easier it will become to pose people without making your photoshoot seem awkward. Before long, noticing all these little details will seem like second nature.
Have any other tips for posing people you'd like to share?
111 illustrations of amazing poses you can use as guidance when posing and directing men. Print the cards to keep in your pocket, or add them to your smartphone for quick reference.

Check out these 8 essential tools to help you succeed as a professional photographer.
Includes limited-time discounts.
Teryani Riggs (they/them) is an adventure, who loves all things wild and free. Teryani can often be found in the midst of a social/eco-justice campaign, hiking through wild backcountry, or hitchhiking around the world listening to other people’s stories. While their focus has historically centered on landscape, travel, and wilderness photography, they’ve also been hired to shoot genres as varied as historical fiction reenactments in the studio to product and food photography.
2 Comments
Leave a Comment
👋 WELCOME TO SHOTKIT!
🔥 Popular NOW:

This is a great resource. Thank you!
Sarah
Sometimes it’s hard to keep all the different tips in mind at once, but practice makes perfect.