


How to Swap Backgrounds using AI in Photoshop
Discover how to easily swap backgrounds in Photoshop with AI, transforming photos with new scenes and compositions in a few clicks.
Photoshop | Software | By Judyth Satyn
Shotkit may earn a commission on affiliate links. Learn more.
This guide will give you the easiest ways to swap backgrounds using AI in Photoshop.
I’ve been using Adobe Photoshop for many years, and often need to switch backgrounds in my photos.
Now that AI has come onto the scene, this task has become much easier.
Using Photoshop's AI features, you can flawlessly change backgrounds in photos in mere seconds.
Let’s dive into the tutorial.

Download a free copy of Adobe Photoshop to follow along with this simple tutorial.
How to Change Backgrounds Using AI in Photoshop
There are many reasons why we might want to swap or switch a background in a photo.
The background might be distracting. You have a gorgeous photo of your niece with her brilliant smile, but the background diverts the viewer's eye.
Or perhaps the background doesn't complement the main subject or the intended theme of the photo, like when a vivid-colored mural disrupts the harmony with the desired classic Art Nouveau theme.
You could want to have fun and pretend you have traveled the globe, swapping out the current photo background from your living room for the Eiffel Tower.
Another reason is that you wish to create an art piece by combining two images.
So, let's get started and change the background.
Step 1 – Open the Image
The first thing to do is check that your version of Photoshop supports AI, and if it doesn't, download the latest version.
Plus, remember that to use Generative Fill and Photoshop's AI features, your browser needs to be connected to the internet.
When you have Photoshop 2023 or Photoshop (Beta) open, head to the main menu bar and select File > Open.
In the dialogue window that opens, locate your image, click on it, and hit Open.
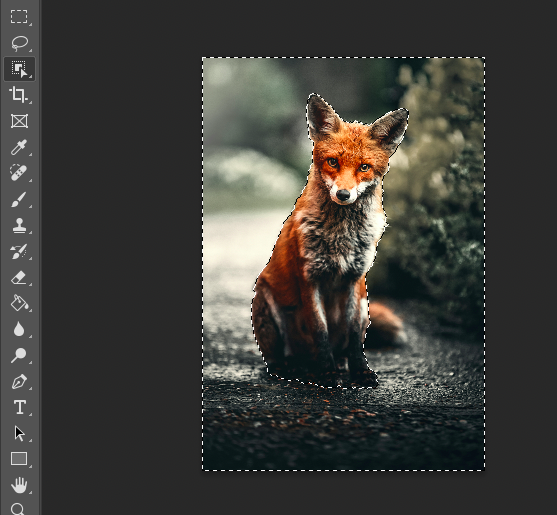
We have chosen an image of a fox in a street.
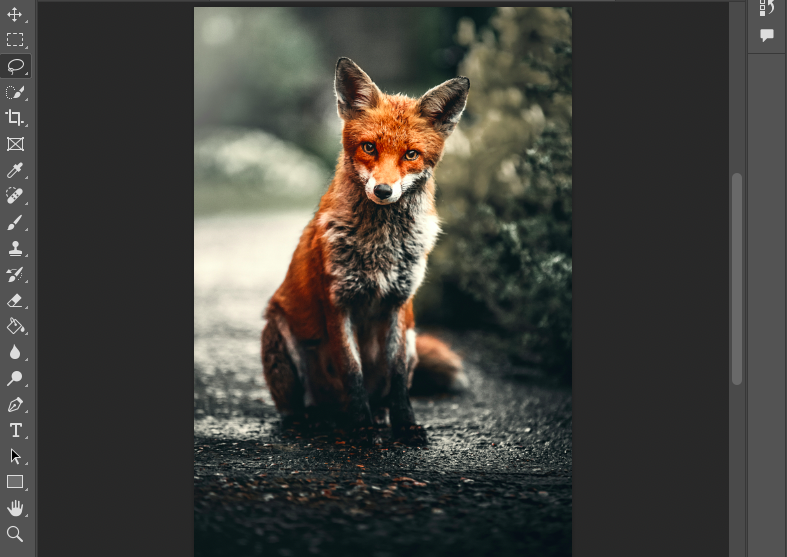
The image of the fox is perfect for the project, but we want him to be in his natural habitat, not on the road.
Step 2 – Create a Selection
AI is incredible, but as of today, it still can't read our thoughts.
Therefore most of our interaction with AI is directing the AI to follow our biding.
The first direction is to specify the area we wish to replace, and the second is the text prompt.
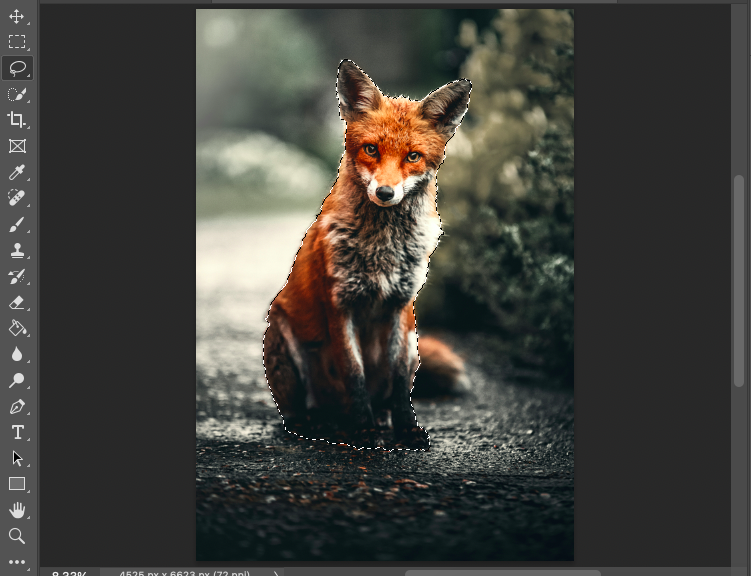
If you have a subject, like the fox, head to the main menu bar and select Select > Subject.
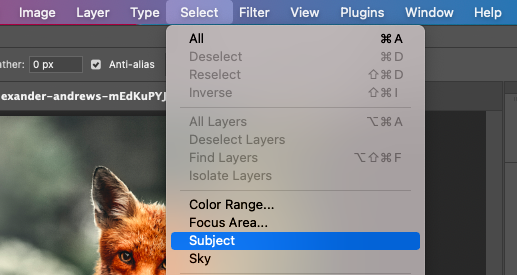
Once Subject is clicked, Photoshop will take a few moments to create an active selection around the subject in the image.
This selection will be depicted by broken lines or marching ants.
Usually, when isolating an object or subject from a background, we need to be very particular about the edges.
This is to make sure it blends well with its new surroundings.
However, when using AI, this is less of a concern as AI will select a background that merges well with the outline of the subject.
AI will also consider the tone of the subject and make sure it blends with the new background.
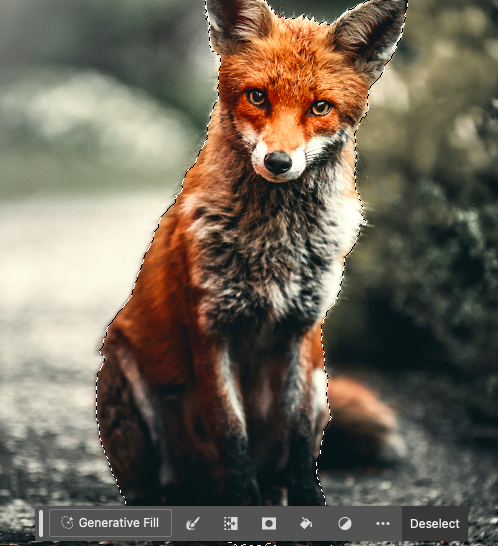
Step 3 – Invert the Selection
We want to remove the background rather than the subject, so we will need to invert the selection.
To invert the selection, go to the main menu bar, choose Select from the drop-down menu, and select Inverse.
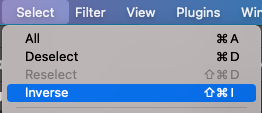
Once clicked, a line of marching ants will surround the edges of the canvas and the fox.
This will make the active selection of the background, which directs Photoshop's AI to focus on this area.
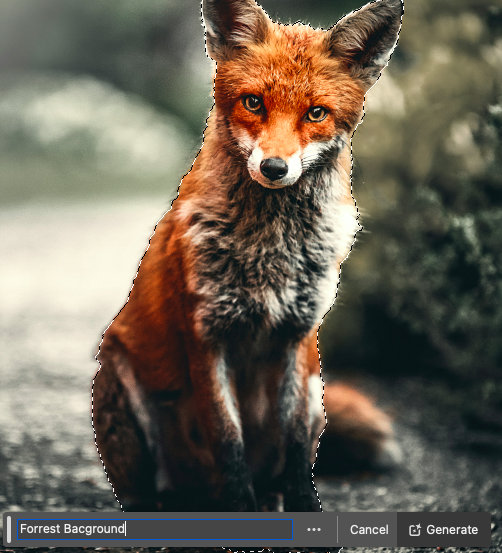
Step 4 – Enter Text Prompt
When a selection is active in the canvas workspace, the Contextural Task Bar will appear.
If the Contextual Task Bar does not appear, you can activate it by going to Windows > Contextual Task Bar.
Alternatively, you can head to the main menu bar and click Edit > Generative Fill, and a taskbar will pop up.
Hit the Generative Fill button in the Contextual Task Bar to open the Generative Fill taskbar.
Enter a text prompt to direct Photoshop's AI to generate what you want.
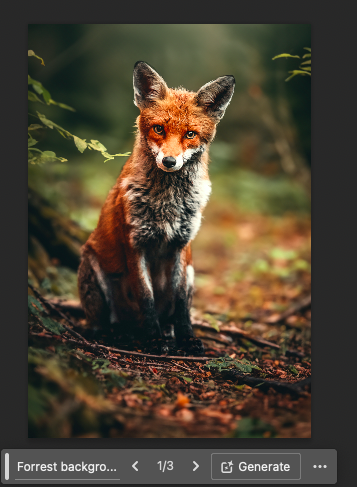
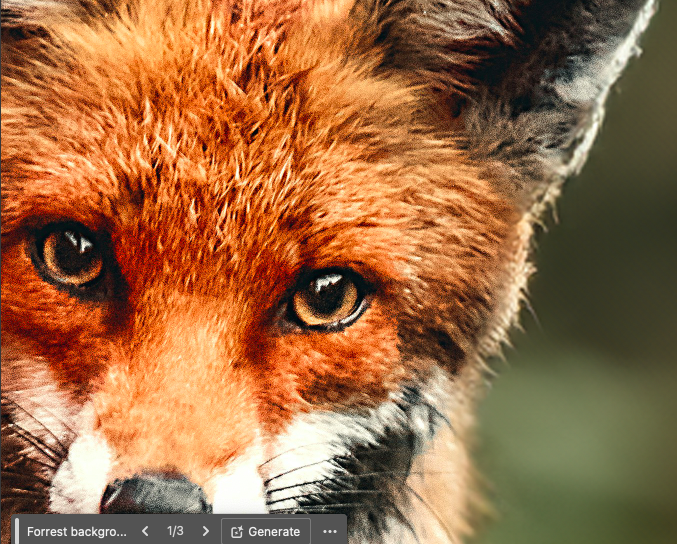
We have entered a very basic prompt: “Forrest Background.”
Photoshop will take a few moments to generate at least three variations based on your text prompt.
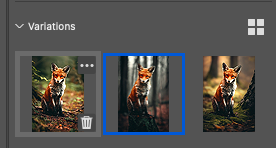
You can find these variations in the Properties panel, under Variations.
Just click on the arrow beside Variations, and they will be displayed.
As you can see below Photoshop's AI has done an incredible job of generating a realistic image.
Below is the first variation created. The shading and tones are so perfect it would be hard for the viewer to discern at first glance that the fox wasn't photographed in this forest.
To view the next two variations, either click on a variation in the Properties panel or click the arrow in the Generative Fill taskbar.
The second variation is also pretty seamless; Photoshop has positioned the fox on a tree stump.
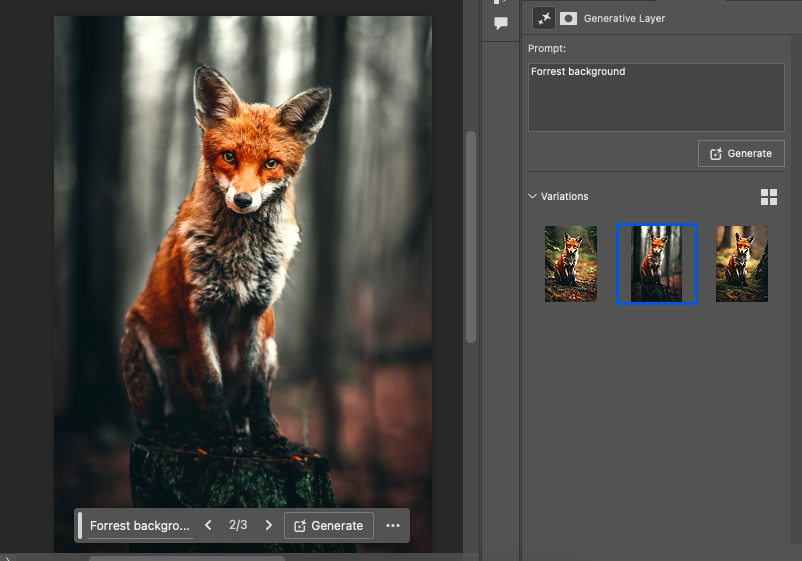
The third version is similar to the first. It seems Photoshop's AI knows what forest is a fox's natural habitat.
Step 5 – Re-Generate As Needed
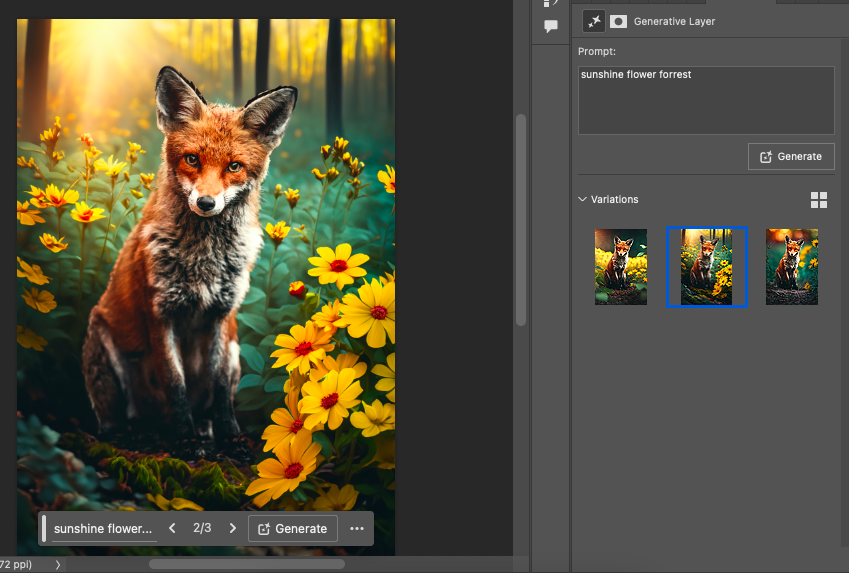
If you're not happy with the woodland that Photoshop has dreamed up, you can enter a new text prompt.
We have entered “Sunshine Flower Forest.”
We're happy with the incredible realistic woods in the first batch of variations. However, we want to see what the fox will look like in the sunshine, with some flowers.
Will this be a more fitting, striking setting for this sad-eyed fox?
It only takes Photoshop seconds to generate three new variations.
However, this time, the background looks less like a photo and more like an airbrushed artwork.
- See also: How to Replace Sky in Photoshop
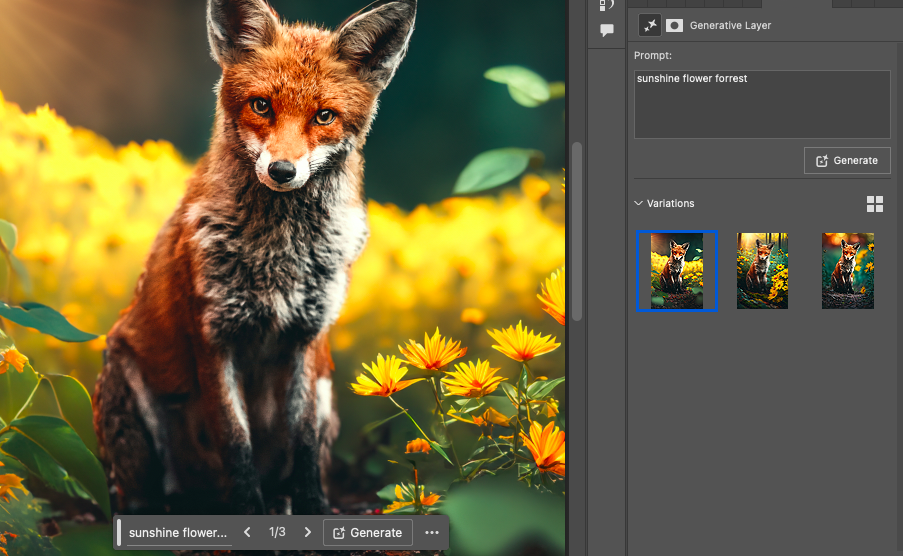
The sunshine behind the fox adds a more dramatic and less somber setting, but the flowers are too fake.
Step 6 – Zoom in to Review
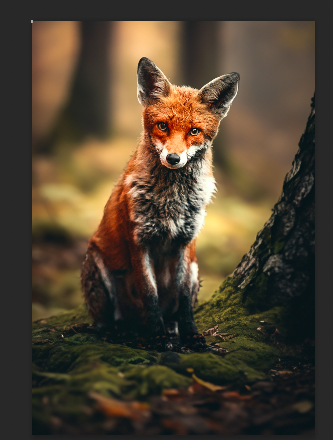
Zoom in to view the subject's outline, where it merges with its new background.
Sometimes, Photoshop's AI might make a glitch, so you want to make sure that your image is sound and there are no errors.
To zoom in, go to the toolbar and select the Zoom tool, located at the very bottom.
The Zoom tool is the circle icon with a diagonal line (a magnifying glass).

Alternatively, use the hand keyboard shortcut. Hold down Command (for Macs) or Ctrl (for Windows) and click the plus (+) key to zoom in or the minus (-) key to zoom out.
When zoomed in, we can inspect the edges, and this subject's outline looks perfect.
Photoshop has left enough areas of fuzz so that the fox's fur doesn't look copy and pasted.

We can compare the two images. Above is the first variation Photoshop generated. Below is a close-up of where the fox's fur meets the original background.
Although Photoshop has trimmed the fur slightly, it has left enough wisps of fur to create a natural photographic look.
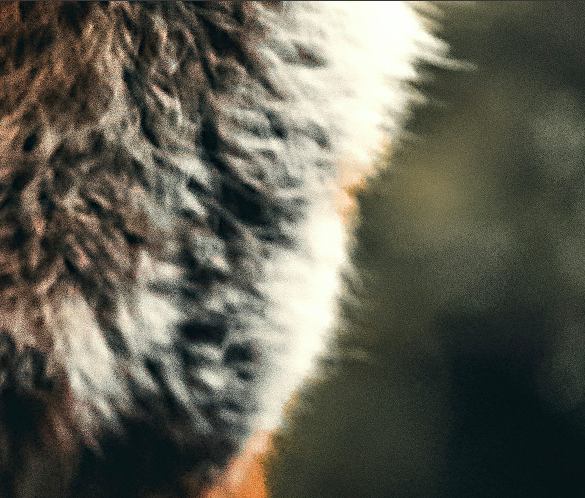
In this AI-generated background swap, we won't need to make any corrections.
If you do find an error along the edges of your subject, you have a couple of choices to remedy the error.
You can either regenerate the image with more precise prompts, or you can flattten your image and edit the error.
To flatten your image, follow the next step.
Step 7 – Flatten the Image
When you flatten an image, all layers will be merged into one. This means that all the variations which Photoshop generated will be erased, except the one you wish to keep.
If you want to save the other variations, it could be worth saving the image as a PSD file before flattening.
Make sure your preferred variation is visible in the canvas workspace before you flatten the image.
Photoshop will flatten and save whichever image is visible.
Head to the main menu bar and select Layer, and from the drop down menu that opens beneath select Flatten Image.
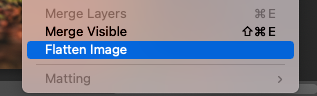
All layers will be merged into one layer.
Step 8 – Save the Image
Now you can save the image. To do so, go to the main menu bar and select File > Save a Copy.
The Save a Copy dialogue box will open.
Enter a name for your image, and select the location you wish to save it.
From the drop-down menu beside Format, select JPEG, then hit Save.
Your image will now be saved and ready to be shared or printed.
We hope you enjoyed this tutorial and will find many uses for your new background-swapping skills.
If you liked this tutorial, we're sure you will also like – 21 Fun Photoshop ideas to try today.
Adobe MAX Update 2024
Photoshop is the ultimate tool for photographers, graphic designers, and visual creatives looking to take complete creative control of their workflow.
The Adobe MAX Update 2024 introduces several enhancements and new features to simplify core tasks.
With the assistance of Generative AI, these tasks include the ability to remove distracting elements from an image and streamlined processes for placing 3D elements in a 2D design.
Removal Tool – The key updates include an enhanced Remove Tool to effectively remove unwanted or distracting objects from an image without deteriorating the overall composition.
Distraction Removal – The automated Distraction Removal feature identifies people, objects, and overhead wires that may distract from the image.
Generative Fill – Powered by Adobe Firefly AI, Generative Fill allows you to build a composition with photo-realistic 3D elements, including correctly placed shadows, highlights, and perspective.
Generative Expand – Photoshop’s Generative Expland allows you to resize the canvas and use Adobe Firefly Image Mode to fill in photorealistic elements.
The Adobe MAX 2024 Updates are now live, and there's never been a better time to optimize your creative output with the Adobe Creative Cloud suite of applications.
FAQ
How do I change a background in Generative AI Photoshop?
To change the background with Generative AI in Photoshop, you first need to create a selection of the background.
When the background is selected, activate Generative Fill and enter a text prompt.
The text prompt has to be precise to help direct Photoshop and generate the best background results.
Can AI change the background of a photo?
Yes, you can change your background using AI. There are many online apps that you can use.
Alternatively, you can use photo editing software such as Photoshop, which now has AI features.
How to do a background swap in Photoshop?
To swap a background in Photoshop, you will need to create a precise selection of the subject using a selection tool.
You can then copy and paste the subject or object onto its new background.
Can Photoshop AI remove the background?
Yes, Photoshop AI can remove a background. The Generative Fill tool will remove or change a background.

Judyth is an experienced studio photographer and glass artist. When she isn’t Photoshopping comedians into the bellies of sharks, you can find her cooking delicious treats for her guests.

👋 WELCOME TO SHOTKIT!
🔥 Popular NOW:
