


Time-Saving Lightroom Shortcuts for Mac & Windows
Want to make photo editing quick and easy? Learn these 20 Lightroom keyboard shortcuts and you'll be powering through your post-processing!
Lightroom | Software | By Polina Raynova
Shotkit may earn a commission on affiliate links. Learn more.
If you use Adobe software to edit your photos, you’ll know how useful it is to have a handful of Lightroom shortcuts up your sleeve.
Whether you’re a beginner or a seasoned pro, using shortcuts while editing can dramatically speed up your post-production workflow.
In this guide, we’ll introduce some shortcuts that you definitely should be using with Lightroom already, as well as some others that you may not yet know.
The shortcuts work for both Mac and Windows and should be the same whether you’re using an older version of Lightroom standalone or subscribe to Lightroom Classic CC.
Still struggling to remember all the shortcuts? Use this free interactive Adobe Lightroom & Photoshop Shortcuts Keyboard Tool.
Popular course reveals the simple tricks to getting incredible results with Lightroom in record time. Give Your Photos The Look They Deserve!
![]()
20 Useful Adobe Lightroom Shortcuts
1. Rate your images: numeric keys 1 to 5
One of the most significant advantages of Lightroom is that you can use it not only to edit your photos but also to organize them in a very efficient way. This is certainly not a feature to neglect when you have to deal with a bulk of images, say, from a wedding or another event.
So you probably already know that you can give each image a rating from 1 to 5, but did you know that you can do it by pressing the buttons on your keyboard?
To give your photo one star, simply press 1 on the keyboard, to give it two stars, press 2 and the rest I’m sure you can already guess. 😊
This one is definitely one of the Lightroom shortcuts that I use the most and it does save a significant amount of time.
Give it a try next time you sit in front of your Adobe Lightroom!
2. Reject a photo that you don’t want in your collection: X
Here’s another Lightroom trick that I use as often as the first one. It works wonders when you have to sort out photos from events or photoshoots.
Imagine you’re going for a candid lifestyle shot where people look natural, but also no one is sneezing, blinking or just frankly looking awkward for no apparent reason… It isn’t easy! So for sure, you’re going to have to get rid of a lot of images from the initial upload.
Press the X key on your keyboard to reject the photos that you won’t be needing for your final selection. They won’t be deleted – just stored in a folder with all of the reject ones from the session. (You can then choose to delete all the rejected photos at once if you want to.)
3. Pick or Flag an image: P
Sorting through a session is mission impossible without rejecting some of your photos, true. But it’s also impossible if you don’t flag or pick the images that are worth your (and the viewer’s!) attention.
The Lightroom shortcut for flagging images is the P key. Simply tap on it to mark your image as worthy of further editing.
This a great shortcut that you can use while you’re in the Library module and which goes quite well in combination with the previous two mentioned above.
4. Quick access to Library module – grid view: G
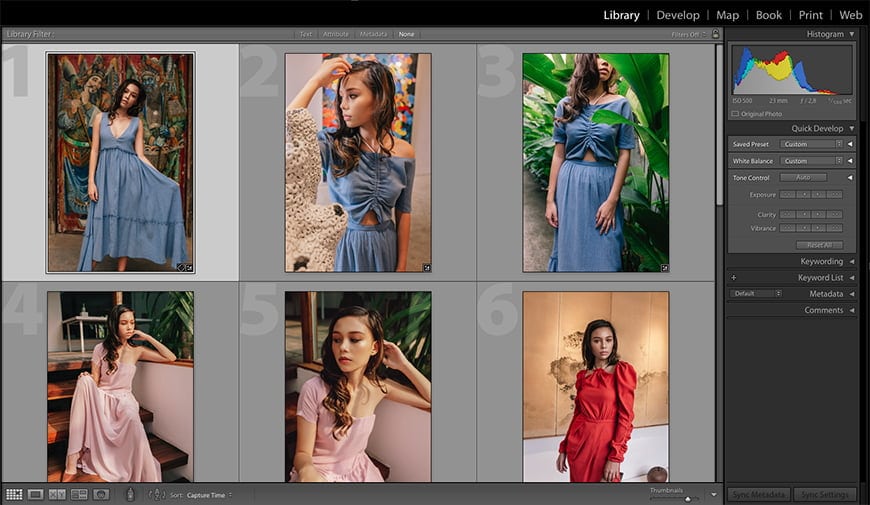
Speaking of the Library module and all the tools you can use there to put your photos in order, it’s also good to know how you can quickly bring this mode to your screen.
There’s a shortcut for this – to gain a quick access to the Library mode and more specifically the grid view, you only need to press G on your keyboard.
5. Change to single-image view (loupe view): E
While you’re still in the Library mode, there’s one more quick trick that you can learn. In case you prefer to see just one photo at a time in the main window, you’re in need of the loupe view (or simply the single image view).
You can take advantage of this type of view if you tap E on your keyboard. It will display your photos in a way which is quite similar to the view you get in the Develop module.
6. Enter the Develop module: D
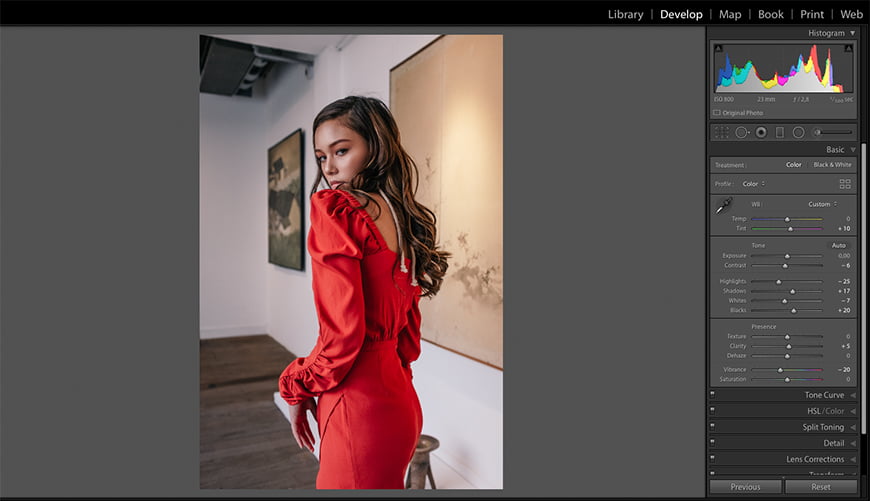
Once you’ve finished choosing your best images, the next step is to start editing them.
In other words, you need to start developing, something that you’d normally do in the digital “dark” room of Lightroom.
In order to access the Develop module you can take advantage of another shortcut – this time the letter you’d be needing is D. Find it on your keyboard and give it a go.
7. Show Before & After when you finish editing: Y
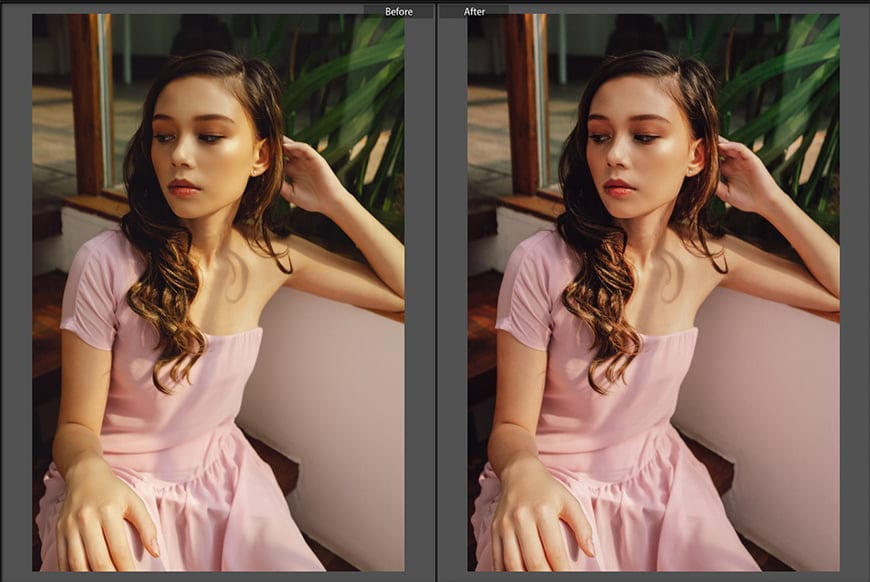
When you hit the Y key on your keyboard you’ll be able to get yourself a nice comparison – it’s the before & after version of the edit you’ve just done.
On the left-hand side you’ll see the “before” photo and on the right-hand side you’ll see the “after” photo.
It’s a really useful comparison mode and also a quick reality check. It’s sometimes easy to get carried away with the edit, especially if you’re given creative freedom to do so.
Taking this into account, it’s essential to be able to compare the end result with the original photo.
8. Hide the panels and switch between Normal and Full-screen: Ctrl + Shift + F / Command + Shift + F
Here’s one more of the important shortcuts and something which I find myself using quite often. Sometimes when you’re focused on your monitor while editing your photo, the panels which help you edit it can become a great distraction.
Seeing your image with clear eyes is essential for every photographer. You can quickly get rid of the distractions around it by hitting Ctrl + Shift + F, if you’re on Windows or Command + Shift + F if you’re using Lightroom for Mac.
9. Convert your image to black & white: V

There’s a very quick and easy way to check if your photo looks good in black & white. Sometimes you’re not really sure if this will be the case and instead of wasting time using the traditional approach, you can use one of the Lightroom keyboard shortcuts that the program has to offer.
Simply press V and you’ll see your photo in a black & white version. If you’re not happy with the result and prefer it to be in colour – just tap V one more time and things will go back to normal.
This is one of those shortcuts which proves truly handy for every photographer.
10. Instant access to the crop tool: R
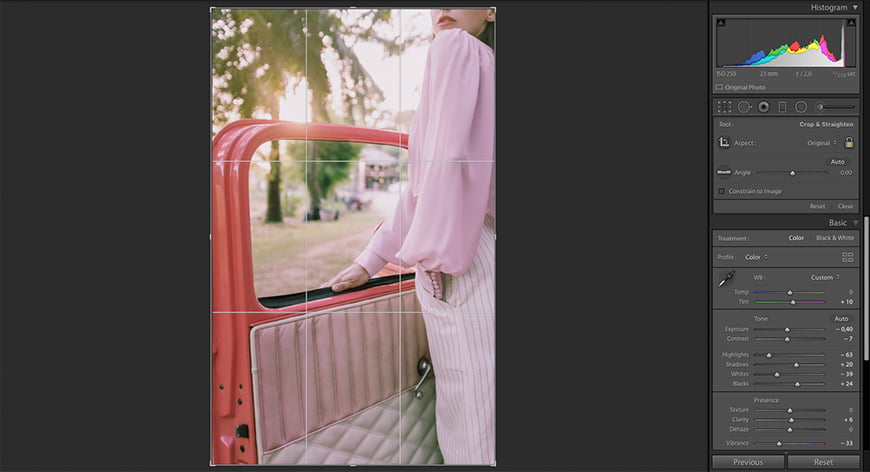
What are the most important tools that every photographer uses when editing? When asked this, I’m pretty sure that the crop tool will be one of the first things that comes to mind.
That’s why it’s essential to have quick access to it. Thankfully, Lightroom has taken care of that with another useful shortcut.
Simply tap on the R key in order to activate the crop tool.
11. Shortcut to the straighten tool: Ctrl / Command
Imagine that you’ve already cropped your photo, but now that horizon line doesn’t look quite right to you. To make the necessary adjustments you need the straighten tool.
If you’re on Windows, to get there you have to hold down the Ctrl key on your keyboard.
If you’re sitting in front of your Mac, then you’ll need to use the Command key (or the so-called Apple key). Hold it down and you’ll get the same effect.
12. Open the brush tool: K
Moving further away from the basic adjustments, we’ll inevitably stumble upon the adjustment brush tool. It’s really hard to imagine doing precise edits without it.
One of the next Lighroom keyboard shortcuts I’ll introduce is a quick access to the brush tool.
The key that you need here is K. Once you tap on it, you’ll be taken to one of the most precious tools in the Develop module: the brush tool.
13. Show or hide the mask you’ve created: O
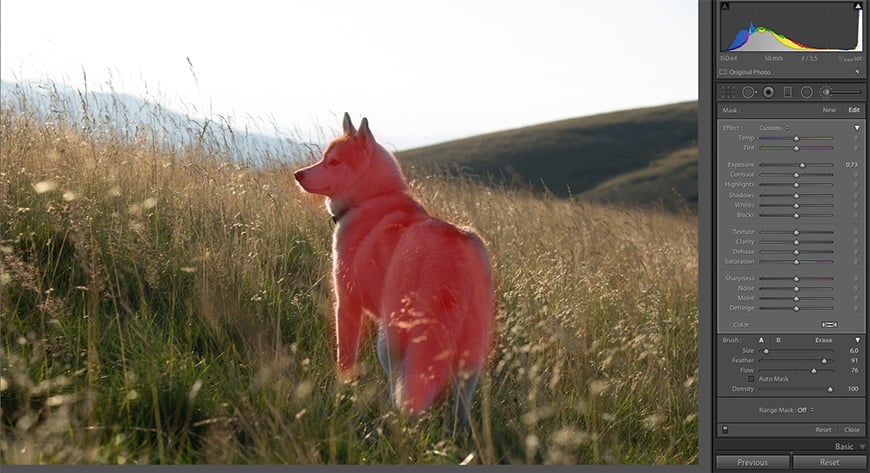
Being able to control the mask you’ve created in Lightroom is just as important as creating it.
You have a few options to create a mask: you can take advantage of the Graduated Filter, the Adjustment Brush or the Radial Filter.
To reveal the mask you’ve created with one of those tools, hit O on your keyboard.
If it becomes a distraction for you at some point and you want to remove it, simply tap on the same letter again and it will disappear.
This is another of the Lightroom shortcuts that I use every time when I’m working on slightly more complex edits.
14. Control the Brush size: square brackets
If brushes and masks are a part of your usual workflow in Lightroom, then the next shortcut will surely be quite useful for you.
To control the brush size according to what you need at the moment, you have to use the square brackets on your keyboard: [/]. Use the open bracket to reduce the size of your brush and the closed bracket to increase the size accordingly.
The same trick you can use in Photoshop – definitely one of my top 5 favourite and most often used shortcuts!
15. Show or hide guides in the Print module: Ctr + Shift + H/ Command + Shift + H
If you find yourself in the Print module of Lightroom, there are a couple of important shortcuts you’ll be needing at some point. The first one is to show or hide the guides.
To do this you have to use a combination of three buttons on your keyboard. Depending on whether you’re using a Mac or Windows, the combinations differ slightly.
Mac users: press Ctr + Shift + H. For PC users with Windows: it’s Command + Shift + H.
16. Show or hide rulers in Print module: Ctrl + R / Command + R
This next shortcut is all about the rulers, which you’re most probably already used to seeing in Photoshop. I’ve come across some people who complain that this option tends to be more reliable in Photoshop.
If you do need to use the rulers in the Print module of Lightroom, here’s the shortcut: Ctrl + R for Windows and Command + R for Mac OS.
17. Continue editing in Photoshop: Ctrl + E / Command + E
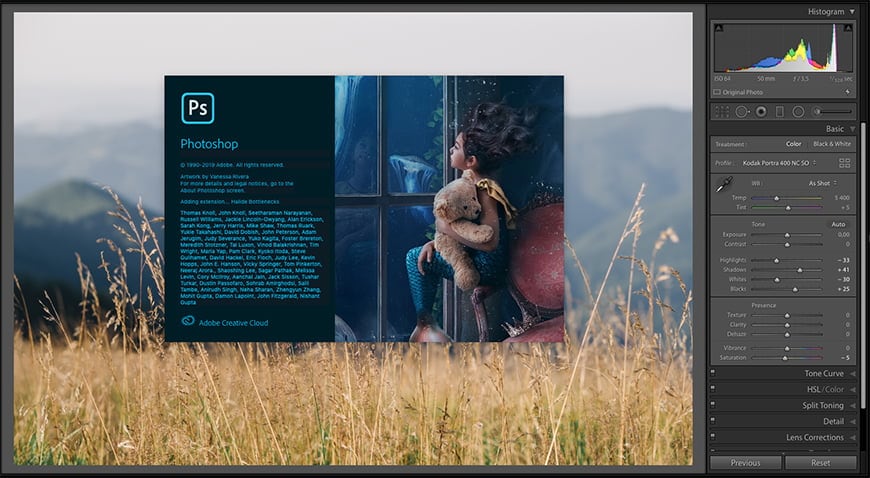
Lightroom is a really great piece of software when it comes to bulk editing, but there are a few aspects in which Photoshop is just indispensable.
If you need to perform high-end retouching for a client or for a personal project, there’s no other place like Photoshop (to practice frequency separation skin retouching, for example).
So how do you “toggle” between the two programs in a smart way? There’s, of course, a shortcut for that as well!
If you need to continue editing your photo in Photoshop, you have to press Ctrl + E for Windows or Command + E for Mac.
18. Delete selected photos: Ctrl + Alt + Shift + Delete / Command + Option + Shift + Delete
This one would be the toughest key combination to remember out of all of the Lightroom keyboard shortcuts we’ve checked out so far.
It’s used in case you need to remove your photo from both the catalog and the collection.
They came up with this complicated combination on purpose – the reason is that you really don’t want to accidentally permanently delete an image (or more!) of yours with this shortcut. And there is truly no way you can hit those four keys at the same time without wanting to.
The only downside is that it’s actually not so easy to remember. I’ve personally forgotten it more than once until it settled in mind my mind as something permanent.
And I’ve also felt a few times like a piano player who’s not particularly skillful to say the least!
Here are the key combinations:
For those who are using Windows: Ctrl + Alt + Shift + Delete.
For the ones using Mac OS: Command + Option + Shift + Delete.
19. Copy/Paste Develop Settings: Ctrl + Shift + C or V / Command + Shift + C or V
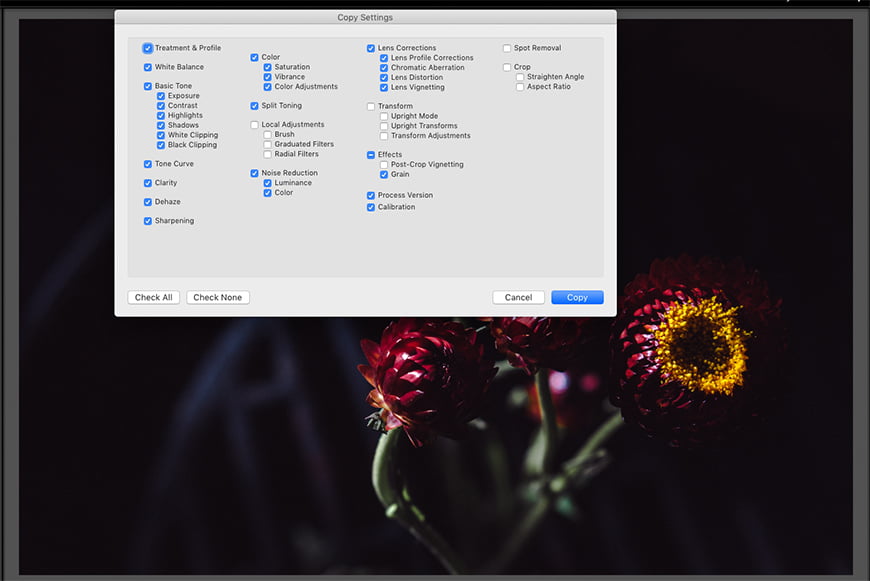
This shortcut is a total lifesaver for editing a large number of images at the same time. It lets you copy and paste the adjustments you’ve already made to other images from the same photoshoot that share similar lighting conditions.
This is one of the Lightroom keyboard shortcuts that’s easy to remember. Don’t forget that once you’ve opened the Develop settings panel you have the freedom to choose which settings exactly you’d like to copy (in most cases you don’t want to copy everything).
The key combinations that you need here are:
For Windows: Ctrl + Shift + C to copy / Ctrl + Shift + V to paste
For Mac: Command + Shift + C to copy / Command + Shift + V to paste.
20. Export the photos you’ve chosen: Ctrl + Shift + E / Command + Shift + E
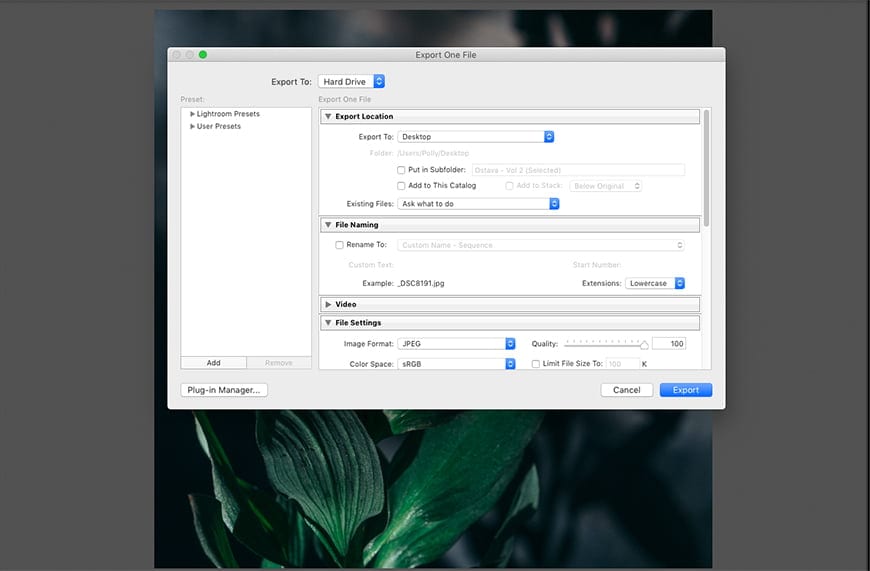
When you’ve finished editing your photos the one thing that’s left for you to do is to export them.
The last shortcut that we’ll share in our Lightroom online “textbook” is focusing on this final stage.
To export your images accordingly you’ll need to bring up the Export dialogue box. Instead of searching for this in the options at the top of the screen, you can save time by using this shortcut.
For Windows hit Crtl + Shift + E and for Mac use Command + Shift + E.
Final words
These are 20 of the most popular Lightroom shortcuts that will surely be useful for every photographer – no matter if you’re a beginner or someone who’s already more advanced in the photography world.
The list of all of the possible shortcuts created by Lightroom would be much longer than this one. It wouldn’t be an overstatement to say that what we’ve touched upon is only the tip of the iceberg. But in reality, do you need all of them?
Trying to remember too many would be overburdening yourself, so sticking to the most useful and most regularly used shortcuts is a good strategy.
How many shortcuts do you use on a daily basis? Share with us in the comments below!

Hi there! I’m Polina, a freelance photographer, always on the look out for creating simple images with powerful impact.

👋 WELCOME TO SHOTKIT!
🔥 Popular NOW:
