


How To Unnest Clips in Premiere Pro
You won't get far with your video editing unless you learn how to unnest a clip in Adobe Premiere Pro. Here's the simplest way I've found to do it properly.
Premiere Pro | Software | By Ashley Darrow
Shotkit may earn a commission on affiliate links. Learn more.
When you break video editing down, it’s really nothing more than stitching together basic skills into much more complicated edits.
I’m going to get you started with one of the most basic skills out there: Here’s how to unnest in Premiere Pro.
Download the latest version of Adobe Premiere Pro to follow along with this simple tutorial.
Start a free 7-day trial today
Nesting allows you to combine separate clips together for faster editing. I use nesting all the time to speed up my edits.
I’ll keep this guide quick in the spirit of improving your video editing workflow—let’s unnest some clips!
How to Unnest in Premiere Pro
I’ll be keeping this brief and working with footage from a project I shot recently. (I got to develop expired super 8 film in coffee!)
In this project, I had to stop my film scanner to fix a jam that caused a break in my clips.
Nesting them together allows me to edit them as if they were a single clip, but there are times when you want to work on segments individually.
There’s no official one-button solution for unnesting in Premiere, but you do have options. Here are the two ways you can break apart a nested sequence in Premiere:
Use Command / Control Z to Undo Nested Sequence
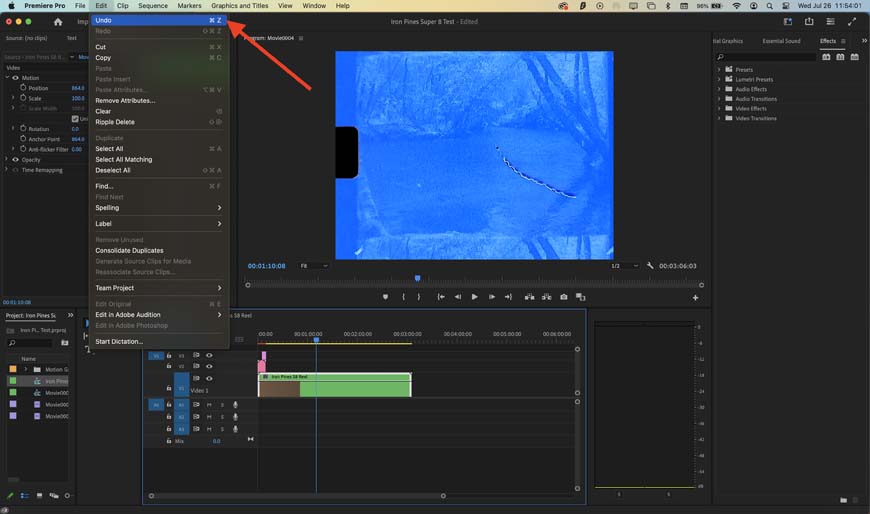
If you catch it fast enough, unnesting is as easy as CNTRL + Z.
The easiest way to unnest clips is to just hit Command (or Control) + Z.
You can also go to the edit menu and select “undo” from there.
This only works if you’ve recently nested your clips or if you don’t mind stepping back through a few edits to undo your nest.
Drag and Drop to Unnest All the Clips
Command + Z doesn’t always workout when it comes to undoing editing mistakes. If you’re too far along in your editing process, stepping back through your work can cost you hours of editing time.
Thankfully, you can undo nesting by dragging your individual clips out of the nest.
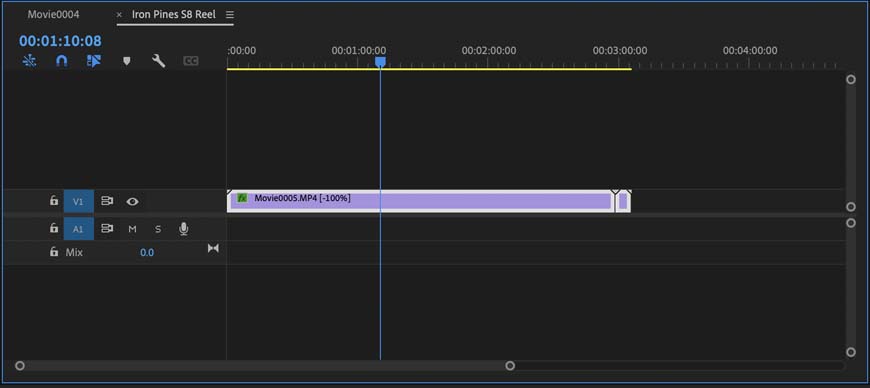
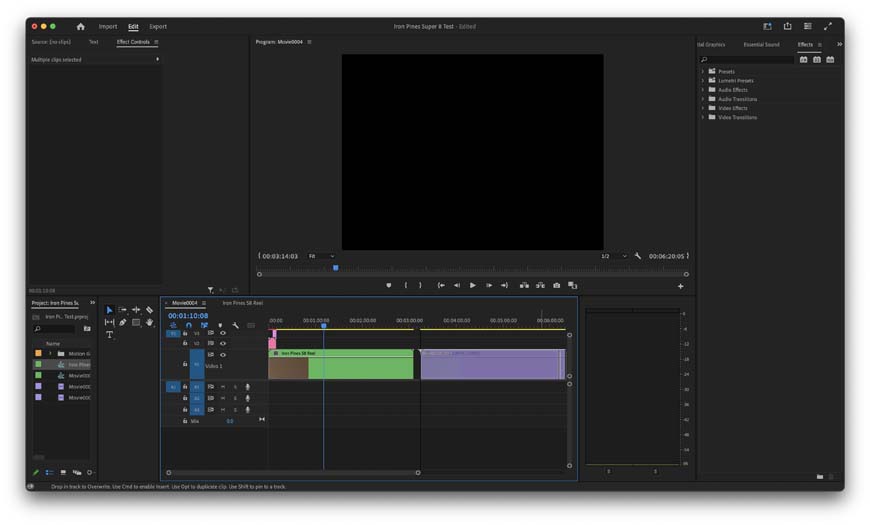
This is the view of a nested clip after you've double-clicked it. It's essentially a sub-sequence within your main sequence.
Your first step is to double-click on your nested clips.
Nesting works by tethering all the clips together in their own sequence. This nested sequence functions like a clip while in your main sequence, but you can always double-click a nest to edit the original clips inside of a nested sequence.
You can take advantage of this fact by pulling your nested clips out of a nested sequence.
While I'm on the subject, you can also edit and overwrite sequences when you double-click into a nested sequence. You might not even need to un nest if you're looking to edit separate audio tracks or selected clips within the nest.
Your individual clips never go away when you nest them, they just hang out in their own sequence.
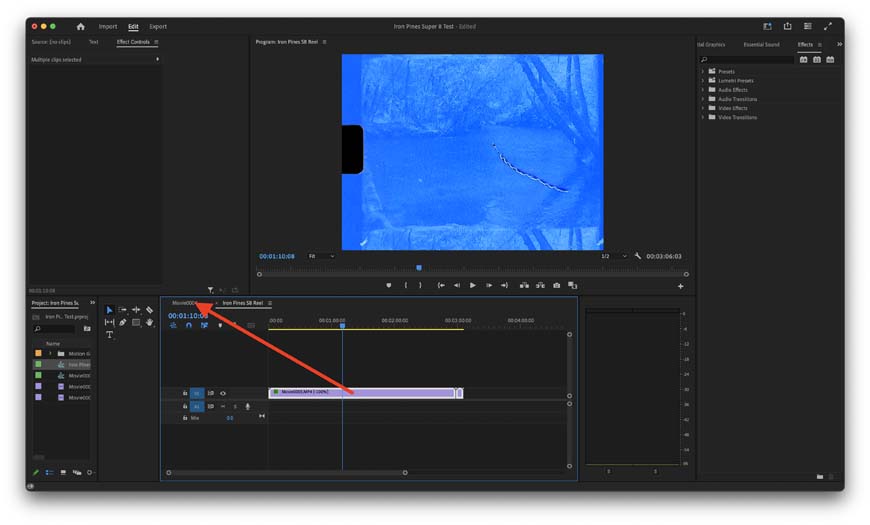
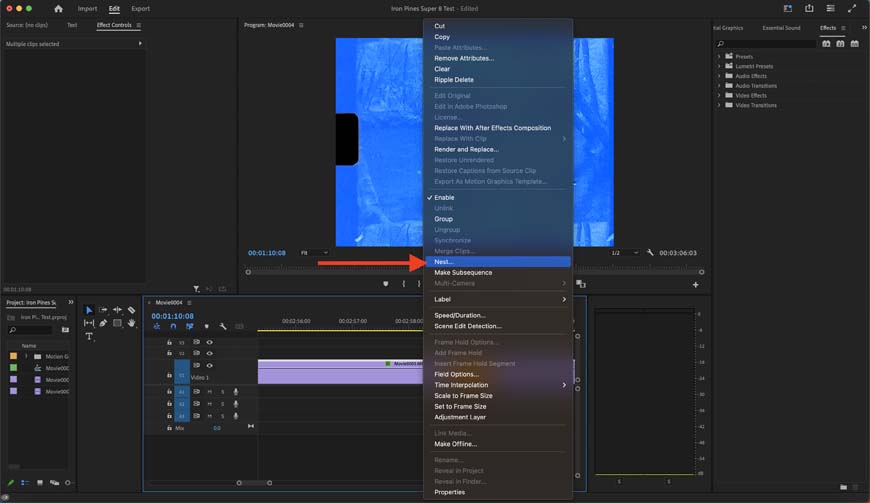
Once you double-click into the nested sequence, it’s as easy as dragging and dropping all the clips back into the original project panel.
You can do this by dragging your clips back into the main project panel as shown by the arrow in the screenshot above.
Now you've got copies of your clips next to their nested sequence!
Now that your unnested clips are back in the main sequence, you’ve essentially got two copies of those clips to work with.
You can go ahead and delete your nested sequence and keep your unnested clips. Keep in mind that you can pull individual clips out of a nested sequence if you accidentally added the wrong clips to your nest.
Here's a quick tip that will save you a lot of trouble when unnesting. Always make sure you put your clips back in their original layers and positions. There's nothing worse than realizing that your clips are out of order after you've done hours of editing.
The last way to deal with unnested clips is to simply drag your clips back out of the media bin and onto your main sequence. The project assets in your media bin can be copied as many times as you need no matter how many sequences you put them in.
How To Edit Multiple Clips After Nesting
A nested sequence functions as its own clip when on your editing timeline. This means you can start editing clips as if they were single clips.
This means that you can do anything you’d like with your nest and treat it as you would any other clip. You can right-click a nested sequence to edit its properties or drag and drop effects from the effects panel onto your nest.
Nested sequences are a great way to speed up your workflow.
When I’m working with scans of super 8 or 16mm film, I’m often dealing with disconnected clips that ultimately come together to form a single clip.
So, nesting these separate pieces together is an easy way to streamline my workflow and ensure my editing is uniform across all clips in a project.
How to Create Nested Sequences in Premiere Pro—A Super Quick Refresher
Nesting is way easier than unnesting in Premiere.
Okay, you’ve made it this far, but maybe you forgot how to nest clips in Adobe Premiere Pro along the way.
All you need to do is highlight the clips you want to nest, right-click, and select “nest.”
If you want to unnest your clips, just scroll up a bit.
Adobe MAX 2024 Update
As part of the MAX 2024 Update, Adobe Premier Pro is enhancing its use and application of generative AI technology.
To optimize the outcomes, Adobe Firely seamlessly adds frames to the start or end of a clip while aligning to audio. While it doesn’t sound like much, the effort and time savings will streamline overall workflows.
Generative Extend
Premiere Pro’s Generative Extend is Adobe’s first pro-grade video feature, making the most of generative AI.
The Adobe Firefly Video Model harnesses AI learning and application to deliver commercially safe outcomes.
As part of the MAX Update, Generative Extend lengthens clips to cover gaps in video footage, ensures smooth transitions, and holds shots longer for precision edits.
Content Credentials
One of the most valuable assets in the age of AI image creation and manipulation is content certification.
Adobe Premier Pro introduces a new form of media metadata that identifies if the content has been tampered with. It’s an essential element to confirm the validity of any visual creative’s work.
The Adobe MAX 2024 Updates are now live, and there's never been a better time to optimize your creative output with the Adobe Creative Cloud suite of applications.
Wrapping Up Nesting and Unnesting in Premiere
You’ve now got control over one of the most powerful, yet most basic, editing tricks in Premiere Pro.
Nesting and Unnesting clips is an essential part of improving your editing workflow, but there is so much more to learn when it comes to Adobe's video editors.
Let me know what video editing tips you'd like in the comments below and I'll get to those in a future video editing tutorial!

Ashley is a photographer, writer, and film critic. When Ashley’s not writing essays on photography, cinema, and theory, he’s out taking pictures with retro film cameras.
1 Comment
Leave a Comment
👋 WELCOME TO SHOTKIT!
🔥 Popular NOW:

I didn’t have any expectations concerning that title, but the more I was astonished. The author did a great job. I spent a few minutes reading and checking the facts. Everything is very clear and understandable. I like posts that fill in your knowledge gaps. This one is of the sort.