


Vibrance vs Saturation (Main Differences to Know)
Learn all you need to know about vibrance vs saturation, including their differences, and how to apply them for stunning results with your photography!
Learn | Photography Guides | By Greg Cromie
Shotkit may earn a commission on affiliate links. Learn more.
The main difference between vibrance vs saturation is vibrance brings out only dull or muted tones, while saturation increases the intensity of all colors across the image.
In this guide, we'll look at vibrance vs saturation to find out how they differ and to discover which is best for your photos.
What if I told you that there's a way to add punch and drama to even your most lifeless photos?
With pretty much any editing application, you can enhance the vibrance and/or saturation and make eye-popping images every time – this is the beauty of colour photography.
In essence, vibrance and saturation are all about controlling the colour enhancement. But there are some important and subtle differences between the two.
Let's take a closer look.
Vibrance vs Saturation: Definitions for Photographers
What Is Saturation? (What does saturation do to a photo?)
Have you ever taken a photo that was a little dull or flat, but the colour potential was evident and needed a little push? Changing the saturation is the simplest way to make those colours sing.
The best description is that saturation impacts the intensity of colour and, what's more, it enhances the power of every colour in the image.
Unlike other colour corrections approaches, saturation cranks up, or down, the colour intensity evenly.
But, like most editing changes, handling saturation requires a gentle approach as too much can result in unnatural and unappealing images.
What Is Vibrance? (What does vibrance do to a photo?)
Where saturation is a uniform application of colour intensity, vibrance takes a more targeted approach.
While vibrance will subtly elevate most colours in an image, it specifically enhances any elements of a photo that are not colourful enough.
Vibrance is a convenient tool if you have a photograph that has a right balance of colour intensity in all areas except one.
Technically, by controlling the vibrance, you can elevate the colour intensity in that dull element – all without overdoing it in the areas that already look great.
Your success in controlling this is going to depend on the quality of your editing software.
When Should You Use Vibrance or Saturation?
It will help if you only use vibrance or saturation when your composition requires it. Applying too much vibrance or saturation results in images that are too intense.
I've seen many photographers make this mistake – a tiny bit of saturation goes a long way, but too much creates over-the-top photos that are trying too hard.
So when should you use vibrance, saturation, or both?
If the colour intensity is evenly applied in all areas bar for certain colors, vibrance can push those areas out of hiding. But always take the time to check that the enhanced image remains balanced.
Bouncing back and forth between your before and after image helps. That way, you can tell if you've overdone it and can claw back some of the intensity. Another way to look at it is to only apply incremental changes.
If you've shot an image on a dull day where the lighting is flat, chances are your whole composition will be flat. Or, you may be shooting with a low-resolution camera that doesn't capture the colour well.
In either case, enhancing the saturation will have an impact on the whole image. All your colours will come to life before your eyes as you slide the intensity up. But remember, take baby steps and always check the before and after comparison.
While we've mostly talked about pumping up the colour intensity with vibrance and saturation, it's also important to remember you can reduce both the same way.
If you have an image that out-of-camera is too intense, you can lower the drama level with a targeted vibrance change or a wholistic saturation drop. Or it could just be that you are going for a creative approach with a colour-void composition.
How to Adjust Vibrance & Saturation
As I touched on earlier, almost every photo editing tool – on both desktop and mobile – will have the ability to control vibrance and saturation.
As for how well they do, this will depend on the quality and power of that application. Some will be a little too cavalier about it and punch both up to extremes.
Other post-processing applications, such as those intended for enthusiast and pro use, will take a more gentle approach.
Let's take a look at the three most popular editing applications that I know take vibrance and saturation seriously.
Photoshop
Adobe Photoshop is one of the most powerful visual design tools that features a comprehensive set of photo editing functions.
Managing both vibrance and saturation in Photoshop is incredibly intuitive and straightforward. There's a range of ways that you can control colour intensity. But for the sake of simplicity, let's go with the easiest.
Once you have an image open, go to the Image drop-down menu and select Adjustments and then Vibrance.
There are two sliders – one for vibrance and the other for saturation. You can control one or the other to control the intensity of colors within your composition.
Lightroom
Adobe Lightroom is the pro photographer's go-to RAW image editing application. Like Photoshop, there's a comprehensive desktop and mobile version available.
And, as we have seen with Photoshop, the process for managing colour intensity within Lightroom is straightforward and very refined.
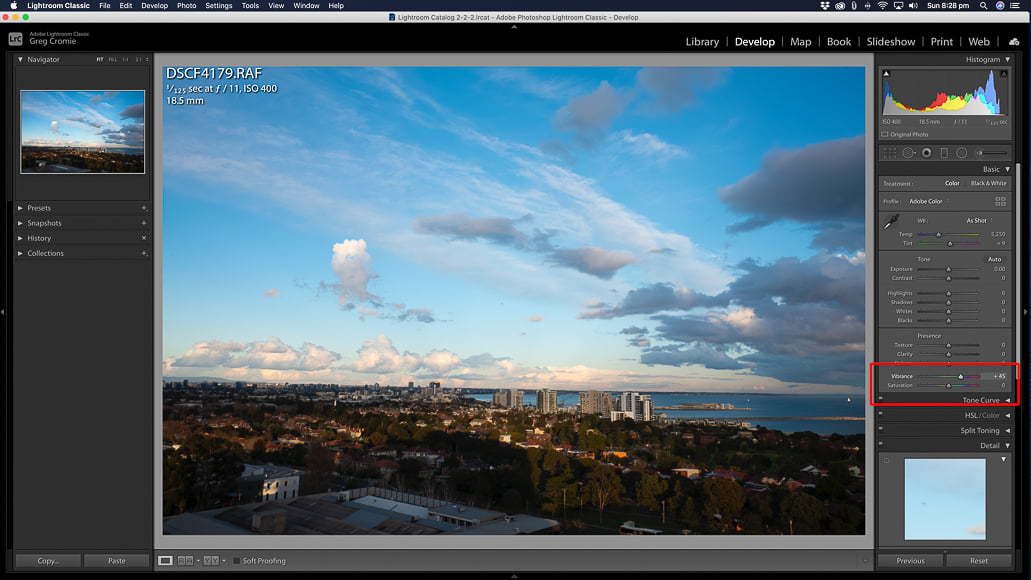
With an image loaded in the Develop tab of Lightroom, locate the Basic menu on the right-hand side of the screen.
The Basic menu features adjustment sliders with the last two being Vibrance and Saturation. By sliding these you can increase or decrease the colour intensity to optimise your images.
Luminar
Skylum's Luminar is another easy and comprehensive image editing application that can easily manage colour intensity. While the concept delivers the same results, the terminology and approach are a little bit different from the Adobe products.
With an image loaded in the Edit panel, select the Professional tab and open the Adjustable Gradient filter tool.
You'll notice that there's a slider for Vibrance – we'll get to saturation in a moment. What's more, you can apply a mask or control the colour intensity in the top or bottom halves of the image – this is great for landscape image editing.
With saturation, you can control this from the slider in the Colour Enhancer tool also located in the professional tab.
Examples of Vibrance vs Saturation
Below I have provided a couple of examples of how vibrance and saturation can impact some ordinary images.
In these cases, I went a little heavy on the sliders to demonstrate the point. By the way, these were all edited using Adobe Lightroom with the method I described earlier.
Example 1: City Skyline – Saturation
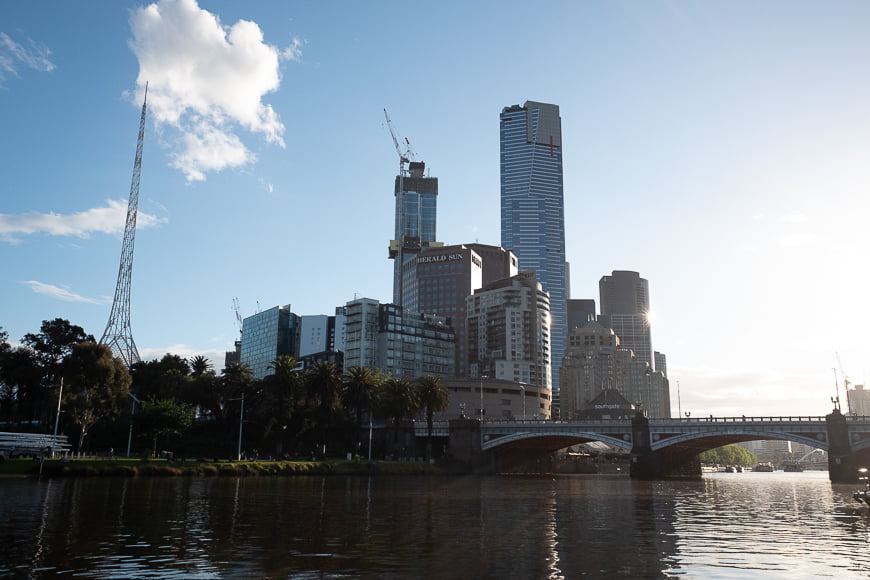
In this original skyline image of Melbourne, the colour is quite flat – largely due to the glare from the sun washing out the colour. The sky and the water are very dull, and there's no hint of warmth in the composition.
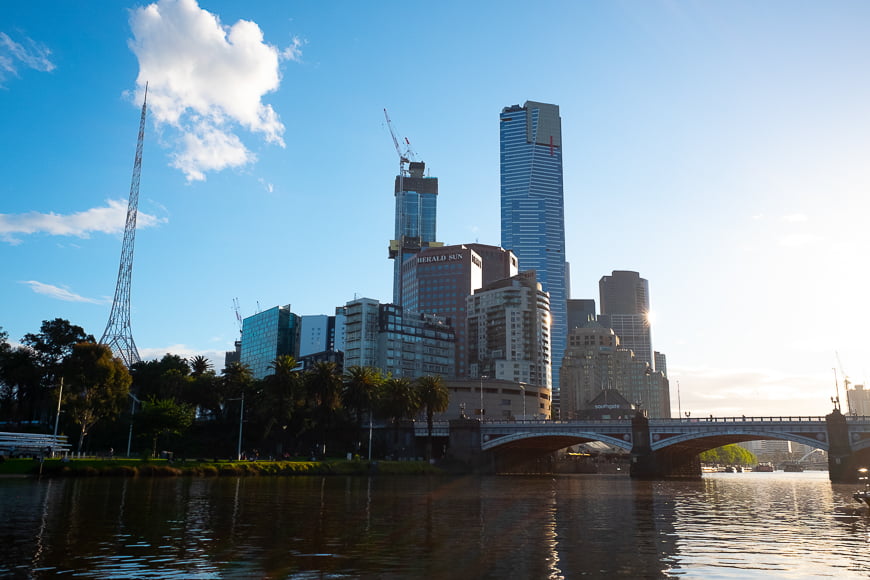
In the same image, I enhanced the saturation by pushing the slider up to +50.
Now, the blue of the sky and buildings and the green of the grass and trees has been enhanced. Also, the warm tones of the buildings and the sun flares increased.
Example 2: Pebble Beach – Vibrance

In this original beach shot captured in Bicheno, Tasmania, the overcast sky resulted in a muted colour palette.
There's little in the way of vibrance as everything is a little too grey and dull. I was especially disappointed that the water was so dull and wanted to make that stand out more.

With the same image, I pushed the vibrance slider up to +50 to make the water more vibrant and have the blues stand out. But, I still was not satisfied.
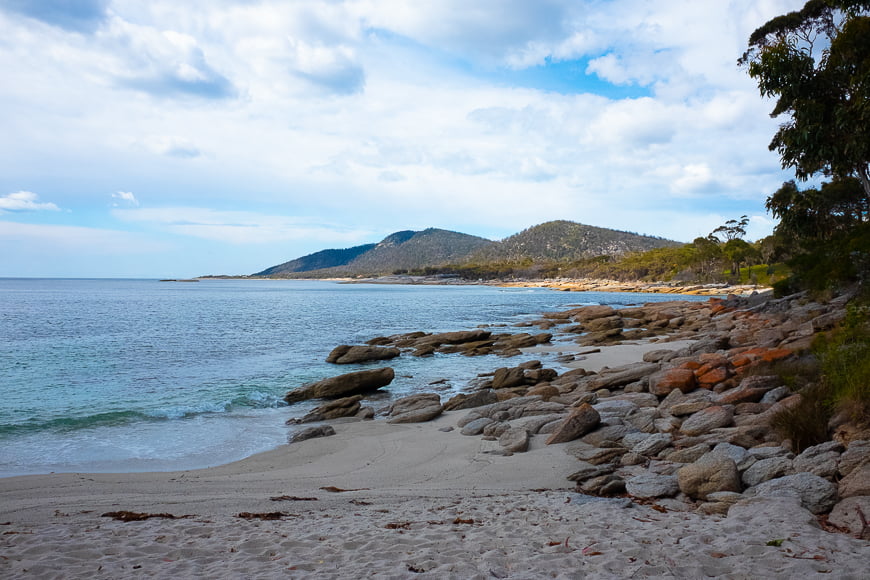
In this third image, I cranked both the vibrance slider and saturation slider up to +50. This delivered punch and drama to an otherwise lifeless composition.
Despite my heavy-handedness, the result is quite nice. The rust colour in the rocks is popping, the blue patches of sky contrast against the clouds and the green hills have depth. Even the sand in the foreground has gained greater dimension.
Final Thoughts
Now that we've covered vibrance vs saturation, you hopefully have a clearer idea of the difference between them and how each one can be used to influence the intensity of colors in an image.
Using vibrance and saturation can achieve stunning results without even having to touch other editing tools. Just don't fall into the trap of over-baking your images with too much of either.
While adjustments to saturation or vibrance can help bring out muted colors, you don't want to, say, end up with unnatural-looking skin tones in portraits. Even landscapes can appear unnatural if you go too hard on the vibrance or saturation sliders.
Your best bet is to always check your before and after images side by side to see that you've got the right effect.

Check out these 8 essential tools to help you succeed as a professional photographer.
Includes limited-time discounts.

I’m a Melbourne-based street photographer and blogger. I love to travel to Japan to photograph and document its dynamic people and culture.
3 Comments
Leave a Comment
👋 WELCOME TO SHOTKIT!
🔥 Popular NOW:

Thanks for checking our my article. If you have any questions or comments please leave them below and I will get right back to you. Cheers. G
AFTER READING YOUR ARTICLE I NOW AM READY TO SCAN 150 MORE FIRST 200 ARE OK BUT NOW IM LOOKING FORWARD LAST 150 THANK YOU
That’s great to hear. Thanks. G