


Cloudy Day Photography (Tips & Settings for Pro Results)
Master cloudy day photography with expert tips and settings to achieve professional results in soft light, even when the skies are overcast.
Learn | By Judyth Satyn
Shotkit may earn a commission on affiliate links. Learn more.
This guide to cloudy day photography will lead you through the tips and settings for pro results.
Every day is the perfect opportunity for a creative venture. When you are passionate about photography, cloudy days are no exception.
You will learn how to master the art of shooting on cloudy days and using the best settings and pro tips.
Cloudy Day Photography Tips
- Embrace Soft Lighting: Utilize the diffused light for even exposures.
- Capture the Drama: Use stormy clouds as a dramatic backdrop.
- Reduce Glare: Consider a polarizing filter to enhance sky details.
- Increase ISO: Adjust for dimmer conditions, but watch for noise.
- Stabilize: Use a tripod to prevent camera shake in low light.
- Boost Saturation: Enhance muted colors in post-processing.
- Protect Gear: Be ready for sudden rain; use rain covers.
- Shoot Raw: Allows greater flexibility in post-processing.
- Focus Manually: Ensure sharpness in low-contrast scenes.
- Experiment with White Balance: Find the right tone for your scene.
How to Get Great Results with Cloudy Day Photography
Cloudy days can create some exquisite shots. Landscapes lie below hovering gloomy clouds and streaks of vibrant sun rays.
Overcast weather is dramatic and atmospheric. The light is dimmer, diffused and soft.
If you haven't tried shooting on a cloudy day, what are you waiting for? Give it a shot.
1. Best ISO Setting to use on a Cloudy Day
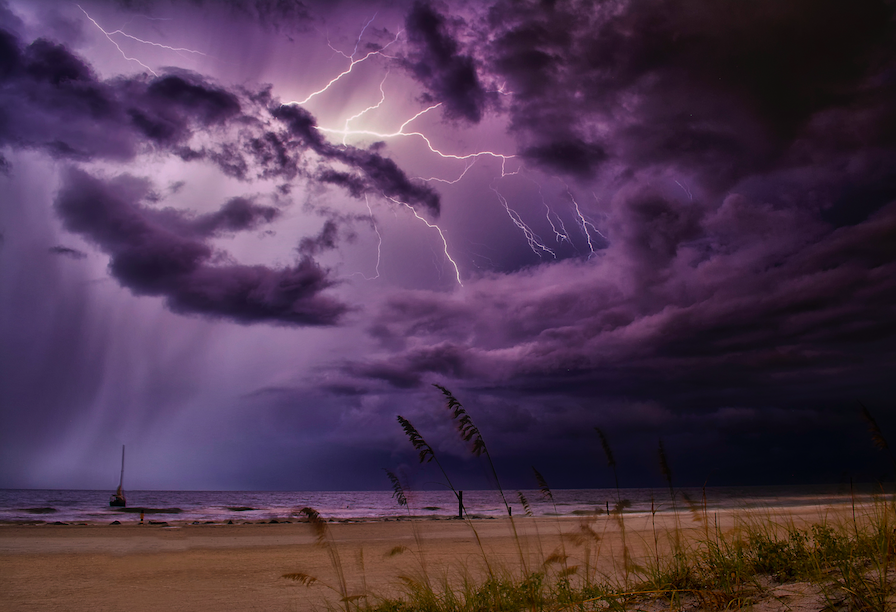
Image: Greg
On sunny days the ISO setting will typically be set at 100. Cloud day photography will hover somewhere between 400 to 800.
Not all cloudy days are made equal. There are different ISOs needed for the varying light range of cloudy days.
For instance, the gloomy thick cloud that hangs heavy in the sky. When the cloud is so dark, midday light can be equivalent to twilight.
This type of day will be darker, so the ISO setting will need to be set on the higher end. Between 600 to 800.
Remember that a photo taken with an ISO setting of 800 will be grainier than a lower ISO setting. So when possible, veer for a lower ISO setting unless you want a grainy look.
To decrease the ISO, use longer exposures. Combine the higher ISO with a tripod and remote shutter release.
The ISO setting will be closer to 400 when the cloud is light. This type of cloudy day gives a soft light diffused glow.
One neat trick I use when photographing on cloudy days is to put the camera on an automatic setting. This way I check what the camera picks as the best ISO.
I decide from there on what ISO to use. Combining ISO, exposure, and aperture for the best results for my photo shoot.
2. What Aperture to use on a Cloudy Day
The ideal aperture will be set wide on a cloudy day due to less available natural light.
Try an aperture of f-stop 2.8 to f-stop 4 to allow more light onto each exposure.
(If you have a faster lens, you can increase the aperture to f/2, 1.4 or 1.2.)
A wider aperture creates a shallower depth of field. If you want a deep depth of field accommodate by adapting ISO and exposure.
3. What Shutter Speed to Use

Image Shafifotumcatcher
Shooting images on overcast days, we need to do everything to capture adequate light.
Lower your shutter speed to allow more light onto the exposure.
When shooting a long exposure, use a tripod and cable release to avoid any visible camera wobble.
If you plan to capture fast action or shoot moving subjects, you will need a fast shutter speed. To give you sharp images.
A slow shutter speed will result in blurred images. Accommodate for a fast shutter by using a higher ISO.
The preference is to choose grain (high ISO) over blur (increased exposure time).
4. Using Flash on a Cloudy Day
Cloud cover works as a natural soft light diffuser. Cutting down on high contrasts and dark shadows. The results are even exposures.
If the cloud cover is heavy it can lead to a flat dull mage with limited contrast.
With the use of an off-camera flash, you can add highlights to specific areas of the scene.
Off-camera flash can be used like a painter's brush stroke. The flashlight will increase contrast and add a dramatic effect.
This will add highlights to dull areas to lift them from the scene.
Essential for wedding photography and portraits. If shooting nature photography you can highlight specific trees.
Off-camera is a fantastic way to emphasize selected areas of the scene to make them pop with vitality.
Particularly useful on heavy overcast days when the ambient light is lower.
5. Use Manual vs. Automatic
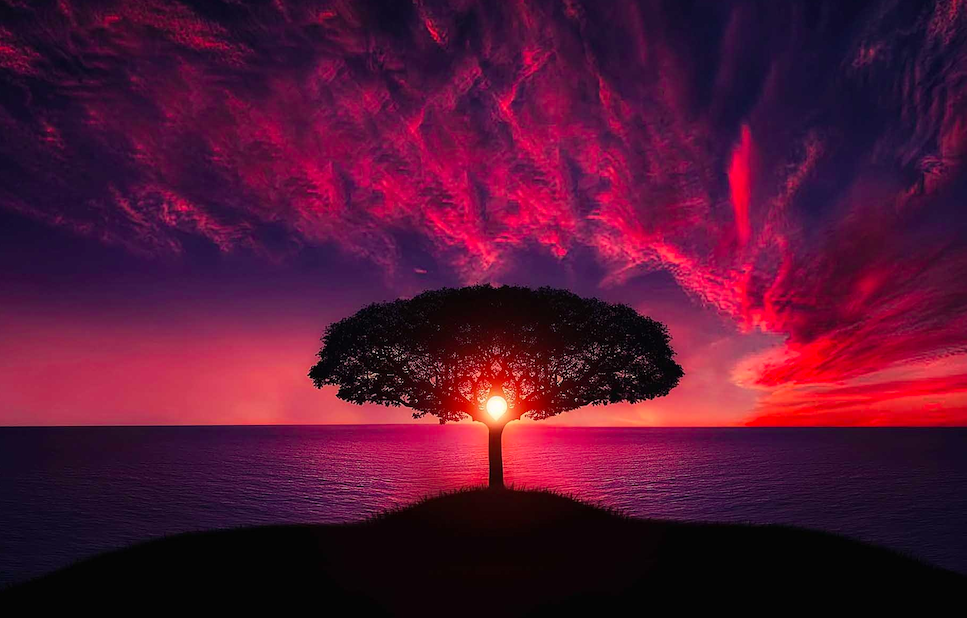
Image: Pixabay
When shooting cloudy day photography it is best to use manual camera settings. You want control over the results.
Allowing the camera to choose the settings might result in an unwanted grainy look. If the camera decides to bump the ISO up high.
You can opt to change the ISO to automatic. This is useful if the cloud cover has intermittent sun rays breaking through.
The camera can automatically balance the ISO to accommodate light increases or decreases.
There is the option to switch the lens focus to auto mode. Allowing the camera to automatically focus so you can concentrate on what's important.
Consider using the camera's “cloudy” setting. For automation of cloudy day ISO and white balance.
6. Use a Polarizing Filter
The use of the best polarizing lens filters can result in stunning cloudy-day photography.
A polarizing filter will add contrast and depth to the cloudy sky. Adding life to what might otherwise be a flat image.
They are also useful for reducing any atmospheric glare. A polarizing filter will enhance saturation by improving contrast.
Take one along on a cloudy day photography shoot. To try experimenting with photographing with and without one.
7. Raw Camera Settings
I will always shoot cloudy day photographs raw, to reap the editing benefits in post-production.
Overcast days can make lighting choices difficult. Plus the lighting can change in an instant if sunshine breaks through.
Shooting in raw will give you flexibility post-production, to iron out any underexposed or overexposed areas.

Image: Summer
8. Correct White Balance
The wrong white balance on an overcast day will result in blue-toned photos.
The correct white balance will sit around 6000 – 6500k. This will give the photos extra warmth.
If images look too blue dial the white balance up to closer to 8000k. When they become too pink dial it back down.
9. Reduce Camera Shake by using a Tripod
And let's not forget the tripod. When there's an overcast sky it's a no-brainer.
An increased exposure time leads to a higher possibility of capturing camera shake.
Using a tripod will allow you to shoot long exposures comfortably.
10. Create Directional Light
You don't need to rely on a flash to amplify contrast or add brightness to specific areas.
Directional light can be achieved with the use of a plain whiteboard or photography reflector. The board will reflect extra soft light onto the subject.
Strategically place the whiteboard and direct light onto your subject.
11. Protect your Camera Gear
Whatever you do don't go out without good protection for your photography gear.
Every photographer hates to have to ditch faulty photos. Imagine having to ditch your gear.
Remember it is not only rain that can destroy your camera but mist and drizzle too.
Or change the date of your shoot. Shooting portraits on rainy days isn't advised due to the potential for damage to your gear.
Cloudy Day Photography: Pro Tips for Portraits Under Soft Light
Clouds are a natural light diffusor for harsh direct sunlight. An overhead sky softbox creates a beautiful natural soft light.
Photos taken outside under direct sunlight will be highly contrasted with dark shadows.
Subjects might be squinty-eyed and ladened down with dark eye sockets. And let's not mention wrinkles.
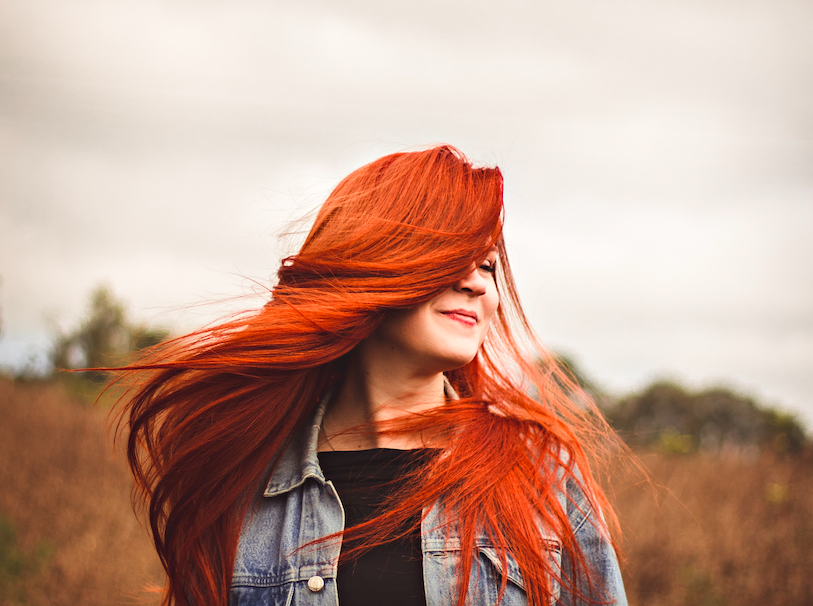
Image: Thiago Schlemper
Photographers look for a way to soften light when taking portraits, usually using a softbox or a light diffuser.
Direct light causes harsh shadows that can cut across a subject's face, requiring post-editing to remove.
Use directional light – When it is overcast weather you can place the subjects anywhere. There will be no need to worry about light direction or shadows.
There will still be some directional light, evident from soft shadows.
Factor in natural directional light when positioning your subjects. You can use it to your advantage to brighten their faces.
Use light-colored board – For extra light use a light-colored board. Use this to illuminate your subjects. This is a simple and easy trick to selectively brighten areas.
Dramatic cloud backdrop – Use the clouds as a dramatic backdrop. A heavy layer of thick clouds creates an interesting composition.
Use vivid colors – Certain colors become more vivid on cloudy days. Red hair will pop.
Take photos with more color for added contrast. Colors such as yellow, bright blue, pink, and red will add extra vibrance to the shoot.
Use off-camera flash – Use off-camera flash to highlight specific areas. If the scene is looking flat this is a great way to create contrast and emphasise subjects.
Why Are Overcast Skies Great for Photos?
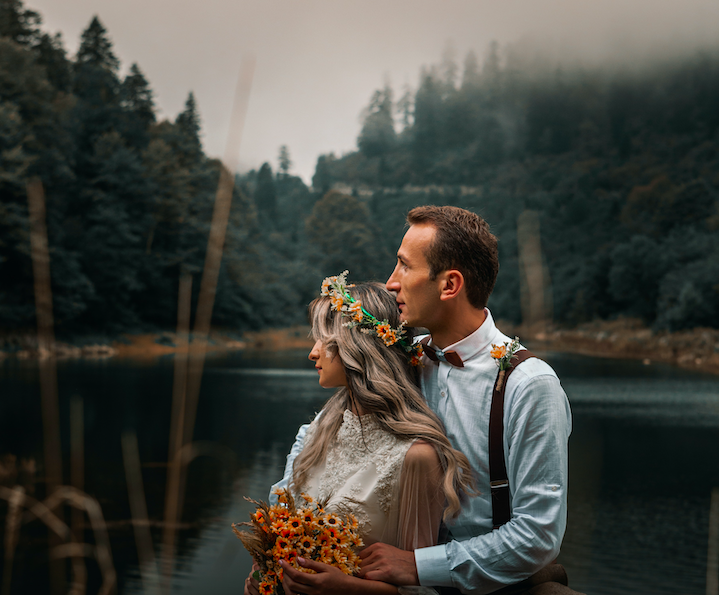
Image: Matthew
Cloudy days are good for taking pictures for so many reasons. Where do we start?
Natural Light Diffuser
Light cloud works like a natural light diffuser, distributing light throughout the scene.
Light will be dispersed onto your models. No squinting eyes, no harsh shadows.
Natural diffused light makes cloudy days perfect for outdoor portraits.
Make Colors Pop
Sunlight washes out bright colours but an overcast day amplifies them. You can use this to your advantage.
Compose images using bright colors. Get models to wear vibrant colors to contrast the dull cloudy backdrop.
Dramatic Composition
A cloudy day can be a photographer's blessing. They are the perfect atmospheric and dramatic composition.
They exude a stunning raw beauty. Thunder clouds look like pure magic when an isolated ray of sun breaks through.
Capture the dark beauty of water reflecting overhanging clouds, with their dark somber tonal greys.
Reduce Contrast
Cloudy skies reduce contrast. You can find details in shadow areas. Areas that would normally be hidden on a bright day.
If you are looking for contrasting shadows you can wait for a sunny day.
A cloudy day is the best type of day to take Architectural photos. All the details of the building can be observed.
Clouds
Make clouds the central theme. Storm clouds with streaks of tonal greys create dramatic photographs.
Clouds are varied. They make for a fascinating subject.
And remember, when you go to your photo shoot, bring an umbrella.

Check out these 8 essential tools to help you succeed as a professional photographer.
Includes limited-time discounts.

Judyth is an experienced studio photographer and glass artist. When she isn’t Photoshopping comedians into the bellies of sharks, you can find her cooking delicious treats for her guests.

👋 WELCOME TO SHOTKIT!
🔥 Popular NOW:
