


How to Create a Watermark in Luminar
Learn how to add a watermark to your images in Luminar 4 with this simple, step-by-step tutorial. Protect your photos & promote your brand!
Luminar | Software | By Usnea Lebendig
Shotkit may earn a commission on affiliate links. Learn more.
Watermarking photos is a key part of the editing process for many photographers, and not just pros.
Watermarks allow you to mark your photos as your own, making it harder for image theft (all so common in the internet age) while also making it easier for viewers to know at a glance who took the photos.
Adding a watermark in Luminar isn't particularly difficult, though the process is considerably different to using a photo editing app like Lightroom or Capture One.
Let's take a look at how to create a watermark in Luminar.
Guide to Creating a Watermark in Luminar
As mentioned above, adding a watermark in Luminar requires a considerably different process to an app like Lightroom.
The primary difference is that Luminar uses layers, a feature which is key to adding elements from other image files to a standalone image.
Note: The instructions for adding a watermark below were written for Luminar 4, but with minor adjustments can also be done in Luminar 3.
1. Create a Watermark
Obviously the first thing you need to do is create your own unique watermark. This can be something as simple as your signature or as complex as a professionally created logo. Either way, it's important that it's unique and that you're the only one using it.
For this tutorial, we'll need one that is either black text on a white background or white text on a black background (the former is preferable).
If you're doing a signature, it might be easiest to use something like a Wacom tablet so you can sign your name naturally holding a pen.
For me, the easiest way is to use Photoshop or GIMP, though any photo editing program with a text feature should work (e.g. OnOne Photo RAW).

For this tutorial we'll be using this logo from Gold Hat Photography
There are also a number of free watermark options on the internet, but these don't always work as well as one would like.
Whichever way you choose, once you have your logo save it as a .jpg file. If you're using Photoshop a .psd file will also work. Just don't save it as a PNG file, as Luminar doesn't always read .png files so well.
Tip: Make sure your watermark background is pure white, not the eggshell white that often comes from scanning in images.
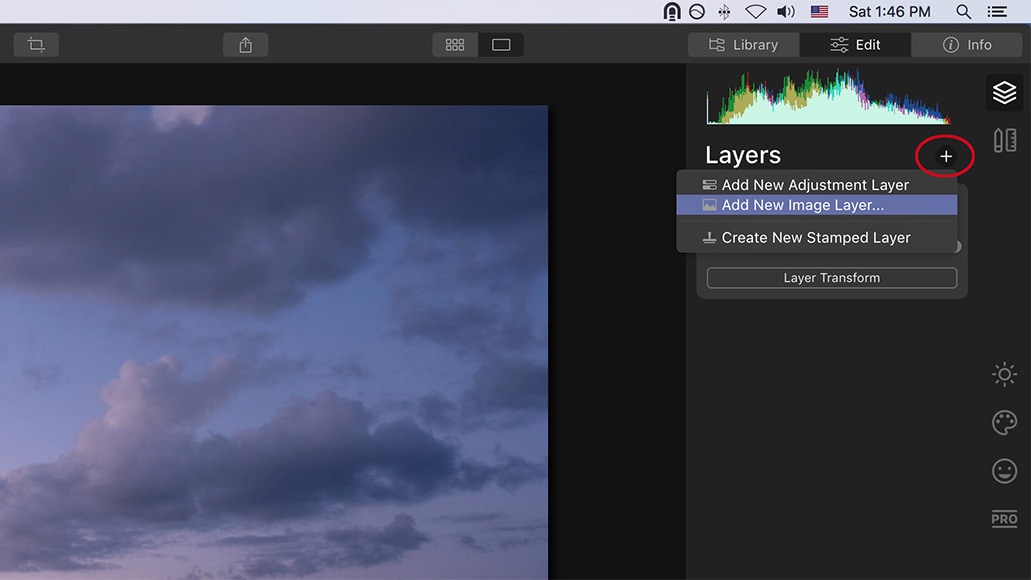
2. Create a New Image Layer
Now that you have a watermark image file, choose the image you want to add a watermark to in Luminar and open up the edit module.
Once you're there, open up the layers panel.
Next, hit the plus sign to add a new image layer.
If it comes out a bit large and distorted (like mine below), don't worry. Luminar is just trying to fit it into whatever size your canvas is.
![]()
Luminar has a Layer Transform feature (Free Transform in Luminar 3) that will allow you to size the logo just right.
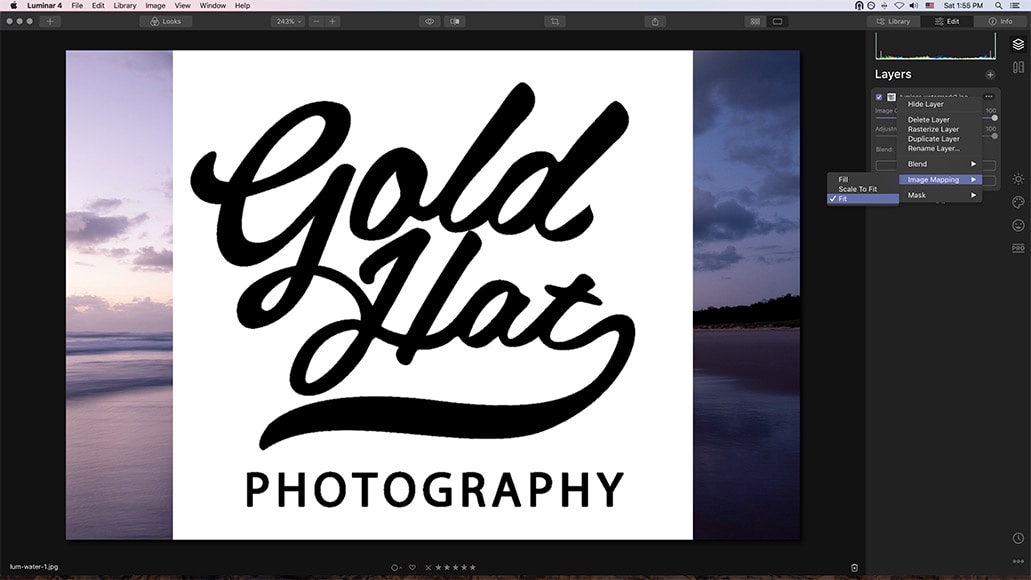
3. Sizing Your Watermark
To get your watermark sized correctly we'll start by fitting it to the canvas.
To do this, click on the three little dots next to the image name of your logo layer.
From there, scroll down to Image Mapping and then choose Fit. (In Luminar 3 you can get to the menu by right-clicking on the image layer.)
Next, we'll need to transform the layer to get it into the proper place.
In Luminar 4, all you need to do is click on the Layer Transform button on your watermark layer. (In Luminar 3, go to Tools and then select Free Transform.)
Lock the aspect ratio (the padlock in the toolbar) and then drag one of the corners of the watermark until you've reached the size you want. Once it's the right size, drag it to wherever you think it will look best in the image.
It doesn't have to be perfect. The nice thing about Luminar is that you can always go back and change things whenever you like.
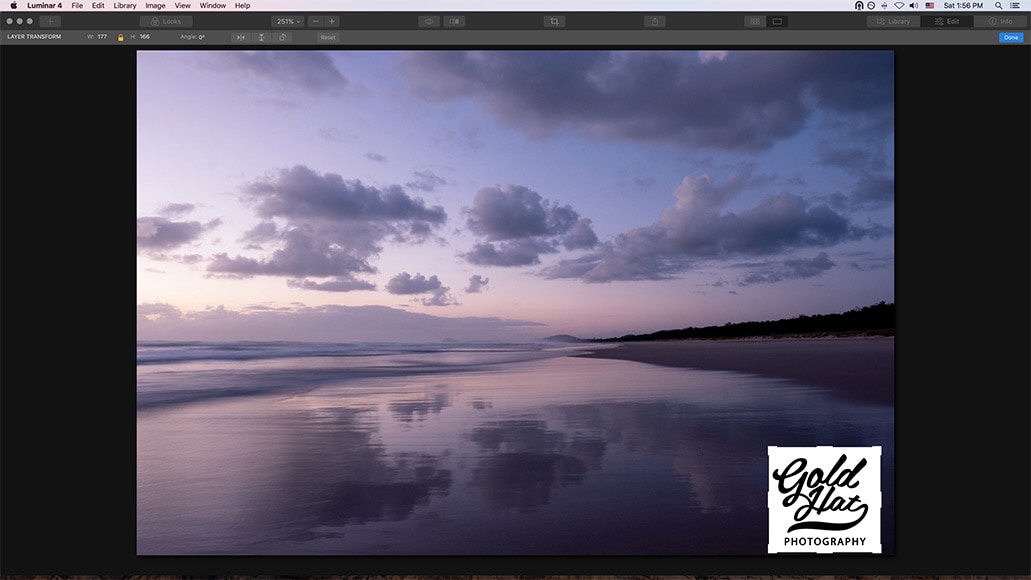
When you've got it to look about right, hit Done.
4. Changing the Background Color
If your logo is black on white, you'll most certainly want to remove the white background.
To do this, go to the Blending Modes for the layer that has your watermark and choose Darken. This tells Luminar to only show the dark pixels, not the light ones. Now only the dark script shows up.

Of course, dark script doesn't always show up well on a dark background. For example, in this image it hardly shows up at all.
In these cases, having white script will often work better. Luckily that's an easy change to make.
Reversing the Colors
To change the black to white, we'll need to add a Curves Adjustment. In Lumianr 4 you can find this under the Light panel in the Essential editing filters group.
Once you're in Light click on “Advanced Settings” to get to the curves adjustment panel.
(In Luminar 3 simply add the Curves filter from the filter list.)
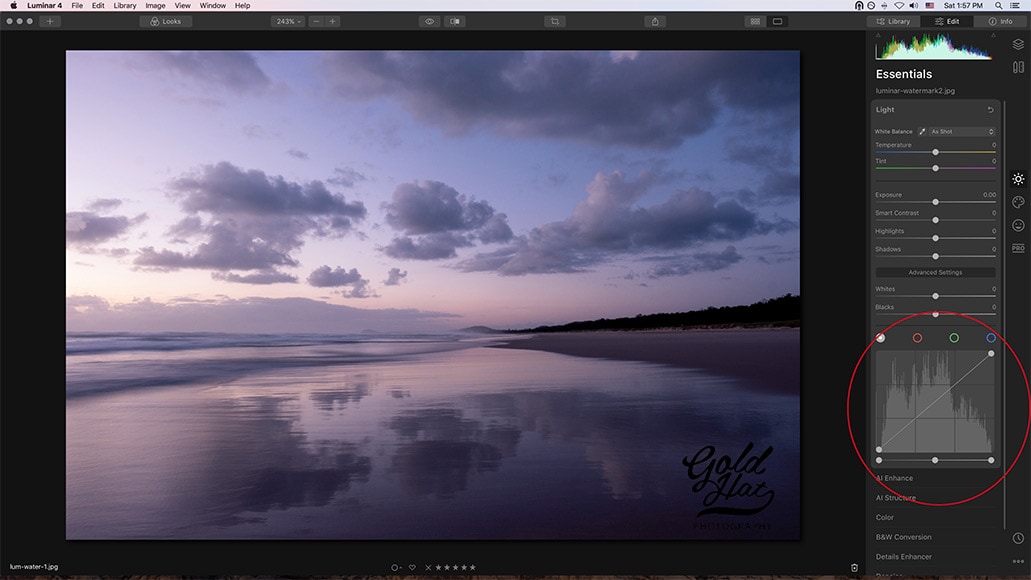
If you're not familiar with how to use curves, don't worry. You won't need to know much for this change. All we’re going to do is move the black point (on the bottom left) to the top left to turn it white.
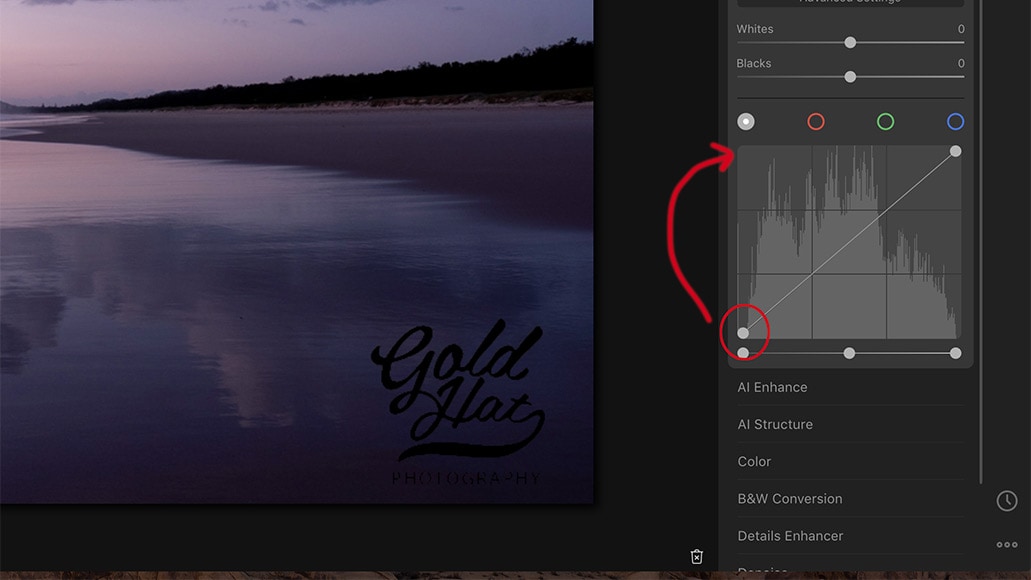
Then do the reverse with the white point – take it from the upper right and move it down to the black (bottom right).

This is what your curves panel should look like once you switch the points:

Now this creates an interesting effect, but it's not really what we're going for.
To finish the conversion you'll need to go back up into your layer blending mode and switch it from Darken to Lighten.

5. Final Adjustments
There are a number of final adjustments you can make.
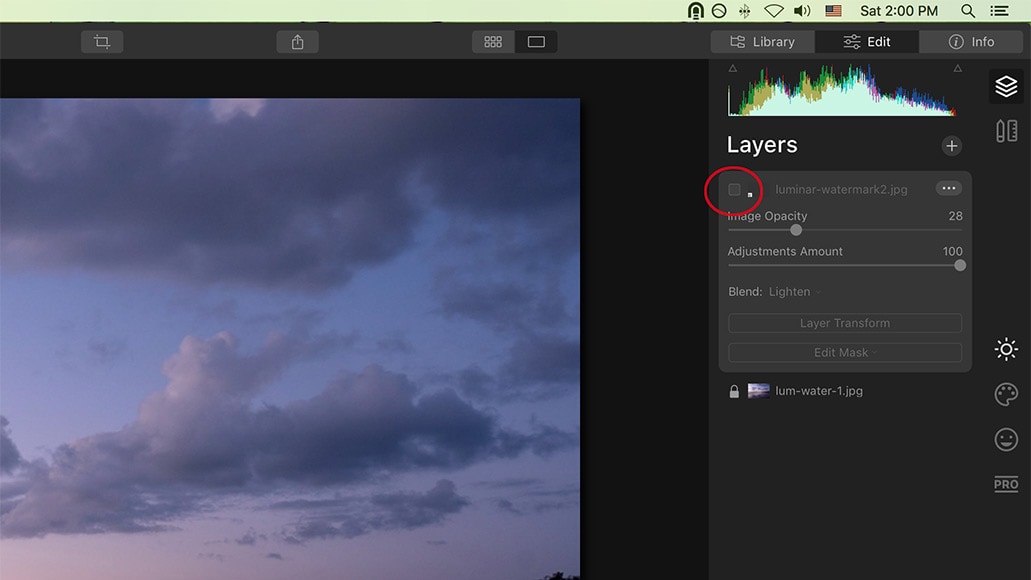
For example, if you're like me and don't want your watermark to be overwhelming, simply change the layer opacity level. (You'll have to return to the layers panel for this.)
I also took this opportunity to make my logo smaller, as I don't really like it detracting from the impact of the overall image. I also thought it looked better on the other side of the image.

Now all you have to do is export the photo. Your watermark will be there.
Because Luminar does non-destructive editing, you can always go back and change the size and location of your logo layer.
You can also choose to export a copy of your photo without the watermark by toggling the watermarked layer off.
The layer will always be there ready for you to use again whenever you need it.
Final Words
So that's how you add a watermark to a photo in Luminar. Personally, I find it easier to do in Luminar 3 than in Luminar 4, but it's pretty straightforward either way.
What do you think? Do you use watermarks? If you have any other tips for how to add a watermark in Luminar, feel free to share them in the comments.

Usnea Lebendig is an experienced photographer and reviewer who loves to photograph professionally and in moments where the world’s beauty and/or strangeness leaps in front of the lens.
2 Comments
Leave a Comment

👋 WELCOME TO SHOTKIT!
🔥 Popular NOW:

But that’s only one photo… I have hundredths. I have to do it on every single one? … I think I’m going back to lightroom.
I take it you need the full version of the program to accomplish the watermark layer? I’m normally using Adobe Lighthouse but wanted to try Luminar. I tried doing the layers and it doesn’t have the features (or I can’t find them) that you mention.