


Best Lights for Video Recording
Discover the top lights for video recording, in our comprehensive guide to the best equipment for enhancing your video quality and creativity.
Shotkit may earn a commission on affiliate links. Learn more.
In this guide, I'll take you through some of the best lights for video recording that are currently on the market.
Lighting plays a pivotal role in videography, and taking control of your lighting is a vital skill.
For that, you need the right equipment. Durable, reliable gear with good specs that will help you on your journey towards becoming the best filmmaker you can be.
Superior video recording and color accuracy in a durable and portable unit with app control and special effects for creative lighting.
I’m not going to cover the high-end cinematic equipment here.
The products covered will be more for the ‘average’ videographer.
The one that most of us are either getting into lighting for the first time or looking to upgrade.
So, let’s get stuck in.
What is the Best Light for Video Recording?
Aputure MC Pro (Best Pocket-Sized RGB Light Panel)
- Durable build
- Well-designed
- Can be controlled from an app
- Great range and accuracy of colors
- Steep learning curve for beginners
- Relatively expensive
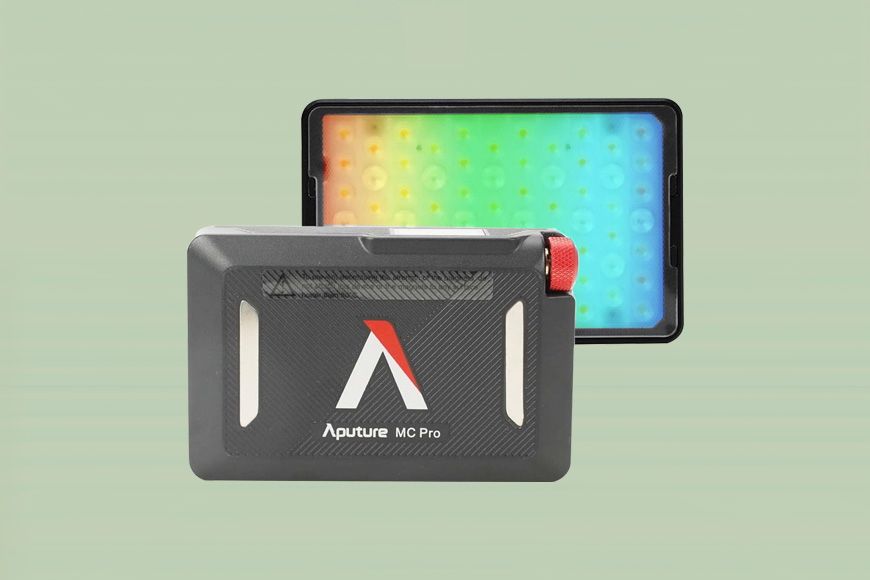
The Aputure MC Pro is a fantastic little light that outdoes its competition in a number of ways.
It's compact and portable, which makes it a great choice for videographers who want lighting on the go.
And that portability is paired with durability. An IP rating of 65 means it's water and dust-resistant, so you can shoot with it outside without problem.
In terms of the lighting, it’s bright with great color accuracy and color options. The light boasts a full RGB color spectrum and adjustable temperature, so you can adapt to your ambient lighting conditions.
It also integrates seamlessly with the Sidus Link app. From there, you can have wireless control over each of the light's features.
The Aputure has in-built special effects so you can get creative with your lighting scenarios: for example, strobe and lightning, to name just a couple.
As for the build, I've already mentioned its durability, but it's also well-designed. The ballhead and egg crate are magnetic, and the diffusers are too, so everything fits together securely.
Anyone on a budget could consider the original Aputure Amaran MC [Amazon | B&H], which isn't nearly as bright and doesn't come with all the bells and whistles of the Pro, but is lighter and a lot less expensive.
Lume Cube Cordless Ring Light Pro (Best Ring Light)
- Portable
- Good battery life
- Excellent color accuracy
- 180-degree tilt
- Longer filming times will need recharging breaks
- May be too small for larger setups
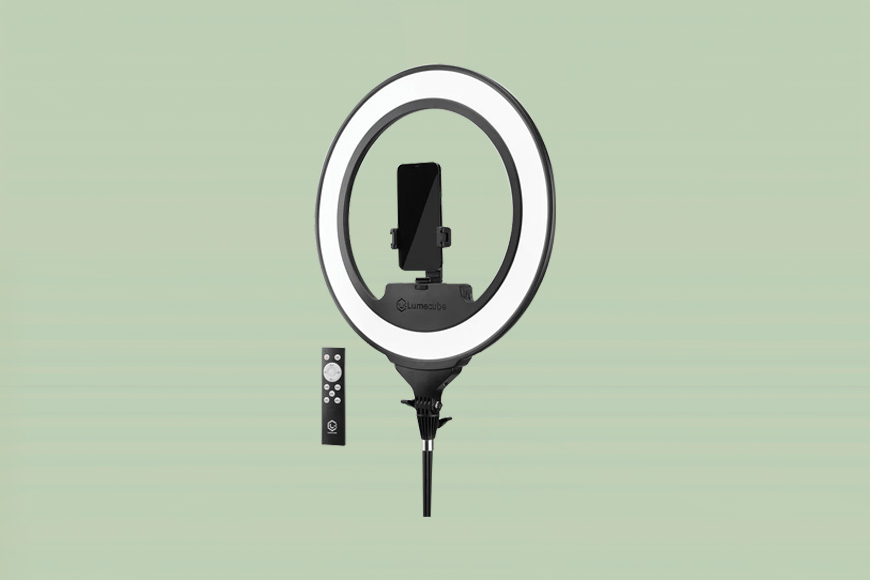
There’s nothing like a ring light to throw a flattering light, and they’re especially good for lighting people and products.
So, if your videos are going to involve interviews or are in the commercial arena, focused on products or food, then the Lume Cube Cordless Ring Light Pro is an excellent option.
It’s 17.5 inches in diameter, has fully adjustable color brightness and temperature, and, with a high CRI rating of 96, provides excellent color accuracy.
As this video light is cordless, there are no constraints on where you take it. This is particularly useful for videographers who want to shoot in a dynamic way.
As it’s cordless, you’d want it to have good battery life, too – and it does, offering between 70 and 120 minutes on a single charge, depending on the brightness level you use.
Its controls are easy to navigate, and there’s also a remote control for adjusting your settings remotely. That’s especially handy if you’re filming alone, or filming yourself, and don’t want to stop filming to adjust anything.
It comes with a stand that is 70 inches high, fully extended, plus mounts for a smartphone and camera.
Lume Cube RGB Panel Pro (Best LED Light Panel)
- Great color accuracy
- Outstanding color variation
- Customization options
- Good battery life
- Need to plan for recharging on longer shoots
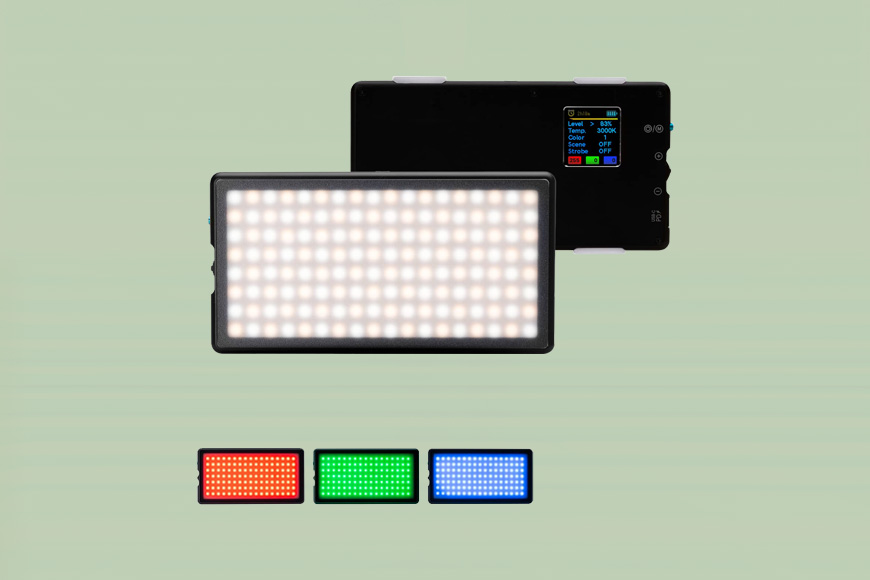
With its slim, portable design, the Lume Cube RGB Panel Pro looks pretty similar to the Aputure MC Pro, and it is very similar in terms of features too, but comes in about $100 less.
It boasts the full RGB spectrum, so you can produce a mind-bogglingly huge variety of colors with it and give yourself amazing flexibility when it comes to how to light your scenes.
It has a high CRI rating of 96, so it emits highly accurate color, and its adjustable color temperature range of 2700K to 7500K will ensure you can adjust to pretty much any ambient lighting conditions.
The controls are easy to use and, like the Aputure, this piece of lighting gear can also be paired with an app, Lume-X, from which you can wirelessly adjust all of your settings.
It has customizable creative lighting effects, like pulse, flash, and strobe, which you can use to enhance your video footage.
Battery life is good, too, which adds to its portability. On a single charge, you can get up to 4 hours at 50% power and 2 hours at 100%.
The RGB Panel Pro also has a Dynamic Run Time feature that updates you on how much battery life it estimates you have left, based on the energy usage of your current settings.
Aputure Amaran T4C (Best Tube Light)
- Versatile
- Durable build
- Good variety of mounts
- Portable
- Good battery life and power options
- Doesn't have a full colour spectrum
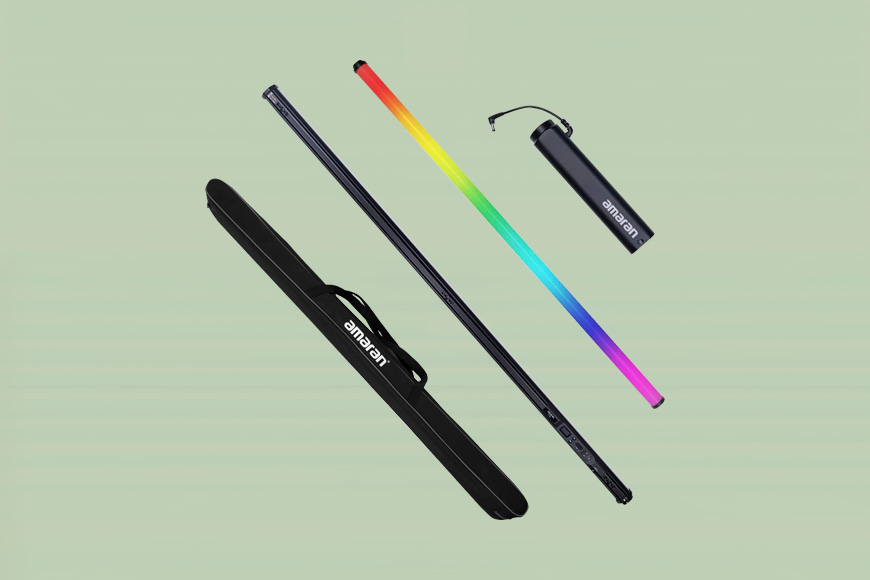
The Aputure Amaran T4C is an excellent lighting option for any videographer looking for creative colour control.
It can be used as a key light for interviews and also works great as a fill light or for run-and-gun shooting.
As a tube light, it can bring a unique aesthetic to your video lighting setups and allows you great flexibility in terms of placement.
The color temperature of the light is fully adjustable (warm, cool, green, magenta), so you can adapt easily to the ambient lighting conditions. Brightness, too, can be controlled precisely, so it’s a breeze to fine-tune your scene’s exposure.
It has 46 color gel presets and 15 built-in lighting effects, all of which have layers of variable control.
It's battery-operated, and you can use it either by plugging directly into a power outlet, or with its swappable, rechargeable battery grip.
Having a battery grip that you can easily swap over is especially great for those run-and-gun creators.
The T4C also has multiple mounting options. With its variety of screw threads, locating pins, and rail mounts, the light can easily be connected to a wide range of existing camera and grip accessories.
Like the Aputure MC Pro, mentioned above, this light also pairs with the Sidus Link app, for you to control your video lighting setup wirelessly.
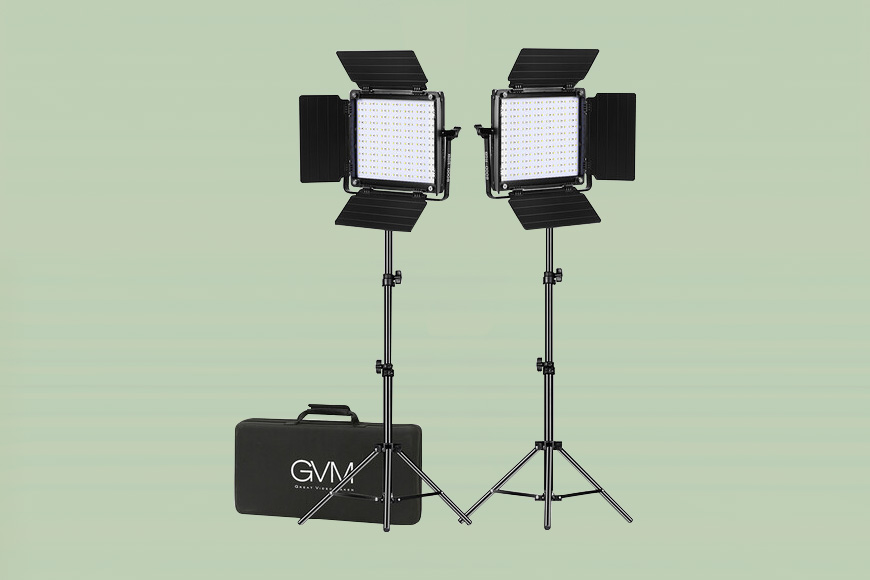
GVM RGB 60W 2-Pack (Best Beginner Lighting Kit)
- User-friendly
- Full RGB spectrum
- Wireless remote control and smartphone app
- Durable build
- Can use battery or AC power
- Steep (but quick) learning curve
This lighting kit is a great option for beginners. Not just because it’s a great piece of kit but also because you get two lights instead of one – even though it’s similarly priced to most of the other video lights in this guide.
Having the option to light a scene with two lights is especially good for beginners (or having the option to decide between lighting with one or two, or using one light as a key light and the other as a fill light) as, without much or any experience with lighting, trying to get the right aesthetic and exposure can be daunting.
Each 60W light emits bright light with a CRI rating of 97 and with a fully adjustable color temperature ranging from 3200K-5600K.
It also offers the full RGB color spectrum, so beginners will have unlimited color options for their video shoot from the start.
The lights have a durable build, and their light stands extend from 23.6 inches to 78.7 inches.
Although beginners will have to take some time to familiarise themselves with the various controls, the layout of the physical controls on the back of the light’s housing is clear and intuitive.
And, if you’d rather control things remotely, that can be done via a smartphone app. An app that includes some smart features that, for example, also give you the option to sync the lights with music.
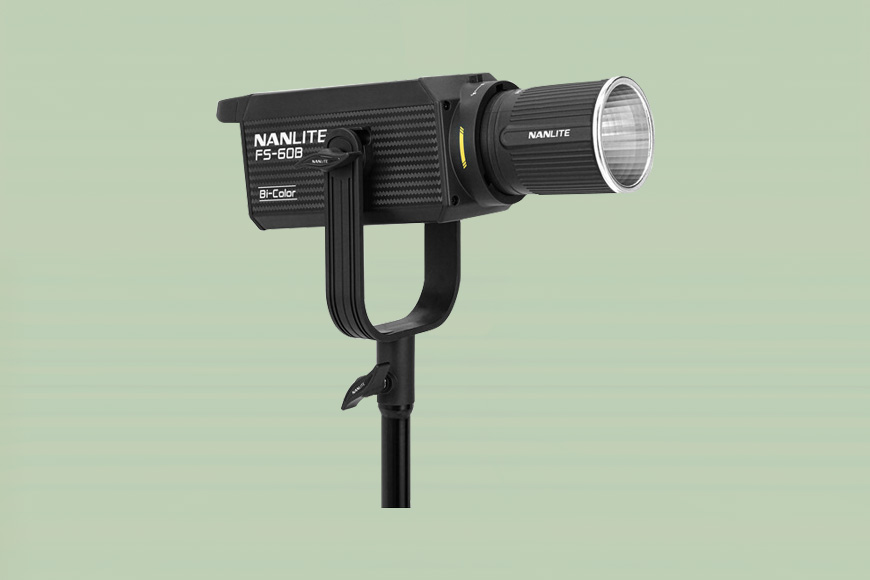
Nanlite FS-60B (Best Low-Range Studio Spot Light)
- Durable build
- High CRI rating
- Can control it with an app
- Suitable for long shoots
- Not super portable
- Heavy
The FS line of lights is great, and unlike the Amaran 100/200 line from Aputure, the FS is very well constructed with much sturdier build quality.
It’s a bi-color LED light that emits a steady, bright, yet low-range light with a CRI rating of 97, plus a fully adjustable color temperature.
By “low-range” I mean lower in output. Many videographers use these Nanlites as fill lights.
It also has 12 built-in lighting effects to aid your creativity, including pulse, storm, and welding.
It's powered by AC, so although you don't get the portable qualities of some of the other video lights in this guide, you can use it with no problem on longer shoots.
It also houses a silent fan cooling system to stop it getting overheated during extended use.
The light is compatible with Bowens mounts, which is a great help for setting up dynamic and diverse lighting. Using this mounting system, you can attach a good variety of diffusers and the like to modify the lighting setup of your video shoot.
The Nanlite FS-60B can also be paired with a smartphone app so you can control its settings remotely.
Aputure Amaran 60D (Best Budget Studio Spot Light)

- Good build and design
- Can be controlled wirelessly
- Accurate color temperature
- Battery or mains-powered
- Need spare batteries for longer shoots
This affordable, compact, powerful, and robust COB light is ideal for use as a key light on location or when run-and-gun shooting.
You can power it directly from the mains, or by battery.
It’s another bi-color light, very similar, in fact, to the Nanlite above.
It also has a silent cooling fan built-in, eight preset lighting effects (as opposed to 12), and the same versatility thanks to its full Bowens mount compatibility.
You can easily adjust the color temperature, and the light’s output has stepless dimming from 0 to 100%.
Like the Nanlite, it can also be paired with an app for full wireless control: the Sidus Link.
If you wanted to save $10 or so, and/or already use the Godox system, you could get the Godox SL-60W CRI 95+ (Amazon | B&H).
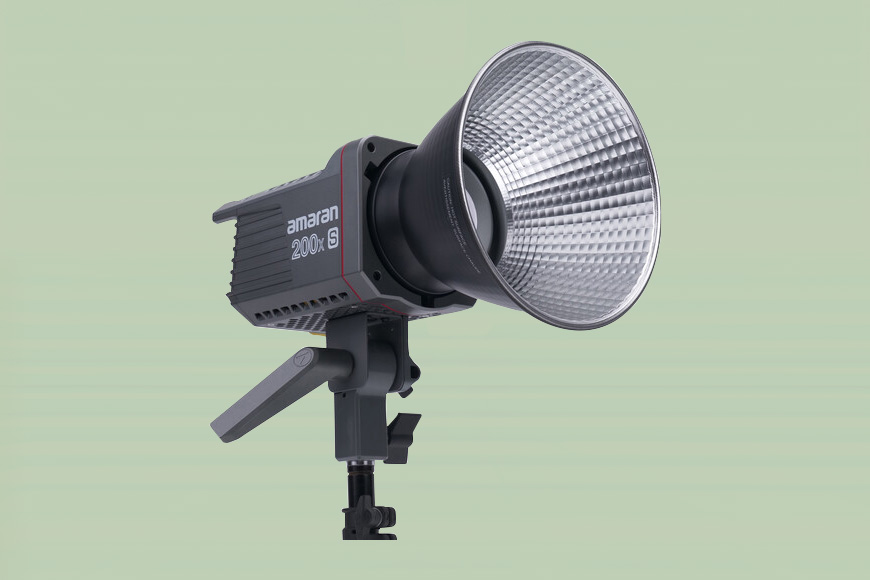
Amaran 200X (Best Mid-Range Studio Spot Light)
- Lightweight yet robust
- Relatively expensive
- Silent cooling fan
- Good color accuracy
- Relatively heavy
- A little expensive
The Amaran 200X is a great mid-range light; mid-range as in not the most powerful light on the planet, but also not the weakest.
It has an output of 45,400 lux (if you use it with the included hyperreflector), which is plenty bright for a wide range of video lighting situations.
It has stepless dimming, and you can either make those adjustments on the light's LCD screen or do it from the Sidus Link app.
From that app, you can also activate one of the nine creative lighting effects, or also control multiple units.
Like the other COB lights mentioned in this guide, it also has Bowens mount compatibility, which gives you a lot of flexibility when it comes to modifying your light output with diffusers or softboxes, for example.
You can power it by battery, or plug it straight into the mains, and, if you’re using it for long shoots, you can do that with peace of mind, as it has a built-in cooling fan to stop it overheating, and the fan is silent so that it won’t affect your audio.
If this video light is too expensive, you can bump down to the Apurture 200D, which isn't quite as bright. You can also bump up to the Aputure 300D Mark II if you want to spend more [Amazon | B&H].
Which Lights Are Good for Video Recording?
Understanding how and when to use different kinds of lights helps videographers choose the most suitable one for each situation.
Here are some of the options:
LED Panels
These are versatile and energy-efficient sources for general lighting, that provide even and uninterrupted illumination. They are also one of the most compact and portable choices.
You can easily adjust the color temperature and brightness, and you can often do this wirelessly from an app.
LED Spot Lights
These kinds of lights produce a more focused and intense light to direct at specific areas and are usually used to accentuate particular elements in a scene.
They’re also good for creating dramatic effects.
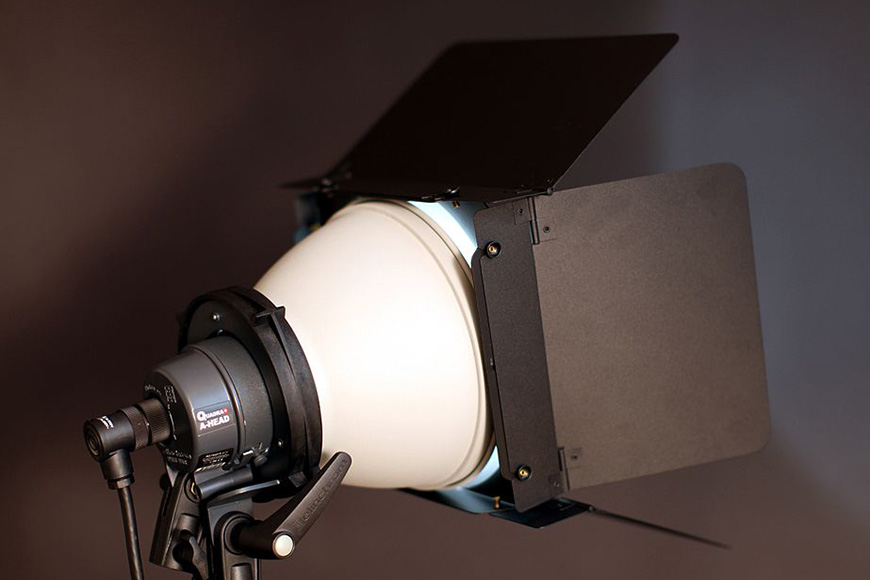
Fresnel Lights
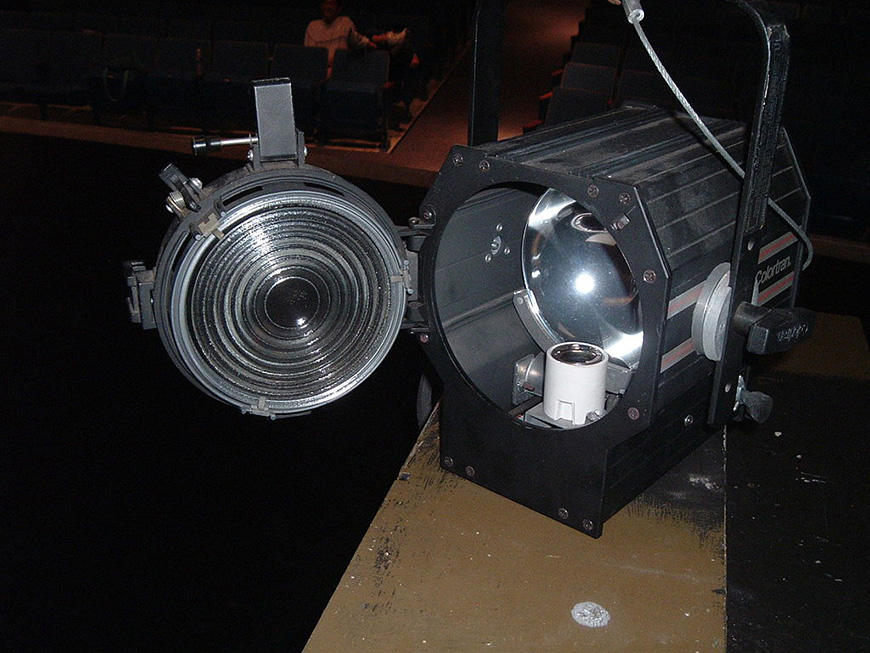
Credit: KeepOnTruckin at the English-language Wikipedia, CC BY-SA 3.0, via Wikimedia Commons.
These are the kind of lights I guess most people imagine when they think of lights on a film set, at least aesthetically.
Their hallmark is that they produce a focused and controllable beam of light (so you can control its spread and intensity), and they have a lens with an adjustable focal length to help with shaping the light beam.
As video lights, these come in traditional and LED versions.
HMI Lights

Credit: Eliot Lash, CC BY 2.5, via Wikimedia Commons
HMI (Hydrargyrum Medium-Arc Iodide) Lights are extremely powerful, daylight-balanced lights for outdoor and high-speed shooting.
They’re extremely popular with film production companies due to their high quality, and high power, and often used as a key light.
Normally you can’t change the color temperature on them as they’re meant to simulate daylight.
They also tend to be pretty expensive.
Ring Lights

Credit: George Milton
A ring light is a circular light source that can be mounted around a camera lens, or, for example, on a stand for off-camera lighting.
Their specialty is creating an even, shadow-free, and flattering light. For this reason, they're popular with vloggers, people shooting food, and people shooting interviews.
Tube Lights
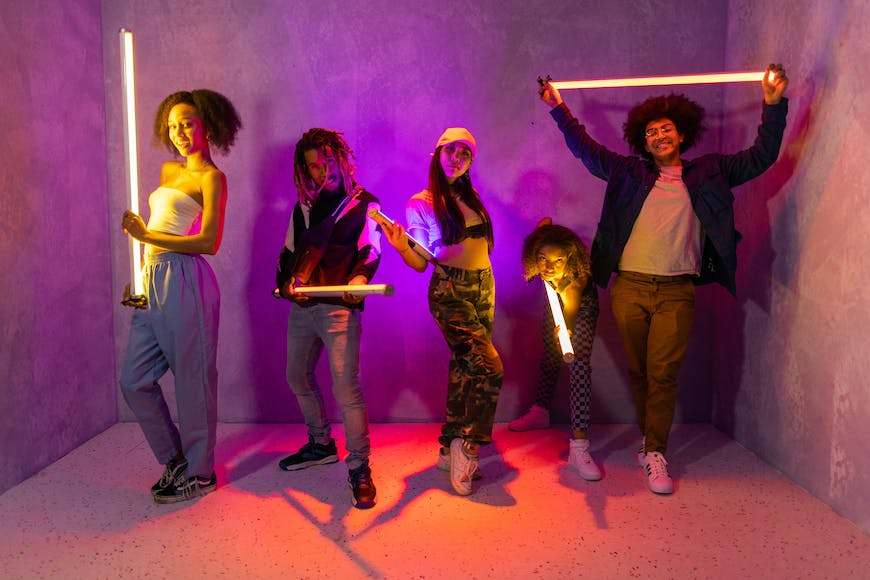
Credit: RDNE Stock Project
These are very versatile lights that are great for setting up creative scenes.
They are compact and, thanks to their tubular design, portable and often flexible or modular.
They often have the capability of emitting a wide spectrum of colours, too. So they’re perfect for accent lighting, creating dynamic backgrounds, or simply adding atmosphere to scenes.
Bi-Color LED vs Daylight: Which One Should I Get?
Both these types of video recording lights are very different, so the one you choose will depend on your needs and preferences.
Bi-color LEDs give you the ability to choose from a range of color temperatures.
You can switch between cool daylight and warm tungsten light (and all the steps in between), which gives you a lot of versatility.
You can adapt to changes in the light conditions, or need to match existing ambient light.
A lot of bi-color LEDs are also compact and portable, so they're particularly useful for videographers who want video lighting they can use on the go.
On the other hand, daylight LEDs produce a constant color temperature that is supposed to match natural sunlight.
They tend to have a higher output than their bi-color brothers, which makes them perfect for situations where you need a powerful, focused light source.
Outdoor shoots in natural lighting are a good example of situations where you need to overpower the existing ambient light.
Have a think about what your most common shooting conditions require, and you’ll be able to see which of these kinds of lights you’d need.
What Accessories Do I Need to Light My Scene?
Lighting a scene effectively for video recording often involves more than just the lights themselves.
There are quite a few accessories you should consider investing in to both enhance your lighting setup and give you peace of mind.
Softboxes and Diffusers
Credit: Harry Cunningham Harrydigital
These are essential accessories for softening the light, reducing harsh shadows, and creating a more flattering, even illumination.
Reflectors
Reflectors bounce light back onto your subject, filling in shadows and adding a natural, soft glow. They come in various shapes and sizes, with options for different reflectivity levels.
Barn Doors
Credit: Gürkan Sengün, CC BY-SA 3.0, via Wikimedia Commons
Sounds weird, but these are not actual barn doors. These are flaps on the front of your lights (e.g., as on Fresnel lights), which allow you to control and shape the beam of light.
They are used to prevent light spillage and to precisely direct the beam of light.
Gels and Filters
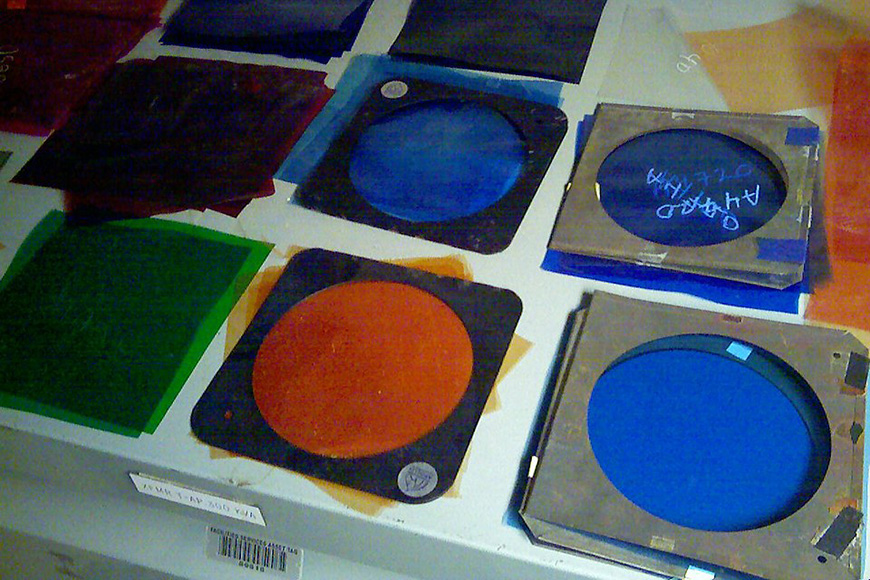
Credit: User:KeepOnTruckin, Attribution, via Wikimedia Commons
Gels and filters are used to modify the colour temperature of your lights or add creative effects. They are useful for matching lighting to different environments or creating a specific mood.
Light Grids
You attach light grids to the front of your lights to control the spread of light. They are handy for preventing light spill and maintaining a controlled lighting environment.
Light Stands
Maybe the most important accessories.
Good-quality, adjustable light stands are essential for positioning your lights at the right height and angle.
Sandbags
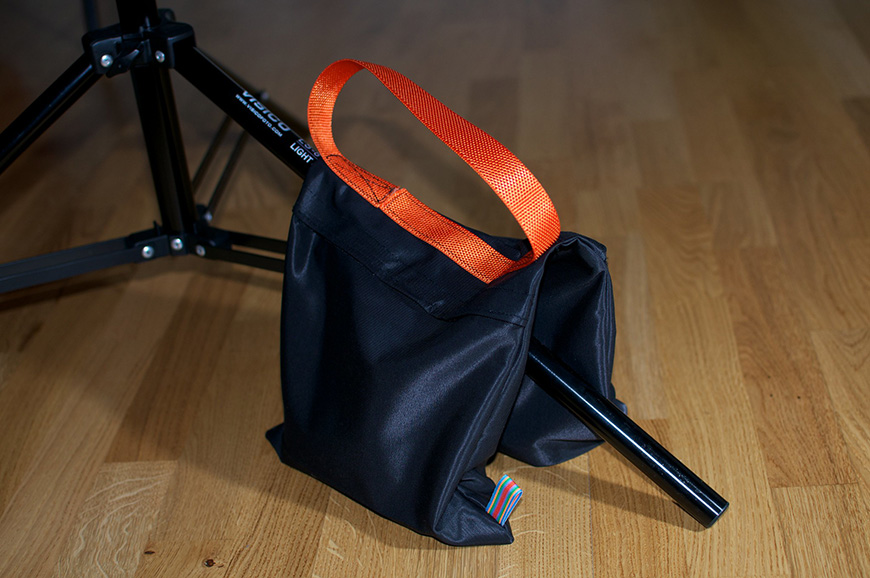
Credit: Erik Olsson, CC BY-NC-SA 2.0 DEED, via Flickr
I confess, sometimes I forget to take my sandbags. And I regret it.
But you really need them to weigh down your stands to ensure the stability and safety of your video lighting setup.
This is especially important in outdoor setups where lights may be vulnerable to tipping or being blown over.
Remote Control or Dimmers
Remote controls or dimmers enable you to adjust the intensity of your lights without physically touching them. This is convenient for making real-time adjustments during shoots.
These days, a lot of lights come with remote controls or the ability to be paired with an app. But, if your lights don’t, this is a good investment.
Carrying Cases
Good-quality, protective carrying cases are essential for transporting your lights and accessories safely. The best ones have padding and compartments to keep everything organized.
Battery packs
If you're using a light that takes batteries, make sure you have enough spares to ensure you won't have to take inconvenient shooting breaks or stop shooting altogether.
Power Strips and Extension Cords
Make sure you have enough power sources by using power strips and extension cords. This is especially important when working with multiple lights and/or in locations with limited electrical outlets.
Gaffer's Tape
A must-have for any videographer's kit bag.
Use it to secure cables, affix gels, and make quick adjustments to your setup.
There aren’t many problems that arise on shoots that can’t be fixed with a piece of tape!
How Bright Should Lights Be for Video?
The brightness of lights for video depends on a lot of factors.
How you will expose the scene, the light intensity you want, whether there’s any background or existing ambient lighting, and your overall desired mood.
The brightness you need for each light will also depend on what you need that light for.
Is it a key light? Is it a fill light? Is it to create atmosphere?
The important thing is that you have a light that will be bright enough to light whatever conditions you’re shooting in.
It's also important that the light either has adjustable intensity, or you have the light modifiers, to reduce its emissions if needed.
How Important Is Color Accuracy?
Color accuracy is an essential feature of video recording lights as it directly impacts the overall quality and aesthetics of your footage.
Accurate color rendering means your video will faithfully represent the true colors of whatever subjects or environments you are filming.
Make sure you choose lights with high CRI (Color Rendering Index) ratings.
If you do, you’ll both create footage with true-to-life colors while also reducing the need for extensive color correction in post-production.
All of the lights I’ve outlined in this guide range from a minimum CRI rating of 95, up to a high rating of 97.
How Do You Get Good Lighting for Live Videos?
Lighting live videos can be challenging, but there are a few things you can do to tip the odds in your favour.
Make sure you use enough lights and position them correctly so that you get even lighting.
Consider doing away with your lights entirely. Just because you have them, it doesn’t mean you have to use them.
If natural light will work, and you think it will be consistent during the shoot, consider it.
If you’re using lights, make sure your equipment is high-quality.
As outlined in the section above, color accuracy is important, so make sure the colors you’ll get will be as true-to-life as possible to enhance the quality of your live video footage.
As you’ll be shooting live, there’s no room for error, so it’s essential that you test your lighting setup.
Test your color temperature, check for any areas of harsh shadow, light spill, or blown-out highlights, and make sure you’ve dealt with them before the shoot begins.
Video Lighting: On-Camera Vs Off-Camera
On-camera lights are compact and portable, and easier to set up and adjust.
And, as they shine directly onto your subject or scene, it’s much easier to make quick, real-time adjustments to them.
Unfortunately, though, this ease of use comes with some serious limitations.
On-camera light produces harsh shadows and less-than-flattering light. It also limits you to a single kind of lighting effect.
On-camera lights, because you cannot reposition them, also give you an increased risk of glare or reflections, which can mess up your footage.
Off-Camera Lighting, on the other hand, frees you up creatively.
You get more flexibility in terms of positioning, which in turn gives you less harsh shadows, less glare, and overall a more flattering light.
Your footage will have more depth, and a more professional look and feel to it.
But of course, setting up off-camera lights is more difficult and time-consuming, so if you’re a run-and-gun videographer, they may not be suitable.
How Do I Balance Natural and Artificial Lighting for Video Recording?
Balancing natural and artificial light when recording video can be tricky, but it’s essential if you want to achieve a professional look.
Firstly, you need to understand color temperature. Natural light, such as sunlight, tends to have a warmer color temperature, while artificial lights can vary.
Make sure that the temperature of your artificial lights matches the natural ambient light so that your footage doesn’t have any color imbalances.
There are several ways in which you can do this.
You can use color correction tools like gels or filters. These can be applied to artificial lights to make them match the color temperature of whatever light is coming in naturally.
You can also modify your artificial light source with a softbox, umbrella, or diffuser. That will soften your artificial light sources, mimic natural light's diffused quality, and give you a natural look.
It's important, too, to adjust the intensity of your artificial lights to match the natural light's brightness.
Don’t let your artificial light overpower the scene, and pay attention to the direction of light to ensure a seamless blend between your natural and artificial light sources.
Another good idea is to use reflectors to bounce natural light onto your subject or fill in any shadows created by the artificial lights.
Reflectors help distribute light more evenly and contribute to a balanced overall look.
Of course, it’s also a good idea to time your shoots well.
Consider the time of day if you want to shoot with natural light, as its quality and direction vary throughout the day.
Plan your shoots to take advantage of the most flattering natural light conditions and use artificial lights when needed.
A basic tip, but still an important one: don’t forget to set the white balance in your camera to match the lighting conditions.
If you're using a mix of natural and artificial light, it’s better to manually adjust the white balance, rather than let the camera do it automatically.
Finally, as always, you need to test your setup.
Make sure you have everything under control and balanced, well before you start shooting.
Which Brand is Best for Video Lighting?
There are a lot of quality brands operating at the amateur and prosumer level. All of them have strengths, and all of them have offerings for different budgets.
That being said, here are the brands I recommend:
Godox
Godox is well-known for producing lighting equipment that is reliable, good-quality, and affordable.
They produce a wide range of LED lights and lighting accessories to help you tackle most video recording scenarios.
Aputure
This company is known for portable lighting – so, lightweight and compact options that are good for on-the-go videography.
Generally, their products come with adjustable brightness and color temperature.
Nanlite
These guys specialize in high-output COB LED lights and versatile tube lights.
They are a go-to for compact, powerful light, and creative lighting options.
SmallRig
SmallRig is mainly known for its camera accessories, like camera cages, but SmallRig also offers compact, mountable LED video lights.
So, if you’re looking for something extremely compact and user-friendly, you might want to check out their products.
Frequently Asked Questions about Video Recording Lights
What is the best light for video recording at home?
That really depends on what you are recording at home. If you’re shooting products, food, beauty, fashion, or a vlog, then ring lights are good.
If you want to add atmosphere or accent lights, then consider a tube light.
If you’re shooting a movie, then you might want a more complicated setup with multiple COB lights, at the very least, a key light and a fill light.
The best light for recording video at home is the one that helps you shoot exactly what you want to shoot.
What are the most portable lights for video recording?
The most portable lights for video recording are tube lights, small COB LEDs, and LED panels.
Out of the choices in this guide, the first three, the Aputure MC Pro, the Lume Cube Cordless Ring Light Pro, and the Lume Cube RGB Panel Pro are probably the most portable.
However, all of the products in this guide are portable to a certain extent.
What is the best color lighting for video recording?
It depends on where you are recording.
The important thing is that your light creates the color temperatures that you need.
If, on the other hand, you are looking for a more creative avenue, and more atmosphere, then it's a good idea to get a light that can emit the full RGB spectrum.
Can I use a ring light for video recording?
Yes, you can, especially if you are shooting something close up, that needs a flattering key light that produces few shadows.
Some examples would be people, food, or fashion.
Are LED lights good for videography?
Yes, they are.
LED lights provide bright, even, flicker-free light, which makes them ideal for videography.
What is the best LED light for video recording?
That would be the light or lights that allow you to shoot what you want to.
Any of the LED lights in this guide would be an excellent option, but the one you choose will vary wildly depending on what you are shooting – whether you’ll be shooting on-the-go, on location, etc.
What is the best lighting for webcam videos?
The best lights for webcam videos are ring lights, as they throw even, flattering light.
How can I light myself for a video at home?
You can light yourself in a number of ways. You just need to make sure that the light is flattering and the right color temperature so that you have a true-to-life skin tone.
Generally, ring lights are a good key light for this, but if you want to get more creative, you could use a combination of multiple LED panels and tube lights.
Stephan Jukic is a technology and photography journalist and experimental photographer who spends his time living in both Canada and Mexico. He loves cross-cultural street photo exploration and creating fine art photo compositions.
👋 WELCOME TO SHOTKIT!
🔥 Popular NOW:
