


How To Change The Color Of An Object In Photoshop
Changing the color of objects in Adobe Photoshop is quick and easy. Learn the most efficient way to do it in this easy-to-understand tutorial.
Photoshop | Software | By Ana Mireles
Shotkit may earn a commission on affiliate links. Learn more.
Many professionals need to know how to change the color of an object in Photoshop. Sometimes it's to illustrate the different versions of a product in an e-commerce store, while other times it's to color match different elements in the picture.
Whatever the reason, if this is something you need to learn, this article can help.
There are many different ways to change something's color in Photoshop, but I'll show you the two that I find to be the easiest.
(One method is almost an automatic feature that saves a ton of time, and the other gives you more control.)
Check out the Photoshop tutorial for each method below.

Download the latest version of Adobe Photoshop to follow along with this simple tutorial.
Start a free 7-day trial today
Method 1: Color Replacement Tool
The original picture was taken by Surya A
Changing the color of an object is such a requested retouching technique that Adobe Photoshop introduced a specific replace color tool.
It's really easy to use, but you don't have much control over the results. In any case, it can be useful in many situations, so here's a quick guide on how to use it.
Keep in mind that this will change the original pixels – so, this is a destructive method. I advise you to make a copy of the background layer before you start so that you'll always have an original to go back to in case you change your mind.
1. Choose the color
First, click on the foreground color swatch at the bottom of the Tools panel to open the color picker.
From there, you can choose whichever color you want your object to be. Click OK to turn it into the foreground color.
2. Grab the color replacement tool
Depending on the version of Adobe Photoshop that you're using, this tool can be found in different places. It's either in the flyout menu of the Brush tool, the Healing brush, or the under the three dots at the end of the panel.
Find yours and click on it to activate it.
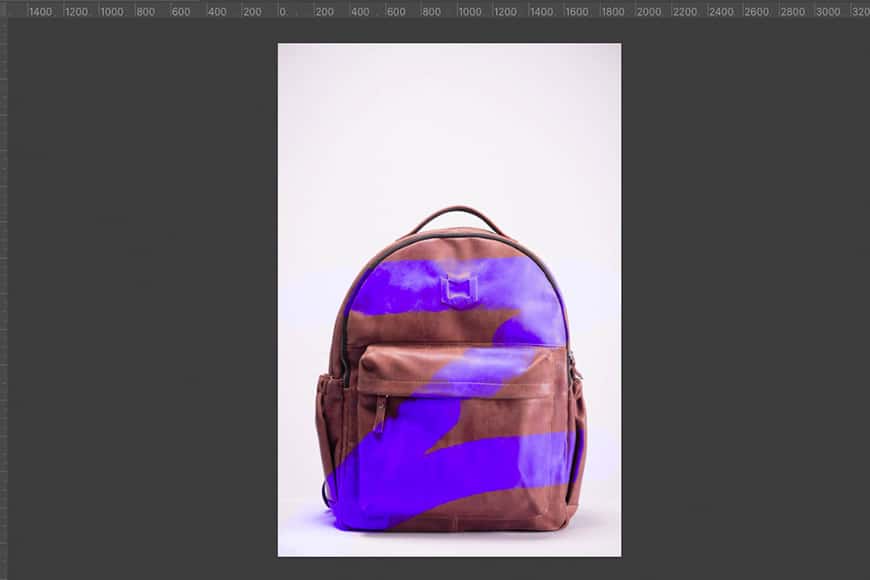
3. Paint the object
The color replacement tool works like any other Brush tool – you can adjust the size and the hardness. Paint over the entire object to change its color.
You can also adjust the Limits and the Tolerance if you want more control over the neighbouring areas.
Alternatively, if you want to make sure the changes apply only to the object, you can select it. This way, you'll know that you can't go over the marching ants and color any unwanted areas.
PRO-TIP: Change the Mode for different results
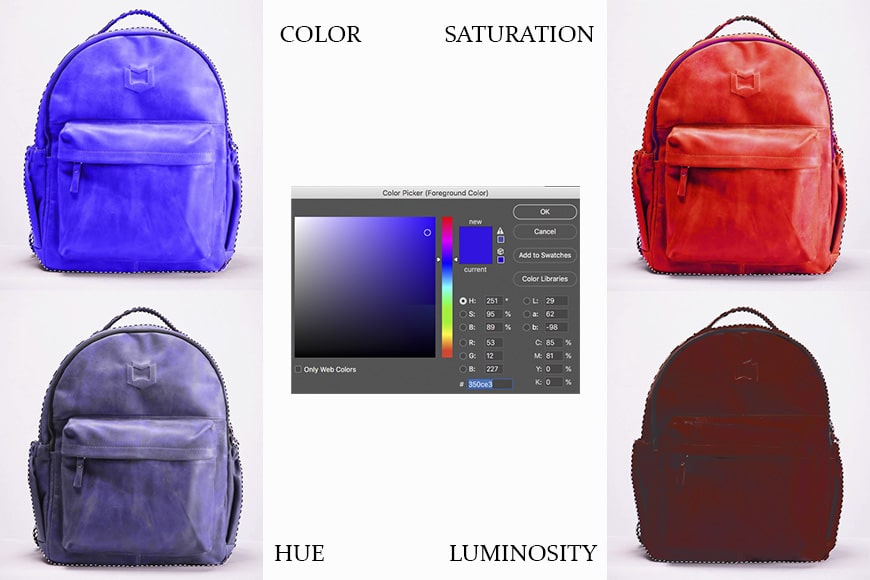
All four versions were done with the same blue from the color picker – I only changed the Mode in the options bar.
Keep in mind that Hue, Saturation and Luminocity form any color. If you want to affect only one of these aspects, go to the Mode menu in the Options bar and choose which one you want.
Method 2: Hue / Saturation Adjustment Layer
Using adjustment layers to change the color of an object in Photoshop is a non-destructive method, and it gives you full control over what you're changing.
As I mentioned at the beginning, there are many methods to do this. Some people prefer to use Curves, others the Color Channel, etc.
The best one to easily change colors, even for beginners, is to use the hue and saturation adjustment layer. Here's a step-by-step guide to do it.
1. Select the Object

This can be the most tedious part of the process – fortunately, there are many selection tools in Photoshop. The one that works best depends on the subject you're selecting and your editing skills.
I've found that it's a combination of different tools that get the job done most of the time.
For example, the pen tool is the most professional tool, requiring a lot of skill to use. That's why many people recommend it as the best one. However, if the subject has hair or fur, then the pen tool won't do you any good.
So, pick the best tool for the specific object you're working with. In my case, the Object Selection tool should do a good job – at least as a starting point.
2. Refine the selection

Once you have the first selection, you'll normally have to fine-tune it. When you change the color of an object, you need the selection to be perfect. Otherwise, you'll see the edge of the object from the original image.
You can do this in a number of ways. You can use another selection tool to add or subtract something from the first selection or modify it from the Selection menu and the Properties panel.
In this case, I need to subtract from the selection the background that you can see through the handle. I'll use the Quick Selection Tool and then Feather a few pixels.
Another option is to use the Refine Edge Tool.
3. Add a Hue / Saturation Layer
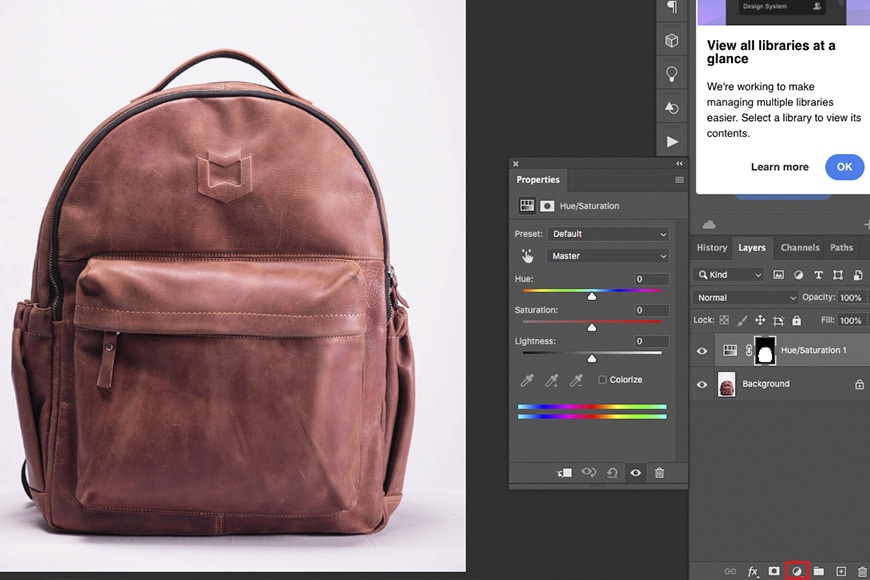
You'll find the adjustment layer icon on the bottom of the Layers panel – click on it to open the menu. From there, choose the Hue/Saturation layer. This will create a new layer with a layer mask.
The mask allows for the adjustments to be visible only on the object you selected. Otherwise, they would change the color of the entire image.
Move the sliders until you find the desired color.
4. Look out for color reflection
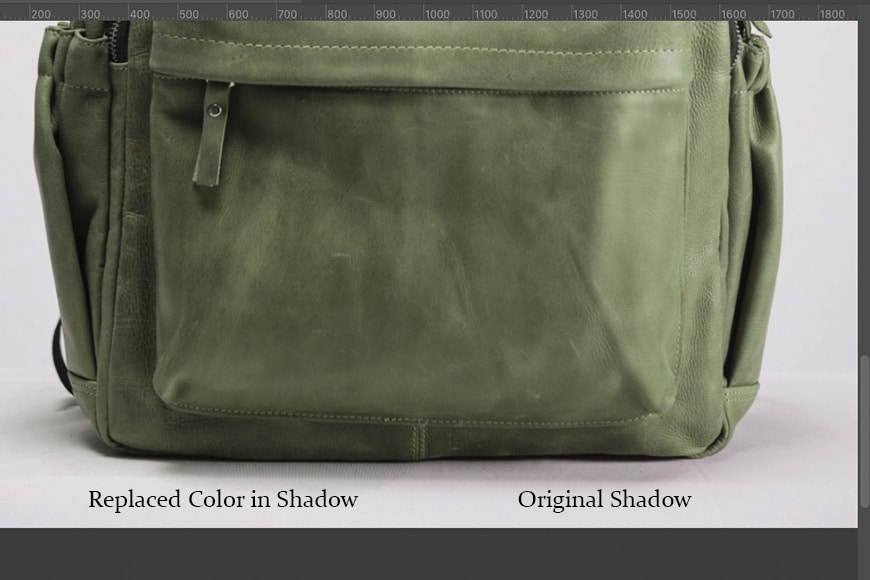
When you're replacing an object's color, you also need to consider what's surrounding the object. Sometimes objects or surfaces reflect the color of the object, and you need to fix that as well to achieve professional results.
You can do this by opening the Properties panel of the layer mask. There, you can use the brushes to adjust the mask where you need to make visible the Hue / Saturation adjustment.
PRO-TIP. Change black to white
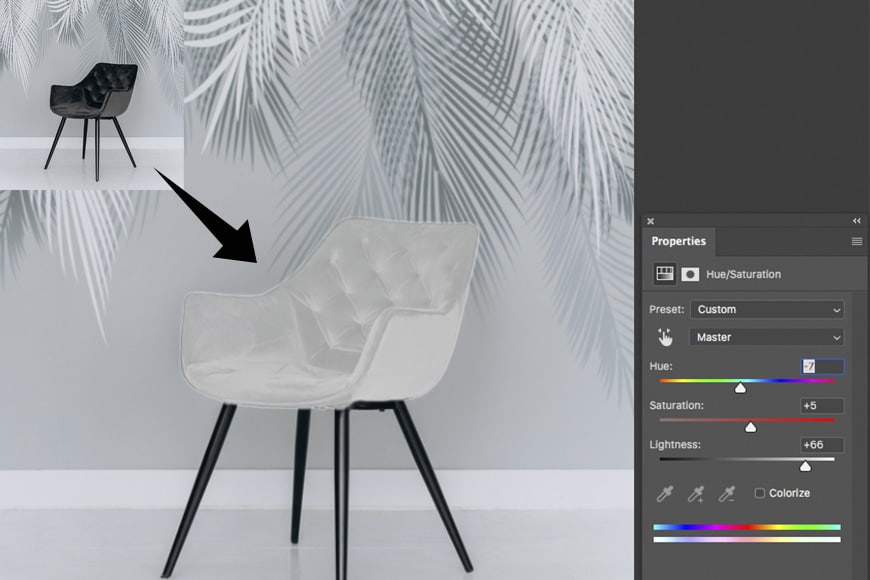
If you want to turn black into white using the same Hue / Saturation technique, use the lightness slider.
Then, you can fine-tune the transformation using the Blend If tool from the Layer Style panel.
Adobe MAX Update 2024
Photoshop is the ultimate tool for photographers, graphic designers, and visual creatives looking to take complete creative control of their workflow.
The Adobe MAX Update 2024 introduces several enhancements and new features to simplify core tasks.
With the assistance of Generative AI, these tasks include the ability to remove distracting elements from an image and streamlined processes for placing 3D elements in a 2D design.
Removal Tool – The key updates include an enhanced Remove Tool to effectively remove unwanted or distracting objects from an image without deteriorating the overall composition.
Distraction Removal – The automated Distraction Removal feature identifies people, objects, and overhead wires that may distract from the image.
Generative Fill – Powered by Adobe Firefly AI, Generative Fill allows you to build a composition with photo-realistic 3D elements, including correctly placed shadows, highlights, and perspective.
Generative Expand – Photoshop’s Generative Expland allows you to resize the canvas and use Adobe Firefly Image Mode to fill in photorealistic elements.
The Adobe MAX 2024 Updates are now live, and there's never been a better time to optimize your creative output with the Adobe Creative Cloud suite of applications.
Final Words
Thanks for reading, and I hope you found this guide helpful.
If you have any doubts or want to share your knowledge about other techniques to change the color of an object, drop us a comment below.
Another Photoshop tutorial you may like is this recent one on how to use the path tool.
Download the latest version of Adobe Photoshop to follow along with this simple tutorial.
Start a free 7-day trial today

Ana Mireles is a Mexican researcher that specializes in photography and communications for the arts and culture sector.
3 Comments
Leave a Comment

👋 WELCOME TO SHOTKIT!
🔥 Popular NOW:

Super helpful! Do you find one method more reliable when working with textures or reflective surfaces?
An alternative
https://www.clippingpathstation.com/
Thanks for reading my article – let me know if you have any questions.