


Guide to the Displacement Map in Photoshop
This easy-to-follow tutorial will teach you how to create displacement maps in Photoshop. This is a must-know for professional-looking image manipulations!
Photoshop | Software | By Ana Mireles
Shotkit may earn a commission on affiliate links. Learn more.
Have you ever tried pasting some text or other design onto a photo only to have it come out looking like it just didn't belong?
That can be solved by using a displacement map. With it, you can adapt any element to an image by using the information from the texture underneath, similar to a clipping mask.
Once you apply a displacement map to the new component, it will seem like it goes up and down with every wrinkle, every crack, or every pore of the object it's being placed on top of.
This tutorial will guide you step-by-step on the creation of a displacement map. Then I’ll show you how to apply it to create realistic composites. So let's get started.

Download the latest version of Adobe Photoshop to follow along with this simple tutorial.
Start a free 7-day trial today
What Is a Displacement Map?


Credit: Urban Sanden (background image) / Charlie Deets (dog image)
First, I should clarify what a displacement map actually is. It might sound very technical and probably daunting if this is your first time approaching it, but let me put you at ease.
A displacement map is nothing more than a greyscale version of your original image saved separately in Photoshop’s native format (PSD).
This can be used with the Displace Filter to add texture to different elements that you want to incorporate into your photo.
As with other image manipulation techniques, such as how to create a Radial Blur effect, how to change background color in Photoshop, or even how to mirror an image in Photoshop the explanation is often more complex than the execution – don't worry. I'll lead you through it.
When to Use Displacement Maps?
Ok, like I was saying, displacement maps allow you to really integrate different elements on a composite. I know this still sounds a bit abstract, so let me tell you some concrete examples.
Let's say you're working with a portrait and you want to give your subject a tattoo. If you simply paste in the design, it will be clear that it's not part of the original. It might even look like your watermark or something completely unrelated.
Instead, if you could see how the graphics ‘wrap' around the pores, the scars or the imperfections of the skin, then it would look realistic, because that's how the ink of a tattoo reacts – it wouldn't completely cover the skin.
Another common use of displacement maps is to add logos to products and objects.
For example, many photo retouchers that work with brands or e-commerce websites are already working on the images when the products are still in production.
So, you have the photograph of a prototype and you need to add the logo to make a preview image. For example, it might be a shirt that needs to have the logo on the chest area.
Then, the logo needs to be ‘distorted' by the fabric's weaving to look like it's part of the shirt.
Of course, these are only some examples to explain when and why to use displacement maps in your photographic practice. There are all sorts of creative uses, so the sky is the limit.
Next, I'll show you how you can create a displacement map, and then how to apply it. Once you know the technique, you'll see that the creative juices will start flowing on their own.
- Read more: How to create a pattern in Photoshop
How to Add a Displacement Map Using Photoshop
To follow along with the guide you just need to have a background image.
As I mentioned before, it’s your creativity that sets the limits so you can use any image you want. Just make sure it has enough texture, especially if this is your first time. That way you can clearly see the effect.
Also, you can grab a second image or graphic to place on the background. This is optional though because you can also use a type layer to add some text, or create a design using the Shape tool, etc. The choice is yours.
Step 1: Open your image
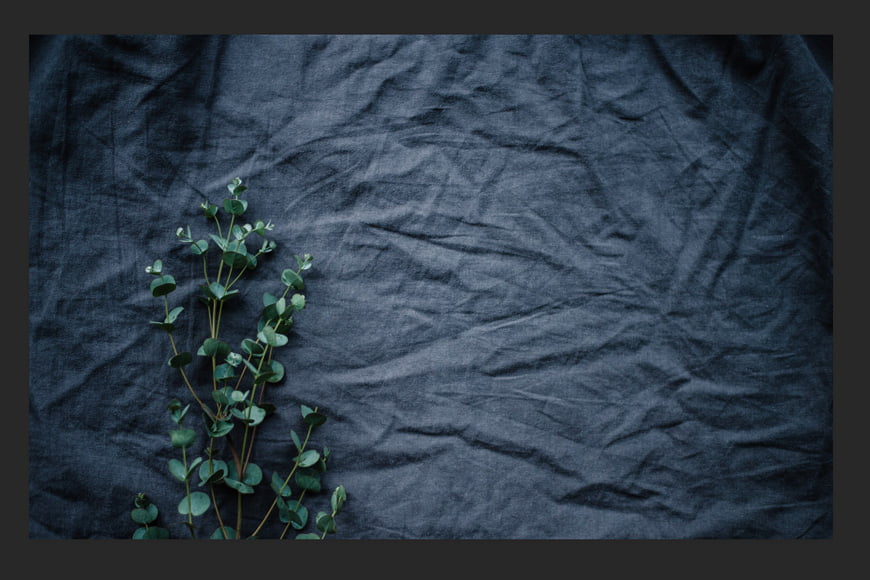
Credit: Annie Spratt
Open your background image in Photoshop. Make sure it's in RGB mode, as the next step uses the channel section. You can see this by going to the menu Image and then clicking on the Mode sub-menu.
Step 2: Pick a channel

Go to the Channels panel. If you don’t have it active go to the menu Windows and activate it. Here you’ll see that your color image is labeled RGB because it puts together three channels: Red, Green, and Blue.
Click the eye icon to activate and deactivate each one of the channels and find the one that has more contrast. In my case, it's the green channel, but this may be different for you.
Step 3: Duplicate the channel

To make a new document out of this channel, right-click on it and choose Duplicate Channel. This will open a dialogue box where you can choose the destination.
By default, it will be set to add the duplicate in the same document you're working on. Change this to New from the drop-down menu. This way it will open as a separate file.
Name it Displacement Map. This can be done later on when you save it, but you can do it here so that you always know which document you're working in.
Then accept the settings, and this greyscale image that comes from the channel you chose will open in a new tab.
Step 4: Add Contrast
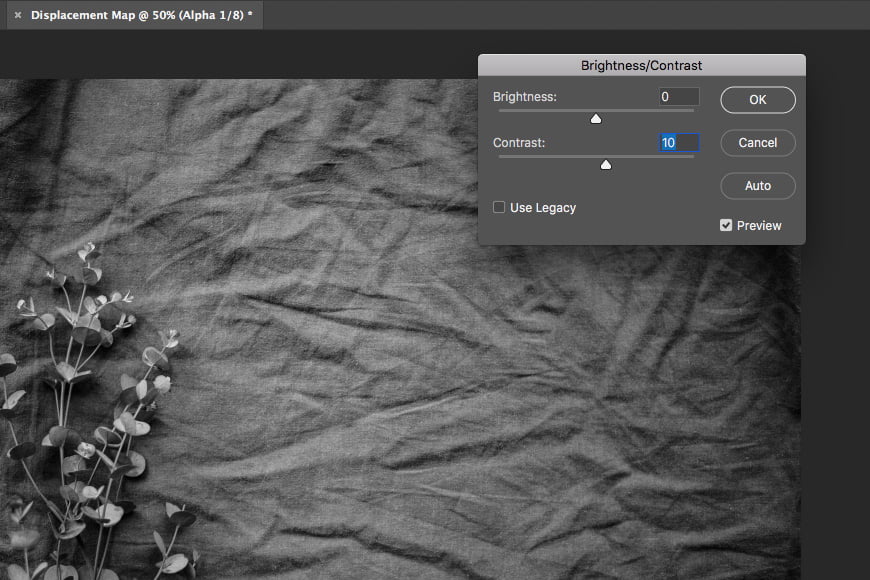
This is an optional step. Depending on your image, it can be that even the most contrasted channel wasn't enough. If this is the case, then you can add the extra contrast now.
This can be done in several ways; you can adjust the Curves, Levels, or simply use the Brightness/Contrast tool.
It doesn’t matter which one you use – go with whichever is most comfortable for you. The amount of contrast is also a personal choice depending on your taste and the desired effect. You’ll get the hang of it after a few tries.
Step 5: Add Gaussian Blur

Now you need to blur your displacement map just a little. Open the Filters menu and choose Blur, Gaussian Blur.
This will open a dialogue box where you can set the amount of blur you want. Don't overdo it. Just add enough so your effect isn’t too extreme. Remember that the desired result is a realistic integration of the elements.
This is, again a matter of choice depending on the look you want to achieve, as well as the size and resolution of your photo.
There is a preview window for you to check how the gaussian blur is affecting the photo. When you're satisfied, click OK.
Step 6: Save your file
When you're done, save this new document as a .psd file. If you named it during Step 3, then just save it as it is. If not, name it now as ‘displacement map'.
You can call it what you like, actually, but I recommend this name because this way, it will be easy to find in the next part of the process.
Step 7: Add a smart object to the original file

You can now close the displacement map and go back to your original photo. Here you can add whatever it is you want to integrate into your composite: some text, a logo, or a second image.
If you're creating this element in Photoshop, for example using the Shape or the Text tools, then you'll need to convert them into smart objects.
When you create texts and vector graphics, Photoshop places them as a new layer. To find it just open the Layers panel.
Here you can go to the menu and choose Convert to Smart Object. You'll notice the thumbnail icon will change.
If, instead, you decided to add a second image or to import the graphics, use the Place Embedded option from the File menu. This way it will be pasted directly as a smart object.
Step 8: Apply the displace filter

Now you can go to the menu Filters, Distort, Displace. From the dialogue box that this opens, choose the adequate values.
As a default, these will be set to 10. I always start with that, and most of the time this is good.
When you choose the values, it will open up a browser window. From there you need to select the displacement map file you created with the black and white image.
If you want to change the values from the Displace filter, just double-click on the filter from the Layers panel and it will open the dialogue box again. This is possible because you applied it to a Smart Object.
Ok, now your object is distorted, but usually this doesn't mean it looks integrated. For this, you have to change the blending.
Step 9: Apply a blending mode

There are two ways to adjust how both layers interact. The first is to change the Blend Mode from the Layers panel.
Make sure the top layer is selected (the one with the smart object). Then, open the drop-down menu and start scrolling through the blending options. For example, Multiply or Soft Light work well for this effect.
Another technique that you can apply either in combination with the first one or as the only solution, is the Blend If tool.
To reach this, double-click on the layer, next to the name. This will open the Blending Options window. In it, you'll see two sliders on the bottom right. These are the Blend If tool.
Start moving them until you find the result that you're looking for, just make sure that the Preview option is checked. The top slider causes certain tones from the top layer to disappear, while the bottom slider makes visible certain tones from the underlying layers.
So move them both until you find the right balance. To smooth out any transition, you can ‘break' the sliders by holding the alt key while dragging them. This will create a start and finish point for each one creating a better transition.
3 Quick Tips for Realistic Displacement Maps
- Always use the Blend If tool for a more professional result.
- You can use the Liquify filter if you need to follow the natural lines of the background.
- Consider the point of view and vanishing point of the original image.
Adobe MAX Update 2024
Photoshop is the ultimate tool for photographers, graphic designers, and visual creatives looking to take complete creative control of their workflow.
The Adobe MAX Update 2024 introduces several enhancements and new features to simplify core tasks.
With the assistance of Generative AI, these tasks include the ability to remove distracting elements from an image and streamlined processes for placing 3D elements in a 2D design.
Removal Tool – The key updates include an enhanced Remove Tool to effectively remove unwanted or distracting objects from an image without deteriorating the overall composition.
Distraction Removal – The automated Distraction Removal feature identifies people, objects, and overhead wires that may distract from the image.
Generative Fill – Powered by Adobe Firefly AI, Generative Fill allows you to build a composition with photo-realistic 3D elements, including correctly placed shadows, highlights, and perspective.
Generative Expand – Photoshop’s Generative Expland allows you to resize the canvas and use Adobe Firefly Image Mode to fill in photorealistic elements.
The Adobe MAX 2024 Updates are now live, and there's never been a better time to optimize your creative output with the Adobe Creative Cloud suite of applications.
Displacement Mapping | Final Words
That's it! You'll find that using a displacement map in Photoshop is done in a few steps but it opens up an infinite number of creative possibilities.
Don't be afraid to try it out and experiment to see what unique results you can get!
Download the latest version of Adobe Photoshop to follow along with this simple tutorial.
Start a free 7-day trial today

Ana Mireles is a Mexican researcher that specializes in photography and communications for the arts and culture sector.
2 Comments
Leave a Comment
👋 WELCOME TO SHOTKIT!
🔥 Popular NOW:

Thanks for this really detailed article. It was quite helpful for a project I’m working on.
Thanks for reading my article – let me know if you have any questions.