


How to Use the Liquify Tool in Photoshop
Are you ready to learn this powerful Photoshop tool? Find out how to liquify facial features and more with this step-by-step tutorial.
Photoshop | Software | By Ana Mireles
Shotkit may earn a commission on affiliate links. Learn more.
Interested in learning how to use the Liquify tool in Photoshop? Perhaps you've heard about it but never actually given it a try.
This article is designed to give you an introduction to the tool and step you through your first tries at using it.
In this tutorial, I'll be retouching a headshot because there's a liquify tool specifically for portraits that I want to show you. However, the liquify filter has many uses.
For example, you can fix clothes with it in fashion photography. You know when fabrics make awkward folds around a model's body, or you need the shape of a dress to look more voluminous? Those are details that can be retouched with Liquify.
Commercial photographers can benefit from it as well. If they're placing a logo onto an object and it needs to follow the shape of the product, they can use the liquify tool in Photoshop to bend it.
These are just some of the practical applications, but you shouldn’t forget the creative uses for art photography – it also helps out with fine-tuning displacement maps.
In any case, I’ll show you how it works, and then you decide which uses you want to give it.

Download the latest version of Adobe Photoshop to follow along with this simple tutorial.
Start a free 7-day trial today
What is the Liquify Tool in Photoshop?
The Liquify tool is used to distort parts of your image. With it, you can push or pull, pucker or bloat specific pixels without losing quality.
While this has been around for many years, Adobe has put a lot of emphasis on developing this tool.
In older versions of Photoshop, you didn’t have as many options as you do today. And it didn’t have the face-detection intelligence that makes it so user-friendly in Photoshop CC.
There are many tools in the workspace of the Liquify filter, so let’s start by identifying which ones you have at your disposal and what they do.
What Are the Tools Within the Liquify Filter?
You open the Liquify tools by going to the menu Filters, Liquify. Or you can use the keyboard shortcut Shift + Cmd + X.
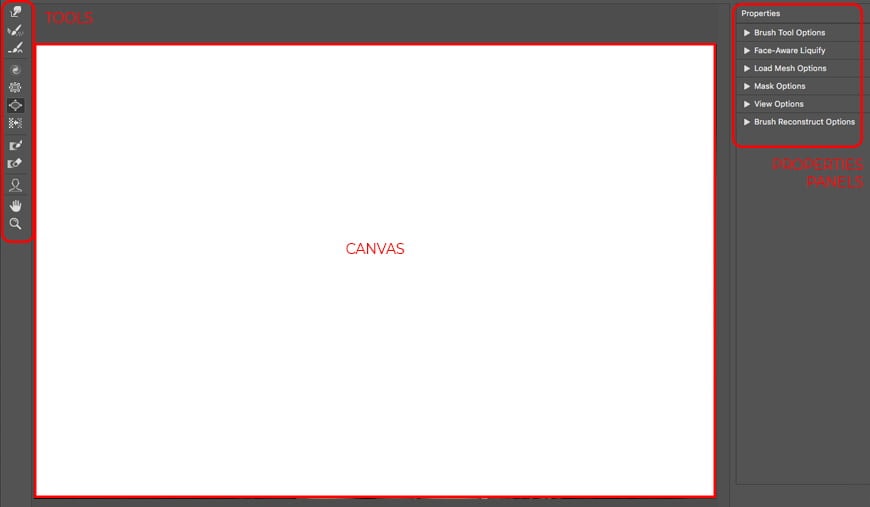
This will launch the task space with many buttons and panels which can make it a bit intimidating.
Let’s break it down to see that it’s not as complicated as it looks. On the right-hand side, you’ll find a series of panels that will give you the options to control some of the tools more precisely.
The bottom two – View Options and Brush Reconstruction – are useful for seeing how you’re doing. View Options allows you to see the layers underneath the one that you’re liquifying. Brush Reconstruction has sliders that allow you to go back and forward through your edits, as well as Restore All.
On the left-hand side, you have the toolbox with twelve choices. Fortunately, the icons are pretty clear, so it will be easy for you to remember even on your first try.
I'll go through them one by one. Obviously, the Zoom and the Hand tool are just to move around like they are in the regular workspace, so I won’t be talking about those.
Forward Warp Tool
Just like the icon shows, with the forward warp, you are pushing a piece of the image forward. You can use it to narrow something too wide or to push back into place something that's sticking out.
Then, you can go to the Properties panel on the right to adjust the settings and gain more control:
- Brush Size – As with any other Brush tool, you can adjust how big or small you want it depending on the size of the area that you want to retouch. It can be adjusted by dragging the slider or directly inputting a number in the box. Alternatively, you can use the bracket keys to change the brush size without leaving the canvas area.
- Brush Density – This controls the edges of the brush. It determines how hard or soft your brush will be. The higher the brush density, the harder the edges will be. Therefore, a lower density value will create more feathering.
- Brush Pressure – The Brush Pressure changes the speed of your effect. With higher pressure, things will be modified quickly and you’ll have less control. If the brush pressure is low, you can see how the filter is affecting the image and easily stop it when it looks the way you want it to.
- Brush Rate – This is similar to the Pressure control but it applies specifically to the tools you use in stationary mode.
You can download free Photoshop brushes here.
Reconstruct Tool
This tool puts everything back into place. If you're not convinced about one of the changes you’ve made to your image, you don’t have to start all over.
Just grab the Reconstruct tool and brush over the area that you need to restore. This will bring all the pixels back to their original place.
You can adjust the brush settings in the Properties panel, just like the Forward Warp. Also, if you hold Alt while dragging the mouse, it will just smooth out the effects instead of fully reconstructing the original.
Smooth Tool
If you need to smooth any hard edges in an image, this is the tool you need – e.g. if the shoulder seam of a coat makes a straight angle instead of curving with the model’s body.
Any sharp turns that should be curved can be fixed using the Smooth tool. You can adjust the settings of the brush in the same way as the previous ones.
It’s also useful to fine-tune other liquifying adjustments that might otherwise be too noticeable.
Twirl Clockwise Tool
This is pretty self-explanatory. Wherever you position this tool, the pixels will rotate in a clockwise direction while you hold the mouse button. This gives you that creative Photoshop twist effect.
You don’t need to click and drag this tool, it’s usually used in stationary mode. Again, the brush properties can be adjusted in the panel.
If you want to change the direction od the twirl, just hold Alt while you use it.
Pucker Tool
The Pucker tool creates a sort of black hole where everything on the edges will get pulled towards the center of the brush.
In this case, holding the Alt key won't change the direction of the effect, but instead will switch you over to the tool that creates the opposite effect: the Bloat tool.
Bloat Tool
As I mentioned, this is the opposite of the Pucker tool. While the Pucker tool draws the pixels inwards, Bloat pushes the pixels towards the outer edge, giving the illusion of bloating.
To go back to the Pucker tool you can press Alt again.
Push Left Tool
The name of this one tells you exactly what it does, however, it's a bit misleading on how you use it. With the Push Left tool, you can push the pixels to the left, but to do so, you have to click and drag up.
As you can probably guess, if you drag down, then the pixels will move to the right.
Freeze Mask Tool
Now we’re back to the intuitive names because Freeze Mask will hold those pixels in place even if you pass a liquifying tool over them.
This will allow you to distort one area without accidentally disrupting something you didn’t intend to alter. For example, if you want to retouch the subject without altering the background.
Just use this tool to paint over the areas that you don’t want to change. You can adjust the brush settings in the properties panel, and you can modify the Mask options in its panel.
If you painted on something you didn’t want to, just press Alt to switch to the opposite tool: Thaw Mask.
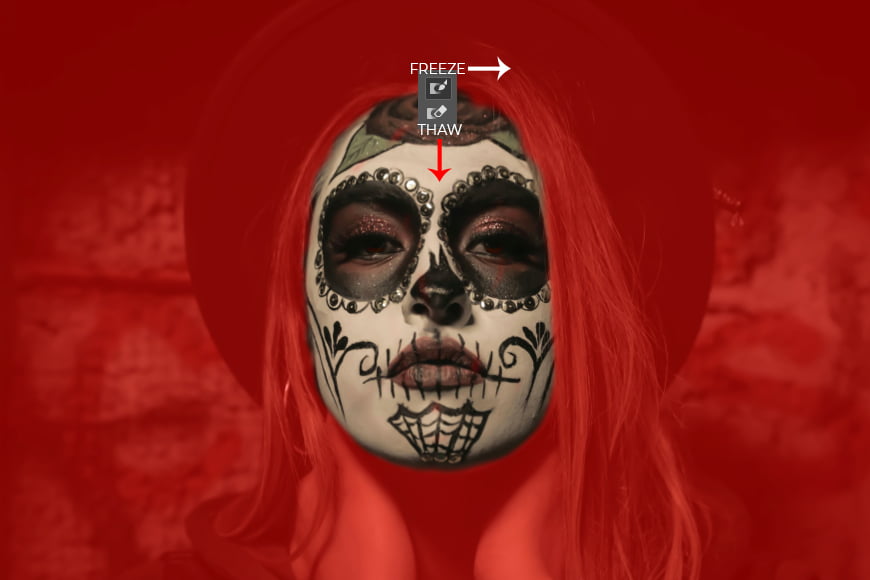
Credit: Tony Hernandez
Thaw Mask Tool
This will unblock anything that was protected by the Freeze Mask. The properties and options can be adjusted exactly like the others.
Face Tool
The Face tool is the one that I was telling you about in the Introduction. This is the latest development from the Photoshop Liquify filter.
This tool automatically recognizes the face (or faces) in the image. Then, it separates the features (forehead, eyes, nose, mouth, chin, etc.), and allows you to modify them.
I won’t go into much detail here because I’ll show you how it works with an example later on.
How to Liquify Facial Features in Photoshop
When you use the Liquify tool to modify facial features, remember that it's a powerful tool and needs to be applied carefully.
As a portrait photo retoucher, you should be aware of the impact and influence of your work.
Neither I nor the Shotkit team endorse unethical editing. Anything I do in the following example is purely demonstrative of the capabilities of the tools and is not intended to offend or impose any aesthetic judgment.
1. Using the Forward Warp Tool

Credit: Tony Hernandez
This is the way photographers did facial photo retouching for many years, before the introduction of the Face Tool.
Some professionals still prefer it over the Face-Aware Tool because you have more freedom. Also, sometimes you’re forced to use the Forward Warp tool because Photoshop can’t recognize the face – like in the example I used here.
It’s worth saying that this technique requires a lot of practice and a bigger learning curve.
Despite my advice to keep it realistic, I went completely the opposite and made an exaggerated retouch. I did this to make the manipulation very evident for demonstration purposes.
Picking up from the model’s makeup as a Mexican Catrina, I used the Forward Wrap Tool to push the contour of the eyes to make them bigger. You can also achieve this effect by using the Bloat tool.
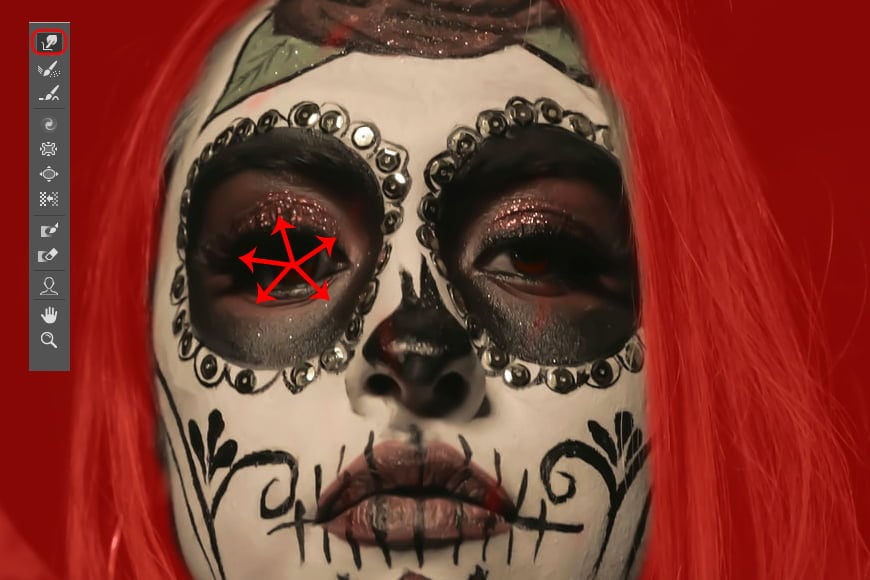
Then I used it to push the cheeks inwards, to make the face shape like a skull. This had an impact on the hair even if I tried to protect it using the freeze mask.
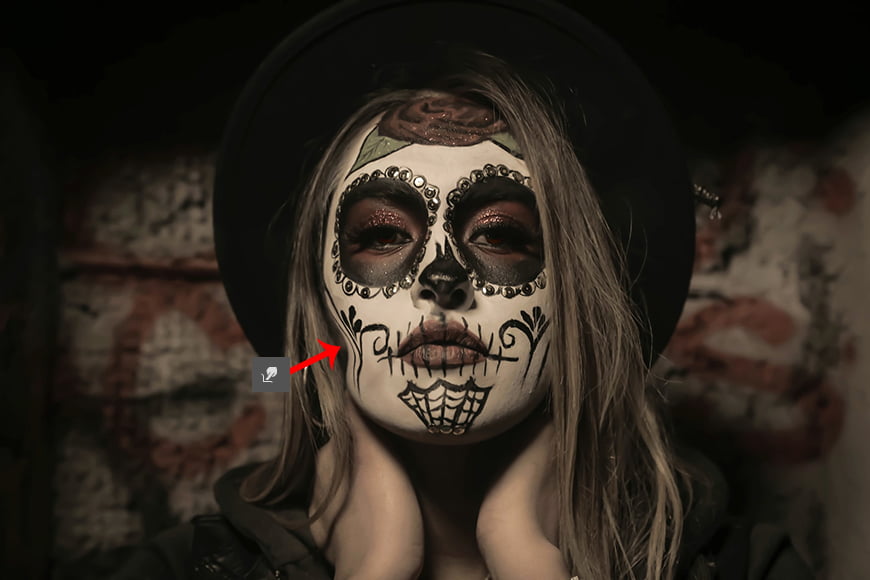
This is because Photoshop can hold the pixels you don’t want to touch, but it doesn’t make up new ones to fill the void when the originals are pushed away.
Finally, I flattened the mouth, since skulls don’t have pouty lips, and made the nose narrower.
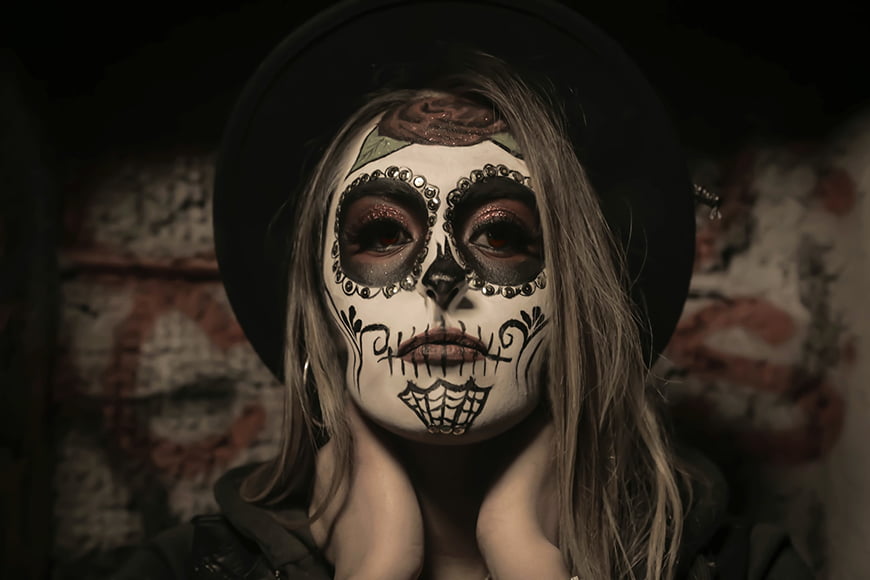
2. Using the Face-Aware Liquify Tool
Credit: Lucas Sankey
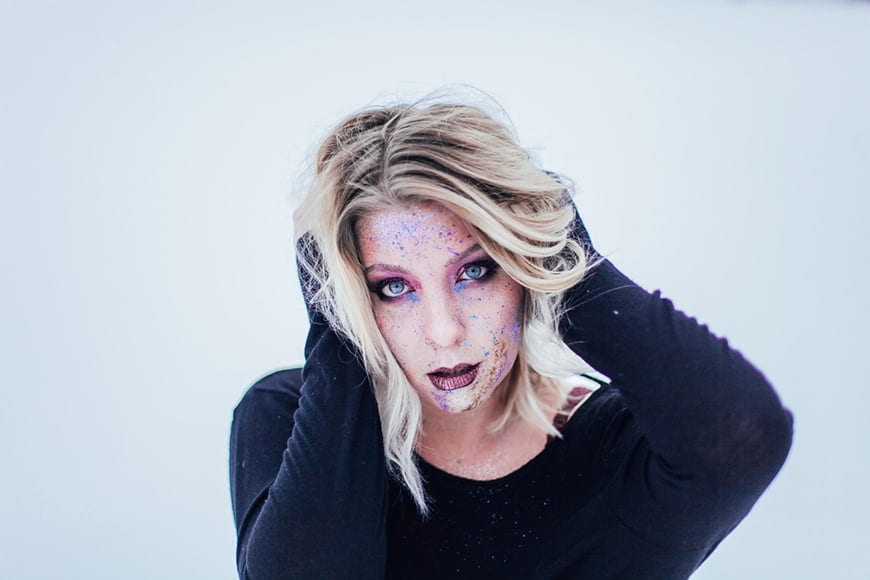
Now, let's see how to use the Liquify tool in Photoshop with face-awareness.
This time I chose a model with less makeup so that Photoshop was able to recognize the features and the Face-Aware tools became available. (I still kept the ‘fantasy-makeup' to avoid misunderstandings about facial retouching's ethics.)
Although I tried to do some of the same retouches from the previous example, the result gave the subject features that resemble more of those from the Corpse Bride in Tim Burton’s film and less of a Catrina.
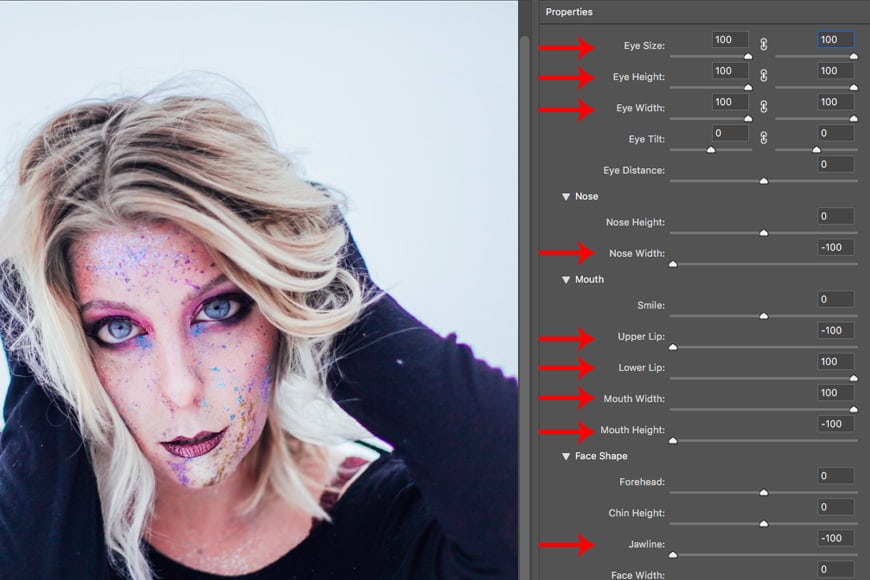
I wanted to make the eyes bigger, so I pushed the sliders to 100% in Size, Height, and Width.
So far so good, but when I tried to modify the face, it was impossible to narrow only the cheeks and accentuate the jawline.
So I had to choose between a very round face or a very narrow chin. As you can see I chose the chin to make her look more ‘cartoony'.
On the plus side, the hair didn’t get as affected by the face manipulation as the other example, despite the fact that it didn’t have a Freeze mask.
The mouth and nose were successfully flattened but overall I couldn’t make as many adjustments as I might have liked to render her more surreal. With the Face-Aware Liquify tool, it's difficult to achieve a skull-like shape with the model's head.
In the end, both techniques have their pros and cons; which one you choose is a matter of the image that you’re working with, the result you’re looking for, and your retouching skills.
How to use a Mesh to Control the Liquify Tool
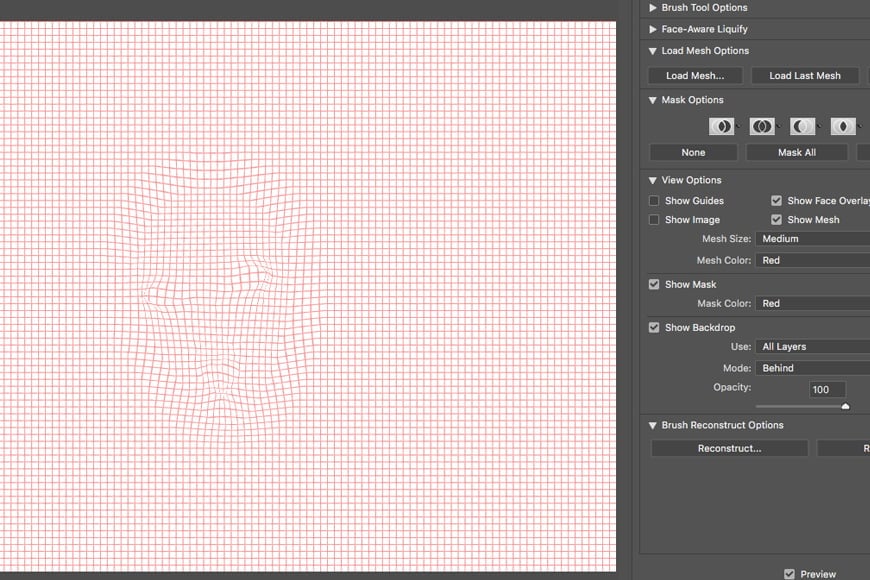
Another cool feature from the Liquify tool is the Mesh. This is sort of a grid that allows you to see the changes you’ve made by shaping itself together with the image.
Here you can see the mesh from the Face-Aware example I did before. Notice how the straight lines from the grid are molded as the liquified image.
(Learn more about grids in our article on Photoshop grids and guides.)
You can decide to have it visible all the time or just activate it when you need it by ticking the box in the View Options panel. You can also change the color to make it more or less evident.
However, the best part of it is that you can save the mesh once you’re done. You can do this in the Properties panel with the button Save Mesh.
Then, you can load it and apply it to other images. For example, different models disguised as a Catrina. You can load a previously saved mesh or the last one you used.
Photoshop Liquify Tool FAQ
Where is the Liquify tool in Photoshop?
You can find the Liquify tool by going to the Filter menu.
What is the shortcut key for Liquify in Photoshop?
Shift + Cmd + X will activate the Liquify tool. Then, inside the workspace the shortcuts for the different tools are:
W – Warp
R – Reconstruct
E – Smooth
C – Twirl
S – Pucker
B – Bloat
O – Push
F – Freeze
D – Thaw
A – Face
Why can't I Liquify in Photoshop?
If you are using the PS6 version of Photoshop, you won’t be able to apply the Liquify Filter to a Smart Object. Double-check that you’re working with a rasterized layer.
This shouldn’t be an issue in the latest versions of Photoshop CC.
How can I Liquify non destructively if I can't use Smart Objects?
Make a copy of your background by duplicating the layer. Then you'll always have the original untouched.
Final Words
As you can see, there are many ways to use the Liquify tool in Photoshop. It can be used to make subtle retouches to an image, or for bold creative adjustments.
Just remember to bear in the mind that the Liquify tool is very powerful. It’s easy to get carried away, so you need to be conscious of what you're doing.
It’s not the same to use the liquify filter to pull back a crazy curl than to completely change someone's face structure.
So, keep your retouching realistic and stay true to who the person is, as well as your own values and personal style.
Download the latest version of Adobe Photoshop to follow along with this simple tutorial.
Start a free 7-day trial today

Ana Mireles is a Mexican researcher that specializes in photography and communications for the arts and culture sector.
👋 WELCOME TO SHOTKIT!
🔥 Popular NOW:
