


How to Fix Bad Lighting in Photos on iPhone, Lightroom, Photoshop
How can you still create interesting and impactful photographs when there is bad lighting? These 8 tips will help you get great images even when light is poor.
Shotkit may earn a commission on affiliate links. Learn more.
Unless you work exclusively in the studio, you'll probably have to fix bad lighting in photos at some point in your photographic journey.
Not to worry, though. In this article, you'll find eight tips to help you with your lighting problems, whether they're caused by flare, hard shadows, or something else.
Let's get started!
9 Tips for Fixing Bad Lighting in Photos
1. Use Editing Software
-
Best Software for Fixing Bad Lighting: Luminar Neo
Even though we should try and get it right in camera, there are times when you simply have to get the shot… and this may mean taking a photo in bad lighting.
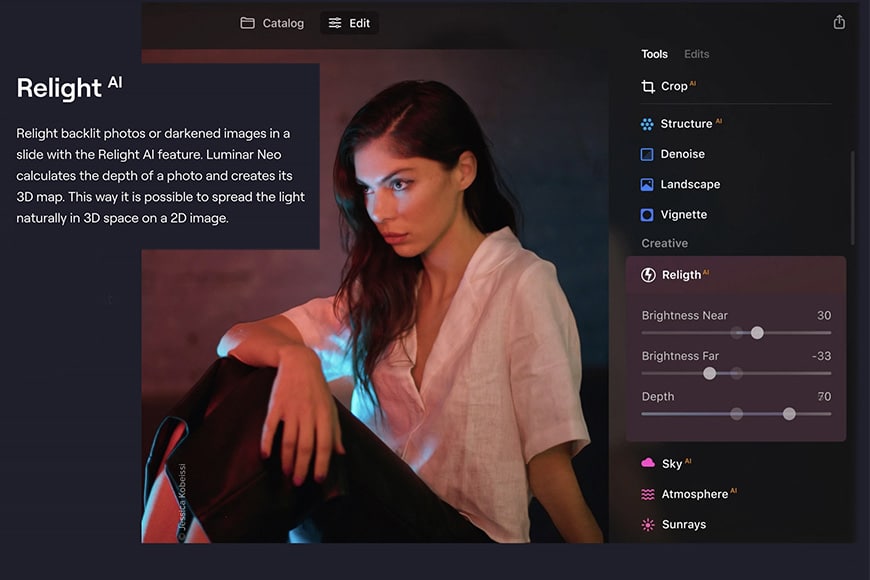
For times like these, there's an incredible tool that can come to the rescue called Relight AI – part of the Luminar Neo photo editing app, available for download here.
Among all the other features of Neo, the Relight AI tool allows you to add natural lighting effects to your image with a few slider clicks in post-production.
Artificial Intelligence creates a 3D map of your subject, allowing you to adjust the near and far brightness separately, with astounding results. There's also a Depth slider so you can fine-tune the lighting for the best results.
Learn more in our Luminar Neo review.
-
How to Fix Bad Lighting in Photoshop
With today's technology, bad photos due to bad lighting can now be saved! Here's how to edit lighting in photos.
To fix lighting in photos, you will need a powerful editing software like Photoshop. When you open a raw format file in Photoshop, it first opens in Adobe Camera Raw (ACR). So, if you have a raw file, try to recover as many details as possible there before moving on to Photoshop.
Whether you started the process in ACR or not, once you arrive in Photoshop, you can work in layers to make local adjustments and work non-destructively.
You can start by adding a Curves layer to adjust the white balance using the eyedropper tools. Then, add a Hue/Saturation adjustment layer to make the HSL adjustments in the overall photo.
For local adjustments, add a Curves adjustment layer to brighten the image – then invert the layer mask to hide this adjustment.
Using the brush tool, start to paint white the areas that you need to brighten. Then, repeat the process with a Curves adjustment layer that darkens the image.
You can add a subtle vignette effect if the background is too light. This will guide the attention toward the main subject.
Hold the Alt key and click on the eye next to the background layer to see the final image compared with the original.
-
How to Fix Bad Lighting in Lightroom
Here's how to fix bad lighting in a photo easily.
To fix bad lighting using Adobe Lightroom, start by making some basic adjustments. The Whites slider determines how bright the white point is, and the Blacks slider controls the black point. Adjust both of them to avoid clippings.
Then, move the Highlights and Shadows slider to recover as much detail as possible. You can also do these adjustments using the tone curve. A good starting point is to create a basic S curve, and then fine-tune it according to your specific photo.
Back in the Basic panel, you can use the Contrast slider to increase the contrast since you probably lost quite a bit trying to regain the details in the highlights and shadows. Also, use the Dehaze slider to add contrast and pump the colors if the image looks flat due to flare and haze.
If you feel it's necessary, you can create a vignette with a subtle radial filter.
If the image has a color cast, you can correct the white balance using the eyedropper tool and click on something that you know is white or neutral. Otherwise, use the slider to adjust the color temperature.
With Adobe Lightroom, you can also use lighting-based presets to fix bad lighting. See more here.
-
How to Fix Bad Lighting in an iPhone Photo
How to fix lighting in photos on the iPhone is easy. You can use the Auto Enhancement feature in the app Photos to fix bad lighting on your iPhone.
Simply open the image you want and tap on Edit (upper right corner). Then, tap on the magic wand icon for Auto Enhance. Swipe to adjust the intensity and click Done when you're satisfied.
Otherwise, you can manually fix the lighting using the Exposure, Brightness, Saturation, and White Balance tools.
That's how to fix bad lighting in a photo on an iPhone.
-
How to Fix a Photo that is too bright on iPhone
How to fix overexposed photos on iPhone is quite straightforward. Just open the Photos app on your iPhone and tap on the photo that is too bright (this is known as an overexposed photo).
At the bottom of the screen you should see a button that looks like a dial – tap it and select the Light tab, then choose the Brightness option.
Pull the slider backwards to make the image darker – moving it the other way will make it brighter.
- Which AI Tool Best Handles Silhouettes and Backlit Shots?
Backlit or silhouette images can be among the most difficult lighting challenges to fix.
Even if you expose carefully, it’s common to end up with a subject that’s too dark or a background that’s completely blown out.
Thankfully, modern AI editing tools have become good at recovering both.
Luminar Neo’s Relight AI remains one of the most effective for backlit portraits – it builds a 3D depth map of the image and intelligently separates foreground and background light, allowing you to brighten the subject without washing out the sky or background highlights.
Another AI-powered option worth mentioning is Aftershoot Edits, which takes a different approach.
Instead of focusing on individual sliders, Aftershoot learns your editing style, including how you balance shadows, highlights, and skin tones, and applies that consistently across entire sessions.
This is particularly useful if you regularly shoot in uneven light, such as outdoor portraits at golden hour or events with strong backlight.
Because Aftershoot’s AI has been trained on your own adjustments, it quickly recognises when an image needs exposure recovery or tone balancing and makes those changes automatically.
The result is a series of images that feel consistent and naturally lit, without the hours of manual editing normally required for backlit scenes.
If you're struggling with bad lighting in your photos and want an automated editing solution, you should download a free trial of Aftershoot and have a play around with it.
2. Use Your Camera in Manual Mode
Credit: Tobias Aeppli
While the auto modes of modern cameras can do wonders, they often fail to expose correctly when the available light is a bit more challenging.
To start with, you can change the exposure mode to get a different – and more accurate – reading of the available light. You can also set a custom white balance.
Then, you can control the exposure settings such as the shutter speed, ISO, and aperture to brighten or darken the image based on what you're trying to achieve and the results you're getting – regardless of what the camera thinks it's the “correct” exposure.
This process can help you to get better results – if not to achieve exactly what you need, at least to have more information to work with in post-production.
3. Expose for the Highlights
Credit: Lucas Piero
This theory comes from film photography but still applies to shooting digital: expose for the highlights, develop for the shadows.
This is because too much light is complicated (if not impossible) to recover in the darkroom or, in this case, in the editing process. On the other hand, the dark shadows might have noise, but they aren't as problematic.
You'll have a photo with a lot of contrast. To gain more detail, use the techniques explained in the first tip of the article using the software of your choice.
4. Use Exposure Bracketing and HDR
Setting exposure levels to make good lighting photos need not be hard.
When there's no way to make the perfect shot, you can try a technique called HDR – which stands for High Dynamic Range. Basically, it merges several images with different exposures into one image that contains all the details.
You need to use a tripod to get the same framing – otherwise, the images won't align. Then, take a photo where the highlights are well exposed, another one for the mid-tones, and a third one for the shadows (this is called exposure bracketing).
Later, put the three images together using photo editing software. There are specific programs to do this with a great deal of control, such as Aurora HDR, but you can do it with many other programs such as Photoshop or GIMP.
Also, some cameras and most smartphones can take HDR images automatically. Just be aware that this gives you no control over the final image.
5. Use Shadows Creatively

Credit: Anna Nekrashevich
When your bad lighting is due to very strong shadows, try to use those shadows as part of a creative composition. For example, change the angle of the camera to position them in a better way.
Keep in mind that you can use long shadows to create depth, or you can use them to give a mysterious touch to your picture. You can make them interact with your subject or even become the focus of your shot.
7. Use a Fill Flash
When harsh shadows are not suitable for creative photography, you can use a fill flash. In a portrait, for example, this will soften the subject's facial features.
The flash output is not as powerful as the sun, so you might want to enable high-speed sync to get a touch more contrast with the background.
Take a look at the video above for a step-by-step technique on taking photos with a fill flash and fixing bad lighting.
8. Use the Right Camera Gear
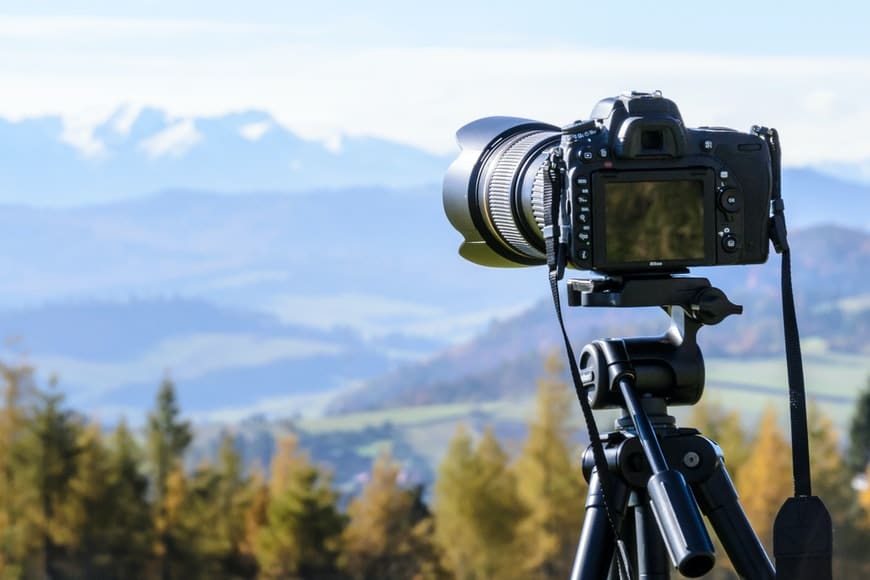
Credit: Photomix Company
Sometimes there's nothing we can do to modify the light, but there are accessories that can help in bad lighting situations.
Understanding your camera's capabilities can reduce the number of bad lighting photos.
A lens hood can help prevent lens flare from ruining your photo. Also, a polarising filter helps fix glare and unwanted reflections. It also darkens the overall image if there's too much light.
Neutral density filters are also helpful when the scene is too bright.
As you can probably guess, a graduated ND filter decreases its density towards one side of the lens. This type of filter is beneficial when there's high contrast in your image – for example when shooting a landscape where the sky is very bright but the foreground is much darker.
9. Change the Position of the Subject
Credit: Nathan Cowley
If you're taking landscape or architecture images, you need to find a way around the bad light. But if you can move your subject, you can find a way to fix the situation.
Analyse the light in your scene and identify what's causing the problem. Is the sun causing a flare? Then move your subject to avoid the sun hitting your lens. Is the light too strong? Move the subject into the shade for better photos.
Final Words
Hopefully, these tips can help you capture the best shot possible – even under a bad lighting situation.
Have you ever faced a challenging exposure? How did you overcome it? Let us know in the comments – we'd love to hear your experiences.

Check out these 8 essential tools to help you succeed as a professional photographer.
Includes limited-time discounts.

Ana Mireles is a Mexican researcher that specializes in photography and communications for the arts and culture sector.
👋 WELCOME TO SHOTKIT!
🔥 Popular NOW:
