






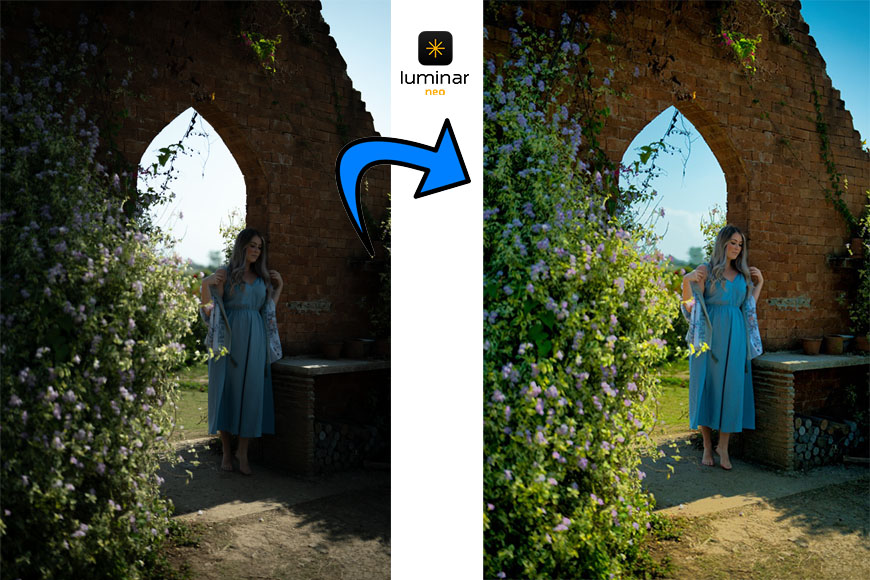
How to Fix a High Contrast Photo in Luminar Neo
Learn how to fix a high contrast photo in Luminar Neo using simple tools to recover detail, balance tones, and improve your edits.
Luminar | Software | Paid Partnership | By Ana Mireles | Last Updated: July 21, 2026
Shotkit may earn a commission on affiliate links. Learn more.
Have you ever tried to take a selfie in front of a stunning sunset and ended up as a silhouette? Or perhaps you set the exposure so you'd look OK, but then the sky loses all of its charm?
This is a very common photography frustration that we've all experienced, and it doesn't just happen in this situation.
Perhaps you're taking photos of your home to sell it, but the windows turn into white, distracting rectangles on every interior photo you take. Or maybe you photographed a beautiful landscape where you can't see anything in the foreground because it's completely black.


Unlock faster, more creative photo editing with Luminar Neo's powerful AI tools.
Photographing scenes with such extreme differences in light isn't easy. Whether it's because of your camera's limitations or the way the photo was taken, the result can be disappointing.
Not to worry, though. In this article, I'll show you how to fix a high-contrast photo using Luminar Neo. It offers intuitive tools that don't require any prior editing experience, and advanced features for professional-grade precision.
So, regardless of your editing skill level, this article can help you save some of your most precious memories.
What is Contrast in Photography?

Contrast in photography can be a deliberate choice. Credit: Mark_jp
If you want to successfully fix a high-contrast photograph, it's important to understand the basics. Otherwise, you'll keep running into obstacles you won't know how to tackle because each photo will need a different approach.
In photography, the term contrast can refer to a difference in color or light. In this article, I'll be talking about light contrast – the difference between the brightest and the darkest parts of an image.
A balanced photo usually has a wide range of tones between these two extremes, while a high contrast photo has a much stronger separation between them.
A high contrast image isn't automatically a bad thing. Photographers often create this look intentionally to add drama, emphasize a subject, or support the story they want to tell.
The problem with high contrast is when the camera's sensor isn't capable of capturing enough detail in the highlights, the shadows, or both. In this case, a good editing workflow can make a big difference.
How to Fix a High Contrast Photo in Luminar Neo
Let's master the art of fixing a high-contrast photo using Luminar Neo.
For this example, I'll use a photograph where the sky is too bright, and the foreground is too dark. This is one of the most common high-contrast situations, especially in outdoor photography.
However, the idea is to show you a workflow that can work for other situations as well. So, don't take everything to the letter or expect specific numbers to follow as if it were a cooking recipe.
If your image has a different issue that involves high contrast, you can still use this workflow.
It's important to note that raw files offer more flexibility for recovering details.
Step 1 – Assess the image
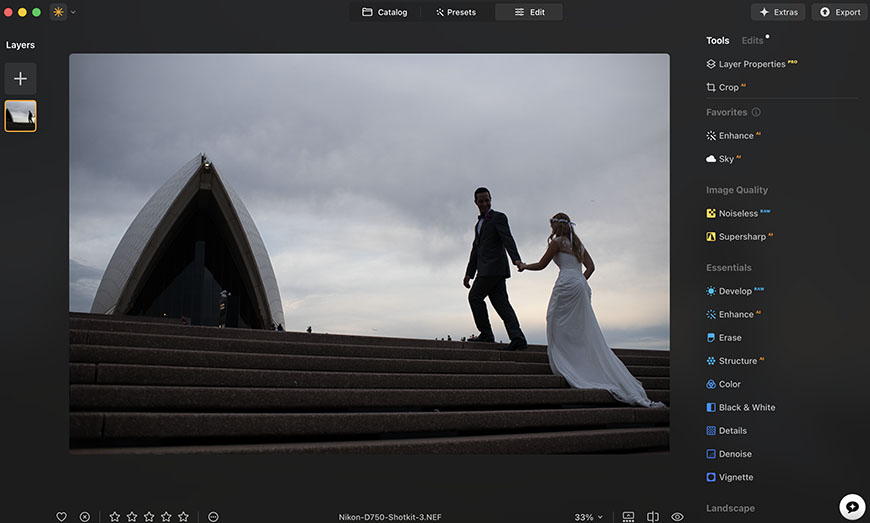
The first thing you need to know is what needs fixing. For this, you need to analyze your photo carefully.
The point is to assess the areas where you need to intervene. For example, are there clouds in the sky or details in the highlights? Can you identify texture and shapes in the shadow areas? Is the subject unevenly lit?
All these things will help you decide where to focus your edits.
In Luminar Neo, you can zoom in to get a better idea of what you have to work with.
Step 2 – Use the Smart Contrast slider
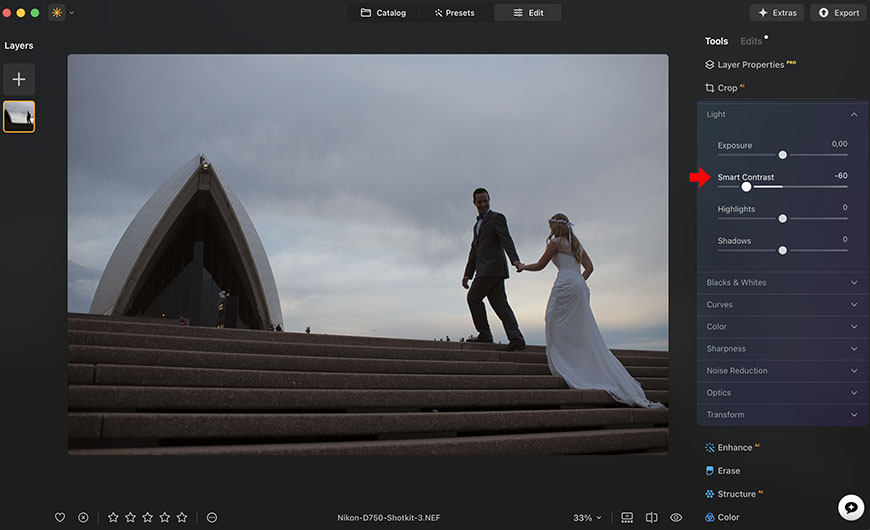
I suggest starting broad, then getting specific. This is because Luminar Neo has a great feature called Smart Contrast inside the Develop panel.
This slider adjusts the relationship between bright and dark areas more intelligently than the average Contrast slider in other software.
Smart Contrast is designed to achieve a more balanced image while still preserving the details. Since we're working with a high-contrast image, move the slider to the left to reduce the brightness difference.
As you move the slider, pay attention to both shadows and highlights. Stop when you notice more details appearing on both sides of the spectrum, but before the image starts to look flat.
Step 3 – Recover the highlights

Once we've tackled the overall contrast, let's start fine-tuning. To start, let's fix the brightest areas of the image by using the Highlights slider. This is also in the Develop panel.
Since you want to recover details, you should move the slider to the left. Make small adjustments and stop when the image no longer looks natural; you don't want to end up with a ‘bad HDR' look.
Remember that you can always come back and make further adjustments if necessary.
Step 4 – Bring back details in the shadows

Now, let's move on to the darker areas. Still in the Develop panel, use the Shadows slider and move it to the right to increase the luminosity and make any details that might be hiding there more visible.
Again, you should make small adjustments so the image doesn't look flat. There should still be enough difference between the highlights and shadows to preserve depth.
Step 5 – Adjust overall exposure

Once you've worked on the shadows and highlights, step back and analyze the image as a whole. If it still feels either too dark or too bright, use the Exposure slider to adjust it.
Moving the slider to the left will darken the image, while moving it to the right will increase the exposure, making it brighter. After this, you may want to go back to the Highlights to make small adjustments.
Advanced Editing
So far, we've made the basic adjustments, and as you can see, the photo is already much better. Just this is enough for most users to fix a high-contrast photo.
However, whether it's because the image doesn't look quite right yet, or because you want more control, let's see some advanced editing.
Step 6 – Refine with Supercontrast
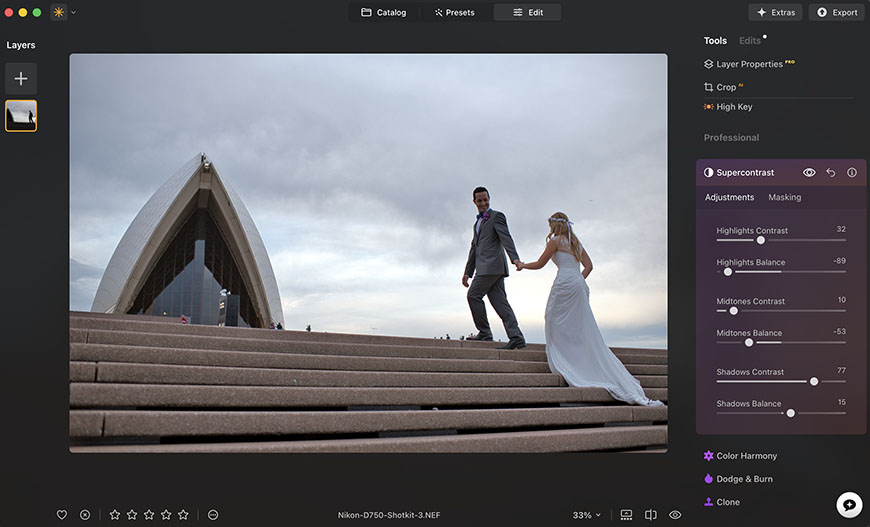
If things are looking better overall but you need more targeted adjustments using the same easy-to-use slider-based method, it's time to try Supercontrast.
To find this tool, you need to leave the Essentials panel and go to the Professional tools.
Supercontrast gives you more control, with three sliders to adjust contrast and three for balance. Using them, you can separately adjust the contrast and balance of the highlights, midtones, and shadows.
Consider that the Contrast sliders adjust how strong the contrast is in that specific area, while the Balance controls how much of the tonal range is affected by the adjustments.
Step 7 – Try Light Depth
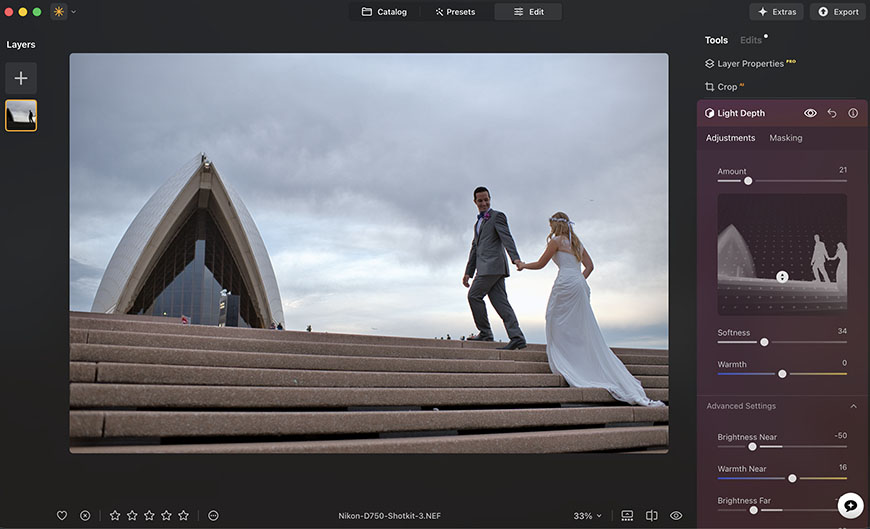
By now, the light in your image should be quite balanced, and you should have recovered all the detail that was lost due to excessive contrast.
However, when the exposure difference between highlights and shadows is too great to start with, bringing back details often comes at the cost of depth.
So, if your image is looking dull at this point, let's give it some extra dimension.
Move on to the Creative tools panel and find Light Depth. This tool analyses the different areas of your image and creates a map of them. As you move from foreground to background, you can adjust the lighting and bring back some three-dimensional feeling without losing the details you've been recovering.
Light Depth is fairly intuitive, but if you want to learn more, check out our dedicated article.
Step 8 – Make local adjustments

While reviewing your edits, you might notice that something in your image doesn't fit with the rest or doesn't look the way you want it to. That's where the local adjustments come in.
If you're already happy with the overall look of your photo, you don't want to make any global adjustments that could ruin all your hard work. Instead, you want to target the specific area you're not satisfied with – this is where masking comes in.
All of Luminar Neo's editing tools have a Masking feature that lets you select parts of the image and edit them independently of the rest of the scene.
In this example, I find that my subjects ended up with an unnatural color saturation. So, I can go to the Color tool on the Develop panel and click on Masking > Mask AI.
The AI will analyze the image and offer me different options based on the elements it found. In this case, I'll select Human since I want to work on my subjects.
Then I simply lower the Saturation and Vibrance sliders until I feel they match the background's saturation. I also went back to the Develop tool and masked only the sky to make some final exposure adjustments. Take a look at the before-and-after results.


It's important to note that you don't have to wait until the end of the workflow to do this. You can use masks at any time and on every tool if you feel it's necessary to make a local adjustment.
Curves: the ‘Manual' Alternative
All the tools included in the workflow I showed you earlier are designed to help you adjust the contrast of your photo in an intuitive and efficient way. This is because they all use sliders, making them accessible to everyone, regardless of skill level.
However, there's one tool I couldn't leave out of this article in case you want a more hands-on approach: Curves.
The Curves tool is designed to give you full control over your photo's brightness levels. Instead of working globally or dividing the image into three tonal zones like other tools, Curves allows you to set specific control points to adjust.
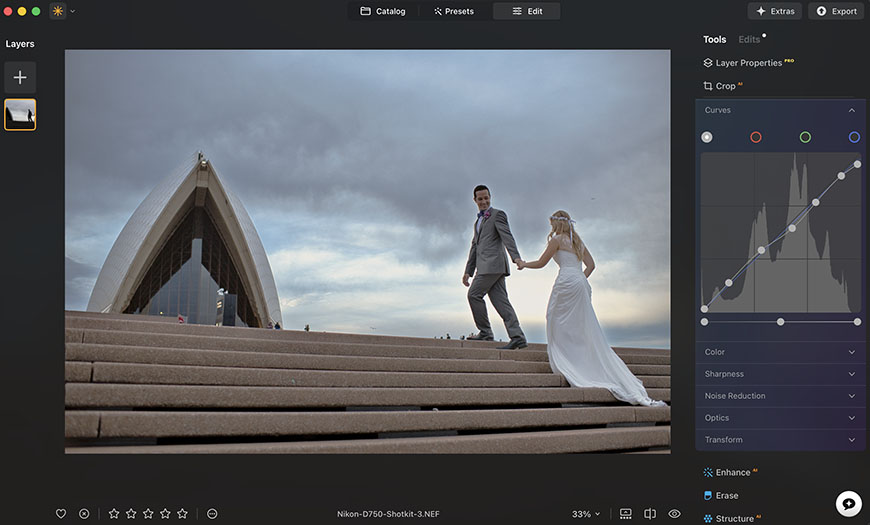
These control points are added along a graph and can be pulled up or down; you can add as many as you like. Also, you can adjust the lowest and highest points of the graph to set the brightest and darkest points.
If you're new to this it may sound confusing, and seeing and moving away from the sliders can be daunting, but you don't have to create a complex graph to see a difference. In many cases, all you need are small adjustments – and remember, you can always refresh and start again by clicking the back arrow.
To brighten the dark areas, lift the lower part of the graph. Following the same logic, you need to lower the higher part of the graph to darken the highlights.
Everything in the middle represents the tonal range in your photograph. Simply click anywhere on the graph and drag it up or down to see the effect.
It may take some time to master this tool, but that's OK; there's no rush and no magic formula. Make small, targeted adjustments and pay attention to the changes. In time, it will come naturally.

Ana Mireles is a Mexican researcher that specializes in photography and communications for the arts and culture sector.
👋 WELCOME TO SHOTKIT!
🔥 Popular NOW: