






How to Use the Vignette Tool in Luminar Neo
Master the Vignette tool in Luminar Neo with step-by-step tips for adjusting size, feathering, and subject focus.
Luminar | Software | Paid Partnership | By Ana Mireles | Last Updated: July 21, 2026
Shotkit may earn a commission on affiliate links. Learn more.
The vignette is one of those photographic effects that can easily become gimmicky, and that's why many photographers overlook it.
However, when applied with intent and a subtle touch, it becomes a powerful way to enhance your images and give them that extra impact.
Luminar Neo makes creating natural-looking vignettes super easy. Its dedicated Vignette tool offers precise controls to fine-tune every aspect of the effect, so you can achieve exactly the look you want.


Create better photos faster using time-saving AI-powered tools and intuitive editing workflows.
In this guide, you'll learn what a vignette is, why photographers use it, how each adjustment in Luminar Neo's Vignette tool works, and how to combine those controls in a real-world editing example.
If you're ready to see what a vignette can do to your images, let's get started.
What is a Vignette in Photography?
Before jumping into how easy it is to add a vignette to an image using Luminar Neo, I think it’s helpful to understand what a vignette actually is and why photographers use it in their editing workflows.
Don’t worry, I won’t go too deep into the technicalities; you’ve probably already seen vignettes in countless photos – maybe without even realizing it. I just want to give you some context so you can use this tool more effectively.
Understanding the Vignette Effect
Let’s start by saying that not all vignettes are added intentionally during editing. Sometimes a vignette appears naturally because of the lens used to capture a photo.
This is known as lens vignetting, and it causes the corners of an image to appear slightly darker than the center. This effect comes from film photography, where it was often considered an optical imperfection, rather than a creative effect.
Over the years, however, photographers began to appreciate the vignette, and it transitioned into digital photography as a post-production effect. Now, it can be added creatively to achieve different things, which I’ll discuss in the next section.
Most vignettes work by slightly darkening the corners and outer edges of a photo; think of it as a visual frame. However, it can also be used to brighten the edges, depending on what the photographer is trying to achieve.
You can learn more about the different types of vignettes in our guide to vignetting.
Why Photographers Use Vignettes
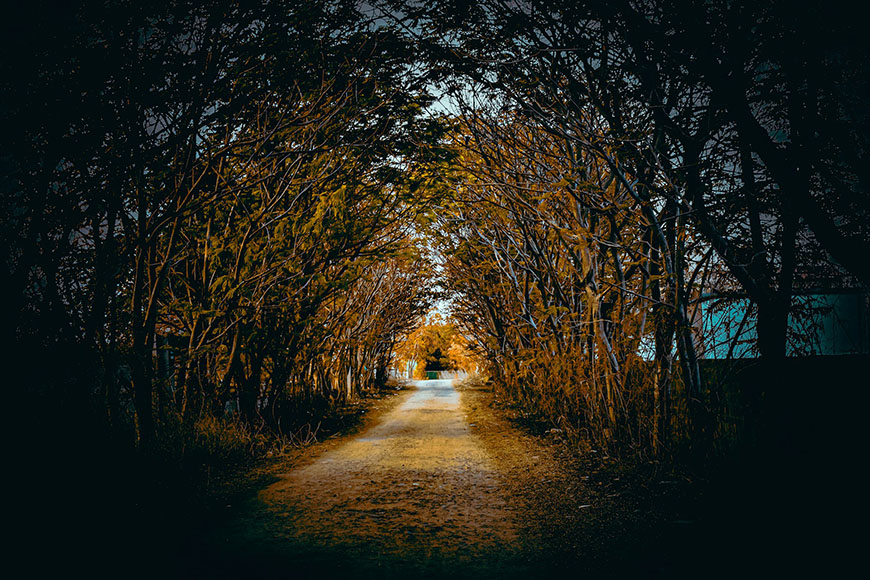
Credit: Vinay Manda
There are plenty of reasons to add a vignette to your editing workflow. Here are a few of the most popular.
Draw attention to the main subject
This is probably the most common use of a vignette in photo editing. As our eyes are naturally drawn to brighter areas, darkening the edges creates a gentle pull toward the center of the frame.
Without being too explicit, you’re drawing the viewer’s attention to your subject, whether it’s a person, an animal, or the main element in a landscape.
Reduce distractions near the edges
Sometimes the edges of a photo contain elements that aren’t so relevant to the story we’re telling with our image, whether these are bright patches of sky, random objects, or busy backgrounds.
A subtle vignette can help tone down those distractions so the viewer remains focused without you having to actually remove anything from the original shot.
Create mood and atmosphere
Vignettes can also influence the overall feeling of an image. The most common use in this regard is to add a vintage mood, but it can also create many others such as drama, mystery, or intimacy.
In fact, this is where the bright vignette comes in, as it can produce a soft, dreamy, or high-key look depending on the style of the photograph.
Add depth and dimension
Photos are two-dimensional, and it’s the photographer's skill that makes them feel three-dimensional. This is achieved by experimenting with lights and shadows.
This is why a dark or a bright vignette can help you add visual depth to your images.
Using the Vignette Tool in Luminar Neo
Now that you know what a vignette is and how to use it to your advantage, let’s see how to add one in Luminar Neo.
One of the great things about it is that it’s not only easy to use but also gives you plenty of flexibility to make the most of the effect. So, let’s start by finding the vignette tool in Luminar Neo.
Where is the Vignette in Luminar Neo
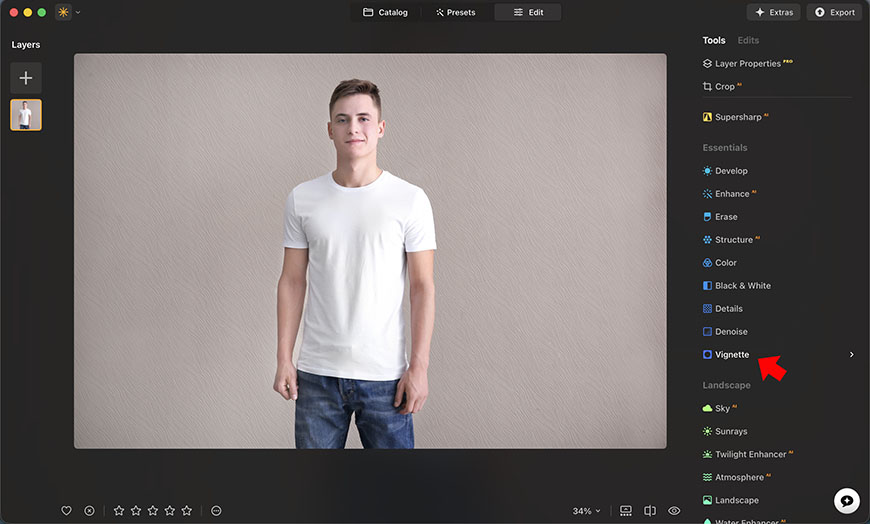
Once you've imported your photo into Luminar Neo, keep it selected in the Catalog and switch to the Edit tab.
Then scroll through the tools in the Essentials section until you find the Vignette tool, and click it. Now, you’ll see the Vignette tool panel open, with all the controls you need to adjust it just the way you want.
Let’s see all the controls of the Vignette tool in detail.
The Vignette Controls Explained
Something I really love about the Vignette tool in Luminar Neo is that, even with multiple controls, it doesn’t have a steep learning curve.
Let me show you how intuitive each of them is and how you can fine-tune the effect to achieve exactly what you’re after.
I've chosen a photograph where the effect will be immediately evident; it doesn't mean it needs a vignette or that it even looks good. So please, bear with me.
I've also exaggerated the amount of each adjustment; in a real-life edit, less is more. I'll show you such an example later in the article.
Choose Subject
This is the feature I believe makes Luminar Neo stand out the most when it comes to adding vignettes. Instead of being limited to a centred vignette, you can choose where to place it.

Simply click on Choose Subject, then click anywhere on your photo – that will be the center of the vignette. This is especially useful if you’re using the rule of thirds or another composition where the main subject isn’t in the center of the frame.
Amount
The Amount slider controls the strength of the vignette, in other words, how dark or how bright it’s going to be.
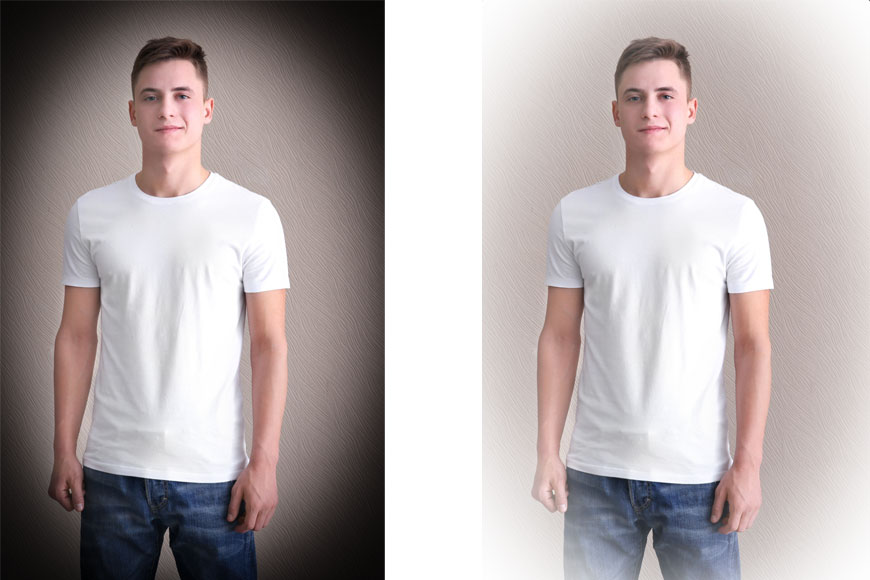
If you move the slider to the left, toward the negative values, you’ll darken the edges and achieve a traditional vignette effect. Instead, if you move it to the right, you’ll have positive values, which means you’re adding a bright vignette.
Size
The size slider determines how much of the image is affected by the vignette.
This may sound counterintuitive to some of you; I know it did to me. The smaller the value, the bigger the edges and vice versa. This is because a small vignette means it’s tighter to the subject.
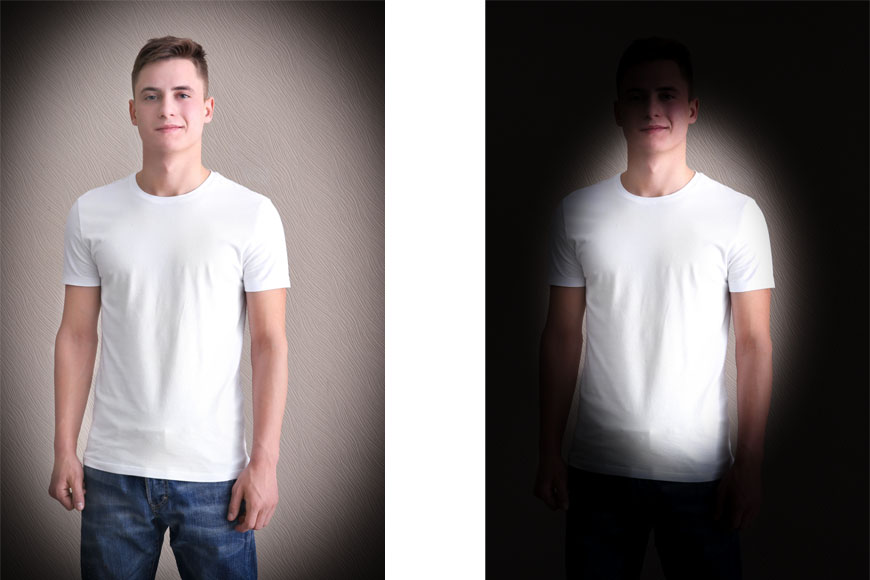
So, drag the slider to the left to affect a larger portion of the image, and to the right for a smaller portion. There isn’t a right or wrong number; it depends on each image and what you want to achieve. So, just move it around until you find it looks OK.
You may need to reposition the center to get it just right.
Advanced Vignette controls
So far, we’ve talked about the basic controls which are visible as soon as you open the Vignette tool in Luminar Neo. However, you’ll notice there’s another section called Advanced Controls at the bottom – these are the ones we’re going to see now.
To display them, click on the arrow next to Advanced Controls.
Mode
The first thing you see is the Mode control. By default, you’ll see it’s set to Post-crop, but if you open the menu by clicking the arrow, you’ll also see the Pre-crop option.

The size of the vignette is the same in both examples. However, the left image is set to Pre-crop and the right one to Post-crop.
If you’re not cropping your photo, whichever option you select will look the same. Otherwise, the mode indicates whether to use the original edges (Pre-crop) or the new ones (Post-crop) as the starting point.
This mostly impacts the effect of the Size slider. The great thing is that you can change the Mode at any point of the editing process if you change your mind.
Roundness
The Roundness slider changes the shape of the vignette. Depending on the image, you may prefer to keep the vignette circular or elongate it.

Simply move the slider to make it rounder or wider until you like the effect that you’re getting.
For portraits, it’s more common to go for a circular vignette that highlights the face, while landscapes often benefit from a wider one. Experiment and see which one you prefer.
Feather
The Feather slider controls how smooth the transition is from the vignette into the image.
You should use this slider in combination with the Size one. This is because a wider transition will affect more of the image, so you might want to go back and diminish the size.
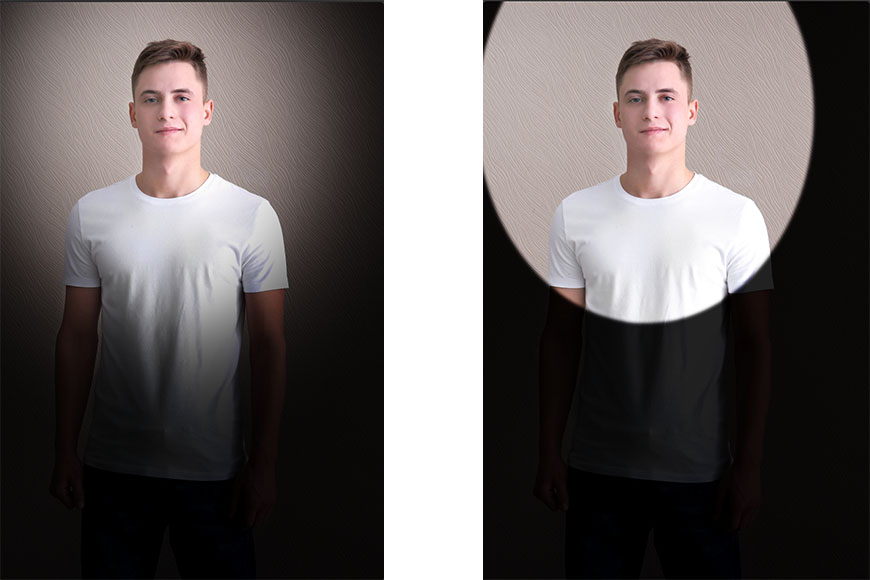
The opposite may also happen: if you prefer a harder edge, you might find the original size you chose to be smaller than you thought.
Remember that a higher Feather value creates a soft, natural transition, while lower values create harder edges that may be more dramatic but less realistic.
Inner light
The Inner Light doesn’t affect the vignette itself. Instead, it brightens the center of the image, which emphasizes the effect of the vignette.
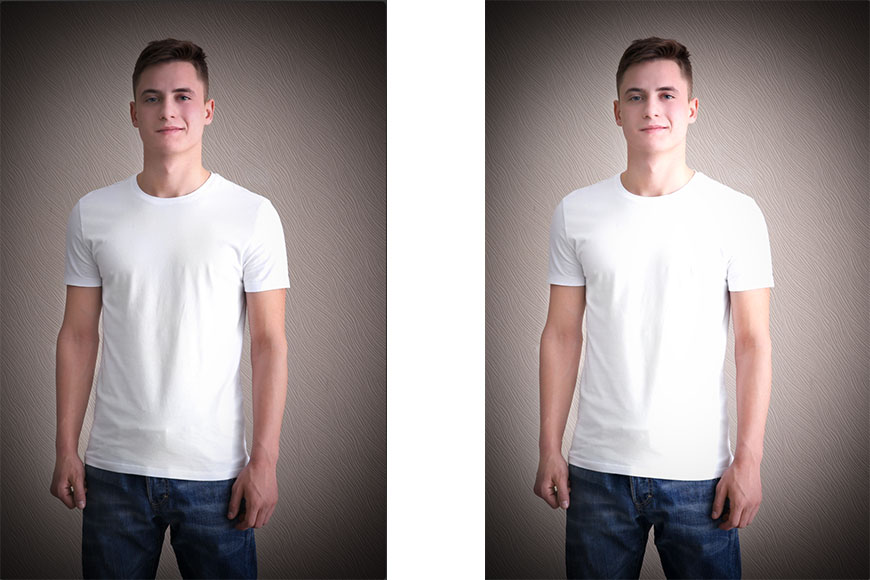
This effect works whether you’re adding a dark or a bright vignette.
How to Use the Vignette Tool in Luminar Neo – A Real Example
Ok, now that you know what a vignette is, when to add it to your workflow, and what each adjustment does, let's put it all together.
In this example, we're putting everything we've discussed into practice so you can see how I edit a photo step by step and the impact on the final look.
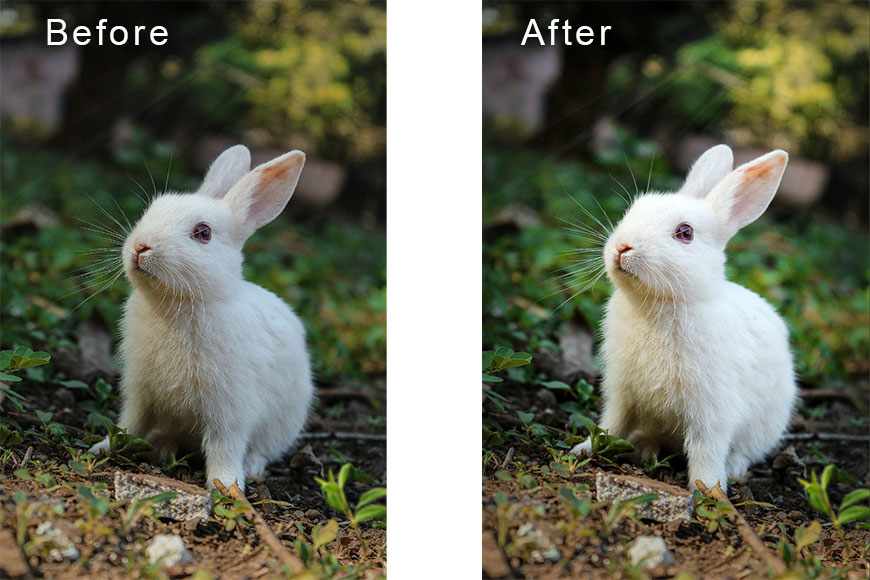
Look at the before-and-after images above – the only editing tool I used was the vignette, and you can see how much it made the subject pop.
Here are the steps I followed:
- Choose subject: I positioned the center on the rabbit's eye.
- I lowered the Amount to -42.
- I left the Size at 0.
- I lowered the Roundness to -53.
- I moved the Feather slider to 92.
- I increased the inner light to 66.
I hope this guide has shown you how powerful the Vignette tool can be when used with purpose. Rather than simply darkening the edges of a photo, a well-crafted vignette helps guide the viewer's eye, enhance the mood, and strengthen your composition.
Experiment with the settings and find your own way to use it in your creative workflow.

Ana Mireles is a Mexican researcher that specializes in photography and communications for the arts and culture sector.
👋 WELCOME TO SHOTKIT!
🔥 Popular NOW: