


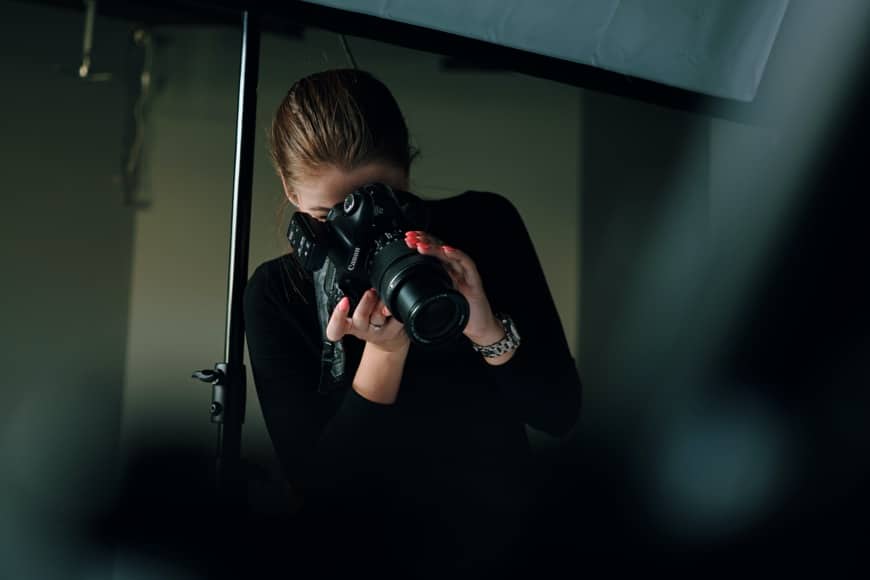
How to Set up a Home Photography Studio (Cheap Way to Do it)
Looking for ideas on setting up a DIY home photography studio? Whether you're shooting products, food or something else, check out this guide with 8 top tips.
Learn | Photography Guides | By Greg Cromie
Shotkit may earn a commission on affiliate links. Learn more.
A home photography studio doesn't have to be a stylish, cavernous, hipster hangout!
You can create an excellent home photography studio in a spare room or the corner of your living room.
Not everyone has the budget for photo studio rental, which is where this guide comes in handy.
We'll show you how easy it is to set up a home studio and share an affordable shopping list of equipment to get started.
We'll also cover how to optimise the existing space you have and provide budget-friendly options for lighting kits, and share 8 useful home photo studio tips.
Let's dive in and take a look!
What Equipment Do I Need for a Home Photography Studio?
One of the biggest questions I get asked is, “How much does it cost to set up a photography studio?”.
I annoyingly answer, “What do you intend to take photos of?”
What you need and spend on a home photo studio depends on the available space and what you want to shoot. The same applies to professional photographers.
If you already have a camera and assortment of lenses, then your shopping list is going to be smaller than someone who's starting from scratch.
A professional photographer could spend tens of thousands of dollars on a home studio set-up – they get paid a lot for this kind of work.
If you're an enthusiast on a modest budget and already have a decent camera and set of lenses, you can cheaply complete your home photo studio setup.
There's no easy answer to the ‘cost' question as you can buy expensive or cheap versions of everything – sometimes you'll get a bargain second hand.
Below is a shopping list of the main equipment needed for a home photo studio and the approximate cost.
Camera Gear
- Camera – The best gear for a home photo studio depends on the style and quality of work. The needs of an enthusiast differ from a professional commercial photographer. You'll need an interchangeable lens DSLR or mirrorless body with manual controls for shutter speed, ISO, and exposure compensation. What's more, it needs to perform well in low light conditions.
- Lens – Many factors determine the best lens for a home studio setup. Choose a zoom lens with a range of 24-70mm for general purpose photography. You can expand later with an 85mm prime for portrait and product photography. Studio work such as portraits requires a wide aperture to achieve a narrow depth of field. Anything that has an f/2 aperture or lower will work. Learn more in our guide to the best lenses for studio photography.
- Camera Gear Cost – An enthusiast could expect to pay between $1500 and $3000 (USD) for a camera and wide aperture 24-70 lens. A professional kit would be between $5000 and $8000 for the same pro-level combo.
Studio Gear
- Backdrop – When taking portraits or body shots, you'll need a backdrop to provide a clean and neutral background. These come in many forms and sizes, from small pop up version to larger rolls – you'll need a sturdy backdrop stand in this case.
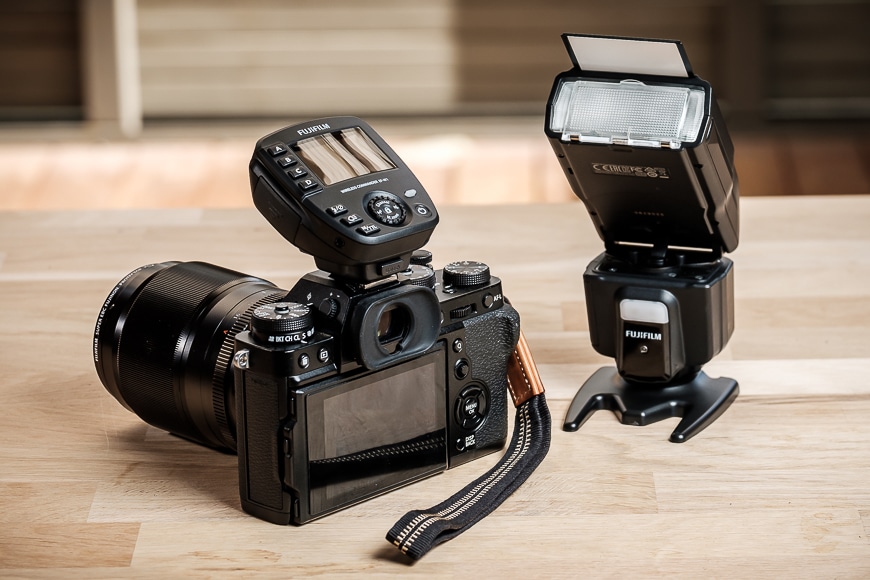
- Lighting – When setting up a home photo studio, one of the most significant investments aside from a camera is the studio lighting setup. You'll need at least one Speedlight that fires via a remote trigger. You may need multiple lighting options depending on the work you do.
- Light Stand – To control the direction of multiple lights, you'll need height-adjustable light stands to place around your studio.
- Light Modifier – Softboxes, beauty dishes and umbrellas are light modifiers that mount to a Speedlight and modify the strength and appearance of light.
- Computer and Software – A computer is an essential part of the home photography studio kit. You'll need one powerful enough to manage RAW image files and editing software such as Adobe Lightroom and Photoshop. Laptops are obviously handy if you move around a lot, but tend to cost much more than desktops.
- Storage – With limited internal storage, consider an external storage drive or cloud storage for your images. Cloud storage keeps a copy of images off-site should anything ever happen to your computer.
- Power Supply – Set up an area to power and charge all of your gear. A powerboard that supports 4-6 standard outlets and a couple of USB ports is ideal.
- Studio Gear Cost – An enthusiast could keep costs low with a lot of DIY hacks. They could expect to pay US$300 – $500 for a single Speedlight, remote trigger, softbox and stand. At a pro-level, the cost of lights, background and additional photo equipment could exceed $2000 to $5000 for a multi strobe kit.
8 Tips on Making a DIY Home Photography Studio Setup
Wondering how you can make a photography studio at home? Here are some tips for doing it on a budget.
1. Decide Your Home Photography Studio Layout
Before we cover how to set up a home photography studio setup, let's talk about location.
Regardless of your living situation, you need a space to set up a home photography studio. Not many people can afford to build an extension for a home studio.
Like me, you'll probably have to make the most of what's available – in most cases, a studio mingles with a living room. Or, if you happen to have a spare room, you have a head start on the layout of your DIY home studio.
Keep in mind that having access to a window and natural light often avoids the need for an expensive lighting setup. With window light, there's enough ambient light for genres such as portraiture and product photography.
- Small Space
If you have a small space, such as one end of the living room, you can create a versatile studio location. While you may not have the room to do full-body fashion photography, there are plenty of other genres you can tackle.
Photographing portraits, products and still-life don't require a massive amount of floor space. As long as you have a way to hang a backdrop or a work surface to set up on, you'll make it work.
Having access to natural light from a window is ideal, but you may need to consider additional lighting equipment to compensate if you don't.
- Large Space
If you have access to a larger space such as a spare bedroom, second living space or even a garage, you can expand your portfolio of studio work.
Photographing oversized consumer products such as furniture or electronics needs a bigger space. The same applies to full-height maternity, family and fashion photography with standing and posing models.
With a big location comes the need for giant backdrops and possibly additional lighting solutions. Especially as the subjects you have in the frame take up more space.
You'll also need to consider what the existing floor covering is and if this will appear in your photos.
Remember that to control exposure in a larger space, you'll need more lights.
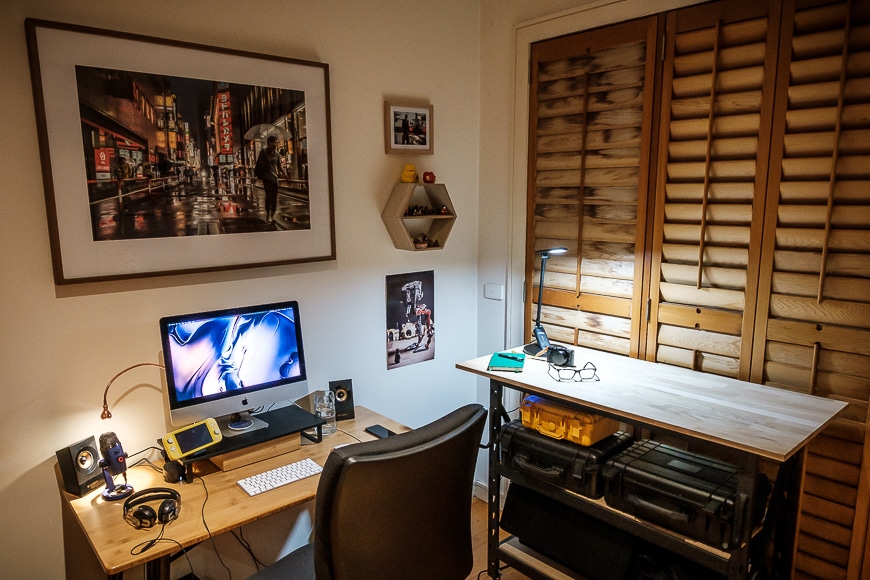
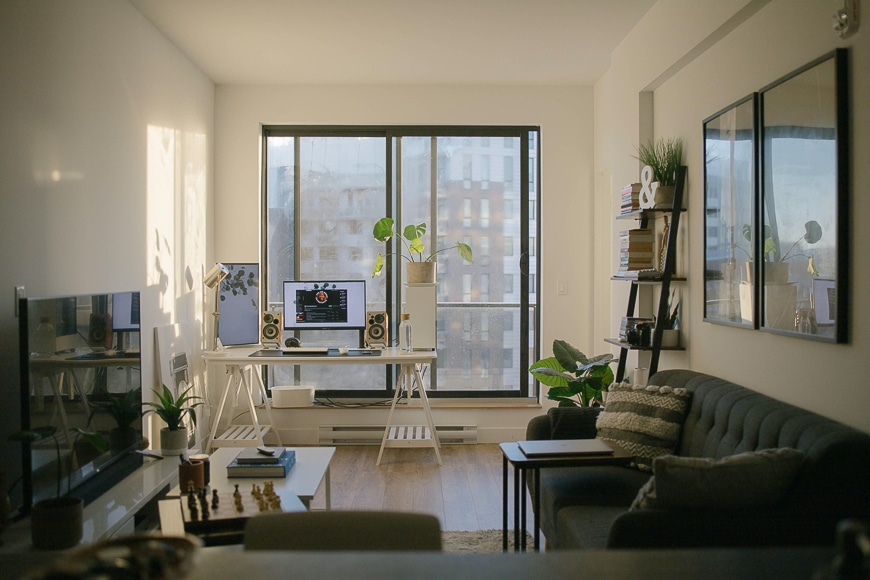
2. Optimise Your Workspace
A home photography studio needs a computer to edit photos – at a minimum. Any computer is going to need a desk or work surface to make the process accessible and comfortable.
Simple computer desks are cheap, but you could also build a DIY workstation. A purpose-built workstation is ideal if you have limited space and want something that you can move out of the way.
Consider a stand-up workbench on castors (small multidirectional wheels) so you can move it out of the way when your studio space becomes your living space at the end of the day.
Creating a DIY workstation means that you can tailor it to suit your needs and style of work.
You can also move it next to windows for natural light. If you can move it outside, the natural light is even better than the window light.
The most significant benefit of a stand-up desk is that it saves you from getting back strain, especially during extended shoots.
Having your workstation next to a window also helps when you have to do fiddly work like cleaning lenses.
Finally, with limited storage, build shelves under your work surface to store your gear. If you're like me and lack carpentry skills, visit your local hardware store for some DIY self-assemble options.
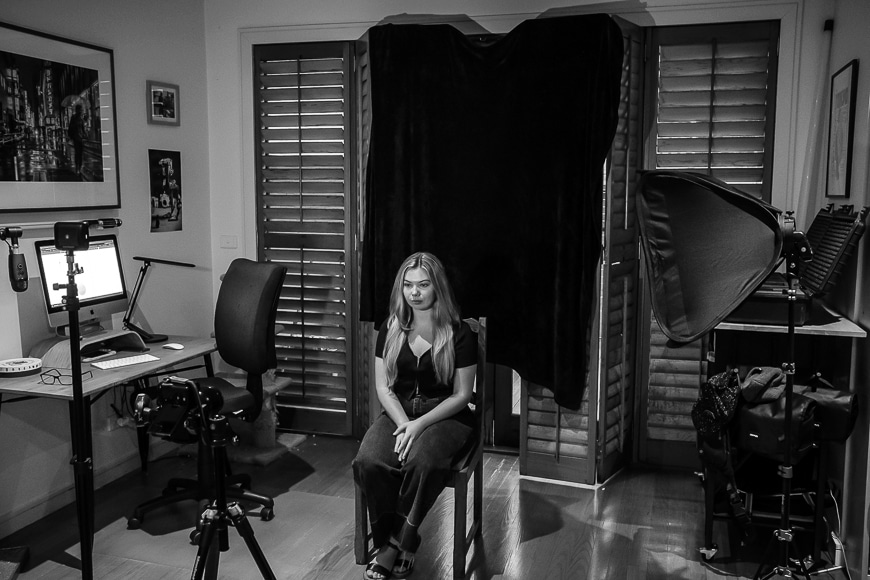
If shooting portrait or headshot images, have them sit on a barstool so you and the model are at eye level and you can comfortably stand while you shoot.
3. Decorate For Everyone's Comfort
Now that you've optimised the workspace for yourself, it's time to consider your clients and models.
If you're setting up a home studio to start a photography business, consider decorating it to suit the job.
I don't mean that you have to move all of your furniture out and make the kids stay in the basement. But set it up like a neat and clean business that's welcoming if you intend to have clients visit.
Keep in mind, you want to make a good impression for your business when clients and models come to your home. Print, frame, and hang some of your best works around the house – or at least somewhere near your workspace.
If you're working from your garage or basement, decorate it to feel welcoming. Also, consider temperature control to make it a comfortable room to spend time in.
One of the benefits of working from home is that you've got many creature comforts already.
Furniture, climate control, and of course coffee! – all essential if you're working from a spare room, garage or large basement.
If you're shooting portrait or fashion images, have somewhere comfortable and private for models to change.
- Check out these studio portrait photography tips and ideas.
4. Use Studio Lighting
In the case of studio photography, you'll need to get a lighting kit if you don't already have one.
The kind of photography that takes place in a studio benefits considerably from studio lighting gear. Plus, being in a studio usually means that there's less light available to get a correct exposure in your images.
- Single Speedlight
If you're operating on a budget, a single on-camera flash unit or Speedlight like these or a constant LED light source is an excellent place to start. For product photography, tiny LED lights are cheap and sit on tabletop tripods.
The on-camera option works well but needs a diffuser to soften the light. Otherwise, direct flash can wash out a subject and create harsh shadows.
- Multiple Speedlights
If you have a bit more cash, consider investing in an off-camera Speedlight and a remote trigger.
You place the flash unit away from your kit so you can control the direction of the light.
The remote trigger connects to the hot shoe on top of your camera and wirelessly communicates with the flash. When you shoot the photo, the flash triggers instantaneously.
With an off-camera flash and a remote trigger, you can set up multiple speedlights around the studio, and the trigger will control all of them together.
Plus, you can control the individual exposure values of each of the speedlights without moving away from your camera.
- Strobes
Finally, you can purchase strobe lights that work in a similar way to speedlights – they use mains power. As a result, strobes generate stronger light and keep up with a fast rate of triggers.
5. Add Light Modifiers

Regardless of how many speedlights you use to control the exposure, you'll need some form of light modifier for each. Modifiers control the direction, shape and softness of the light.
The three most common are the softbox, beauty dish and umbrella. Let's take a look at each:
- Softbox – A collapsable material box that's square, rectangular or octagonal. The inside consists of reflective material, and there's an open-end that faces the subject. You attach an opaque white fabric across the open end and the Speedlight sits inside the softbox. When triggered, the light hits the inside of the opaque material and casts a softer glow on the subject. You can also add additional layers of opaque material for softer light.
- Beauty Dish – A beauty dish is a lot like a softbox but usually smaller and rectangular. They're made from a soft or rigid material and have an open face covered in an opaque filter – or left open. A beauty dish doesn't soften the light as much as a softbox and results in a more dynamic light.
- Umbrella – An umbrella looks just like a wet-weather umbrella and comes in two styles. The first is black on the outside and reflective on the inside. Rather than pointing the Speedlight or strobe at the open end, you point it into the umbrella, and the reflective material bounces the light out. The other style is an opaque white umbrella that you fire the Speedlight into, and it spreads the illumination evenly. Both types of umbrella are ideal for casting illumination on a larger area.
If shooting off-camera with a modifier, you'll need a stand. It's lightweight and collapsable with a central pole that expands so you can set the height.
At the top, you mount your Speedlight, strobe or softbox via a bracket that can be angled to direct the light. Stands allow you to quickly move your speedlights around the studio to experiment and get the right look.
6. Expand Your Studio Kit

We've covered studio lighting and all the bits and pieces that come with them. There are other pieces of studio kit available depending on your needs and budget.
- Reflectors
A photography reflector is a soft fabric disc that unfolds from a compact form. On one side, silver reflective material covers the disc for cool light and on the other, gold material for warm light.
A reflector usually bounces a natural light source onto your subject. They come in a range of sizes and are suitable for outdoor shoots to reflect the sunlight.
Alternatively, you can achieve a similar outcome with a large piece of thick white paper – it reflects a fair bit of light.
- Tripod
A tripod is an essential piece of home photography studio equipment.
A tripod is height adjustable and stable so that you can shoot standing up or sitting down. You attach your camera to the top of the tripod with a bracket.
Once attached to the tripod, you can set up your shot, and the camera will stay in place.
The best bit about using a tripod is that you can control slower shutter speeds than when shooting handheld.
- Laptop
If you're considering the best computer to use for home studio photos, I'd recommend a laptop.
It's especially beneficial if space is limited and you have no choice but to edit photos on the couch. You can also use a laptop to attach your camera to it with tethering cables.
Tether shooting allows you to take the photo and have them appear instantly on your laptop. That way, you can check the outcomes in full resolution on a screen larger than the one on your camera.
Modern laptops can handle Photoshop and other processor intensive editing apps with ease.
- Sand Bags
If using stands with top-heavy strobes or modifiers, considering using sandbags to weigh down the base of the stands. You can buy these from camera stores, or basic ones from hardware stores – or make your own.
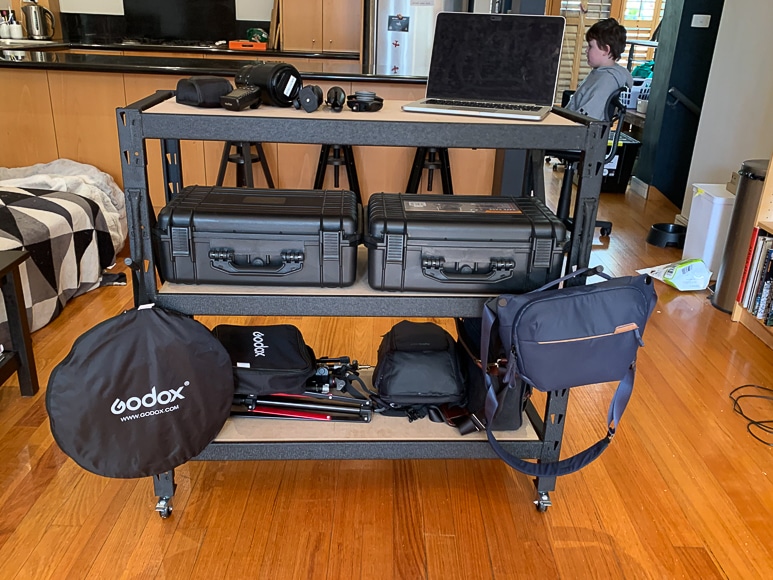
- Storage
You spent a lot of money on your camera and lighting equipment – you don't want it to get damaged lying around the house.
Camera bags can only hold so much and are not ideal for home photo studio work.
If on a budget, I recommend using a large plastic storage container with a rubber seal to store your camera, lenses and lighting kit. If you have a bigger budget, consider the purpose-built camera storage cases available at camera stores.
These look like a plastic suitcase with foam inserts that you can pluck out to fit specific equipment.
My hot tip is to check out hardware stores that sell the same cases at a fraction of the cost.
7. DIY Backdrops
Backdrops are an essential part of a home photography studio.
If you have an exposed brick wall or concrete wall, they look amazing as portrait backdrops. However, most of us don't have a blank or attractive wall for portrait shots.
You can head out to a camera store to buy a frame to hold a range of backdrops ideal for fashion and portrait photography. But these are expensive and cumbersome if you have to live in the same space.
A simple DIY hack is to use a bedsheet with a neutral tone as a backdrop. Or, for a textured backdrop, consider a photo blanket or even a rug.
The critical bit is to opt for neutral colours such as a grey or white background.
(Check out this guide to choosing the best paint if you're going to venture into painting your studio walls. Certain paint brands and colors are better for photography.)
Another option is to head to a fabric store to buy a length of suitable material on a roll – that way, you can roll it up when done.
Or, use a large roll of white paper to create a white background – pro photographers use a similar system where the paper rolls down on a frame.
Hang your white backgrounds from an existing curtain, or use large bull-dog clips to clamp it to a door frame.
See this guide for more great DIY backdrop ideas.
8. DIY Surfaces & Props
If you intend to shoot product images, there are many DIY ways to create attractive surfaces and small backgrounds.
As they don't need to be very large, you can buy the black, white or coloured card from a craft store. These make excellent backdrops that are easy to swap out and are non-reflective.
If you're looking for surfaces to place products on, head to the hardware store and grab some of the sample tiles and floorboards on offer.
Ceramic, stone and vinyl tiles are easy to store and provide options for creative product shots. You can also stand them on end for a bit of background.
Another valuable addition to your studio set is a collection of props.
Props appear in a range of studio photo shoots to add to the story of your images. Props can range from exciting rocks to lay jewellery on to a stuffed parrot for a model to hold during a shoot.
Props don't have to be expensive items – my tip is to source or create your props at next to no cost.
See this guide for tips on building a photography studio for eCommerce and this guide to photo tiles.
Final Words
You don't have to be a pro running a business to set up a home photography studio.
I'd encourage every enthusiast to consider setting up a space to use as a studio. Even if you only want to share your best images on social media.
At the very least, set up a suitable desk, workstation and storage for your equipment.
Home studios don't have to be big expensive projects either.
Taking small steps to set up a home photography studio makes the journey more enjoyable – especially if you add a few DIY projects into the mix.
What have been your experiences with a home studio setup? Do you have a space that you use for taking photos? What are some of the DIY hacks you've used to get by?
What are your thoughts on using studios to take natural and creative shots of people and objects? Do you have any tips on making creative DIY backgrounds?
Become part of the conversation by sharing your experiences, asking questions and commenting on this topic. Happy shooting in your photo studio.

Check out these 8 essential tools to help you succeed as a professional photographer.
Includes limited-time discounts.

I’m a Melbourne-based street photographer and blogger. I love to travel to Japan to photograph and document its dynamic people and culture.
3 Comments
Leave a Comment

👋 WELCOME TO SHOTKIT!
🔥 Popular NOW:

I decided to do a major organizing in the basement. When I did, I found some space for me! I know that the basement isn’t the optimal space for photography, but I am so tired of destroying my house every week and having to decide which area best suits my needs as there are NO empty walls in my boyfriends house. I ordered the cable system for lights and curtains. I had them hung from the ceiling and walls in a box shape, although I really only needed 3 sides. Maybe I would want to hang some twinkle lights or something else in my foreground, and the other 3 sides I hung sheets and painted the floor. I ordered black and white although I do have a backdrop stand I can also use in my little box. This should make my winter shooting a little easier and much more enjoyable.
This was extremely useful knowledge! Thank you for sharing!!
Thanks for checking out my article. If you have any questions or comments please leave them here and I will get back to you. Cheers. G