


Beginners Guide to Photography Lighting Techniques (+Pro Tips)
Learn about photography lighting in this in-depth beginners guide, including the best set-ups, techniques and what equipment you need for stunning results.
Shotkit may earn a commission on affiliate links. Learn more.
Knowing how to work with different light sources and lighting setups is one of the biggest challenges of photography.
That's why we put together this guide to photography lighting: to give you a practical place to start.
In it, we'll look at how to choose the right lighting – be it natural or artificial light – to suit your photography.
By the end of the guide, you'll be ready to start shooting with different types of light in many different situations. So, let’s get started.
6 Basics of Photography Lighting
The word photography means “drawing with light”. So, we’ll take a quick look at some lighting basics before answering the question, “What is the best lighting for photography?”
Here is the basic photography lighting setup for beginners:
1. Start with natural light before adding flash
This is the first lesson in photography lighting basics: make full use of natural light. Natural light – provided by the sun and moon – is constantly changing with the time of day and the weather.
So, explore the effect of light – go out and shoot at different times of the day, and see how this alters the images you create. How do the tones in the image change?
You may find in certain situations that you need the addition of artificial light, and the most obvious tool for the photographer is the camera flash. Simply put, you can use it to provide a good exposure when conditions are too dark.
On the downside, a direct flash is often too much and burns out details. To mitigate this, you can bounce the flash off another surface like a wall or ceiling.
2. The importance of lighting position
The importance of a good indoor photography lighting setup is often overlooked. A single light or flash can help show the effects of directional lighting. Choose some simple objects – fruit, china bowls – and set up your light source to one side of your subject. Then move it around the subject and observe how the highlights and shadows change shape.
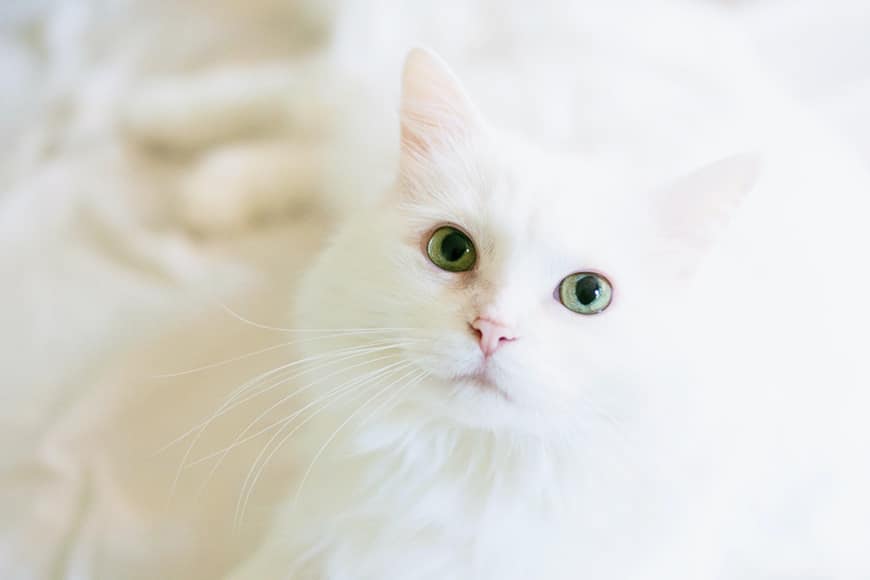
Shadows can increase the three-dimensional look and can make an image a lot more dramatic. If you're shooting a person, check out what happens to the detailing and tones on the face when you move your light source into a different position.
Tip: Convert your image to black and white to see the tones more clearly and then compare your results with full-colour images of the same subject.
3. Soft Light vs Hard Light
Photography lighting can be ‘soft’ or ‘hard’. Hard lighting will make the image more contrasty – reducing the mid tones.
Soft lighting in photography decreases the contrast level and increases the range of midtones giving a cosy, reflective feel.
An on-camera light like a flash or LED panel is usually a hard light source, while a light diffused by a softbox or umbrella is a soft one.
4. Reflectors and Diffusers
A white surface reflects light back to the light source; a black surface absorbs light.
Reflectors are widely used – indoors and outdoors – to reflect light back onto a subject to reveal more detail or balance the contrast across an image. Reflectors can be all different colors – to learn more about each type, see our guide: what are reflectors used for in photography?
Diffusers are used over a light source (such as a flash, strobe or video light) to spread the beam more evenly and reduce its intensity. (See our article: Camera Flash Diffusers: How to Use Them Effectively).
They're also useful when you're trying to light glass and avoid reflections.
5. Color Temperature and White Balance
All light has colour – even ordinary daylight. Think of the “golden hour” just before sunrise when the light is infused with yellow-orange hues.
Colour temperature is measured in degrees Kelvin or K. These range from Shade at 7500K (blue and cool) through Daylight (about 5500K) to moonlight, which is much whiter at 4120K, on to candles at 2500k (red and warm).
Artificial lights have distinctive colours – LEDs often cast a blue light, but standard house bulbs are warmer. Fluorescent lamps at 4500K and halogen lights are yellower, 3,000K.
The white balance control in your camera lets you adjust the settings so that white objects are white and the other colours in view will be correctly balanced to it. There are automatic white balance settings that provide standard choices for different types of lighting.
Post-processing programs such as Lightroom and Photoshop have settings to let you adjust the white balance in an image to compensate for unwanted colour casts – learn more in our guide.
6. Strobes
Strobes are another common light source and a powerful alternative to flash. They can be linked to a remote trigger system on the camera, so they act as more powerful off-camera flashes.
Strobes have very quick recycle times and produce a very quick, strong burst of light.
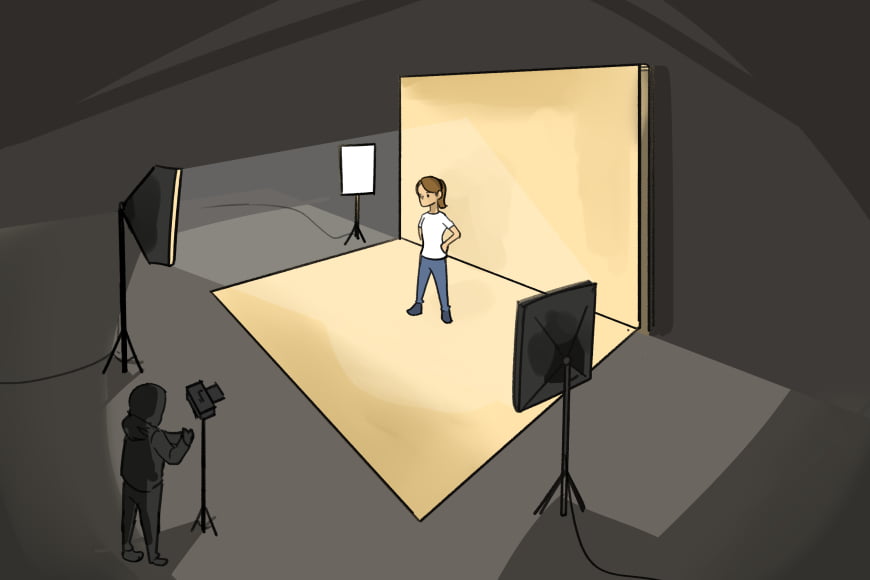
Light Functions
Here are some of the most popular light functions that can be used indoors or outdoors, in the studio or on location:
- Key Light – The main light trained on the subject to create highlight and shadow.
- Fill Light – A fill light literally ‘fills’ in dark areas with light.
- Backlight – This is a light set up behind a subject to help isolate the subject from its background. It's often placed so the subject shields it from the view of the camera. It's often considered the best lighting setup for portraits to highlight hairstyles.
- Rim Light – This is when a backlight is set up close to the subject and, with careful placing, produces a line of highlight around the edge of the subject. Very dramatic and eye-catching!
8 Popular Photography Lighting Techniques
Here we look at some popular photography lighting techniques that you can easily try out and get to grips with in your own photography.
If you want to learn how to set up lighting for photography, are are a few techniques to consider.
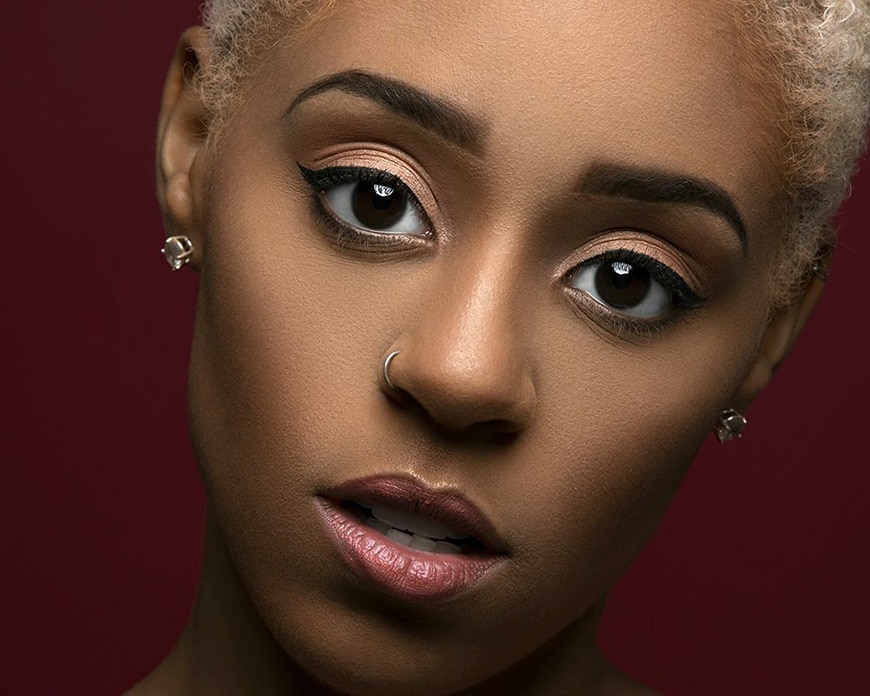
1. High Key Lighting
Credit: Emily Hopper
A high-key style uses two or more light sources to create a brightly lit image, with little or no visible shadows. It's frequently used in commercial photography to create bright, airy images that still retain a lot of detail.
Its opposite is low-key lighting – see the differences between them.
2. Three-point lighting
Three-point lighting uses a key light, a fill light and a backlight. This gives the photographer a lot of control in terms of light and shadow.
3. Broad and Short lighting

Credit: Ales Dusa
Used in portraiture. Broad lighting is when you light the side of the face nearest the camera. Short lighting is illuminating the side of the face furthest from the camera.
4. Rim light

Credit: Cottonbro
Rim light is a type of backlighting. You can create it with an artificial light source or with natural light like the sun (particularly at sunset).
With this setup, the edges of your subject are lit up by the backlight – typically, this leaves hairs and the very edge of your subject illuminated. It helps separate your subject from the background and is very effective.
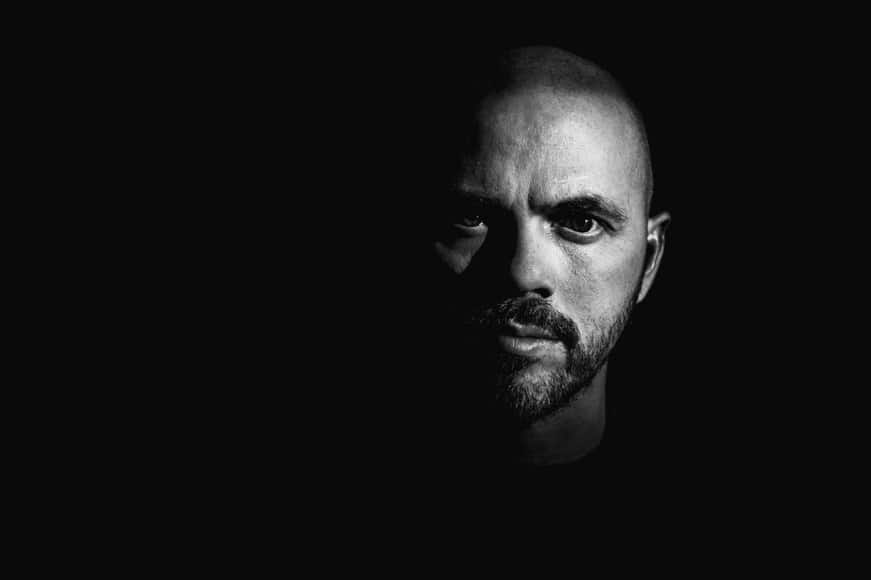
5. Split Lighting

Split lighting is used in portraiture with the light source side-on to achieve a perfect half-lit, half-shadow effect on a face.
6. Backlighting
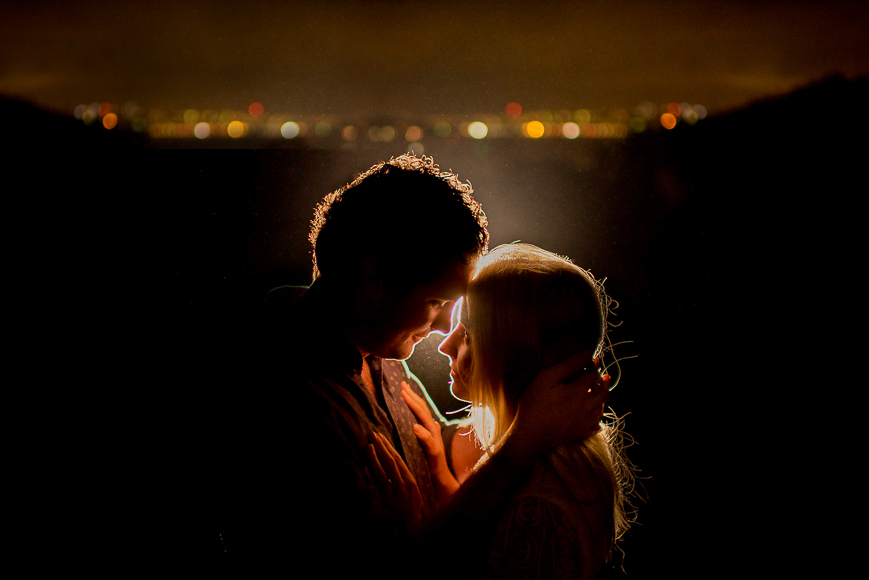
Backlighting is when you light up a subject from behind. It can be used to create silhouettes or semi-silhouettes. If you introduce a fill light, you can overcome silhouetting.
7. Rembrandt Lighting
Credit: Hollie Mateer
Rembrandt lighting is a portrait lighting technique. Named after the great painter, it requires a side key light positioned to create a small triangle of light under the eye on the cheekbone on the further side of the face.
8. Butterfly lighting
Credit: Ziphaus
For a butterfly light effect, you place your light in front and shine down onto the face. This creates a distinctive ‘butterfly’ shadow under the subject’s nose and helps to emphasise facial features such as cheekbones.
What Equipment Do You Need for Photography Lighting?
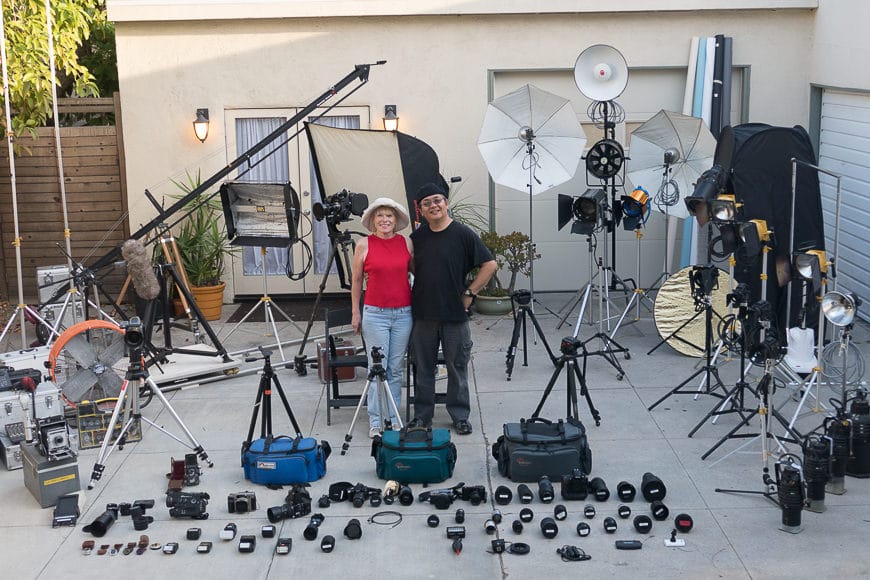
Photography Lighting Gear of Chris Ross Leong
You can do a lot with a single light source such as a flash, but as you become more experienced in photography, you will see that different situations require different lighting solutions.
Here’s a list of the main types of light sources:
- Speedlight / Flashgun – Great for artificial lighting indoors – you can bounce a flash off a wall or ceiling to light up an entire room (depending on its size). A flashgun is very versatile and can be used for many types of photography including portraits, macro and product photography. This is perhaps the most popular photo lighting equipment.
- Strobe – Strobe lights give a short, powerful burst of light off-camera. In simple terms, they work as ‘more powerful flashes’ and they're great for on-location or outdoor work.
- Continuous Lighting / Hotlight – Traditionally used as fill lights for studio work, they give an even light over a large area. Used in film and video as well as photography, they're called ‘hot lights’ because they become very hot!
- Striplight – Striplights make a linear beam of light as opposed to the more normal cone of light provided by photo-lights. They're commonly used in studio lighting, particularly for full-length portrait and modelling work. You can buy LED striplights quite cheaply.
- Ring light – Ring flash or continuous ring lights are used to cast even and often strong light on subjects. this camera lighting accessory has grown in popularity in recent years.
Lighting Modifiers
Modifiers are used to modify the quality of a light source. Here’s a list of some of the most popular:
- Umbrella – A shoot-through umbrella is an easy-to-use and affordable light modifier – all you need is a flash, a light stand and the umbrella. Widely used in portraiture, they cast diffused, even and soft light over your subject – but the light will spill over. A staple in most studio lighting setups.
- Softbox – Like umbrellas, softboxes are a great modifier for beginners as there are many inexpensive options out there. Creating a soft quality of light, while allowing good control of the lighting, a softbox enables you to light your subject without illuminating the background. A perfect beginner photography light setup for those starting out. They're great for portraits, and simple to set up too – see: how do you light a softbox at home?
- Grid or gridbox – Lighting grids can attach to softboxes, or you can buy a separate all-in-one gridbox that can attach to your speedlight. Grids control the spill of light from your source. This is a popular photoshoot light setup in many big and small studios.
- Beauty dish – A beauty dish is perfect for head and shoulder portraiture. Often used by fashion photographers, it can be described as a semi-hard light, resulting in sculpted, but not harsh, facial features.
- Octabox – Sometimes called simply an ‘octa’, the octabox creates very soft and flattering light. It's a great on-location lighting modifier to compliment available light.
- Snoot – A cylindrical tube that fits over a light or flash, a snoot gives directional control over your light. Perfect for very high contrast portraits, or spotlighting.
Other Lighting Gear
Here is some other photography lighting equipment that's commonly used in a studio or on location:
- Triggers – Remote triggers allow you to take control of lighting positions, as they let you set up flashes off-camera.
- Color gels – Color gels can be used for color correction or creative effects. For example, you can use a blue gel to convert tungsten light to look more like daylight.
- Reflectors – You can use reflectors to enhance natural or artificial light by bouncing it back onto your subject. They're an inexpensive tool to add to your camera bag.
- Backdrops – Simple and non-distracting backgrounds are the perfect complement to photography lighting.
- Light Stands – Unless you have an assistant to hold your lights or flashes, a light stand is a real must for any photography lighting set up.
- Sandbags and weights – These can help keep your light stands and flashes sturdy and upright. The last thing you want is a light stand falling over mid shoot!
- Lighting simulator – Did you know there's software that lets you plan where to place your photography lights, then simulate how the light will look in the faces of your subjects? It's called set-a-light 3D, and it's amazingly helpful for studio work. Read our set.a.light 3d review to learn more.
Recommended (& Affordable!) Lighting Equipment
There are tons of brands and models of off-camera light to choose from, but our recommendation as the best bang for your buck brand is Godox.
Godox has made a name for itself in the photography industry for producing a wide range of high-quality products at surprisingly affordable prices.
Here are 3 of their latest products that you should consider when building a studio kit:
- Godox AD100 Pro Pocket Flash – compact speedlight with a removable battery that gives you up to 360 full-power flashes and thousands of lower-power flashes with a recycling time of between 0.01 – 1.5 seconds. For something about the size of a can of Coke, the AD100 packs a lot of punch for a great price!
- Godox SL150R Zoom RGB LED Video Light – This powerful moonlight offers a variable beam spread of 20 to 65 degrees and a variable colour range of 2800 to 6500K with a high CRI/TLCI rating for accurate colour rendering. You can control Hue, Saturation, Intensity and Magenta/Green for 36,000 custom colours! There's even the option to choose from 13 special effects, including Laser, Lightning, Broken Bulb, TV, Fireworks and more.
- Godox TL60 Tube Light – With a built-in battery that provides over 2 hours of run time, this 29.5″ x 1.9″ tube light allows you to light normally hard-to-reach places, with wireless control and a wide CCT range of 2700 to 6500K to meet any ambient light challenge. The RGB mode with Hue, Saturation, and Intensity control gives you access to a wide selection of of custom colors.
If you're trying to build a DIY studio to record YouTube videos, we'd recommend the SL150R as your main key light (modified with an octobox or shoot-through umbrella), and one or two TL60 tube lights to provide some background ambience.
Photography Lighting FAQs
How do I get good indoor lighting for photography?
- Use window light if you don’t have access to any artificial lighting.
- Add a reflector to the window light to have more control over it.
- Try turning off the room light if shooting in the daytime – you may have enough available light.
- Use a flash and bounce it off the ceiling for well-controlled fill lighting.
- If you're looking to light your subject more creatively, use a softbox for a flattering but flexible soft light source.
Are LED lights good for photography?
While natural light works best as your main lighting for photography at home, LEDs make good replacements as well. LEDs have several benefits in photography: they last longer, they don’t overheat, you can use them on camera or on a stand, and they're very cost-effective. An LED panel light is a good general-purpose light for a beginner and they often come with colour filters.
How do you fake natural light?
Use large diffusers – such as a softbox or octabox – to soften the distractingly harsh look of flashlights or strobes. You can also fill in shadow detail in a natural-looking way with a white or silver reflector. Coupled together you can mimic the look of the sun or window light.
What lighting is closest to natural light?
White LED lights are designed to mimic daylight. They're balanced to give a natural look. You can also create a more natural light look in photography with modifiers on artificial lights, such as a softbox. They are also pretty easy camera light setups to work with.
What is the closest light to sunlight?
LED lighting can be very close to sunlight. With colour temperatures typically between 5200K – 6400K, this is as close as artificial light can come to sunlight.
What do you call a light used to gently illuminate shadows?
A fill light used in conjunction with a diffuser can be used to subtly lift shadows in images without creating new shadows.
What lighting is best for outdoor photography?
Speed lights can be set up off-camera, they're easily portable and can be set up via triggers for remote use. Therefore, they're perfect for outdoor use. Use light modifiers for added control of your lighting.
What kind of lights do YouTubers use?
Ring lights are often used by YouTube vloggers. They create a flattering light, effectively remove shadows and create a pleasing catchlight in the eyes. They are easy to store and set up.
Final Words
Whether you start with a flash or an LED panel, you can soon accumulate diffusers and reflectors inexpensively. For beginners, an umbrella or softbox and a reflector is a great place to start and you can add other equipment as you go.
Above all, whatever equipment you invest in, the key is always experimentation. Remember it’s always about nuance: an alteration to camera settings, the subject or the position of your light sources can elevate your images to new creative heights.
Please get in touch via the comments section below with any questions and I will be happy to respond to you.

Check out these 8 essential tools to help you succeed as a professional photographer.
Includes limited-time discounts.
Patrick Mateer is an award-winning photographer who lives in Yorkshire, England with his wife (wedding photographer Hollie Mateer) and two children.
1 Comment
Leave a Comment
👋 WELCOME TO SHOTKIT!
🔥 Popular NOW:

I really enjoyed writing this article – thanks to ShotKit for featuring it. If anyone has any questions at all, please leave them as a comment and I will get back to you ASAP. Thanks, Patrick