


Capturing the Beauty of Nature in Wedding Photography
Discover how to masterfully capture the beauty of nature in your wedding photography, with tips on lighting, composition, and more.
As wedding photographers, my partner Marc and I specialize in capturing the beauty of nature in our shoots.
Our wedding photography style is a combination of adventurous and photojournalistic, and we love telling stories of candid moments and genuine emotion.
When we find ourselves in a natural setting, we always aim to capitalize on the beauty of nature to enhance the love stories we tell.
As part of my wedding photography advice for Shotkit, I recently wrote a handful of articles on photojournalism and storytelling.
Today, I’m shifting focus to share with you how to capture the beauty of nature in your wedding photography.
With over a decade of experience as both a wedding and adventure photographer, I’ll give you practical tips to help you improve your outdoor wedding photography.
We’ll discuss scouting the location, understanding natural light, and composition techniques to try.
By the end, you’ll have more confidence in your abilities and new ideas to try as you venture outside to capture weddings.
Researching and Choosing the Setting

Capturing the beauty of nature in your wedding photography comes down to viewing the location as the backdrop for the love story.
As a lover of nature, I see the story’s setting as a great way to set the mood and ambiance. After all, nature has many lessons and symbols from which we can draw inspiration in love and life.
Setting the scene of a story is important, because it influences the mood and theme of the story and gives it context.
Therefore, it’s no wonder many couples want to get married somewhere epic and beautiful.
A breathtaking wedding location sets the perfect mood for a couple that’s over the moon about getting married.
As their photographer, you can help with that – whether it’s choosing an elopement location or picking out an epic spot for a first look.
In this section, we’ll talk through how to location scout to either choose a location or deal with a designated location.
Then, we’ll touch on timing, since the location has a big impact on the schedule of the day.
That will lead us into the next section, where we’ll dive deeper into lighting.
Research and Scouting
Outdoor photographers often seem like they’re just lucky – like somehow they’re in the right place at the right time to capture the most epic sunrise on the perfect fall day.
Spoiler alert: that outdoor photographer likely hiked three miles before dawn multiple days in a row in search of the perfect light on the perfect day.
My point is that capturing the beauty of nature takes some effort and practice.
How Much Do You REALLY Know About Photography?! 🤔
Test your photography knowledge with this quick quiz!
See how much you really know about photography...

With wedding photography, there’s a lot less that you can control. The wedding date will likely be set ahead of time, and you’ll need to be able to make it work regardless of the conditions.
Location scouting and research, however, can help prepare you for success.
You might even be able to guide your clients to the best time of year to schedule their wedding.
Sometimes, we’re involved in the planning process and often even help our couples with location selection.
In these cases, it’s important to be familiar with locations to know how difficult the access is and how to prepare our couples accordingly.
If you don’t have any control over the wedding, you can at least prepare yourself for the conditions you’ll be walking into.
After over a decade of shooting weddings, I no longer need to scout new venues because I have ample experience in a wide variety of locations.
Even so, when the opportunity is there, scouting helps me storyboard creative shots that I want to try ahead of time.
If you can’t scout in person, sometimes you can scout online to get an idea of what to expect and therefore what conditions to prepare for.
If you’re shooting an off-the-grid wedding, there can be special considerations depending on the location.
As the photographer, you sometimes need to provide extra guidance around bringing appropriate layers and provisions and preparing to deal with weather challenges.
For the sake of this article, let’s move on to outdoor venues and through to photography and leave the logistics of more adventurous weddings for another day.
Outdoor Venues
While I love off-the-grid weddings, logistically, many couples end up at a wedding venue.
The benefit of a wedding venue is that there are usually backup locations and access to parking and bathrooms.
When couples create their own venue, it can create more work because they might have to bring in everything from bathrooms to chairs or even electricity.
An outdoor wedding venue immediately simplifies your to-do list.
When it comes to outdoor venues, you’ll want to scout them either in person or digitally to get an idea of what you’re walking into.
Sometimes, you can help guide couples on their venue selection, but often, the couple selects the venue first, secures a date, and then books a photographer.
When choosing venues, couples often weigh up several factors to narrow down their selection.
They have to balance the scenic beauty of the location with accessibility for their guests.
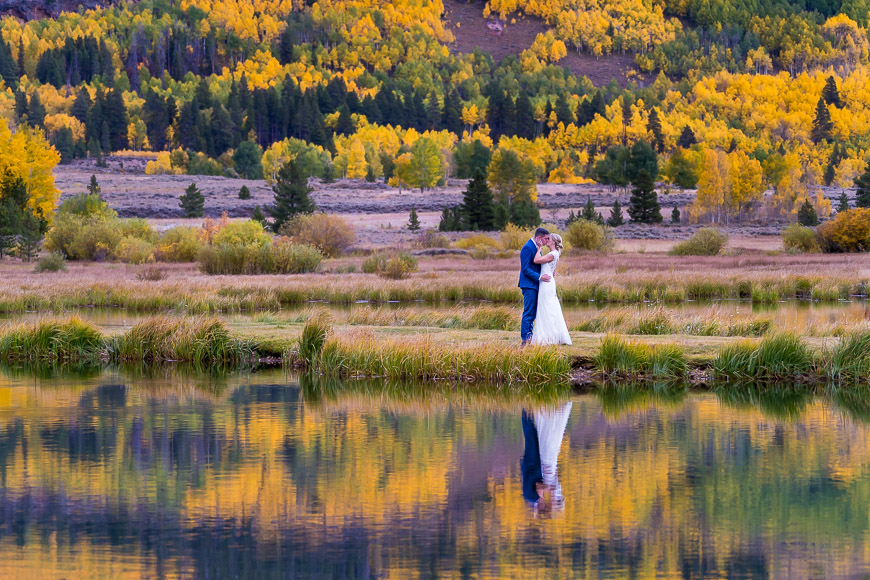
They also might have specific features they’re looking for, such as aspen trees or a lake.
As we’ll talk about in the next section, venues might also have limited seasons or look better at certain times of the year.
As a photographer, it’s good to get the lay of the land so you can prepare to shoot at the location.
You’ll also want to know if you need any permits or permissions for shooting on and around the property.
If you do drone wedding photography, you’ll want to check in on any restrictions, or if you’re doing portraits at a nearby park, you might need a permit.
It’s always smart to ask the venue about their backup plan and find out what that looks like.
You might be completely ready for a beautiful outdoor ceremony at a site you’ve seen on their website, only to end up in a challenging indoor location because of the weather.
If you ask or investigate ahead of time, you can make sure you have any additional gear required to shoot the backup location.
- Related: 40 Creative Wedding Photoshoot Ideas
Time of Year and Time of Day
When it comes to the beauty of nature, timing is everything.
Luckily, there’s no one answer to when the best time for an outdoor wedding is.
Instead, you want to consider all of the options and think through the pros and cons.
Depending on the location of the wedding, summer might have the best weather but the worst crowds.
Fall might allow for beautiful autumn colors but result in risking snow, while spring’s blossoms might be accompanied by the chance of rain.
Winter might be both cold and peaceful.
Different locations have different strengths and weaknesses depending on the time of year.
For example, you can get married in Colorado in any season – but some seasons take more adventurous spirits.
The time of year will also impact your photography both in how nature presents itself and the lighting.
There are apps you can use to predict where the sun will be throughout the day (for example, The Photographer’s Ephemeris) so that you can either advise on the timeline or know what to expect.
That naturally brings us to our next section.
Utilizing Natural Light

Sometimes natural light photographers get a bad rap because it makes it sound like they don’t know how to use more complicated lighting setups.
In reality, learning how to utilize natural light has its own challenges.
And, if you master natural light and really understand how to shoot in any condition, you’ll be ahead of the game when adding additional lighting to enhance your photography.
In this section, we’ll talk through some aspects of lighting that you’ll want to understand, such as quality and direction, and using timing to help control that.
However, sometimes you simply don’t have any control, which is why we’ll also talk about dealing with harsh sunlight.
Quality and Direction
To keep it simple, two of the main concepts to grasp are the quality of light and the direction of light.
When photographers talk about the quality of light, you might hear them talk about soft light, hard light, good light, or bad light.
Good light and bad light are somewhat subjective because some photographers prefer high-contrast light so that they can photograph high-contrast photos, whereas others want soft, diffused light that’s less tricky but can be less interesting.
Soft light is diffused light or low-angle light that is flattering because it doesn’t result in a ton of shadows on your subjects.
Hard light is much more intense light and, depending on the direction it’s coming from, can either create interesting shadows or unflattering shadows.
(This guide covers more about hard light vs soft light.)
Most photographers would agree that hard light coming from an unflattering angle is bad light and leads to needing to use artificial light or light modifiers.
Ideally, you want to avoid midday sun because that’s the most difficult natural light to make look flattering.
But sometimes it’s unavoidable.
Let’s talk through timing when you can impact it and then dealing with harsh sunlight when you can’t.
Timing
The simplest way to utilize natural light is to try to schedule your photoshoot around the best light possible.
Generally, the middle of the day will have the harshest light with the sun directly overhead, thus casting unflattering shadows on your subjects.
Morning and evening are safer as the sun is lower in the sky and therefore comes in at an angle.
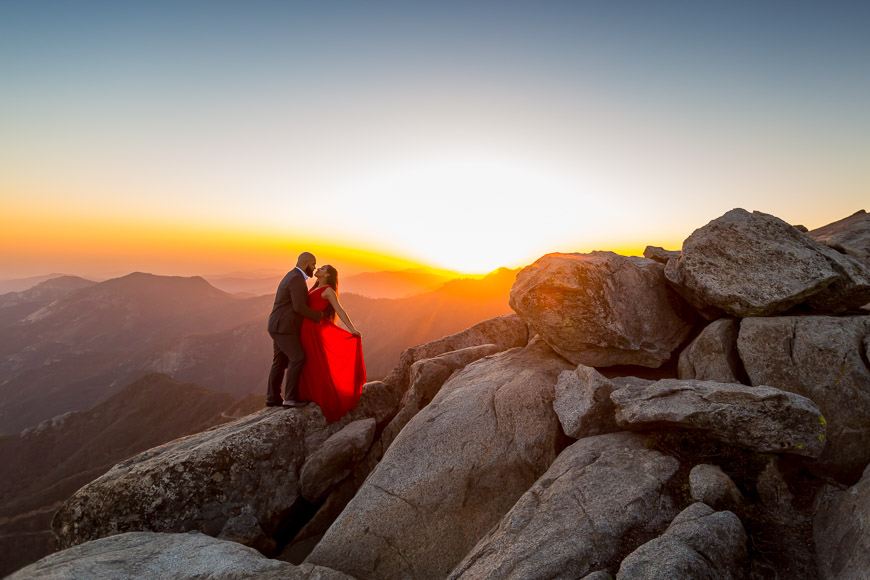
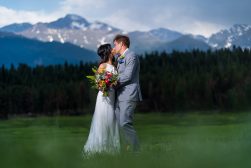
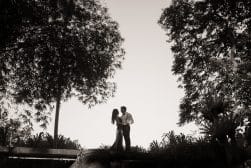
The light in the early morning or evening can often have the extra benefit of a golden glow, which can be very flattering and romantic.
You can also get an effect called an alpine glow on the mountains if you time things correctly.
This might mean sunrise or sunset, depending on your location and what you’re trying to accomplish with the light.
You might shoot into the light to capture sun flare, or you might shoot with the light to use the sun to illuminate your subjects.
If you can plan or influence the day’s schedule, you can set yourself up for success by shooting in the best possible light.
Even if you do the majority of your portraits at a different time, I always encourage couples to sneak away during sunset or golden hour for a few epic shots.
These shots are all about quality over quantity – especially if you’re trying to get your couple back to their party.
Often, you can sneak out during dinner and no one will even know you were gone, but when they see the photos, they’ll know it was worth it.
But unfortunately, it’s not sunset all day long.
So what do we do to deal with harsh sunlight when we inevitably have to photograph it?
Dealing with Harsh Sunlight
Some of the best ways to deal with harsh sunlight include seeking shade, using modifiers, or overpowering the sun with another light source.
Sometimes you need to simply embrace the harsh sunlight and find ways to use it at interesting angles for high-contrast images.
Posing your couple and positioning yourself will be important if you’re trying to minimize the impact of harsh sunlight on faces.
Use creative compositions and angles to incorporate natural elements or show off interesting shadows.
Make sure you choose your exposure intentionally so that your images don’t end up overexposed.
You might expose for your subject or the highlights and embrace dark shadows, or you intentionally might expose for the shadows and let the highlights be blown out.
Other times, you’ll want to take the time and effort to fill harsh shadows either by using a reflector or an off-camera flash.
In the gear section, we’ll talk about the practicality of using various modifiers to help guide you through what gear you might choose.
Shade is also a great option that can create a very flattering soft light.
You can shoot under a tree canopy or architectural features that act as natural diffusers.
Natural Elements in the Composition
Once you have a plan for achieving the best light or dealing with harsh conditions, it’s time to think through composition techniques that will enhance your photographs.
By incorporating the following techniques, you can create images that help capture the beauty of nature in wedding photography.
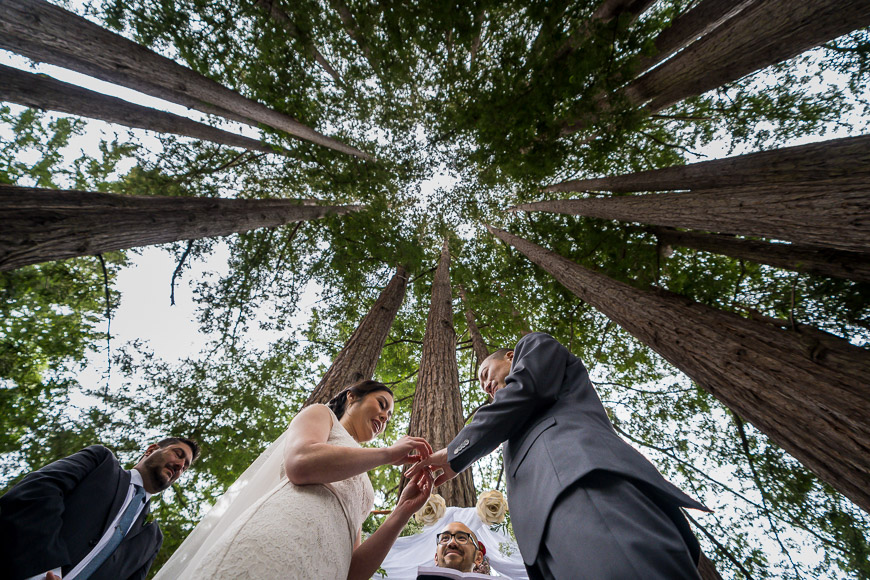
Framing
When capturing weddings in nature, it makes sense to use elements of nature to frame your subject.
You might use trees or foliage to add depth and interest while drawing the viewer’s eye to the main subject.
Horizon lines are also effective, and you might choose to keep your subject under the horizon or have them break it.
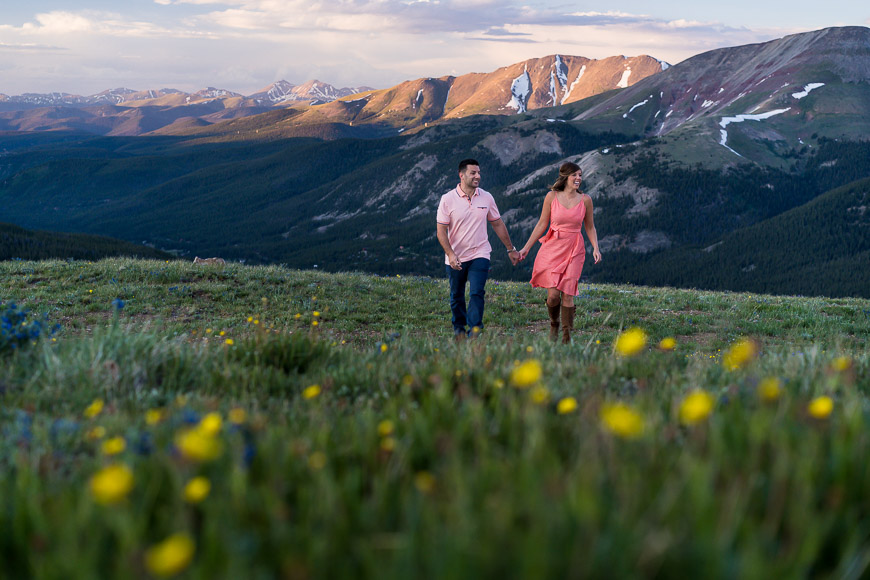
Leading Lines
Nature has great symbols such as paths and rivers that can be used as leading lines that guide the viewer through the photograph while also telling a story.
Leading lines can add a sense of movement, taking the viewer on a journey.
Consider where along that journey your subject belongs for the sake of the photograph and how it reads.
Depth of Field
Depth of field can be used to impact how much of the background or foreground is in focus.
A shallow depth of field can isolate the subject while a wide depth of field can show the bigger picture.
A blurred rock in the foreground might be a great framing element, or a blurred bush in the background might make your subject’s eyes really pop.
I like to mix it up and deliver a variety of styles.
You might start with a wide environmental shot where everything is sharp, textured, and detailed, drawing the viewer into the environment.
Then, you’ll move to a close-up where the background is blurred, hinting at nature but keeping the focus crisp.
Compression
Compression is the effect of bringing distant objects closer together in the frame to make them appear larger.
You can use compression to create a sense of scale and drama in your images.
I love making mountains look bigger so that they show the drama that we feel when immersed in them.
Technical Challenges of Outdoor Photography
In this final section, we’ll talk through some of the challenges of outdoor photography.
From shooting the right gear to nailing your camera settings, a little preparation goes a long way.
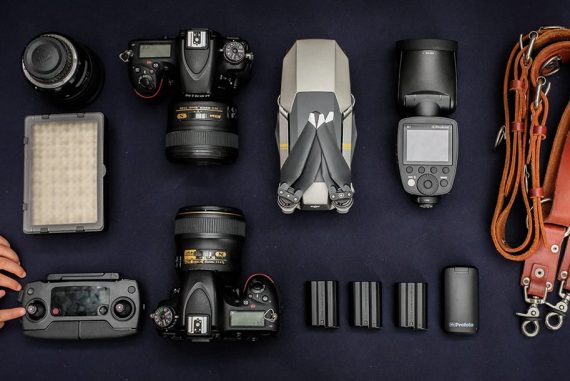
Equipment Choices
When it comes to gear, outdoor weddings often require you to be light and nimble.
You’ll want to make sure that you can carry all the gear you need with you wherever the adventure takes you.
That means things like size and weight come into play, which is one of the reasons I switched to Sony.
Your gear also needs to be durable and reliable.
For example, I love my Shimoda camera backpack because it’s waterproof, comfortable, and carries everything I need for a photo shoot.
I tend to avoid large modifiers like reflectors that are cumbersome to move around quickly with, and instead use a versatile lighting system.
Camera Settings for Different Lighting Conditions
Once you’ve selected your gear, you need to make sure you know how to use it.
You’ll want a good handle on wedding photography camera settings for the various conditions you’re working in.
In bright daylight conditions, for example, you can use a low ISO setting for the highest image quality.
As golden hour approaches or clouds cover, you might consider raising your ISO to capture more detail in low light without ending up with a shutter speed that’s too low.
Your aperture might be decided based on desired creative impact or low light requirements.
Weather and Other Environmental Concerns
Being in nature can be muddy, windy, steep, cold, hot, and otherwise treacherous.
Both you and your couple must be prepared with water, snacks, layers, hairspray, and appropriate footwear.
I always have extra gloves and jackets for when someone inevitably underestimates how the weather might impact the day.
Environmental Impact Awareness
Lastly, you’ll want to consider your environmental impact.
Many outdoor wedding locations will have clear guidelines included in any rules and regulations they have.
This includes things like not scattering flower petals, avoiding a large group on fragile terrain, and being sure not to disturb wildlife.
Some of these things may be common sense to you if you’re an outdoor lover, but they might not be as evident to your clients.
It never hurts to communicate with your couples.
Final Words: Capturing the Beauty of Nature in Wedding Photography
In this article, we explored the art of capturing the beauty of nature in wedding photography.
We reviewed practical tips and techniques, whether you’re helping choose a location for your couple or embracing an outdoor venue.
We talked through the setting, lighting, composition, and environmental challenges.
Now it’s time to elevate your photography to new heights by using the natural beauty of outdoor settings to showcase the timeless romance of your couple.
Nature is a great setting for the next love story you’re going to tell.
Instead of just letting it be there in the background, find ways to bring out its beauty in your photographs.
Whether your next step is to learn about natural light and how to use it effectively or to try out some composition techniques, one last piece of advice: don’t forget to wear practical shoes.
Location selection will require you to consider accessibility for your clients and what they’re capable of, but you’re behind the camera, so don’t be afraid to lay down in the grass or climb up the hillside for that perfect angle.
What aspect of outdoor photography is already your strength, and what can you tackle for improvement on your next shoot?

Check out these 8 essential tools to help you succeed as a professional photographer.
Includes limited-time discounts.
 Best Wedding Photography Gear
 Comprehensive Guide to Wedding Photography in 2024
 Wedding Photography Tips: How to Photograph a Wedding in 2024
 14 Couples Boudoir Photography Tips & Inspiration for 2024
 How to Capture Emotion in Wedding Photography
 15 Pre-Wedding PhotoShoot Ideas, Tips & Poses for 2024
Brenda Bergreen is a photographer, videographer, writer, and storyteller based in Colorado. She specializes in Colorado wedding photography and adventurous storytelling. When she’s not behind the camera or the keyboard, you can find her adventuring with her family.

