


Maximizing Natural Light in Wedding Photography
Find out how natural light can enhance your wedding photography, with tips and techniques for capturing stunning, authentic moments with the light available.
Shotkit may earn a commission on affiliate links. Learn more.
Because of the fast-paced and high-stress environment of weddings, maximizing natural light in wedding photography can be your knight in shining armor.
While there are times to use off-camera flash techniques to level up portraits or for lighting a wedding reception, nailing your natural light photography will enable you to adapt to any situation with minimal changes in gear.
Learning wedding photography is no easy task, but understanding natural light will give you a big step forward.
I've been a wedding photographer for over a decade, specializing in capturing couples in the beautiful places they choose to get married.
Today, I'm going to help you embrace natural light not because it's easy but because it's hard.
It's hard to not be able to control light in our photography when photography is all about light.
Just call me your natural light therapist as I teach you to control the things you can and prepare for those that you can't.
Reasons to Maximize Natural Light in Wedding Photography
While I love crafting a dramatic portrait that achieves my unique creative vision, the photos that mean the most to my couples aren't the ones that I spent the most time, energy, or expertise on.
What matters to a couple is a moment or a look, a person or a place.
In fact, most couples who look through our portfolios when choosing a wedding photographer for their big day don't have a background in photography to help them decide what makes a great photograph.
Instead, they simply know it when they see it.
Unlike an art director looking through a commercial portfolio, brides aren't experts in photography.
But they are experts in love.
What they want is to see love in their photos, which brings us to the reasons to lean on natural light in your wedding photography.
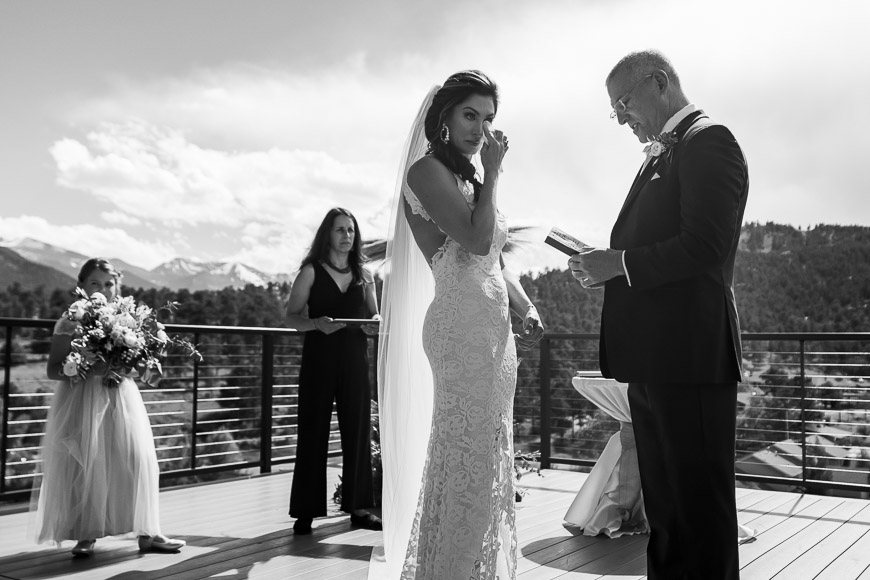
It's Unobtrusive
One of the top reasons to embrace natural light is that it's unobtrusive.
If you shoot without the use of a flash and even employ the silent shutter on your mirrorless camera, you can take photographs of intimate moments without interrupting them.
A flash can be disruptive in a small room or intimate group.
It can be especially disruptive during a wedding ceremony and sometimes not even allowed.
While there are times I'll sparingly use a flash during a ceremony to nail a specific shot, I'm typically more concerned with making sure my photography doesn't negatively impact the ceremony.
There's a reason why flash photography is not allowed at certain performances or events. It's not to make our jobs harder but to ensure a positive experience for the guests.
Faster than Flash

Another reason to not always lean on the flash is that it slows you down.
Whether it's setting up your gear, transporting it between locations, or simply the recycle time, shooting natural light is faster than flash.
The last thing you want is to miss a moment because you're trying to set up fancy lighting gear.
Versatile and Accessible
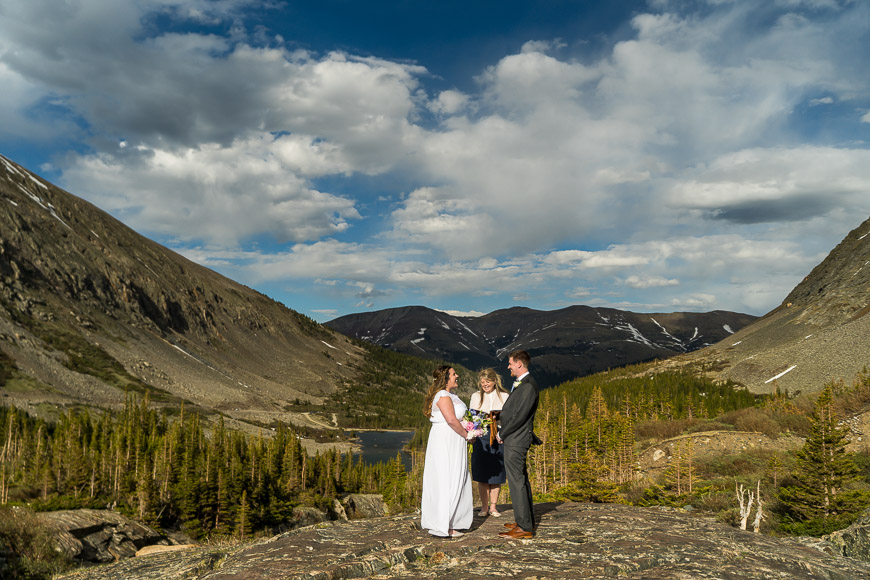
Natural light is readily available and can be used both indoors and outdoors.
Additionally, with the power of the latest technology, cameras are more sensitive than ever to light, reducing our reliance on flash techniques.
While there are times when we may still want to add light, if we know how to see and use natural light, it is always available to us.
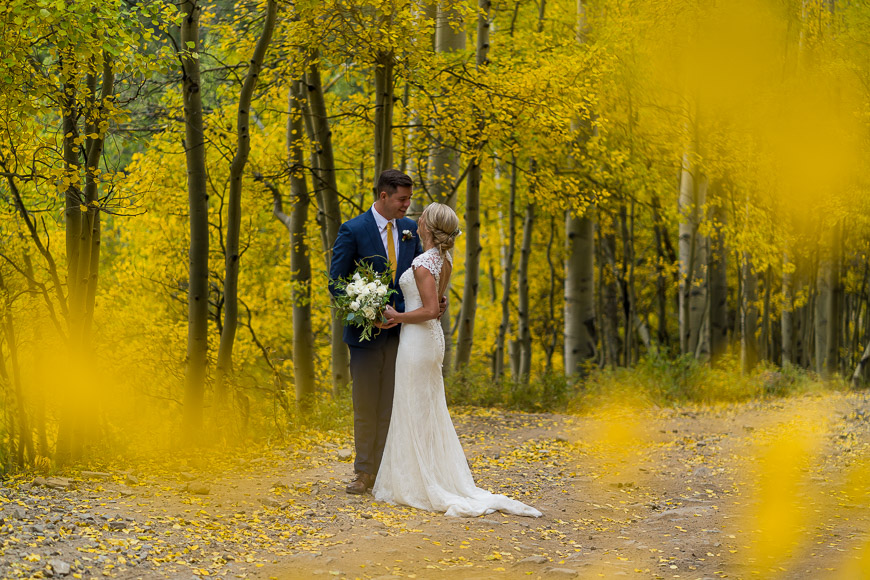
Timeless and True to Life
In addition to being versatile, natural light is authentic.
Using natural light or available ambient light is a great way to capture the mood of a wedding by photographing the scene as it truly appears.
When we add flash to a scene, we're imposing our vision, which can be creative and powerful but also change the story.
While I love pushing my creativity, I like to deliver a mixture of enhanced scenes with true-to-life images that capture reality
Reality is timeless when it comes to wedding photography.
Use Flash with Purpose
Don't get me wrong, I think it's important for wedding photographers to master off-camera flash, bounce flash, and other wedding reception lighting techniques.
But flash should be used with purpose and as a choice, not a default.
Understanding Natural Light
In order to understand natural light, we need to be able to both understand and identify the quality of light on any given day.
Quality of light refers to the characteristics of light that impact both the subject and the overall look and feel of the photography.
Let's talk through some of the characteristics of light and then discuss how to identify them.
Characteristics of Light
Understanding the characteristics of light will help you learn how to see light and, eventually, how to use it.
Light has a color from warm to cool.
Think about a fireplace versus your doctor's office, or more romantically, the difference between golden hour and blue hour.
The color of light can change the mood of your image.
Light also has a direction, and it's important to know where the light is coming from as that will impact how it hits your subject.
Depending on the direction of the light, you might change your position or the position of your subject.
The direction or angle of light will also impact shadows, with some being more flattering than others.
Light can also be either hard or soft.
Hard light is often bright with deep shadows, while soft light is diffused.
Observational Skills
Once you're familiar with the various characteristics of light, you want to learn to recognize them so you can anticipate how they will impact your photos.
When you look around, notice where the light is coming from, including how far away it is and at what angle.
Notice if anything is diffusing or reflecting the light such as a cloud (diffusing) or the snow (reflecting).
This information will help you decide where to place both your subject and yourself.
Do you want to use backlight techniques or ensure that you're finding the softest light to flatter your subject?
Sometimes, it's helpful to walk around your subject in a circle to notice how the light looks from every angle.
When you look at your subject, determine whether it's front light, side light, or backlight.
Preparing to Shoot Natural Light
Shooting natural light means that you're going to work with what's available.
However, that doesn't mean you can't come prepared.
It's always helpful to research and scout so that you're aware of the best timing and locations for optimal natural light.
Then, you can time various aspects of your shoot around the best times to shoot at different locations.
If you're working indoors, such as in the getting-ready room, you can always adjust the window curtains and even encourage positioning your subject in front of the flattering window light.
Adjusting to Lighting Challenges

Adjusting to lighting challenges is an essential skill for natural light wedding photographers.
You'll likely be shooting in diverse and dynamic environments where you'll need to be able to deal with harsh sunlight, changing conditions, and low-light situations.
Let's talk about how to capture natural light in these different circumstances.
Harsh Sunlight and Shadows
When dealing with harsh sunlight, you'll want to utilize open shade when available, using trees or buildings like natural diffusers or reflectors.
From there, position yourself and your subjects strategically so that you minimize any unflattering shadows and place shadows where you want them as much as possible.
Then, you'll use your camera settings to compensate for the strong contrast.
Luckily, the dynamic range of cameras is continually improving, making it possible to shoot in harsh lighting conditions.
You can also use polarizing filters to help cut glare.
Changing Light Conditions
It's important to stay adaptable and be prepared to change your settings quickly if lighting conditions change.
As clouds shift or you move from one location to another, you need to anticipate how the light will affect your photographs.
This is a good argument for shooting in RAW so that you have maximum flexibility to adjust your exposure in post-production.
If you're moving from inside to outside, you'll want to adjust your settings before the action happens so you don't end up with poorly exposed images.
You might also need to remember to put on or take off a polarizing filter if you're using one.
Low-light Situations
Again, another win for camera technology!
You can increase your camera's ISO sensitivity to capture more light in low-light situations.
It's important to know your camera equipment and what an acceptable ISO is without creating too much noise.
You can also use your lenses with low f-stop number capabilities to ensure maximum light can enter the lens.
When playing with using slow shutter speeds, test the limits of acceptable camera shake.
Creative Natural Light
Now that we've mastered the challenges of natural light, let's look for opportunities.
In the examples below, I'll share some opportunities for creatively using natural light to wow your clients.
You'll see that creative lighting isn't just about being able to use a flash with a gel.
It's also about being able to use existing light to create something different.
In the end, learning to look for these opportunities will only improve your ability to both see and create light in your photography.
Silhouettes
Experiment with shooting toward the light source and exposing for the background so that your subject becomes a silhouette.
If you interestingly pose your subject you can tell a story by the shape the silhouette suggests.
Utilize interesting shapes like the profile of a face.
Rim Light
Again, by shooting towards the light you can create an interesting rim light effect when using your subject to block the light source.
The light will light around your subject, creating a rim light. It can be fun to play with the exact placement of the sun behind your couple.
Make slight adjustments and notice the different impacts it has.
You might even get a nice sunburst at an interesting spot.
Sunbursts
Sunbursts, also called sunstars or starbursts, can be created as described above when the sunlight is partially blocked or filtered through an object.
A sunburst through a tree is a favorite of mine.
Photographers also use high f-stop numbers while shooting the light source itself to create a sunstar by producing diffraction patterns around the edges of the sun.
Lens Flares
Lens flare occurs when the sunlight enters the camera lens and reflects off internal elements, resulting in streaks or circles of light in the image.
Lens flares are sometimes considered unwanted anomalies because they reduce contrast and clarity, but in wedding photography, they are commonly used creatively to add a sense of romance to the photo.
Different lenses and focal lengths will cause different sunflares so it's good to experiment with your gear and have an idea of how to create a desired effect.
Shadows
Natural light isn't always about light; sometimes it's about the shadows.
Sure, look for all the characteristics of light that we discussed at the beginning of this article.
But also look for interesting shadows and how you can use contrast to enhance the impact of your photos.
Ambient Light
When we think of natural light, we often think of the sun, but I want you to think of any available light.
This includes ambient light such as twinkle lights, candles, fireplaces, and more.
Use a bokeh effect with twinkle lights behind your couple, or pose your couple near a fire to capture the warm glow on their faces.
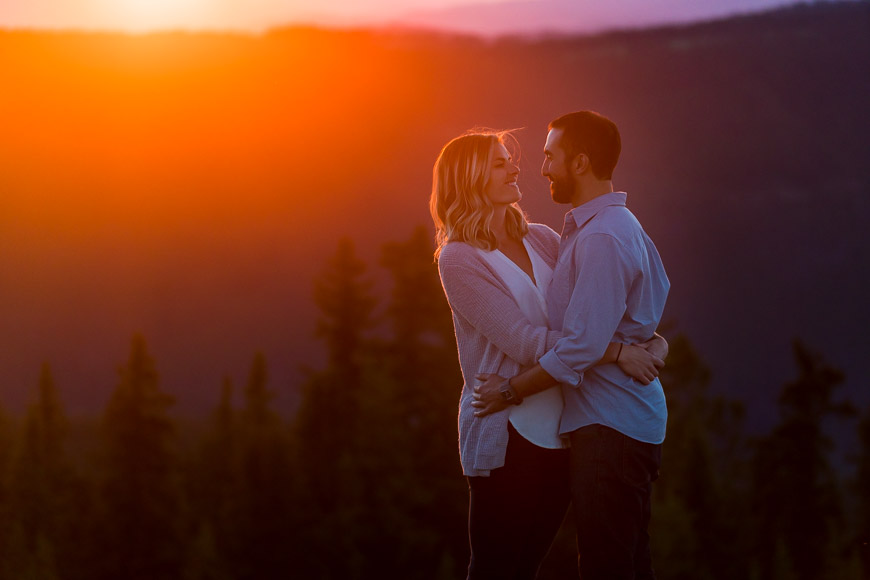
Golden Hour, Sunset, and Blue Hour
A great natural light wedding photographer knows that there is magic to be made during sunset, golden hour, and blue hour.
Golden hour is shortly after sunrise or before sunset and a great opportunity for warm golden light and interesting lens flares.
Blue hour happens before sunrise or after sunset and is the time for cool light and incredible blue sky night shots.
Summary of Natural Light Wedding Photography
Hopefully, this article gave you more respect for the complexity of natural light wedding photography.
We talked about understanding the many characteristics of light and how to recognize, utilize, and manipulate them.
Then, we dove into creative natural light techniques.
Often, we talk about creative lighting techniques as times when we create light.
But sometimes, using the light that's already available to us is just as creative and impactful.
As we discussed, there are many reasons to beef up your natural light wedding photography skills.
Not only is it fast and unobtrusive but it creates those timeless and true-to-life images that your couples will love.
I think when we identify as one type of photographer, natural light photographer or off-camera flash photographer, we needlessly limit ourselves.
Instead, what if we learn as much as we can about both utilizing and creating light and then intentionally decide what's best for our purposes?
It's a challenge worth taking up.

Check out these 8 essential tools to help you succeed as a professional photographer.
Includes limited-time discounts.
Brenda Bergreen is a photographer, videographer, writer, and storyteller based in Colorado. She specializes in Colorado wedding photography and adventurous storytelling. When she’s not behind the camera or the keyboard, you can find her adventuring with her family.
👋 WELCOME TO SHOTKIT!
🔥 Popular NOW:
