


How to Outline Text in Photoshop Elements
Learn how to paint a colored border around your text in Photoshop Elements using the Stroke command. Create stylish, impactful graphics with this tutorial.
Shotkit may earn a commission on affiliate links. Learn more.
The Stroke command in Photoshop Elements allows you to paint a colored border around a layer or selection more easily than ever before.
It's among the tools I find myself using in my daily image manipulations, and it works perfectly to ensure you achieve a practical outline in texts.
Read on as I share a comprehensive guide to outlining text in Photoshop Elements and explain some of the other text transformations possible.

Download the latest version of Adobe Photoshop Elements to follow along with this simple tutorial.
What is the Stroke Command in Photoshop Elements?
When using Photoshop Elements, you can easily manipulate text with the Stroke command tool.
It allows you to paint colored borders around selections and layers. Depending on your preferences, it can apply an outline to a selection or the entire image.
You’ll need to start by making a selection of the elements you want to apply the Stroke command to.
Here is a brief guide on how to interact with the Stroke command when outlining text in Photoshop Elements:
- After opening the image, make a selection of the text to stroke
- From the menu bar, select Stroke (Outline) Selection in the Edit drop-down
- Configure the stroke pixels in the Width text box in the dialog box
- The next step is selecting the stroke’s color and positioning it on your selection
- Use the “Mode” drop-down to blend the different colors used in the selection
- Set the opacity of the stroke to a practical percentage
- Apply the stroke border by clicking the “OK” button
Those planning to stroke an entire panel should consider making a selection of the layer in the Layers panel, then selecting “Edit” and choosing Stroke (Outline) Selection from the menu bar.
The tool allows you to edit and personalize the design of the outline for quality results. You can add several strokes to the outline’s structure and switch colors.
You can also download and install additional fonts online for more complex designs. Ensure you install the fonts before opening up Photoshop Elements, as this allows them to load and become accessible on the platform.
How Do You Outline Text in Photoshop Elements?
Photoshop Elements proves valuable to all typography designers since it has several tools that make text manipulation effective and easy.
The platform allows these professionals to fine-tune the font appearance and profile when creating text and applying outlines.
There are several reasons why you might consider outlining texts in images, including:
- Making the text stand out for a more colorful and impactful outline
- Adding some sense of style – this helps you achieve the perfect design to blend with the text, guaranteeing a creative appeal to the image
Here's a guide on how to outline text in Photoshop Elements:
1. Open a Blank File
The first step when outlining text using Photoshop Elements is opening a blank file on the in-built editor.
Click File, then New, and choose Blank File. If you're a beginner, your best bet is to leave the default configuration that shows up in the dialog box.
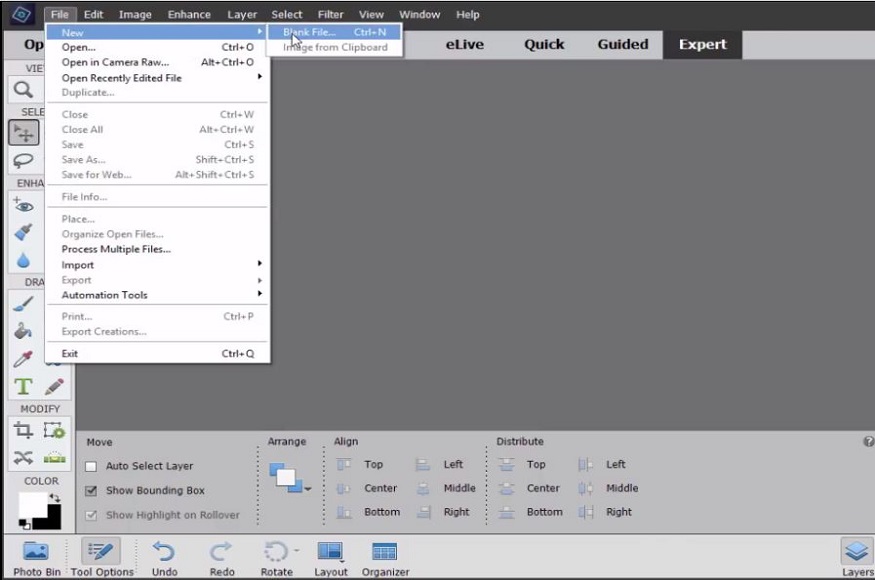
After clicking OK, you’ll see a plain white sheet in the editor.
2. Configure the Type Tool
A “T” icon is on the left toolbar to activate the Type Tool.
Click this icon, and configure the typeface in the dialog box on the screen’s bottom. If you installed new fonts before the process, you’ll find them in the drop-down list.
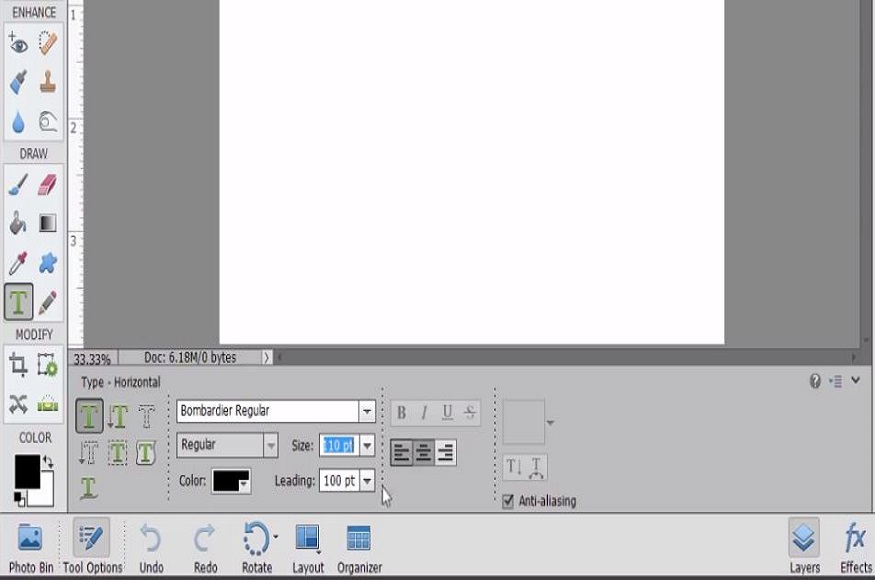
The size should be 110 points, while the leading should be 100 points.
3. Type the Text
After configuring the text format, the next step is to type the text you want to outline.
Click any region on the white sheet and type the text. It’d be wise to center the text before proceeding.
4. Create an Outline
The juiciest step in our process is achieving an accurate outline of your text.
Start by changing the foreground color to red. To do this, click the color tab at the page’s bottom left.
Select the color you want the outline in the Color Pixel panel that appears, and choose OK.
From here, there are two approaches to outlining your text in Photoshop Elements.
Approach 1
The first approach involves creating a new layer and adjusting its style settings.
On the top toolbar, click Layer, select Layer Style, and choose Style Settings.
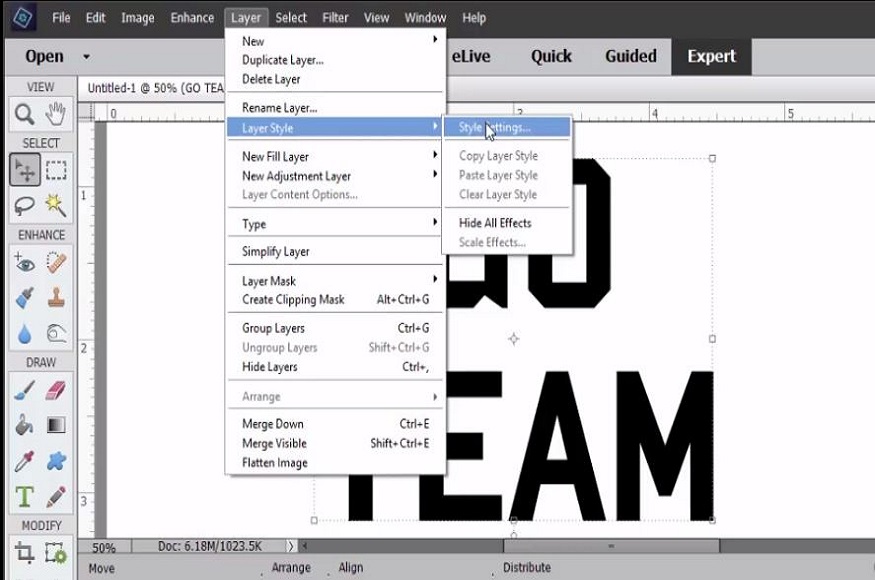
Go down to Stroke in the style settings tab and configure your outline.
Set the outline’s color and choose where you want the design. It could be on the outside, inside, or center.
After defining its position, you’ll observe the changes made to your text.
The Size slider allows you to tweak the density of the boundaries, while the Opacity slider dictates the layer’s transparency.
The only disadvantage to this technique is the boundaries are not as sharp and definitive as most designers would want.
Approach 2
The other approach to outlining text in Photoshop Elements involves using different layers to achieve your desired results.
Start by selecting the text by holding the Ctrl/Cmd key and clicking on the layer with the text in the Layers panel. It will create an accurate outline of the text displayed automatically.
Then select the background layer in the panel and click on the new layer icon to create another layer.
Select the new layer, and on the top toolbar, choose Select. Choose Modify, then Expand on the Select drop-down menu.
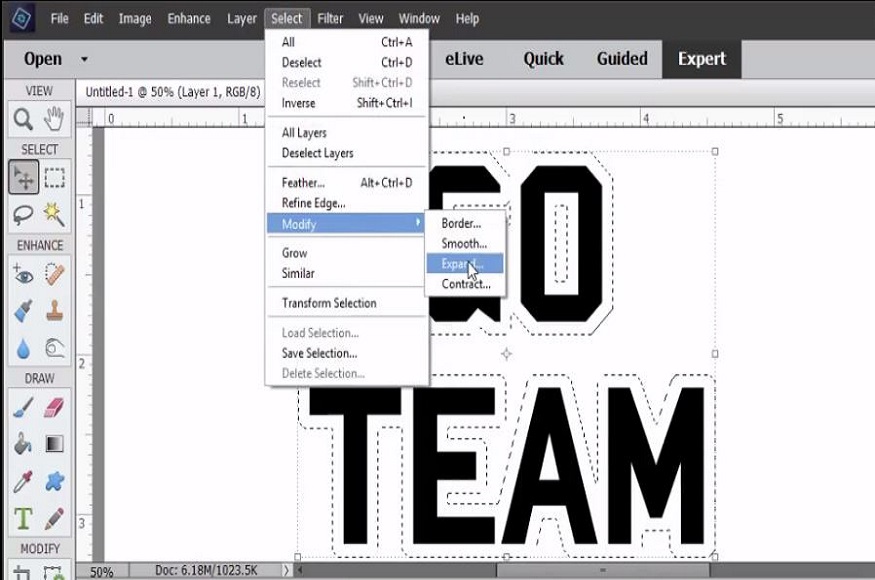
An expand selection tab will pop up on your screen, and you’ll need to set how many pixels you want to expand the boundary by. Since we used 100 points when configuring the typeface, we’ll fix it at 25 pixels.
Ideally, the Expand By pixels should be a quarter of the fixed font size.
You’ll notice that the text selection will be pushed out by around 25 pixels to confirm the changes made.
In the left toolbar, click the paint bucket and click on any region within the boundaries to fill it with color.
This approach is better since it provides sharper edges and an even better appearance to your text.
Tips for Using Text in Photoshop Elements
Photoshop Elements provides different approaches to manipulating text to achieve satisfactory results.
You can add text to images, move the text, add filters, and create outlines using the different tools featured.
This section looks to explain how you can manipulate text using Photoshop Elements.
Adding Text to an Image
Elements allows you to add text to images effortlessly. It will enable you to add lettering horizontally or vertically without involving all the design complications.
To do this, use the Text tool in the left toolbar, characterized by a “T” icon.
Right-click on the Text tool to switch between vertical and horizontal and choose an outlay option.
After defining the text’s outlay, click on any region in the image to insert text.
You can configure the text’s color, font, and size using the options bar.
Moving Text
Positioning the text in the image is also crucial when designing in Photoshop Elements.
Luckily, you can move the text box to different regions in the image by selecting the text and dragging it or moving the entire text box.
It would help to note that if you have a text box in the image, it's on its own layer.
Moving the layer will require you to select it in the Layers panel and select the Move tool in the toolbox.
Use the small circle in your text box’s middle to drag it to its new location.
If no text box exists in the image, use the Move tool to drag the text to the desired region.
Edit Text
Photoshop Elements also allows you to correct typos and add and delete text to your already processed images.
You can perform the aforementioned options on the platform by knowing your way around the Type tool.
The following steps will help you make changes to your text:
Activate the Type tool by clicking on its icon in the Tools panel.
Select which text layer you want to work on in the Layers panel or click anywhere within the text to select the type layer automatically.
Make the text changes:
- You can change the font type, color, and size from the editing options available
- You can also delete text by highlighting the characters you want using the I-beam
- It also allows you to add text by creating an insertion point within the line of text using your mouse
You might need to transform your text for better results in some projects. Start by selecting the layer, then choose Image, and click Transform.
From the options provided, select Free Transform.
Grab the bounding box handle and drag it to scale or rotate. To correct distortion, press Ctrl/Cmd.
Click the Commit checkmark icon after you finish editing your text.
Frequently Asked Questions
How Can I Make Text Stand Out in Photoshop Elements?
The best way to make text stand out in your image is to give it some color and a unique design.
Compare the text color with the background color to ensure the color selected achieves the perfect contrast to make it pop. You also need to ensure the text is on its layer.
To edit the text, highlight the relevant layer in the Layer’s panel and select “Effects.” Choose “Stroke” from the drop-down menu and select a color that perfectly contrasts the text and the surrounding image.
Can You Create a Circular Text Box in Photoshop Elements?
Photoshop Elements has all the necessary tools to modify a text box into any shape by using the Ellipse and Type tools.
To create a circular text box, start by selecting the Ellipse tool and using it to drag out a circle on your canvas.
Then click the Type tool and click anywhere within the Ellipse tool’s path to lock the text cursor to the shape.
This configuration limits your text to the circle’s boundaries, meaning your writing will follow the shape.
How to Create a Hollow Text Outline in Photoshop Elements?
Creating a hollow outline on a text using Photoshop Elements differs slightly from creating a color-filled outline.
Start by going to Layer, then Layer Style, and selecting Blending Options. Set the Fill Opacity to zero and click on Stroke to configure the available options.

Jeff Collier is an experienced film photographer who enjoys experimenting with modern digital photography equipment, software and apps. He’s also an ex-world champion triathlete and avid cyclist, clocking hundreds of km each week in the beautiful Tweed Valley of northern NSW, Australia.
👋 WELCOME TO SHOTKIT!
🔥 Popular NOW:
