


How to Outline Text in Photoshop (+ Make It Transparent)
Try this Photoshop tutorial to learn how to outline text in Photoshop in simple-to-learn steps - a must-have skill for the budding Graphic Designer.
Photoshop | Software | By Judyth Satyn
Shotkit may earn a commission on affiliate links. Learn more.
Outlining text is an important skill to have when you're learning graphic design. It gives the font a “pop” factor and sets it apart from the rest of the image.
Follow the simple steps in this Photoshop tutorial to create a font with quirky outlines using patterns, gradients, or blocks of color.
Let's get started and learn how to outline text in Photoshop.

Download a free copy of Adobe Photoshop to follow along with this simple tutorial.
- Want to buy Photoshop? Tap here to learn how >>
How to Outline Text in Photoshop
Step 1 – Open
To outline text in Photoshop you'll first need to open a file.
Open a blank document in Photoshop, or open the image you wish to add text to.
To create a blank document, navigate to the top menu bar and select File > New.
Enter the new documents details, for example, Width 500 x Height 500 px resolution of 300 dpi in the Preset Details Panel.
Otherwise, to select your chosen image, go to File > Open and browse to the file's location on your computer.
Step 2 – Create a Text Layer
Next, we will create a Text Layer in the Layers Panel.
Navigate to the top menu bar and select Layer and in the drop-down menu. Then select New > Layer.

Alternatively click on the New Layer icon, a square containing a plus sign, at the bottom of the Layers Panel.
Rename the Text Layer in the Layers Panel – this will make it easier to find if you're adding additional layers to your Photoshop document.
Step 3 – Select the Text Tool
Navigate to the Tool Bar and select the Text Tool, which is situated under the Pen Tool, or for the keyboard shortcut press T.
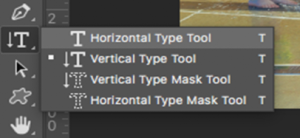
In the Text Tool menu bar, you will be given the option to select a Type Tool that writes horizontally or vertically. Select your preferred orientation.
Step 4 – Select Font Style
When selected, the Text Options Bar will appear above your canvas window. Here you can set the style, size, and color of your font.

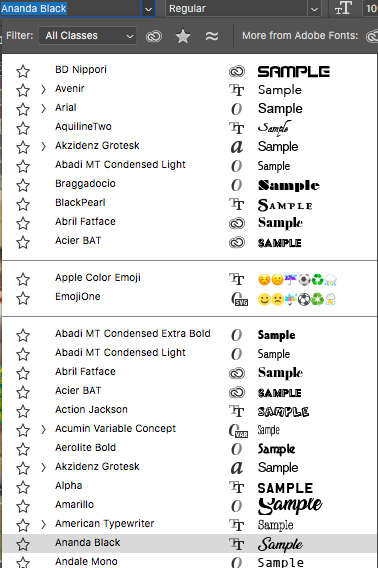
Select a Font style from the drop-down menu in the Type Tool's options bar.
The stroke outline will work on any text so select a font style that best suits your image.
Set the Size of the font and select a color from the Color Picker.

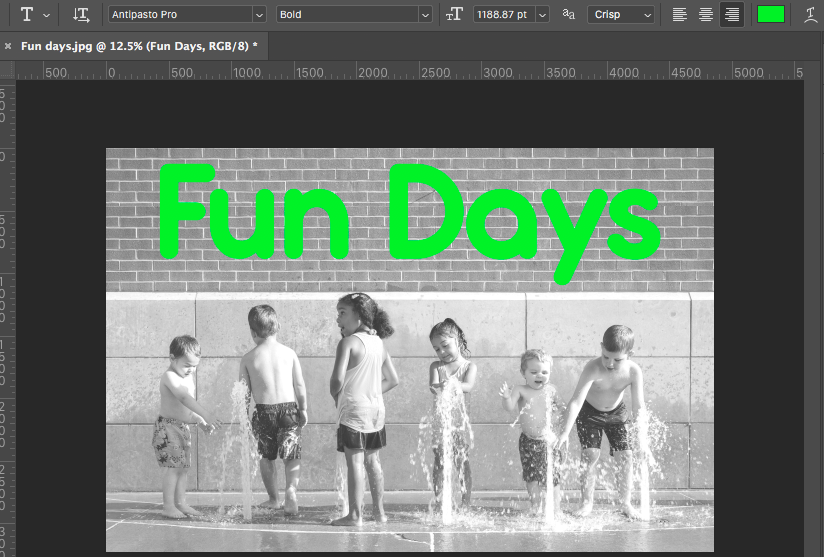
Step 5 – Enter your Text
Click on the Canvas window and write the text.
Adjust the font settings if you find the size or color doesn't suit the image's background.
Learn how to add a drop shadow onto your text or image in this Photoshop tutorial.
Step 6 – Layer Style
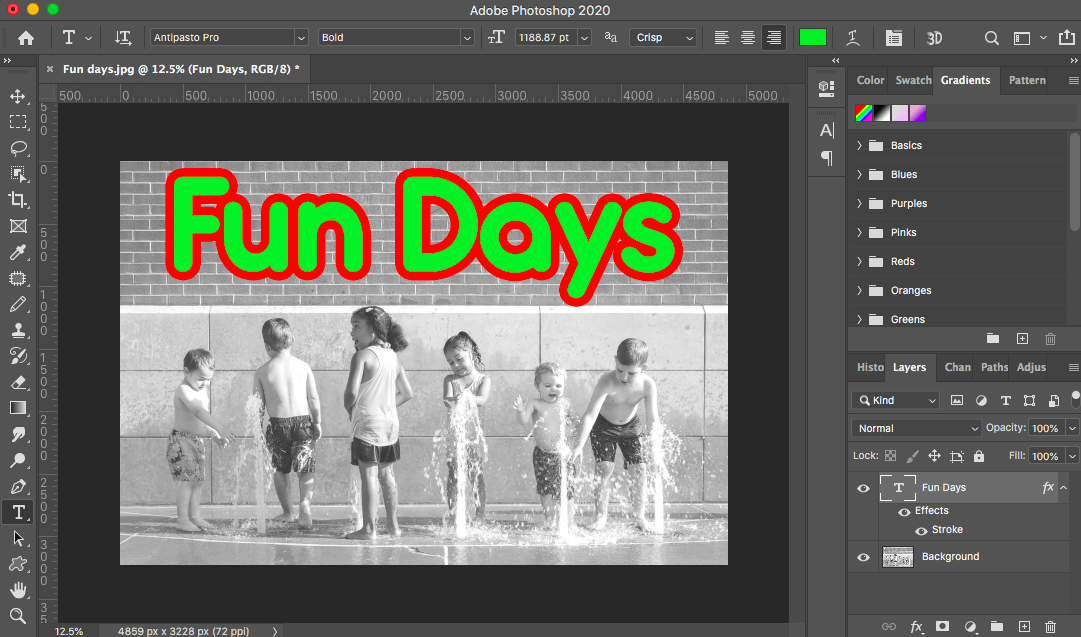
Now that you've created the text, you can begin to add the text outline. To do this we need to create a Stroke Layer Style.
Navigate to the top menu bar above your canvas window and select Layer > Layer Style > Stroke.
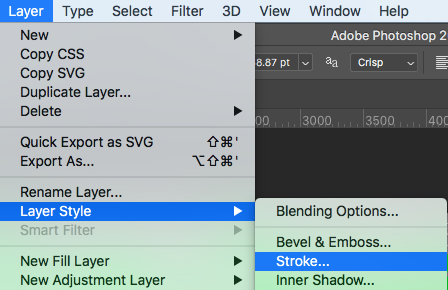
Once selected the Stroke Layer Style dialog window will open – here you can enter the properties for the outlining text.
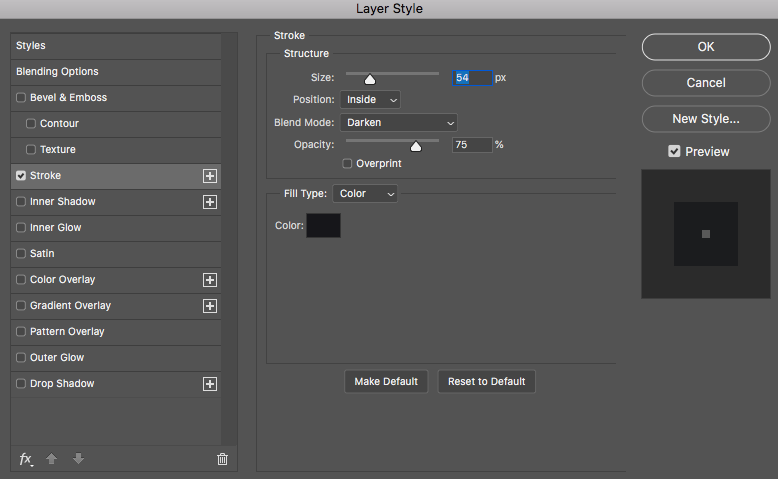
Position the Layer Style dialog box so you can view the text and the text outline as you adjust the outline settings.
In the Layer Style Dialog Box, adjust the size of the outline text by moving the Size Slider or by adding a value into the size box.
You will see the outline text decrease or increase as you move the size slider.
You'll have the option to position the outline text inside, outside, or center. Set the Position to Outside.

Beside Blending Mode, a drop-down menu will give you a list of blending options. Select Normal.
Decide on the Opacity you wish the outline text to be and adjust the Opacity Slider accordingly.
The drop-down menu beside Fill Type gives you the option to choose a Gradient, Pattern, or Colour as the outline text.
Select Color and click on the Color Box. A Color Picker dialog box will open giving you the option to select a color.
When you're happy with the properties of the outlined text, click OK.
In the Layers Panel, a Layer Styles Effect will be added beneath the Text Layer.
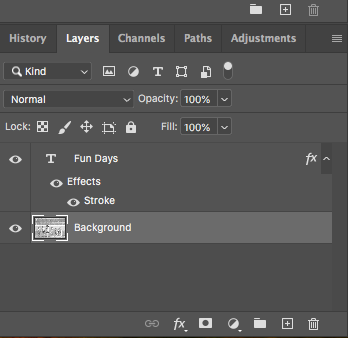
You can click on this stroke effect adjustment layer at any time during the editing process to change the outlining text.
Now you've learned how to outline text in Photoshop with a block of color, why not test it out with a gradient or pattern to see what wondrous font you can create?
Do you want to know how to make your text follow a shape? Check out this Photoshop tutorial for how to type on a path.
How to Make Text Transparent with an Outline in Photoshop
Normally when you want to make the text transparent in Photoshop, you select the text layer and change the opacity setting by adjusting the Opacity Slider in the Layers Panel.
Viola – your text is now transparent.
However, adjusting the opacity of the Text layer will also make the outline of the text transparent. So how do you make only the text transparent?
In the Layer Panel below the Opacity Slider is a Fill Slider. The Fill Slider will change the opacity of only the filled area, in this case, the text.

Ensure your text layer is active then slide the Fill Slider down to decrease the percentage. As you slide, you'll see the text begin to disappear but the outline will remain.
If you want to know more Photoshop editing tricks, you can learn how to make an entire background transparent.
Also, if you're not ready for the complexity of Photoshop just yet, learn how to outline text in Photoshop Elements.
Adobe MAX Update 2024
Photoshop is the ultimate tool for photographers, graphic designers, and visual creatives looking to take complete creative control of their workflow.
The Adobe MAX Update 2024 introduces several enhancements and new features to simplify core tasks.
With the assistance of Generative AI, these tasks include the ability to remove distracting elements from an image and streamlined processes for placing 3D elements in a 2D design.
Removal Tool – The key updates include an enhanced Remove Tool to effectively remove unwanted or distracting objects from an image without deteriorating the overall composition.
Distraction Removal – The automated Distraction Removal feature identifies people, objects, and overhead wires that may distract from the image.
Generative Fill – Powered by Adobe Firefly AI, Generative Fill allows you to build a composition with photo-realistic 3D elements, including correctly placed shadows, highlights, and perspective.
Generative Expand – Photoshop’s Generative Expland allows you to resize the canvas and use Adobe Firefly Image Mode to fill in photorealistic elements.
The Adobe MAX 2024 Updates are now live, and there's never been a better time to optimize your creative output with the Adobe Creative Cloud suite of applications.

Judyth is an experienced studio photographer and glass artist. When she isn’t Photoshopping comedians into the bellies of sharks, you can find her cooking delicious treats for her guests.
👋 WELCOME TO SHOTKIT!
🔥 Popular NOW:
