


How to Transfer a Photo to Wood
Did you know you can transfer a photo to a piece of wood? In this tutorial, we show you the best way to do it. Makes a thoughtful DIY gift for a loved one.
Learn | Photography Guides | By Ana Mireles
Shotkit may earn a commission on affiliate links. Learn more.
If you're looking for a fun project or a great gift idea, you're going to love this technique…
In this article, I'm going to show you how to transfer photos onto wooden objects.
This is a step-by-step guide to transfer laser-printed photos using a product called Mod Podge.
However, I'll also cover a couple of other photo transfer techniques if you don't have a laser printer or Mod Podge.
So pick your favourite photos and let's get to it!
DIY Photo Transfer to Wood: What You'll Need
Transferring photos to wood is not difficult, but the process needs a couple of days. Take this into account before you start the project.
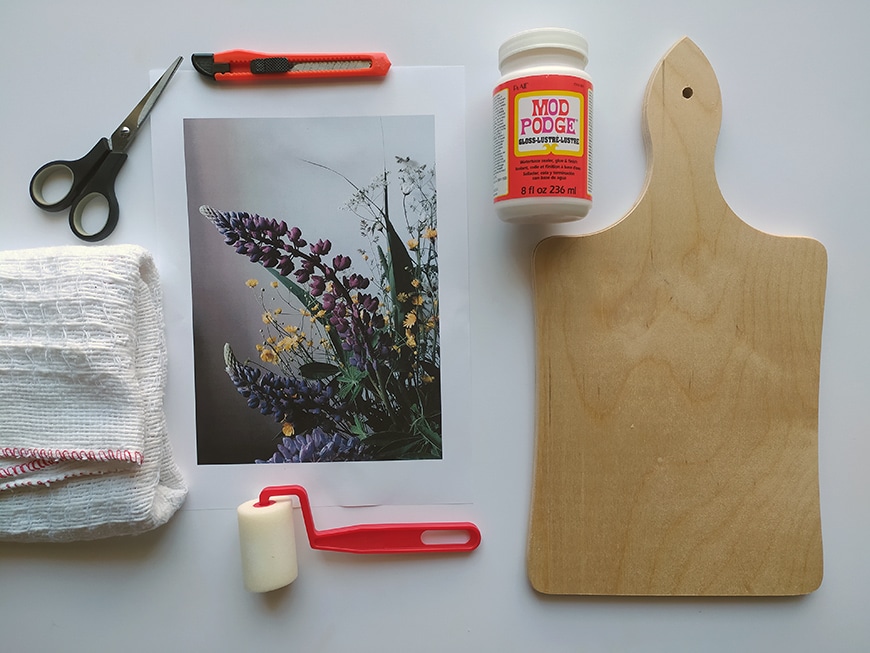
Here's what you'll need to transfer photos to wood:
- Mod Podge Photo Transfer Medium – you can also try making your own Mod Podge photo transfer medium using 2 parts Elmer's glue or cheap white PVA glue and 1 part water.
- A wooden object – it can be a board, a jewelry chest, or anything else you want to transfer your photo to.
- Brush / Roller – I like to use a sponge roller to spread the Mod Podge, but a sponge brush or a regular brush will work too.
- Laserjet printed photo – choose any photo you want to transfer (color or black and white, it doesn't matter). It needs to be printed on regular paper with a laserjet printer.
- Scissors / Cutter
- Cloth / Rag – it doesn't need to be from any specific material; any old rag will do.
- Mat – the mat will be used as a working surface. If you don't have one, you can just cover the floor or the table with some plastic or wax paper to protect it.
- Plastic card – this is to push out all the air bubbles. You can use a kitchen roller or even your fingers, but a plastic card works best.
- Sandpaper (optional) – this is to give it a more rustic look, it's not necessary for the transfer.
What is the Best Way to Transfer a Photo to Wood?
1. Get the wooden object
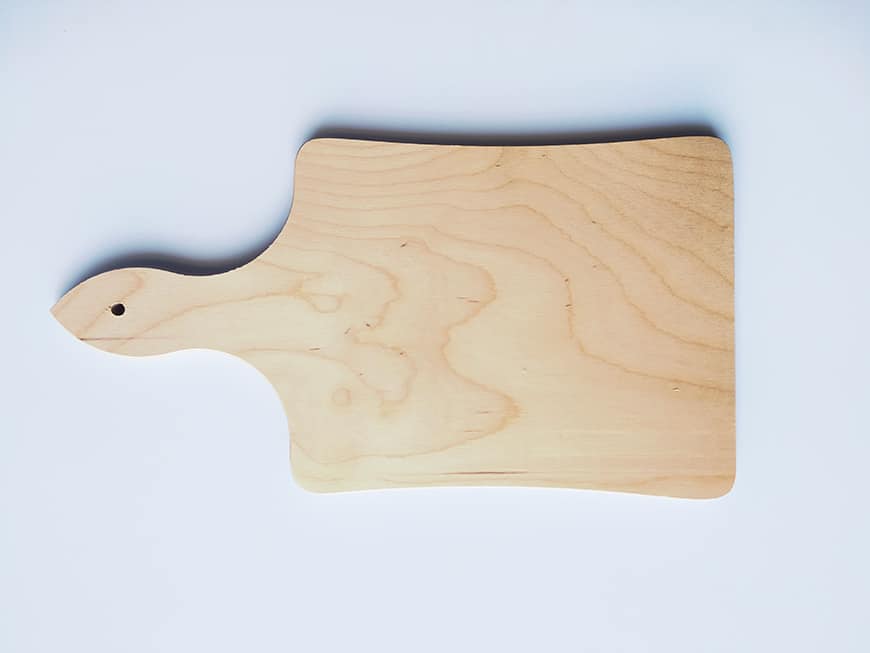
The first thing you need to do is find a wooden object to transfer your favorite photo to.
It can be a wood slice, an unfinished craft clock, a jewelry box, a wooden panel, etc.
In this case, I'm going to use a chopping board to decorate the kitchen.
2. Prepare the photo and print it
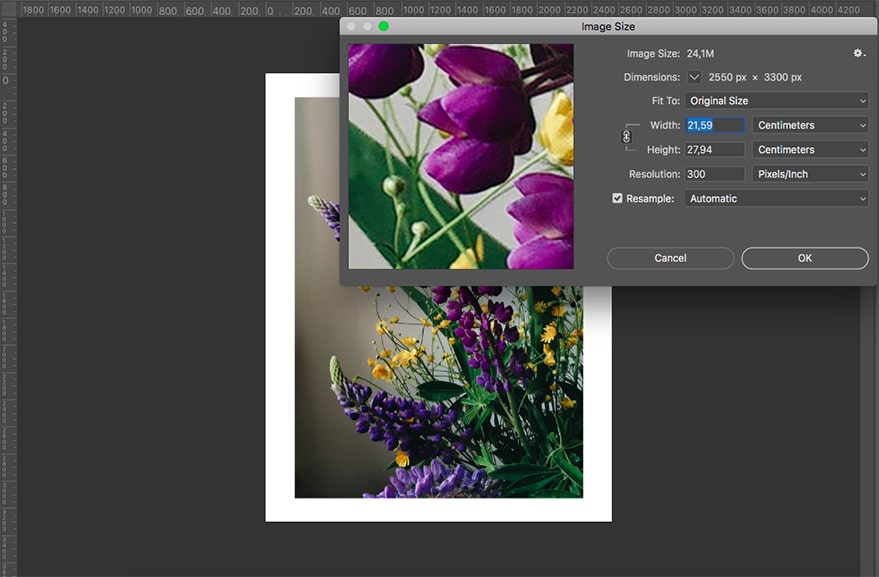
The next step in doing a photo transfer to wood is to ready your actual image.
You can choose any photo printed on laserjet – I'm using an image from Inga Seliverstova. If you don't have a laser printer, you can print the photo on an inkjet printer and then make a photocopy of it at any library, stationery store, etc.
Inkjet works just fine, but you may get sharper results with laserjet, depending on the wood grain you transfer photos to.
Before you print the photo, you need to make a few preparations. First, make sure it's the correct size for the wood. If it's not, you can use Photoshop or any other photo editing software to resize it.
Remember that your chosen photo will transfer to the wood as a mirror image. If you want to keep it exactly as you see it on your computer, you should flip it before printing.
If there's any text in the image, this is super important as the mirror image will show your text backwards. If not, then it's your choice if you want it as it is or mirrored.
In any case, you can flip it using photo editing software.
Now print your photo on regular printer paper – don't use photo paper.
3. Cut it
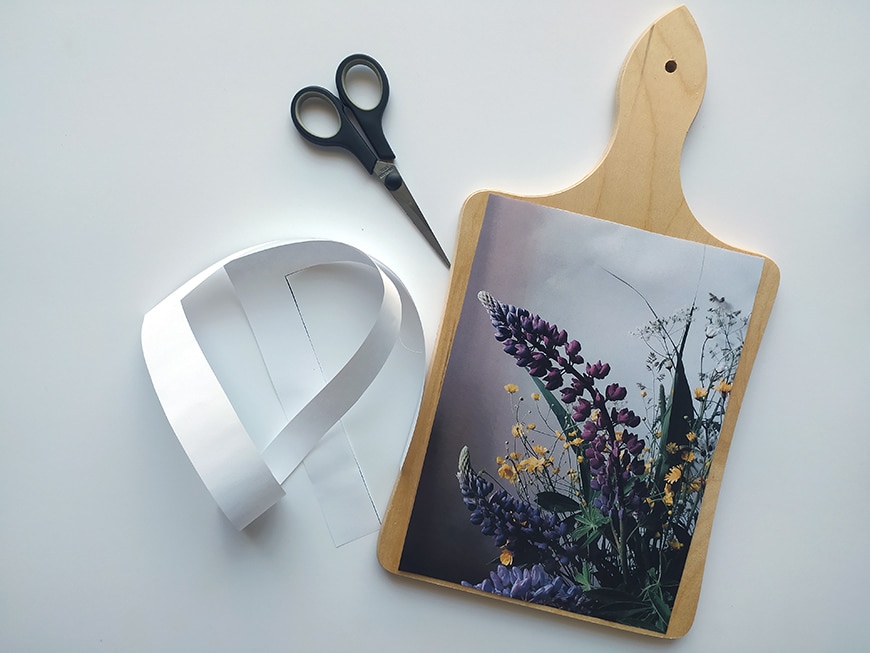
If your photo doesn't have the exact shape or has white borders, cut it down to the size and shape you need for the wood transfer.
4. Cover it with Mod Podge
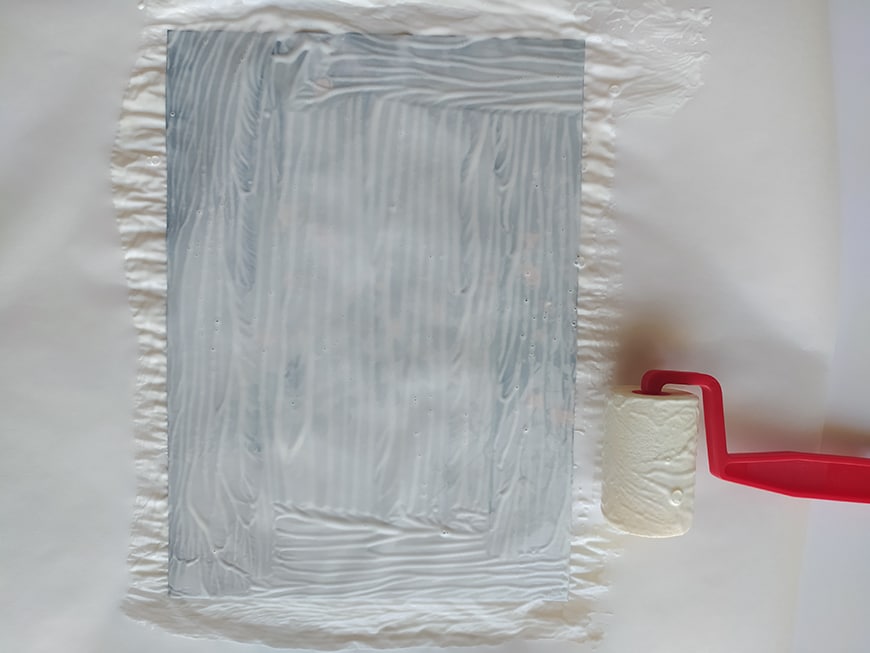
Now you need to cover the image with a generous amount of the photo transfer medium – in this case, the Mod Podge.
The way you do this is entirely up to you. Feel free to pour it onto the photo and then spread it, or you can dip the foam brush and slowly distribute it.
If you do the latter, make sure you do a few passes to really cover the paper – don't worry if you don't see the image anymore. It should look all white, just like it does in the above photo.
5. Place it on the wood

Since the paper is all wet with the Mod Podge, it's going to be a bit flimsy – so, pick it up gently.
Now, place it face down onto the wood. Try to be as accurate as possible because it's better if you don't have to reposition it.
It doesn't have to be perfect, though. Keep in mind that you're going for a handmade rustic look, and any imperfections will look fine against the wood grain anyway
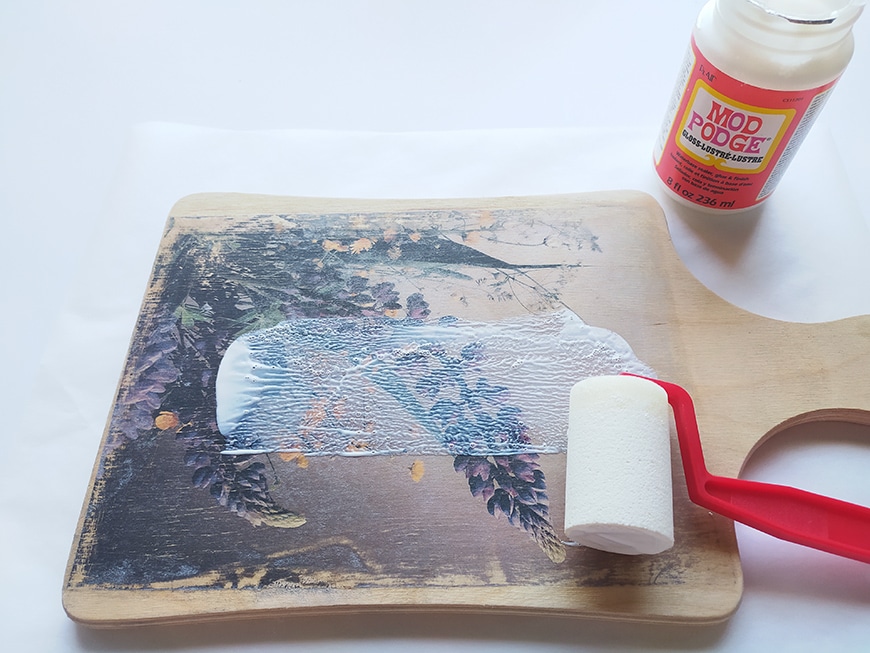
6. Push out the air bubbles
Once you have it in place, you need to push out any air bubbles. Air bubbles can make a photo transfer to wood turn out patchy and incomplete.
You can do a good job just by rubbing your hand from one edge to the other – although using a rolling pin or even a plastic card makes things easier.
As you can see in the photo, I had already taken the wooden board off the wax paper, thinking the messy part was over – bad idea! When you push the air out, you'll also be taking out any excess Mod Podge.
Take my word for it – you want to do this part of the process while your working area is still covered. It depends on how much Mod Podge you used, of course – but it's better to be safe than sorry.
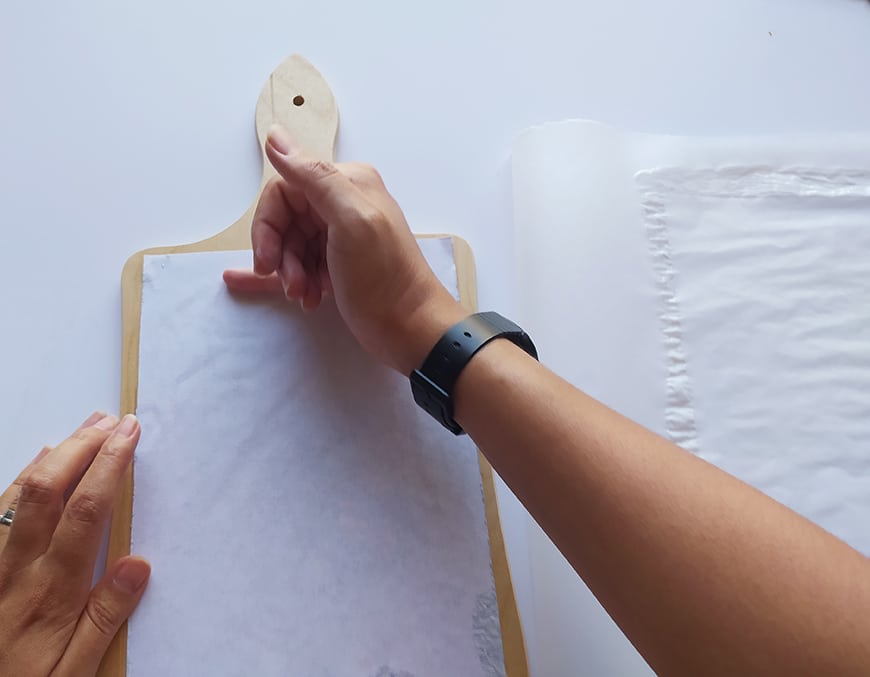
7. Wait until it dries

Well, that's it for now. You can't do anything else until your wood transfer is completely dry.
The amount of time it takes depends a bit on the weather and humidity in the air. To be on the safe side, leave it for 24 hours.
You can tell that it's ready by touching it, of course – but also because it looks like regular white paper again.
You won't be able to see the image, and the color is pretty much uniform throughout the entire paper (as you can see in the above picture).
8. Put a damp cloth on it
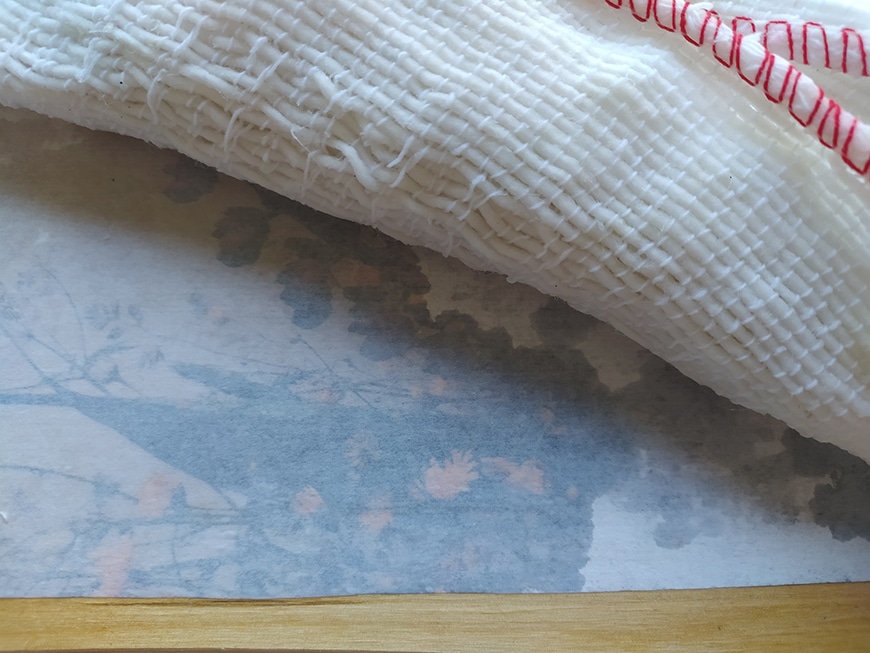
Now you need to get it wet again – I know, it sounds weird. However, when the Mod Podge dried, it transferred the ink to the wood – what you are now doing is getting the paper wet to take it off the wood, leaving the image behind.
About 15 to 20 minutes with a wet washcloth on top of it should be enough.
Notice how the paper becomes more transparent, and you can start to see the photo – that's when you know you can move on to the next step.
9. Peel it off
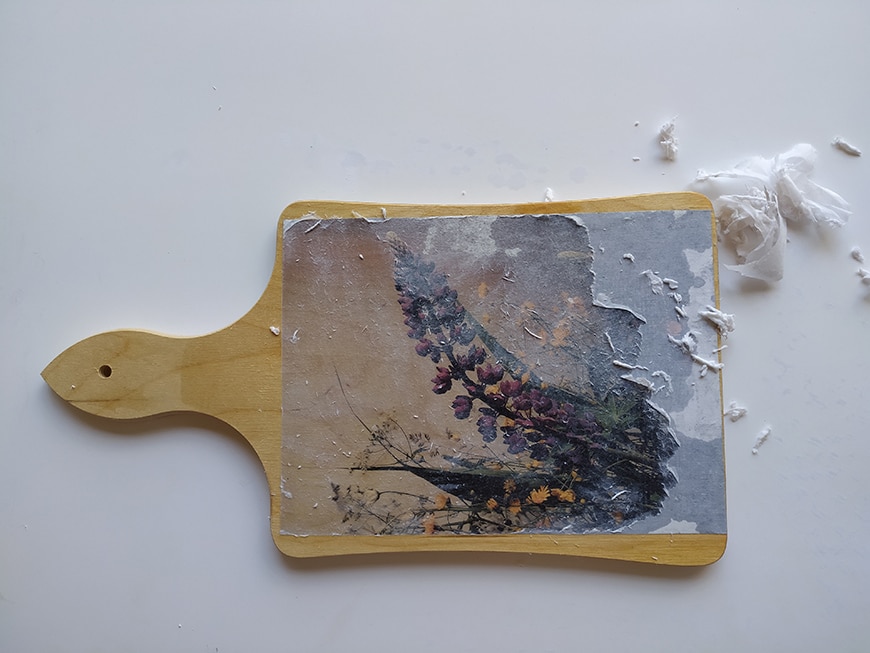
Gently rub the paper to peel it off. If it's not coming off, you should moisten it a little more – don't try to force it, or the image might come off too.
Keep doing the same process a few times until you see there's no more paper on it.
10. Sand it (optional)

If you want to give it more of a rustic look, you can use sandpaper on the picture's edges. Just enough to see the wood grain blend with the photo.
You can rub the sandpaper on top of the image to make it look like an old photo – just do it very gently. It's better to repeat the process a few times than to be too aggressive and ruin the project.
Make sure you do this outside or on a surface that's easy to clean – if you do it on a rug or a carpet, you'll get sawdust all over it.
This step is completely optional, though. If you want to have a more defined photo, skip directly to the next step.
11. Give a finishing coat of Mod Podge
You're done – that's how easy it is transferring photos onto wood!
To make your photo last longer, you can put a top layer of Mod Podge to seal it in. A thin layer is enough – you don't have to cover it as much as you did to transfer the photo.
How do I Transfer an Inkjet Photo to Wood?
To transfer an inkjet photo to wood, you need to print on a type of silicone-coated paper. For example, the paper stickers are stuck onto when you buy them. You can buy inkjet stickers and keep the A4 silicone coated paper after you've used them.
Keep the wooden surface at hand because you're going to make the transfer right after you print. It doesn't matter what you choose – it can be a piece of plywood.
Now, peel off the labels and feed your inkjet printer the silicone-coated paper. You'll need to print on the side that had the labels originally and not the back.
Pick it up from the printer without touching the printed image because the ink is fresh, and you could smudge the photo. Now, put it on the plywood – the printed side should be facing down to transfer the ink onto the wood.
That's it. Pass your hand on top or a rolling pin just to make sure the entire image is transferred.
To preserve your image, you might want to use a sealing product – you can use Mod Podge as a sealer (it comes in matte and glossy finishing) or spray lacquer.
Can you iron images onto wood?
Yes, you can iron images onto wood if you use laserjet printed photos. Choose the picture you want to transfer and mirror the image before you print it – in the same way as the other methods.
Place the print facing down on the wood – you can tape the image along one edge to keep it in place. Also, this will work as a hinge to check on the progress and iron it again if necessary. Otherwise, it would be impossible to keep it in the same place.
All you need to do now is start ironing to warm the entire photo – try to do it as uniformly as possible. Once it's hot, pick up a corner and slowly lift it – while you do this, you should still be ironing the rest of the picture.
Be careful not to burn yourself when you do this. Making a photo transfer to wood is a great family project, but using this technique is not the best if you're doing it with small children.
Final Words
As you can see, there are many ways to do a DIY photo transfer to wood, and they're all fairly easy to do.
The first method takes a little bit of time – but as you can see, the result is worth it!
Give it a try, and let us know if you have any questions or doubts about how to transfer photos to wood.

Check out these 8 essential tools to help you succeed as a professional photographer.
Includes limited-time discounts.

Ana Mireles is a Mexican researcher that specializes in photography and communications for the arts and culture sector.
1 Comment
Leave a Comment
👋 WELCOME TO SHOTKIT!
🔥 Popular NOW:

Thanks for reading my article – let me know if you have any questions.