


Photo Restoration: How to restore old photos
Got some vintage photos lying around that you want to restore? Check out this step by step guide to using Photoshop and other methods to restore old photos.
Learn | Photography Guides | By Ana Mireles
Shotkit may earn a commission on affiliate links. Learn more.
If you like reminiscing and looking at old family albums, you should learn how to give new life to any damaged photos using Photoshop.
In this article, we'll show you how to fix some of the most common problems in old photographs, such as dust, scratches, and fading.
You'll also find some software recommendations if you don't use Photoshop, and some online photo restoration services if you prefer the hands-off approach.
(If you're wondering how to digitize your old prints and negatives, this guide to the best photo scanners will help.
OK, now it's time to bring back some memories!
How to Restore Old Photos using Photoshop


Note that since this article was written, you can now use Photoshop Generative Fill to restore old pictures much easier than doing these manual steps.
1. Add a new layer
Whenever you're restoring an old photo, you should be working on different layers. This allows you to keep the original base intact in case anything goes wrong.
Also, it will allow you to apply different masks and intensities to each layer to have more control over the photo restoration adjustments you're making since photos present various degrees of damage across the surface.
2. Use the spot healing brush

Grab the Spot Healing Brush from the Photoshop toolbox. Since you're working on a separate layer from your original, and this new layer is empty, the Spot Healing Brush won't have any information to work with. To solve this, you'll need to check the option Sample All Layers.
At this point in the process, you could also check Current Layer and Below, but later on, you'll have many more layers, and it's better to set it right from the start.
You should also choose Type: Content-Aware.
Now that you have these settings, you can just paint over any dust, scratch, blemish or stain, and Photoshop will grab the information from the surrounding areas to heal it.
Make sure you zoom in to see all the dust and scratches but zoom out often to see how things are looking from afar. As wonderful as the Spot Healing Brush is, it can sometimes create blotches – so keep an eye on that.
3. Fine-tune the healing

Most of the imperfections can be taken care of with the Spot Healing Brush. However, there are some areas where it just doesn't do a good job – it can create blotches or artefacts.
For those occasions, you can use the regular Healing Brush or the Clone Stamp.
The Healing Brush works similar to the Spot Healing Brush, except that you'll be able to choose the source area, making it perfect for fine-tuning the photo restoration editing process.
Hold the Alt key and click on the area you want to sample, then click on top of the area you want to heal. Photoshop will use the information of the indicated source and blend it with the area that is healing.
The Clone Stamp works in the same way, except that it doesn't blend – it copies and reproduces the pixels exactly as they are.
There aren't many cases where you would need this one when you're restoring an old photo, but it can be useful sometimes – for example, on the edges.
I always use a separate layer for each tool; that's my way of having things organized if I have to go back and fix anything. Feel free to find your own way of doing this.
4. Dodge and burn

Most old photos start to fade in different areas – it rarely happens uniformly across the picture.
To fix this, you'll need to darken the brighter areas and brighten the darker areas – this will give consistency to the overall exposure, as it once was.
You can do this in different ways; I like to use Curves Adjustment Layers in Photoshop. (See: where is the dodge and burn tool in Photoshop?)
First, push the highlights to brighten the dark spots caused by moulding or other ageing problems. The entire image will look overexposed, don't worry, though.
The Curves Adjustment Layer is made on a mask – that's the white thumbnail you'll see in the Layers panel.
When you color the mask black, it won't be visible – you can do this with Edit, Fill, Black. Then, grab the Brush tool and start painting white over the areas that you needed to brighten.
If you paint over an area that didn't need to be dodged, toggle to black and paint over it again. When you're done, you can change the blending mode of the mask for a smoother transition. To do this, use the Blend-If option in the Layer Style.
For burning, you do the opposite process. Add another Curves Adjustment Layer and darken the image. Then use the mask to make it visible only where it's needed.
BONUS TIP 1 – Remove texture
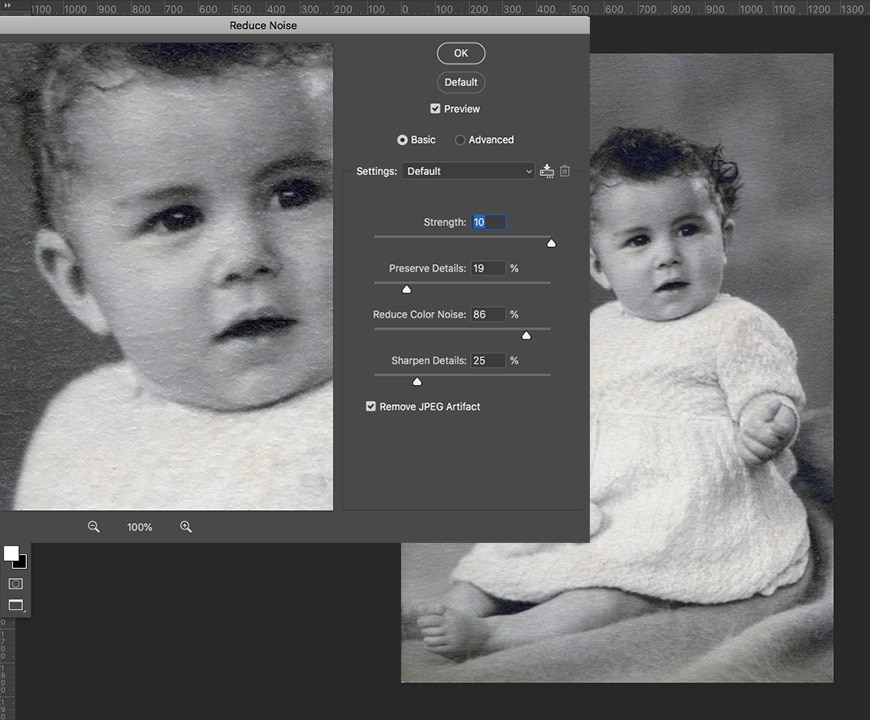
Sometimes photos were printed on paper with a lot of texture, and when you scan them, the texture doesn't always look good.
To reduce or remove the texture, you can use the filter called Reduce Noise. Use the sliders to adjust the intensity of the filter.
Keep in mind that you'll be losing sharpness when you do this, so you'll have to find a good compromise between the amount of texture and the amount of detail in the subject.
This is something to judge on a case by case bases, and it's also a personal choice of the photo retoucher.
BONUS TIP 2 – Remove color deviations

You might notice that sometimes there are color stains or a color cast over a black and white image. You can easily remove a color cast by adding a Black and White Adjustment Layer at the end of the restoration.
You can also use this technique to colorize the entire photo with a sepia tone or another vintage look. You can do this with a Color Lookup Adjustment Layer.
Other Great Photo Restoration Software
We've looked at how to restore old photos using Photoshop, but what other software is available that does a similar job?
1. Retouch Pilot– it's specifically designed for removing imperfections. It's very user-friendly, so you don't need the learning curve you need in Photoshop.
2. PhotoWorks – it has a precision healer that is very helpful in removing dust and scratches.
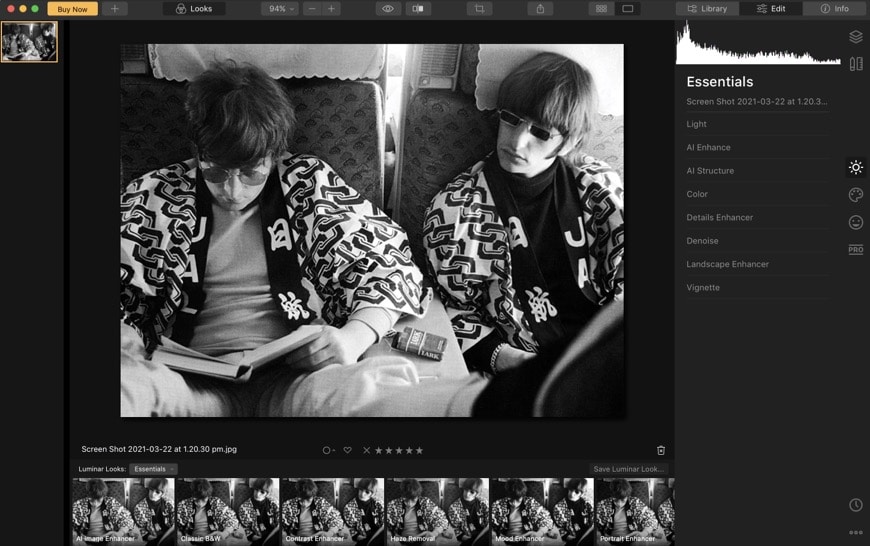
3. Luminar 4 – you can use any of the essential looks to recover the original colors and dehaze to add contrast to old pictures. Then, use the Clone & Stamp tool to remove imperfections.
4. Akvis Photo Retoucher – specifically developed for photo restoration. You can remove dust and scratches as well as reconstruct missing parts.
5. GIMP – it's free, which makes it a great choice if you're not earning money from your restorations. It has some powerful tools, but you'll have to download and install some extra plugins to get the job done – see the best GIMP plugins here.
6. Photomyne – a popular iOS and Android app that lets you scan old photos using the phone's camera, then restore and share them.
7. Lightroom – one of the other pieces of software from the Adobe suite commonly used by photographers. Similar to Photoshop, you can use it to remove dust and scratches as part of the editing process. Here's a tutorial on how to do it.
8. Aiarty Image Enhancer – an AI-powered tool that automatically restores old photos by enhancing details, reducing noise, and repairing scratches and fading. It’s a great option for quick, one-click results, especially when working with multiple images.
Online Photo Restoration Services
If you don't have a photo editing program to restore your photos, or you don't have the patience to catch every speck of dust – don't worry; we've got your back.
Here's a list of online photo restoration services where you can send your digitalized photo, and they will restore it for you.
FixthePhoto – This is an online professional photo restoration at affordable prices, starting at $25 per photo. Upload your photo and get a free quotation to know exactly how much it would cost, as it will depend on how damaged it is. They can fix water and mould damage, restore and reassemble missing pieces, colorize b&w pictures, remove dust and scratches, and overall sharpen and antique photo restoration. The turnover is between 3 and 5 days.
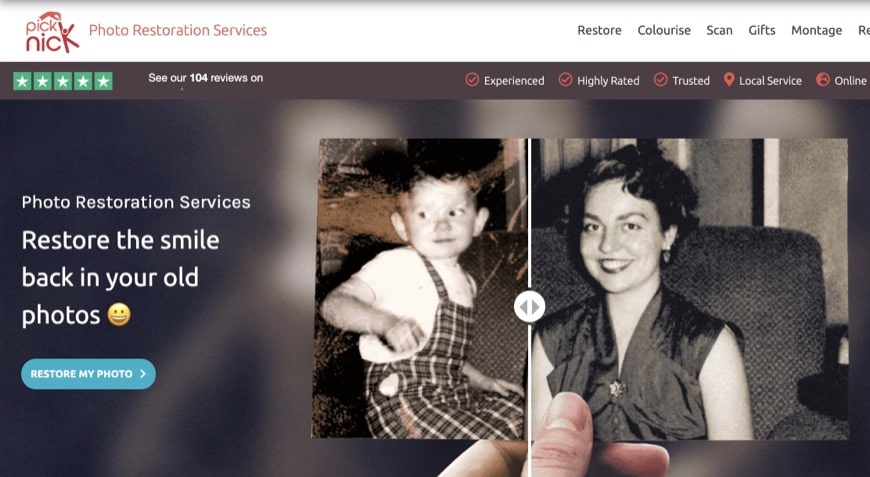
Photo Restoration Services – Based in Kent, UK, it offers local and online services. It offers different prices according to the type of restoration and difficulty. For example, fading restore costs 10 pounds, while damage restore goes from 15 to 60 pounds depending on the needed restoration level between low, medium, high or severe. They also colorize b&w pictures for 45 pounds.
Fiverr.com – This is a website where freelancers offer their services. The good thing is that you'll have tons of specialists to choose from where you can see their portfolios, pricing and turnover to determine which one is best for you. You pay the website, and Fiverr will pay the service provider when they deliver; this way, both parties are protected in the transaction.
Damage Photo Restoration – This online photo restoration service has a turnaround of two days, with the possibility to rush it to 36 and even 24 hrs – at extra cost. The prices depend on restoration level, and they are divided into Standard $25, Premium $35 and Extreme $50.
WeEdit.Photos – This website offers professional photo-retouching of all kinds. While there isn't a photo restoration section, be sure they can handle it. The turnover is 2 days for up to 20 photos – they offer rush services too for an extra cost.
Final Words
I hope you enjoyed the trip down memory lane restoring old family pictures from your vintage film cameras. Remember that the level of photo restoration is always a personal choice.
Some people like to get rid of the biggest problems that are distracting from the subject but leave the imprint of time in it – that's OK.
Other people prefer to restore the image fully – that's OK too, of course!
Now you have all the tools you need, the rest of the process is up to you. If you have any questions or want to share any experiences with any of the photo restoration services mentioned in this guide, please leave your comments below.

Check out these 8 essential tools to help you succeed as a professional photographer.
Includes limited-time discounts.

Ana Mireles is a Mexican researcher that specializes in photography and communications for the arts and culture sector.
3 Comments
Leave a Comment
👋 WELCOME TO SHOTKIT!
🔥 Popular NOW:

Thank you so much for the information. Is this article still legit in 2023, given how fast AI evolves?
You’re welcome Alex. Yes, the information is still valid. Of course, AI can help by doing the leg work and you can use these tools to fine-tune the details that AI might leave untouched or misinterpreted.
Thanks for reading my article – let me know if you have any questions.