


How to Sharpen an Image in Photoshop
Got a blurry photo? We can fix that! Follow this step-by-step guide to sharpening images in Photoshop using the best tools and processes.
Photoshop | Software | By Ana Mireles
Shotkit may earn a commission on affiliate links. Learn more.
Knowing how to sharpen an image in Photoshop is a handy skill for any photographer.
Blurry images happen for a variety of reasons. Maybe you had your camera in autofocus and it placed the focus point in the wrong place.
Perhaps it's a problem with your gear and your lens simply doesn't deliver the sharpest of images. This is a common issue with non-professional zoom lenses.
Or perhaps your image was perfectly sharp but looks a little fuzzy when you upload it to your social networks because of the compression algorithms from Facebook or Instagram.
Whatever the reason, being able to sharpen your images in Photoshop means you have a solution up your sleeve. There are many ways to do this and which one is best depends on your own workflow and what you want to use the image for.
Here I’ll go through some of the most common and useful processes.
- Related: How to sharpen photos in Lightroom
What is Image Sharpness?
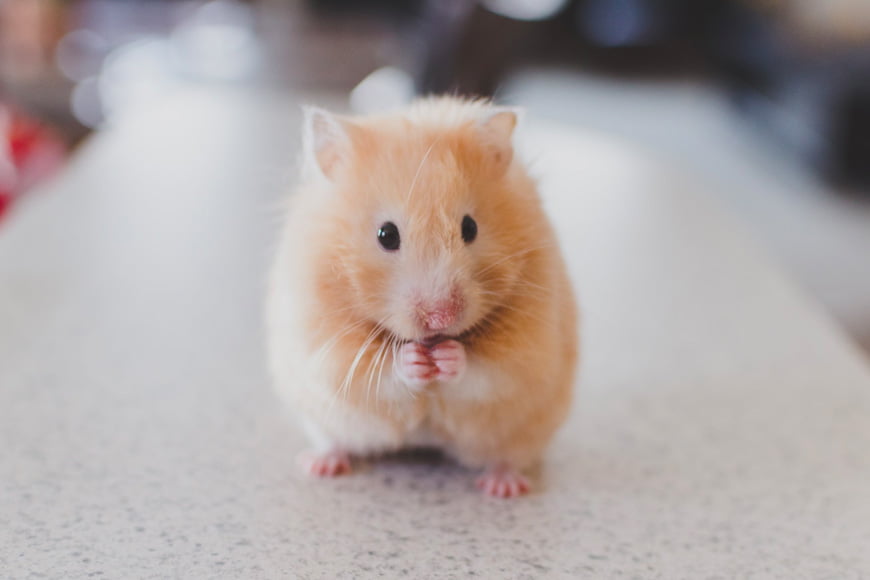

Credit: Ricky Kharawala
Image sharpness refers to the amount of detail you get from the area in focus. Look at this image, for example – the background is purposely blurred out.
This is a technique that makes the subject stand out because it’s in focus. However, not all of it has the same sharpness.
The difference between the before and after images is in the amount of detail you can clearly identify in the face area.
How Do You Make a Blurry Picture Clear in Photoshop?
It’s impossible to change the focus of a photograph once it's been taken, but what you can do is add the effect of sharpness in Photoshop.
This is done by increasing the contrast on the edges to make them look like they are more defined.
So, when Photoshop detects a big difference between lighter and darker areas, it will increase the contrast to make the difference more evident.
Of course, there’s a limit to what Photoshop can do. If the image is too blurry then it won’t be possible to turn it into a clear picture.
Back to the example image above – I can make the subject sharper so that you can see each hair on the face, but I won’t be able to put the background in focus.
Limits of Image Sharpening
The limitation of what you can or can't bring into focus isn't the only one that exists when it comes to sharpening an image in Photoshop.
These tools also have a limit on how much sharpening they can do before they start having unpleasant side-effects. One of the biggest such issues is haloing.
Haloing means that a bright border starts to appear surrounding the most contrasting areas of the image. This border is called a halo.
This issue is not only caused by sharpening; it can also happen with HDR images and other edits when they are pushed over the limit.
Another complication comes if you have any noise in your picture. Noise is an unrelated problem but it becomes much more noticeable if you apply any sharpening filter or technique.
So, it’s better to get rid of any noise before using any of the following techniques.
How to Sharpen an Image in Photoshop
There are many ways to increase sharpness in Photoshop. There are six different filters inside the Sharpen category alone, plus other tools and techniques that you can find in different sections of the program.
This article is about three of the most common, and the most useful in my opinion: Unsharp Mask, High Pass, and Smart Sharpen.
I’ll give you a step-by-step for each one, but let’s start by briefly explaining what they are:
- Unsharp Mask gives you some settings that you can manually adjust, combined with a great algorithm. This makes it a great compromise between fully automatic and manual adjustment.
- High Pass is the easiest one to use while still delivering great results. It works with a new layer dedicated to finding the edges and working only on those.
- The Smart Sharpen filter gives you the most control. Plus, you can save the adjustment as a preset to use on multiple images and create a more efficient workflow.
Let’s go more in-depth about how you can use each one.
1. Using the Unsharp Mask
Step 1: Duplicate the Layer
Find the image you need and open it in Photoshop. As a default, it will open as a locked background layer.
You should always work in separate layers. First of all, you’ll always have the original untouched to go back to if anything goes wrong.
Secondly, even if everything goes as it should, working in different layers allows you to apply different amounts of sharpening to different areas, or even use masks to leave some areas without any sharpening at all.
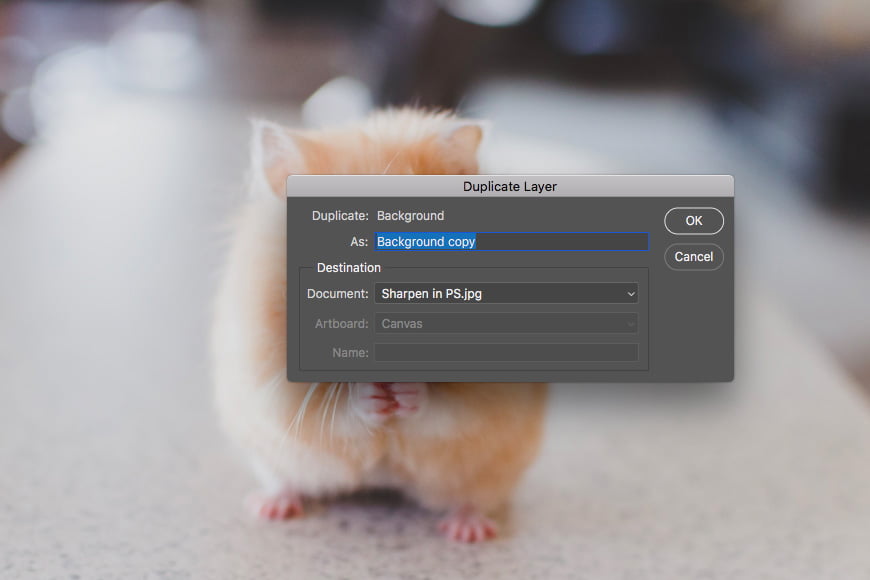
To duplicate a layer you can right-click on it and then select Duplicate Layer from the menu. This will open the properties panel for the new layer.
You can rename it here, or you can do it later on. Leave the rest as it is and click OK. This will create a copy of your background on a separate layer.
- Read more: How to type on a path in Photoshop
Step 2: Change the Blending Mode

While you have this new layer selected, open the Blending Modes menu and change from Normal to Luminosity.
We do this because we're just going to be working with contrast, and the Luminosity blending mode considers the lightness of the pixels. As such, it won't mess with the color or saturation of the image.
Step 3: Apply the Unsharp Mask Filter

Go to the menu Filter, Sharpen, Unsharp Mask. This will open a dialogue box.
Here you can see a zoomed-in area of your image to preview what the filter is changing. Make sure the preview option is checked and you can see changes in the overall image as well.
Start moving the sliders to apply the filter. The Amount slider will control the amount of sharpness. In my experience, around 50 will work well without causing too many side-effects. But this can change from image to image, so just move it and find the right balance.
The Radius sets the number of pixels that will be affected by the filter. Remember how we said the sharpening works by increasing contrast at the edges between dark and light areas? Well, changing the Radius determines how much to consider an ‘edge’ and therefore how many pixels are influenced by the effect.
The Threshold slider indicates how much contrast there needs to be in between zones for it to be considered an edge, and for the filter to therefore be applied to it.
When you're satisfied click OK.
Step 4: Fine-Tune

You can fine-tune the sharpening effect on your image by changing the opacity of the layer. Remember it should look sharp but natural.
You can also use layer masks to apply the Unsharp Mask to specific parts of the image. Just click on the Create Layer Mask button from the bottom of the Layers panel.
This will create a mask to cover certain areas of the layer. Paint in black what you want to cover with the mask and leave white what you want visible.
Step 5: Save
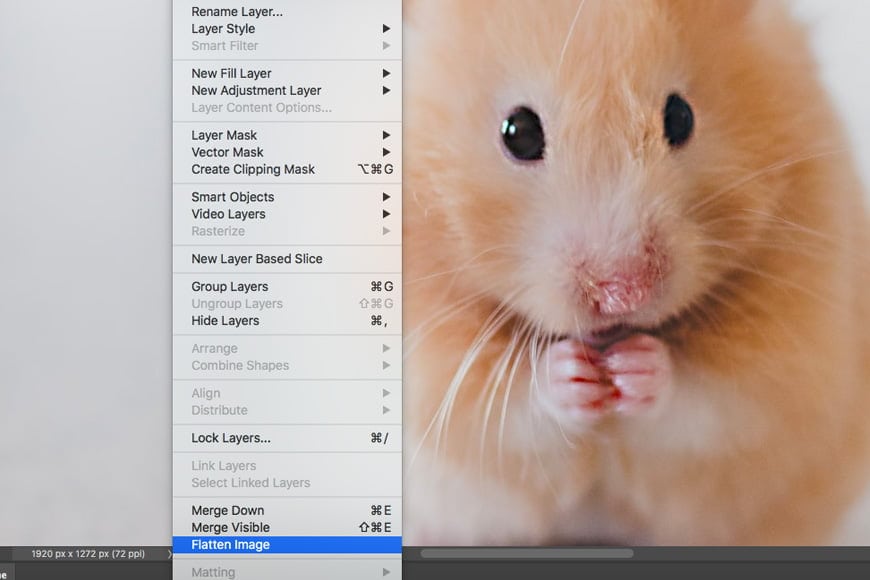
That's it. If you're satisfied with the result and don't need to come back for more editing, you can Flatten the image from the Layers menu. Then save your file.
2. Using the High Pass Filter
Step 1: Duplicate the Layer
Open your image in Photoshop. As I explained in the Unsharp Mask method, working in a separate layer is always advisable. In this case, it's not only a suggestion, it’s required for the sharpening process.
This is because the sharpening happens by blending the original image and the layer with the high pass filter. So, just drag and drop the background layer into the New Layer button to make a copy.
Step 2: Convert to Smart Object
Using Smart Objects is also an advisable addition to your workflow, however, it’s not always as important as others.
For this process it's useful because it will allow you to come back to the filter and adjust it – bearing in mind that you won’t be able to see the effect before applying it.
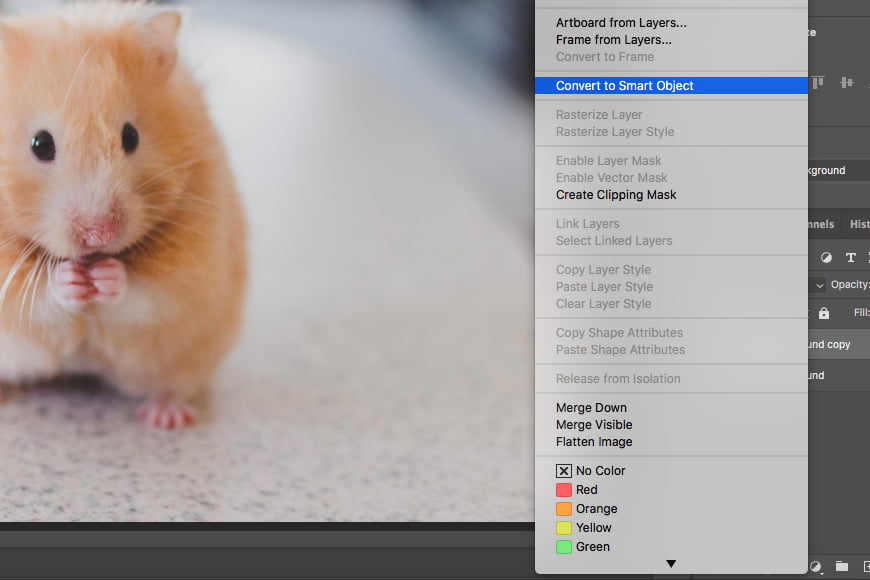
Having said this, select the background copy you just created and right-click on it. Then, select Convert to Smart Object from the menu.
Now you'll work non-destructively, and all the filters you apply to this layer will be Smart Filters.
Step 3: Apply the High Pass Filter

Now go to the menu Filter, Other, High Pass. This filter places a neutral grey layer on top of your image. Then, on this solid color, Photoshop will mark the edges that it found.
The way Photoshop knows which edges to mark is set by the radius. The Radius slider works like the one from the Unsharp Mask: it will determine how many pixels around the contrasting ones will be considered part of the edge to sharpen.
To put it another way, a value of 1 is telling Photoshop that only one pixel on each side of the edge should be manipulated.
Following this, if the slider is at its lowest value you’ll see only a flat grey layer. If you slide it to the maximum you’ll see your entire image because everything is considered an edge.
So, how do you find the best value? You’ll want to see the contour of the subject or the area you want to sharpen well-defined without any of the other areas starting to appear in the grey layer.
Start at the lowest value and slowly slide it to the right until you find the sweet spot. Don’t get too worried though – because you turned it into a Smart Object, you can come back to the filter and adjust the radius as many times as you want. Then press OK.
Step 4: Change the Blending Mode
Ok, now the new layer is created on top of your original image. The default Blending Mode is Normal.
This won’t blend it with the original background. As a result, you’ll only see the grey layer with borders you were seeing in the preview. To see the sharpening effect you need to blend both layers.
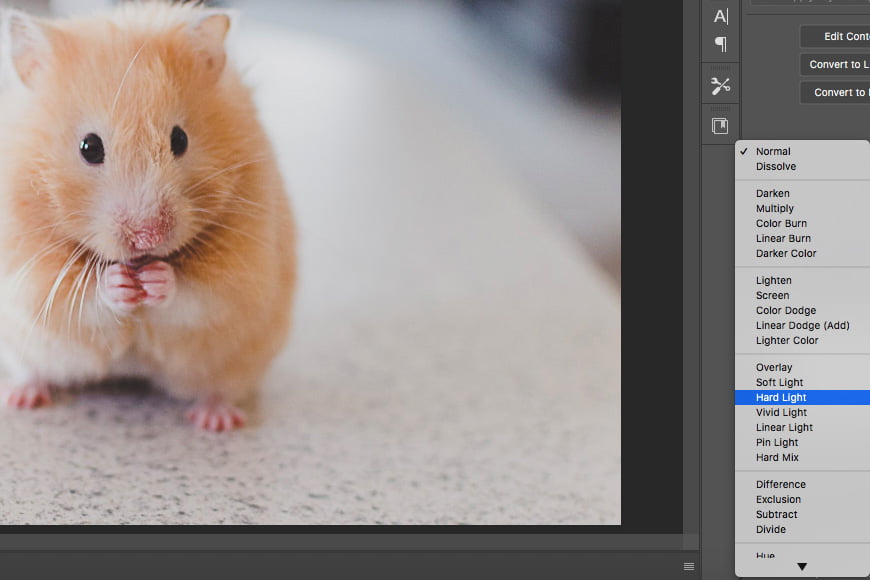
From the Blending Mode menu on top of the panel, you can select the one that works best for you.
If you’re working with one of the latest versions of Photoshop then you can just hover over them and you’ll see a preview of how your image will look. If not, you have to apply each one to find out.
Usually, Overlay or Hard Light blending modes work well. But you can also try with Soft Light for a more subtle effect or Vivid Light for strong sharpening.
Step 5: Fine-Tune
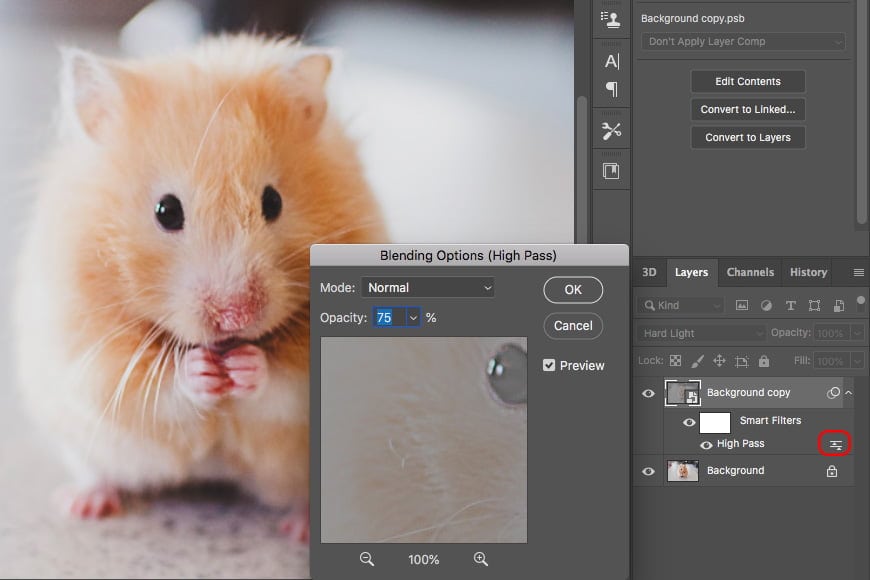
In this case, it's also possible to change the opacity of the filter. Just click on the sliders next to the filter in the Layers Panel.
You can also come back to adjust the Radius value if find that it was too much or too little. Just double-click on it to open the dialogue box again. You can do this as many times as you need.
Step 6: Save
Once you're done with your filter and you have no more need to go back, you can Flatten the layers from the Layers menu and save your picture.
3. Using Smart Sharpen
Step 1: Duplicate Layer

The Smart Sharpen tool is another one that's effective for image sharpening in Photoshop.
As with the others, the first thing you should do after opening your image is to duplicate your layer. This way you preserve your original image.
You can do this from the menu Layers, Duplicate Layer. Or you can do it from the Layers panel by right-clicking on the layer to open the menu.
Step 2: Open the Smart Sharpen Filter
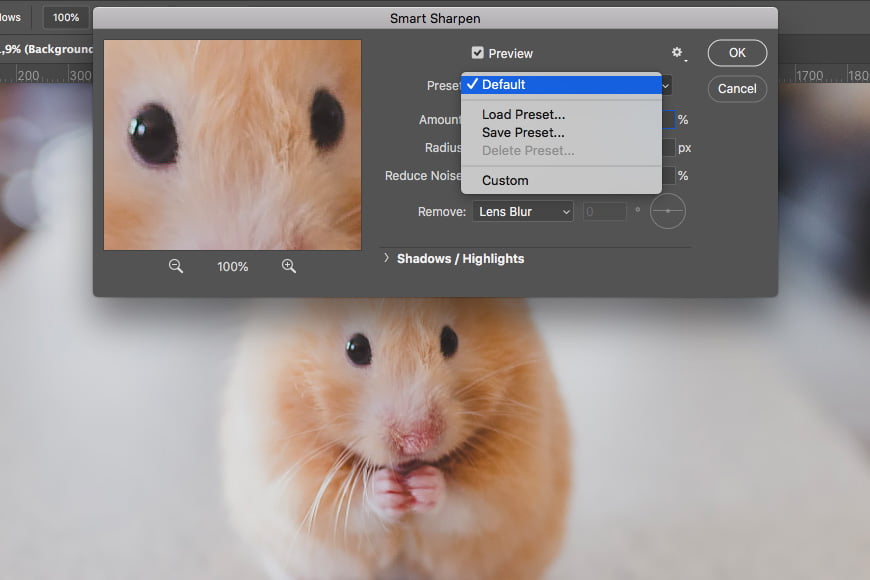
You can access this from the menu Filter, Sharpen, Smart Sharpen. This will open a dialogue box where it will have a default setting.
If you’re not satisfied with it, you can start moving the sliders manually to create a custom filter that can be saved as a preset. Or if you already have one saved, you can load it.
Step 3: Customize Your Filter
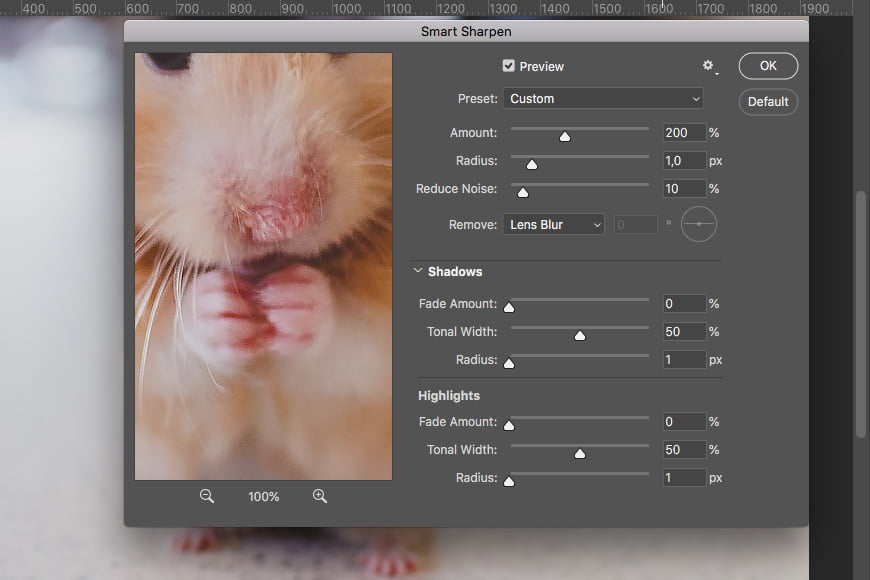
Start by moving the Amount slider. This will set the amount of sharpening. Then move on to adjusting the radius. It works the same as the Unsharp Mask filter. The difference here is the third slider: Noise Reduction.
The Smart Sharpen filter allows you to control this unwanted side-effect with a slider. Start adjusting it to diminish the noise. Don’t go too far or the sharpening effect will start fading too.
Another feature from the Smart Sharpen is the ability to remove some blurriness due to specific problems.
Remember how at the beginning I was telling you that an unsharp image can happen for different reasons? Well, this filter targets some of these in a specific way.
Set the Remove menu to Lens Blur if the problem comes from the optics you were using. Or use the Motion Blur option if the blur comes from a moving subject or a shake from the camera.
You can open up the section Highlights/Shadows if you need to fix any haloing caused by the sharpening process.
Once you’re ready just hit OK and the filter will be applied.
Step 4: Fine-Tune and Save
Just like in the others, you can fine-tune with masks or opacity and then save your work when it's ready.
Adobe MAX Update 2024
Photoshop is the ultimate tool for photographers, graphic designers, and visual creatives looking to take complete creative control of their workflow.
The Adobe MAX Update 2024 introduces several enhancements and new features to simplify core tasks.
With the assistance of Generative AI, these tasks include the ability to remove distracting elements from an image and streamlined processes for placing 3D elements in a 2D design.
Removal Tool – The key updates include an enhanced Remove Tool to effectively remove unwanted or distracting objects from an image without deteriorating the overall composition.
Distraction Removal – The automated Distraction Removal feature identifies people, objects, and overhead wires that may distract from the image.
Generative Fill – Powered by Adobe Firefly AI, Generative Fill allows you to build a composition with photo-realistic 3D elements, including correctly placed shadows, highlights, and perspective.
Generative Expand – Photoshop’s Generative Expland allows you to resize the canvas and use Adobe Firefly Image Mode to fill in photorealistic elements.
The Adobe MAX 2024 Updates are now live, and there's never been a better time to optimize your creative output with the Adobe Creative Cloud suite of applications.
Final Words
I hope you enjoyed this article on making your photos a little sharper!
Remember: decide first what you want to sharpen, then focus on what looks most natural to you. Don't overdo the sharpening, however tempting!
Remember that getting a sharp image starts with the image taking process – not the post-processing.
However, if you don't have time for any of the steps above and would prefer to have an app take care of your blurry image, check out this guide to Topaz Sharpen AI.

Download the latest version of Adobe Photoshop to follow along with this simple tutorial.
Start a free 7-day trial today

Ana Mireles is a Mexican researcher that specializes in photography and communications for the arts and culture sector.
1 Comment
Leave a Comment
👋 WELCOME TO SHOTKIT!
🔥 Popular NOW:

Hi. You can use a free online tool to sharpen image: freetools.site/image-editors/sharpen