


Guide to Bracketing in Photography
What is bracketing and how can you use it? Find out in this in-depth guide as we cover exposure bracketing, HDR, focus stacking & more!
Learn | Photography Guides | By Andy Day
Shotkit may earn a commission on affiliate links. Learn more.
Bracketing is a great way to make sure you come home with the shot that you want, or to give yourself some creative options when it comes to post-production.
Bracketing allows you to blend multiple images together to produce something that one single shot simply cannot achieve on its own.
When we bracket, we take multiple photos of the same scene using different settings on the camera, giving us insurance in case one of our settings was slightly wrong, or to give us options to blend images together using software such as Photoshop, Lightroom, or Aurora HDR.
There are various types of bracketing but this article will focus on giving you tips on exposure bracketing for HDR photography and focus bracketing to allow you to do some focus stacking.
What is Bracketing?
Simply put, bracketing is taking multiple photographs of the same scene, often on a tripod, and making small changes between shots, most typically to the exposure or the focusing.
When Would You Use Bracketing in Photography?
There are two main reasons to use bracketing.
Firstly, you might not be confident that your chosen settings are going to give the best results, and you want to shoot multiple photographs with small tweaks to the settings in between each image to make sure that you come home with the perfect shot.
The second reason is to give yourself the option to manipulate the photos when you get back to your computer, blending images together to create an otherwise impossible depth of field, or a dynamic range — i.e., amount of light from bright to dark — that's simply not possible to capture within one digital image file.
Exposure bracketing and HDR are great for high contrast scenes while focus bracketing and focus stacking can be useful for macro, interior, and landscape photography.
Basically, bracketing gives you the option to combine multiple photographs of the same scene in order to create something that would otherwise be impossible, opening up more opportunities to be creative with your photography.
What is the difference between HDR and Bracketing?
HDR (high dyamic range) photography is traditionally a post-processing technique, whereas (exposure) bracketing is a technique photographers use ‘in-camera' that makes HDR possible.
Exposure bracketing results in multiple shots with different sequential exposures. HDR combines all the shots into one image, using editing software.
Types of Bracketing
There are actually several types of bracketing when it comes to photography, but here are the two most common:
-
Exposure Bracketing

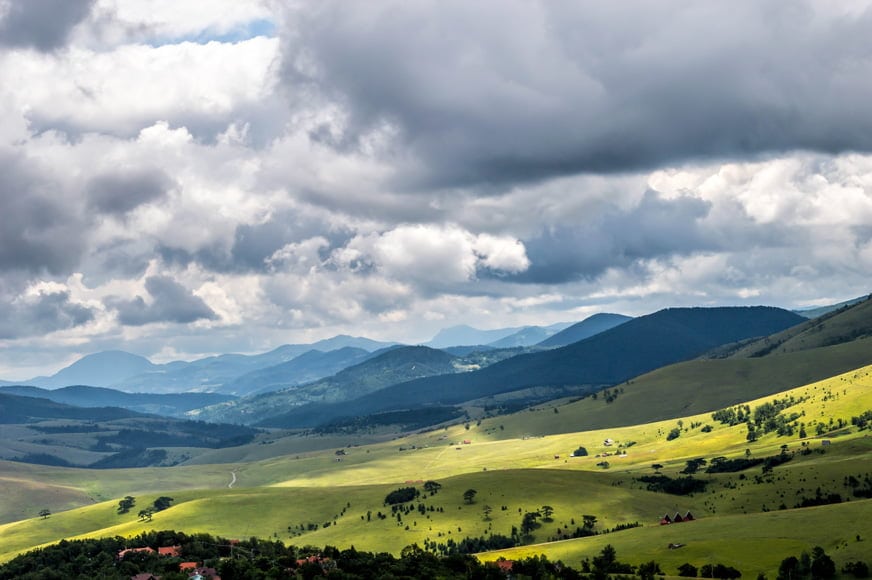
While digital cameras have made huge developments since the earliest consumer models appeared almost thirty years ago, camera sensors still can't see as much dynamic range as the human eye and they can struggle with high contrast scenes.
When we look at a landscape, our eye is able to see details in the shadows while also being able to see the blue of the sky.
By contrast, a camera will often fail to capture both in one image because its dynamic range — i.e., its ability to see both light and dark — is quite limited.
By changing our camera settings — aperture, shutter speed, and ISO — we can tell the camera which section of a dynamic range it should capture, but information that's too bright or too dark is simply not going to be recorded.
We can get around this by using a type of bracketing called exposure bracketing and then using HDR (High Dynamic Range) techniques to blend those images together.
Hopefully, this diagram gives you an indication of how exposure bracketing works. On its own, the human eye sees a broad range of brightness through to darkness.

One photograph can't see anywhere near as much, but two photographs that overlap (this is important!) can be combined together to create something that's closer to what we see naturally.
We use exposure bracketing to produce two or three differently exposed versions (sometimes more) of the same scene.
HDR describes the technique of then combining these different exposures and effectively expanding what was possible to capture in a single image.
HDR photography sometimes has a bit of a bad reputation simply because enthusiasts often push the results too far.
At its extreme, colors are exaggerated and shadows become non-existent. It's worth reminding yourself that if the first thing you see when looking at a photograph is the editing, then it's almost certainly been edited too much!
-
Focus Bracketing


Another type of bracketing is focus bracketing. It's similar to exposure bracketing in that we make changes to our settings between each shot of the same scene, except here we change the focus instead of the exposure.
This can be useful when there's a huge amount of depth in a scene and you want to get everything within the frame in focus.
For example, if you're photographing a cactus in your foreground that's a few feet from your lens, and a mountain in the background that's a few miles away, trying to get both in focus — even at f/16 — might be impossible.
This is where focus bracketing comes in handy. You capture a series of photos, changing the focus very slightly between each shot so that everything — from the foreground to the midground to the background — is in focus in at least one of them.
We can then use editing software such as Photoshop to “focus stack” all of these images, choosing the sharpest parts of each image and blending them all together. This process is called focus stacking.
How to do Exposure Bracketing for HDR Photography
Credit: Gorana Bucic
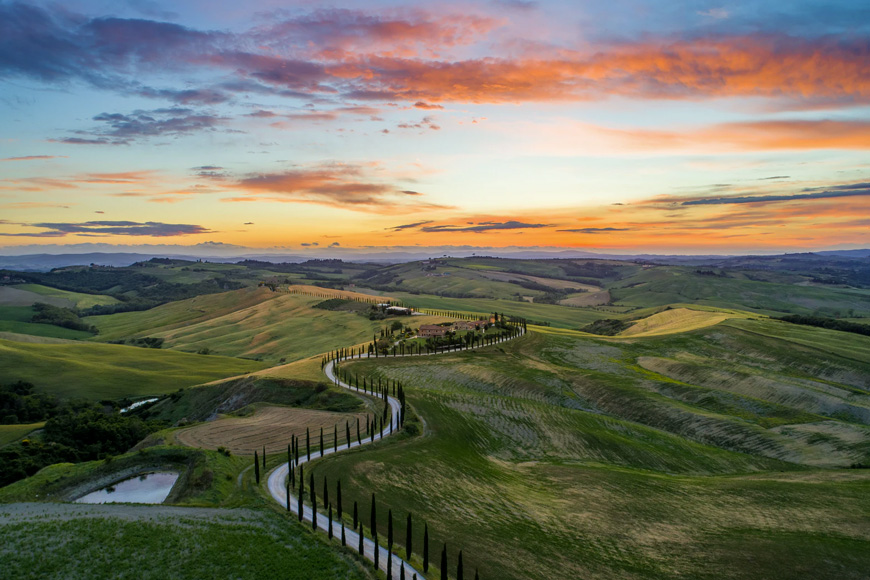
Exposure bracketing and HDR photography are often used to photograph landscapes and interiors — basically, any scene where there's a range of shadows and highlights that one photograph cannot contain.
If in doubt, bracket! Capturing multiple images means you can decide later on whether to use HDR.
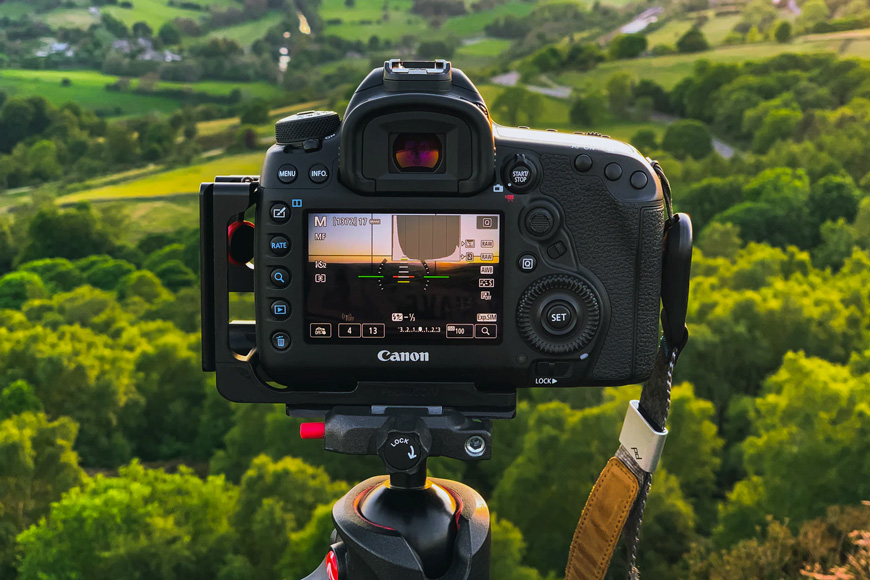
To give you the least amount of work to do when editing, it's best to use a tripod and not change your framing. Even the slightest nudge can make it very difficult to line up images when you get back to your computer.
It's often worth using a cable release to avoid having to even touch the camera during exposure bracketing. You can also use the camera's timer so that the act of releasing the shutter doesn't add movement to a long exposure.
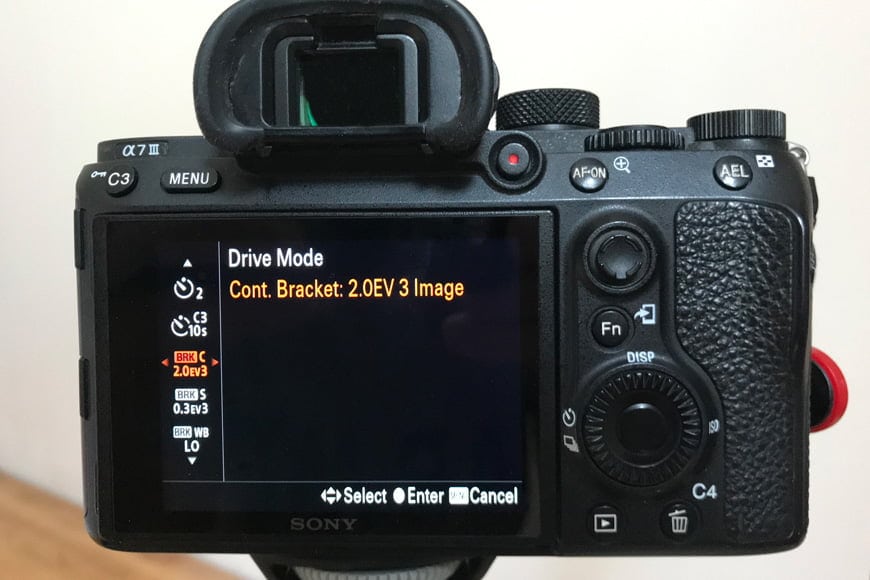
Some cameras have a bracketing mode somewhere in the menu system, so be sure to check if that's an option before you get started.
Often, you'll only need two exposures — one normal, and one under-exposed — in order to create an HDR image. However, it's worth shooting three different exposures just to be safe.
Aim to get what your camera considers to be a “normal” exposure, and then one over-exposed image and one under-exposed image.
If you're using your camera's automatic mode or aperture priority (our two recommendations for getting started), once you have your “normal” image, you can use the Exposure Compensation dial to achieve the other two.
Turn the dial to -2 to under-expose the image and capture some of the highlights missing from the normal exposure.
Turn the dial to +2 to over-expose the image and capture some of the shadows missing from the normal exposure.
If the scene has incredibly high contrast — maybe your frame includes the sun — you may wish to add -3 and +3 exposures as well.
You can learn more in our article on what does exposure compensation actually do.
Advanced tips
Instead of using the Exposure Compensation dial, you can also change the settings yourself by shooting in one of your camera's other modes.
We suggest creating your bracketed shots by changing the shutter speed, but there are other options.
Here are some things to keep in mind:
- If you bracket by changing the ISO, you might be introducing noise into your image, and this might give the same results as simply dragging up the exposure or shadows slider in your editing software. There's nothing necessarily wrong with this, but it might defeat the purpose of using exposure bracketing and HDR.
- If you bracket your photographs by changing your aperture, keep in mind that you might be changing the depth of field and therefore which parts of the image are in focus. This may make it difficult to blend the images later on.
- Changing the shutter speed is usually the best option as you are using a tripod and you don't need to worry about holding the camera steady enough at low shutter speeds. However, remember that movement – such as running water or leaves blowing in the wind – might make HDR processing difficult because the photos might not match up.
Recommended Camera Settings for Exposure Bracketing
As it's best to do exposure bracketing by changing the shutter speed, this example shows you how to use your camera's Aperture Priority mode to get the best results.
With your camera on a tripod, make sure that your Exposure Compensation dial is at zero. If you don't have a cable release, set your camera to its 2-second timer.
Make sure that your ISO is set quite low. If you are shooting in bright daylight, set it to 100. If the light has dropped or if you're shooting indoors but with some natural light coming through a window, try ISO 400 or 800.
Set your aperture to f/8 or f/11. This is a small aperture that will give a lot of depth of field — perfect for landscape and interior photography.
Your camera will automatically choose the shutter speed. Take a photo. This is your “normal” exposure.
Without moving the camera, slide the Exposure Compensation dial to -2. If the shutter speed on your “normal” exposure was 1/400, -1 would give a shutter speed of 1/800, and -2 will give a shutter speed of 1/1600. This will be your under-exposed image.
Now turn the dial to +2. With our example, +1 would give 1/200, and +2 will give 1/100. This will be your over-exposed image.
And that's it! You have your three bracketed shots and you're now ready to start combining them together using editing software.
How to Merge your Exposure Bracketed Shots
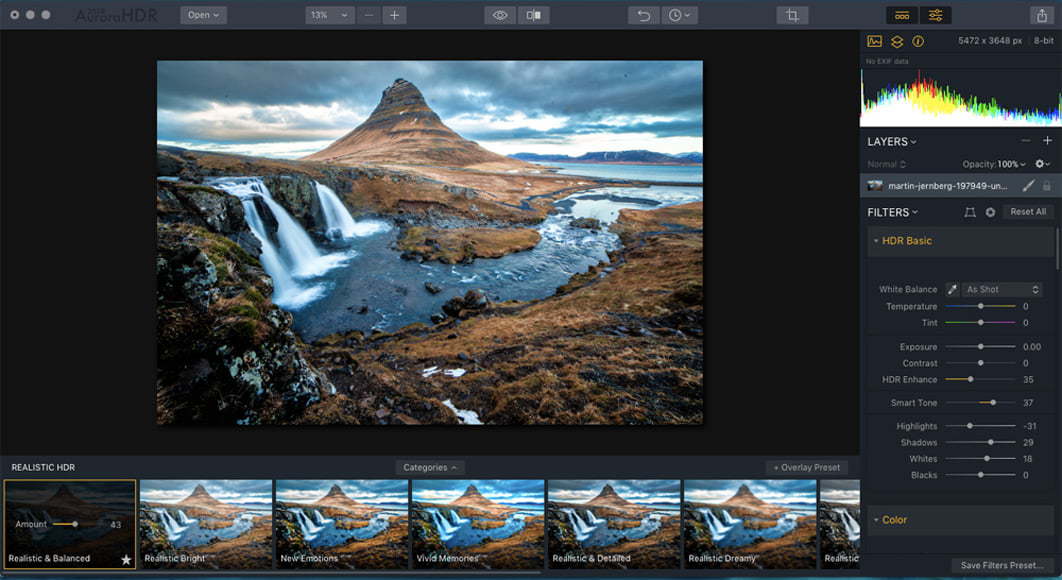
Aurora HDR offers different bracketing options for creating stunning HDR shots.
Most image editing tools allow you to merge the results of your exposure bracketing into a single image for HDR photography.
The best three options are Photoshop, Lightroom and Aurora HDR, with the latter being our number one choice for its simplicity, powerful features, and realistic results.
-
How to Merge Photos using Aurora HDR (Recommended)
Aurora HDR is designed specifically for combining images together to create an HDR photograph. For that reason, it's very easy to use. It can also be installed as a plugin for Lightroom or Photoshop.
Step 1: Upon launching the software, you'll be asked to choose which photos you'd like to use. Pick the three bracketed images from their location on your hard drive. If more are shown, make sure that only the ones you'd like to use are ticked.
Step 2: Make sure that the Auto-Align checkbox has a tick inside it. If there are blowing leaves or running water in your image, click on the gear to the left and from the dialogue, switch on Ghost Reduction.
Step 3: Your computer will now spend some time combining the photos together, and the speed will be determined by the number of photos, the resolution of your camera, and how fast your computer is.
Step 4: Once complete, you have an HDR image that you can edit and export.
Adobe Photoshop is an incredibly powerful tool. If you have it installed, you'll also have Adobe Bridge, and it's easier to get started on merging images by using Adobe Bridge to begin the process. There are two main methods:
Step 1: Navigate to the photographs in Bridge and select the three you want (Control or Command + click to select multiple files).
Step 2: From the menu choose “Tools”, “Photoshop”, and then “Merge to HDR Pro.” Your computer will probably take up to a minute to open these files.
Step 3: You will then be presented by the Merge to HDR Pro dialogue window in Photoshop where you can decide whether you want to Remove Ghosts (good for leaves blowing in the wind and moving water), along with some other options to refine the image.
Step 4: Hit “OK” and Photoshop will start combining the photographs together. Once complete, you can save it or carry on with your editing.
Alternatively:
Step 1: Highlight the files in Bridge and open them in Camera Raw.
Step 2: Highlight all of the images in the navigator in Camera Raw, right click, and choose “Merge to HDR.”
Step 3: Your computer will take a moment to combine them. You can then choose whether to Auto-Align and set the level of Deghosting.
Step 4: Click “Merge…” and you can then decide where to save your new HDR image.
-
How to Merge Photos using Lightroom
Step 1: In the Develop module, highlight the three (or more) files that you want to merge.
Step 2: Right-click and choose “Photo Merge” and then “HDR”.
Step 3: Lightroom will then spend some time merging the images together. Once complete, the dialogue box will allow you to decide whether to Auto-Align and to define the Deghost amount.
Step 4: Hit “Merge” in the bottom right and Lightroom will complete the process, producing a new HDR image file.
How to do Focus Bracketing
Focus bracketing follows the same process but this time changing the focus between shots. Using a tripod is critical for getting good results.
Depending on your preference, you can choose to focus manually, perhaps using your camera's zoom magnifier to help you make sure that you're focusing accurately.
Be careful not to bump the camera between shots as this can make the set of images difficult to merge later on.
Step 1: Set up your frame, ideally using an aperture where your lens is the sharpest — usually around f/5.6 or f/8. (You don't need to worry about using a small aperture to give yourself the biggest depth of field as focus stacking will take care of this.)
Step 2: Focus on the foreground interest and take your first photograph.
Step 3: Focus on an object in the midground and take your second photograph.
Step 4: Focus on the background — perhaps a mountain on the horizon — and take your third photograph.
Three photos are usually sufficient for bracketing if you're using a wide-angle lens. However, you may need to shoot more than three if you are:
- shooting macro photography
- using a larger aperture and therefore creating a shallower depth of field in each shot
- using a lens that is longer than 35mm
- shooting a scene where the subject is very close (perhaps under a metre) to your camera.
If in doubt, take more photos!
How to Merge Your Focus Bracketed Shots
Using Adobe Lightroom and Photoshop, here's the quickest way to blend photos for focus stacking.
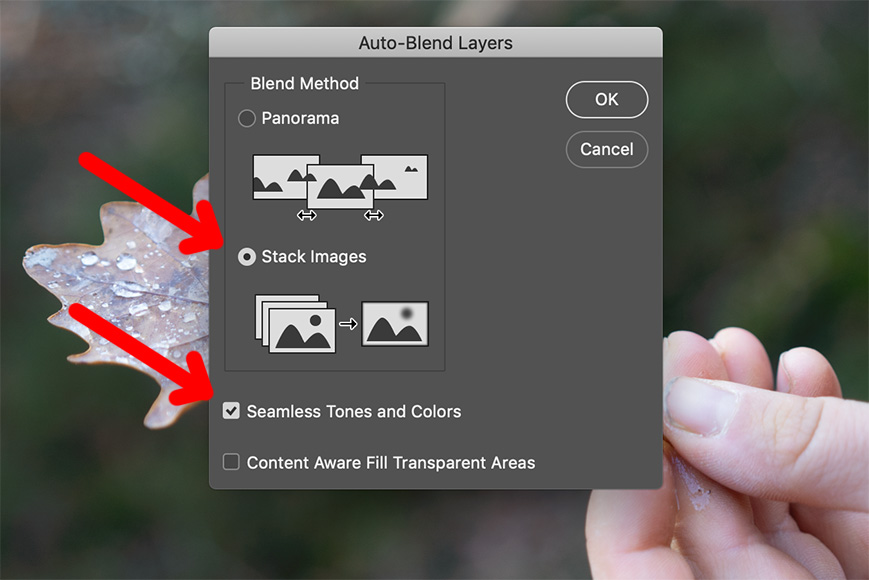
Step 1: In Lightroom, select the images, right-click, and choose “Edit In” followed by “Open as Layers in Photoshop”.
Step 2: In Photoshop, select all of the layers, choose “Edit” from the menu, and select “Auto-Blend Layers”.
Step 3: From the dialogue box, make sure to select “Stack Images” and ensure that “Seamless Tones and Colors” is ticked. (There's no need to tick “Content Aware Fill Transparent Areas”.)
Step 4: Photoshop will then spend a little time working some magic. Once it's finished, you'll notice that Photoshop has added complex masks to each of the layers, picking out the sharp areas and letting only those appear in the final image.
Step 5: Continue editing or simply save your file.
Bracketing Photography FAQs
What is the purpose of bracketing?
Bracketing means taking several photos of the same scene with slightly different settings for each one. These can later be blended together to get the best possible exposure or detail across the whole of the image. Another purpose for using bracketing is simply to ensure you get the shot.
Is bracketing the same as HDR?
No, not exactly. Bracketing is the process of taking multiple photographs of the same scene. HDR is the post-production technique of merging them together to capture maximum dynamic range.
How do you process bracketed images?
You can use photo editing software such as Photoshop, Lightroom or Aurora HDR to process bracketed images. Specific instructions can be found above.
Final Words on Bracketing
Regardless of which type of bracketing you use, understanding the concept can open up new avenues for your photography.
Exposure bracketing and focus stacking can both be a valuable means of achieving photographs that are simply not possible within a single shot. Other types – such as white balance bracketing and flash bracketing – work on the same principles.
Bracketing can be especially useful if you're shooting landscapes, macro photography, or interiors.
If you have any questions about bracketing and how to use it, be sure to leave a comment below.

Check out these 8 essential tools to help you succeed as a professional photographer.
Includes limited-time discounts.
Andy Day is a British photographer and writing, living and working in France, specialising in adventure, travel, architectural and landscape photography.
2 Comments
Leave a Comment
👋 WELCOME TO SHOTKIT!
🔥 Popular NOW:

Hi
thank you for the nice article. I have a question concerning moving objects like waves. If I exposure bracket the sunset with moving waves, it can create some blur, how can we remedy this?
thank you
Bracketing with moving objects doesn’t really work, Eva – in this case, I’d recommend one exposure, then creating an HDR with software such as Luminar Neo.