


How to Add a Vintage Feel to Your Photos Using Luminar Neo
Give your photos a nostalgic vintage effect with Luminar Neo. Learn which tools to use, presets vs. LUTs, and follow a step-by-step tutorial to create the look.
Luminar | Software | Paid Partnership | By Ana Mireles | Last Updated: July 4, 2026
Shotkit may earn a commission on affiliate links. Learn more.
Are you looking to add a vintage feel to your photos, but you're tired of the usual filters that make all images look the same? Then you might want to give Luminar Neo a go.
Successfully creating a vintage look is about understanding the visual language you're using. From film grain and faded colors to light leaks and subtle lens imperfections, these elements work together to recreate the character of analog photography with your digital editing workflow.
In this article, you'll learn how to achieve that look with easy-to-use tools in Luminar Neo. I'll start with presets, which can be customizable, one-click solutions, and I'll later move on to individual tools that give you full control to determine exactly how you want your image to look.
So, whether you're an amateur looking for a fun, no-fuzz method to ‘age' your photos or a more experienced user aiming to fine-tune every detail, you're in the right place.
By the end, you'll have a better understanding of why Luminar Neo is the perfect software to use if you're after a vintage feel that looks unique, well thought out, and suited to each of your pictures.
What Makes a Photo Look Vintage?
Before jumping into the tools, let's analyze what makes an image look vintage. This way, you can choose the right tool and apply the effect with intent, achieving better results.
Film grain and texture
One of the most recognizable characteristics of vintage photography is film grain. Unlike the perfectly smooth images you can achieve with high-resolution cameras, film contained small particles that created texture across the image. The higher the ISO, the more noticeable the grain was.
In today's photography, it's common to add film grain to help images look organic and tactile. Unlike digital noise, which is a byproduct of technical limitations in low-light photography, film grain is a creative choice.
When you combine digital grain with other elements like faded colors or light leaks, your photograph will have a vintage feel.
Faded and muted colors
Another hallmark of vintage photography is its color palette. Unlike modern digital photos, which often have vibrant colors, film cameras produce softer tones.
Furthermore, different films rendered colors in different ways, making some of them easily recognizable. In fact, photographers often chose their film based on the result they were after.
Some popular examples include Fujifilm, which was famous for its rich greens and cooler color rendition, versus Kodak films such as Kodacolor, which produced warmer colors and pleasing skin tones.
Over time, prints would also fade naturally, which is why using muted colors in your editing process contributes to the nostalgic feel.
Warm color casts
Closely related to the previous characteristic is the color cast.
Many older photographs tend to lean slightly toward the warmer colors such as yellows, oranges, or soft sepia hues. This effect is often associated with both the original film response and the natural aging process of printed photographs.
In film photography, color balance was influenced by the chemistry of the film stock itself, as well as lighting conditions and how it was processed.
Some films produced warmer tones naturally, while others could shift over time. In any case, this is why a warm color cast adds a sense of time, memory, and atmosphere that transports us to a different era.
You can add this warmth during the editing process to help recreate this effect. Even a slight adjustment can soften the image. If you combine this with muted colors or film grain, you're adding a vintage feel.
P.s. Color casts aren't always deliberate and can sometimes ruin your image. Unwanted color casts can also be removed using Luminar Neo.
Narrower dynamic range
Photographers like Ansel Adams demonstrated that film could capture and reproduce an extraordinary tonal range. However, achieving those results often required advanced skills, careful control of exposure, specialized development techniques, and extensive darkroom work.
Generally speaking, modern digital photography has a wider dynamic range than the average film photograph.
It's worth noting that not all digital cameras are equal in this regard. Older or entry-level digital cameras have a more limited dynamic range than newer professional models.
So, whether it's a film photograph or an older digital image, you may not retain both the brightest highlights and the deepest shadows at the same time. In some cases, the transitions between tones can also appear less detailed and more compressed.
This is something to keep in mind when mimicking a vintage look in photo editing.
Light leaks, lens imperfections, and vignetting
Today, even smartphones and entry-level compact cameras can deliver technically clean images. Back in the day, this wasn't the case.
While professional film cameras, paired with the right lens, could produce sharp, high-quality images, many consumer cameras exhibited technical imperfections we associate with the vintage look.
I'm talking about vignetting, light leaks, soft-focus edges, etc. While this was once considered a defect, modern photographers often intentionally use these effects to recreate a nostalgic feel.
You too can easily add any of these ‘imperfections' using Luminar Neo and pair it with other characteristics mentioned here to add a vintage look to your digital images.
What Are the Best Tools to Achieve a Vintage Look in Luminar Neo?
Now that you know what makes a vintage look, let's see how to easily recreate one using Luminar Neo's multiple features.
Presets
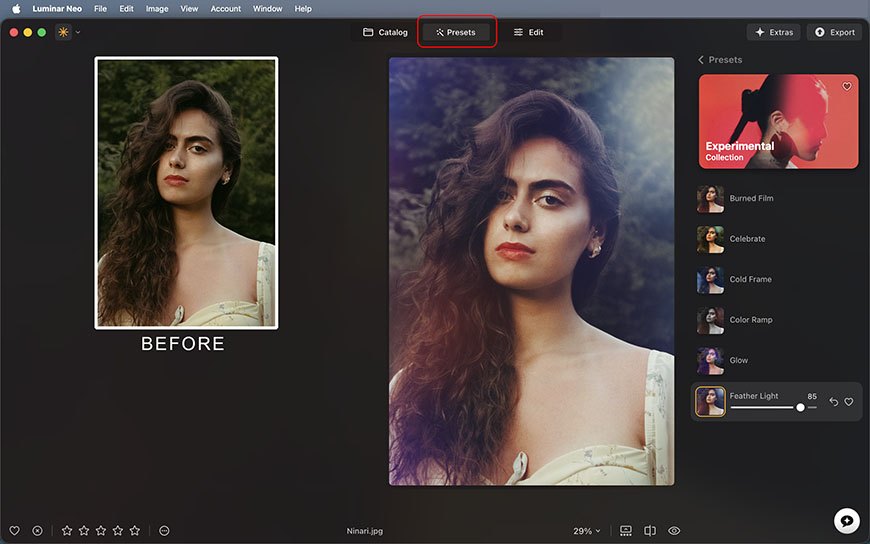
If you're looking for the fastest way to add a vintage look to your photos using Luminar Neo, Presets are an excellent place to start. They have their own section, which you can find between the Catalog and the Edit options.
Applying a preset can add texture, color, vignettes, and more with a single click, allowing you to instantly transform the look and mood of your image.
Luminar Neo includes a variety of presets with your purchase. Its AI engine will analyze your image and suggest which one it thinks is best. However, it can't read your mind, and it won't know you're after a vintage feel. So, explore the presets on your own to find which one you like – just hovering over them will generate a preview.
My favourites are Deadly Reef from the Waterscapes collection, Burned Film and Feathered Light from the Experimental collection, and Speedway from the Blockbuster collection. But it really depends on the picture, and what you're after.
It's worth noting that you can get more from the Luminar Marketplace or create your own. Presets can be used as a one-click solution, but they're also customizable. So, you can use them as a starting point and keep editing to your liking.
Color Transfer
![]()
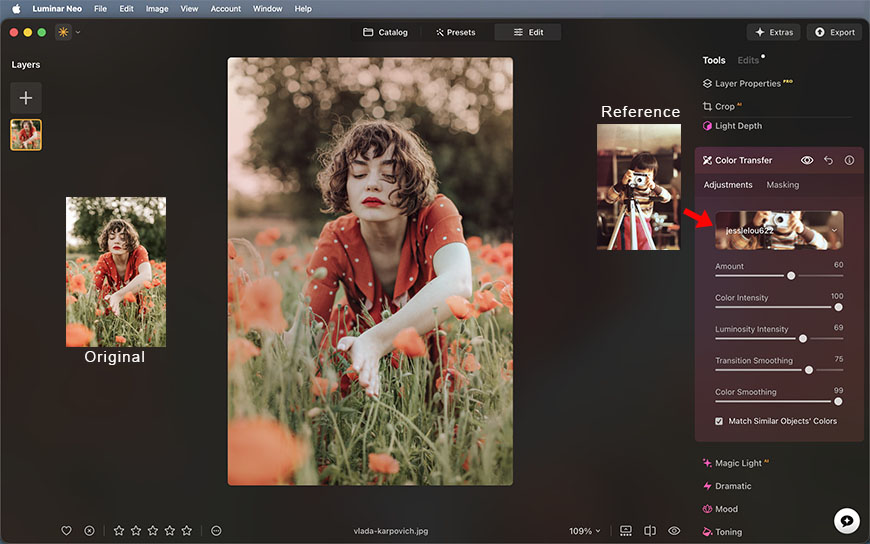
Another amazing tool from Luminar Neo that can help you achieve a vintage look is Color Transfer.
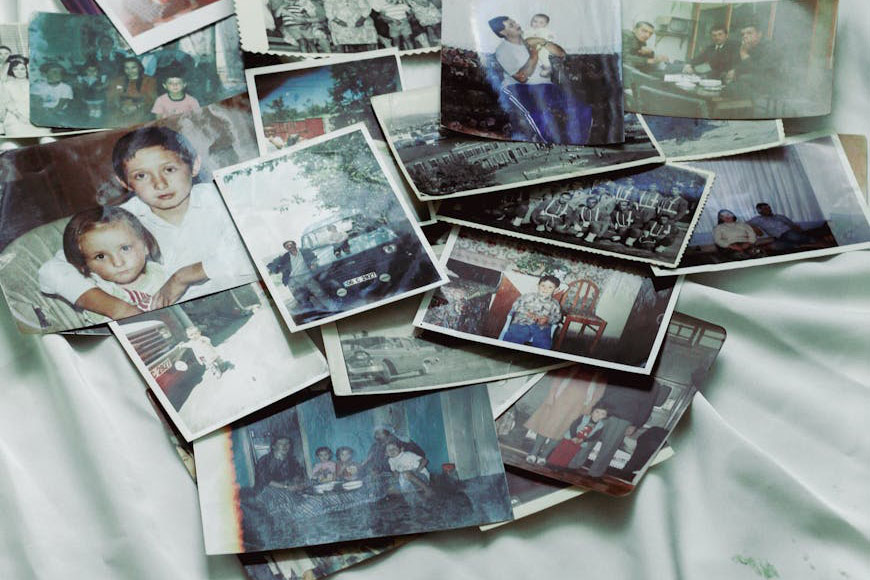
The great thing about it is that you can upload a real vintage image that you like, and Neo will apply its color palette to the photo you're editing.
This is a more personal approach to the process, and it allows you to keep control over other vintage elements you may want to introduce or avoid because it only affects colors.
If you don't have a reference photo, Luminar Neo comes with a set of built-in images directly in the tool. Once you've chosen the picture and applied it, you can fine-tune the effect with a set of sliders.
If you choose images that have similar subjects, you can even enable the ‘Match Similar Object's Color' option for better results.
You can find the Color Transfer tool inside the Creative panel in the Edit section of Luminar Neo.
Mood
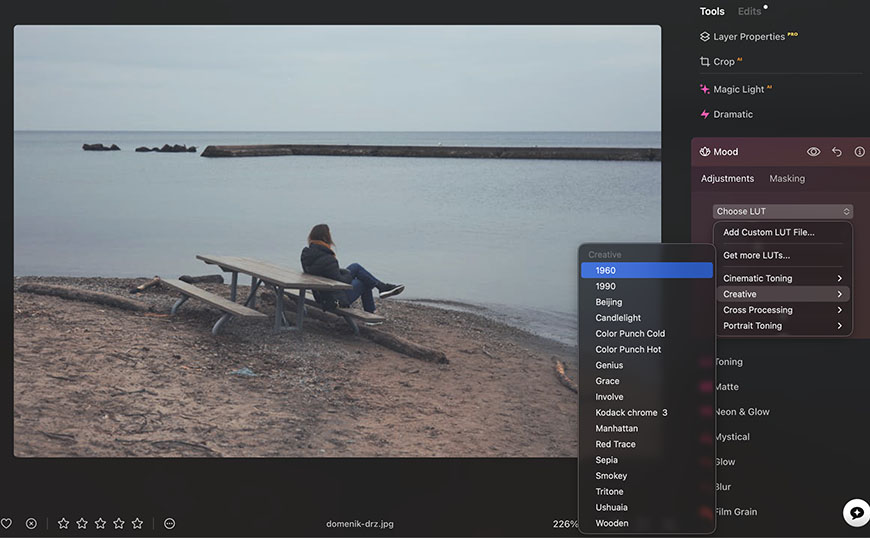
The Mood tool allows you to apply LUTs to your images. While LUTs and presets may seem similar because they change the overall appearance with a single click, LUTs primarily change the color and tonal relationships according to a predefined mapping.
This makes the Mood tool particularly useful for creating vintage looks. In fact, Luminar Neo comes with many LUTs pre-installed, which can refer to a specific era (1960, 1970), a film stock (e.g., Kodak Chrome 3), or apply a specific color cast (such as sepia).
Feel free to explore all of them. Simply by hovering over the name, you'll see a preview. Then, once applied, you can customize it with sliders.
If you want a more distinctive look, you can upload your own LUT files. Like the Color Transfer tool, the Mood tool is located in the Creative panel.
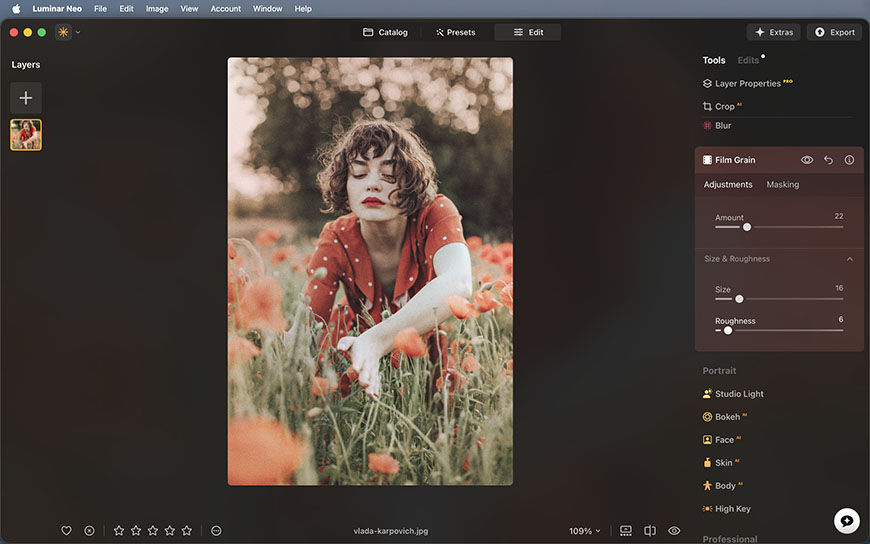
Film Grain
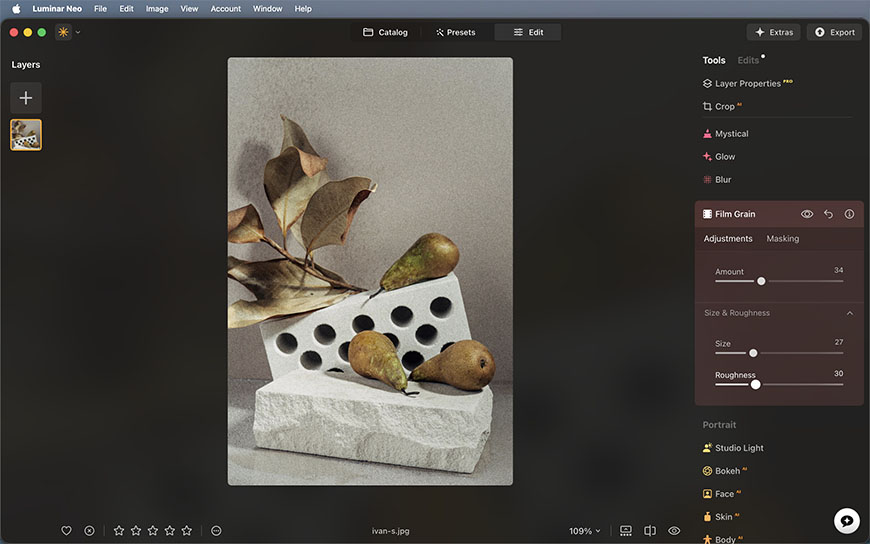
As mentioned before, film has a characteristic texture, and it can be recreated digitally to add a vintage feel. In Luminar Neo, you'll find a dedicated tool to easily apply this effect.
Still in the Creative panel, scroll down to the bottom to find it. Once opened, use the Amount slider to apply the texture. Then, use the Size and Roughness slider to adjust how it looks.
You can add film grain on top of the color adjustment tools we've discussed earlier, or even to a black-and-white photo.
When it comes to film grain, I find it's useful to follow the ‘less-is-more' rule. However, the slider makes it easy for you to experiment and find the best look for each picture you edit.
Consider that a more sensitive film has bigger grain. So, if you're working on a night scene or a low-light photograph, you can increase the size, and it will look natural. Instead, well-lit images look best with just a subtle effect.
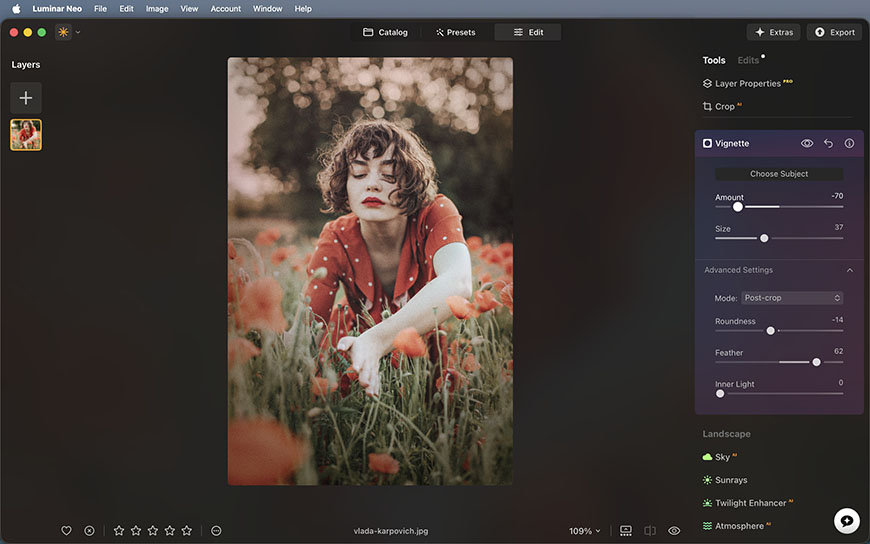
Vignette
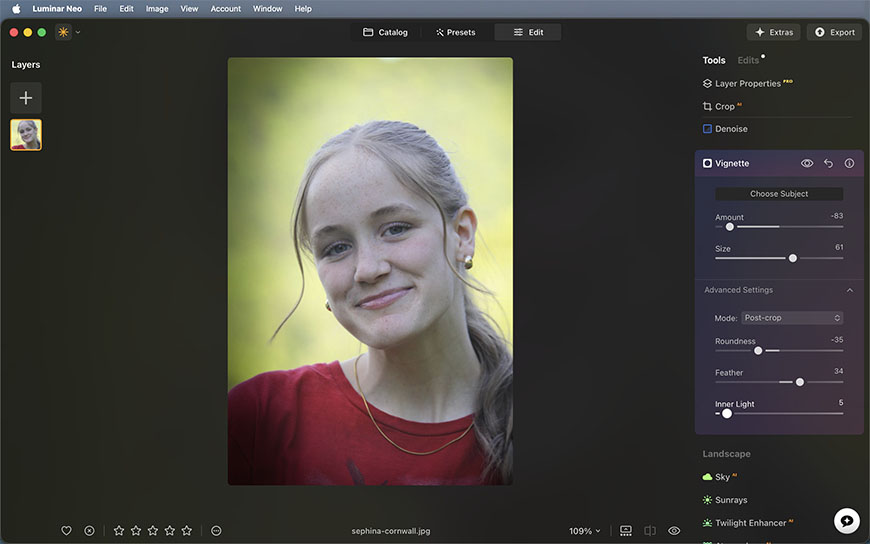
The Vignette tools allow you to darken or brighten the edges of a picture. While this adjustment is used in different editing styles to draw attention to the main subject, darker edges are often associated with vintage photography.
You can find the Vignette tool in the Essentials panel in the Edit workspace. Unlike other software, Luminar Neo allows you to choose the subject, which is useful if you're not working with a central composition.
Do keep in mind that you're mimicking an optical effect from analog photography; it's not just a creative choice.
So, the vignette wasn't customizable in real life, and therefore, the flexibility Neo gives you should be used with restraint if you want the image to look realistic.
After applying it, you can control the effect's size and intensity and adjust how it transitions into the rest of the image.
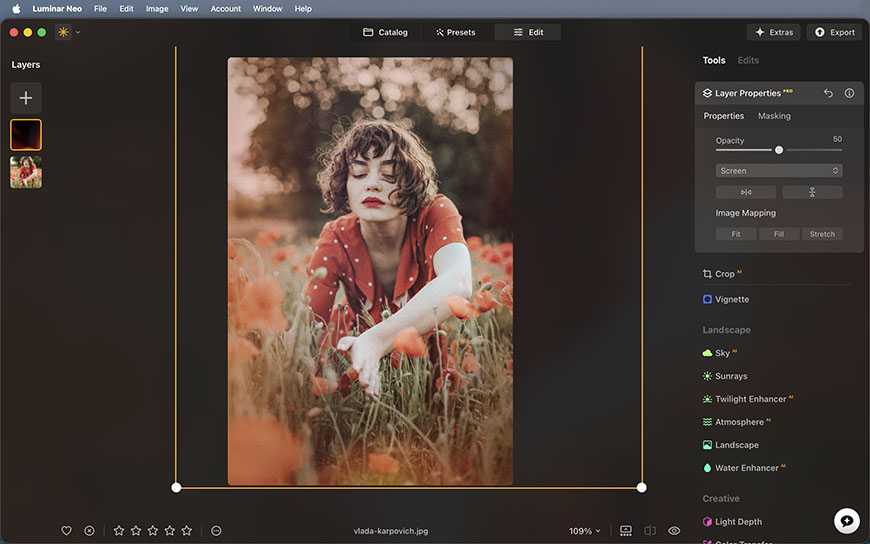
Layers

Luminar Neo also allows layers in its editing process. This gives you the most flexibility when adding extra vintage-style elements.
This is especially useful because it comes pre-installed with a series of light leaks and lens flares to add as overlays.
These elements can easily emulate the imperfections of analog film photography. You can further adjust their blending mode, opacity, and position to make them feel natural and perfectly integrated into the photo.
You can find the Layers feature on the left side of the Edits workspace. On top, you'll find the button to upload your own images to achieve a unique vintage look.
How to Achieve a Vintage Look in Luminar Neo: Step-by-Step
Of course, you can add a vintage feel using the Develop tools by adjusting the light and colors manually. However, Luminar Neo has these tools that make your life simpler and your workflow faster.
Here's an example of how I add a vintage feel in just a few steps.
Step 1
I started with the Color Transfer tool by uploading a custom reference photo.
Step 2
Then, using the Mood tool, I added a 1960s LUT.

Step 3
I then added some film grain, making sure it didn't become distracting.
Step 4
Now, I add a vignette, making sure to drag the Amount slider to the left so it darkens the edges – if you drag it to the right, it brightens them. I also refined the effect with the Advanced Settings.
Step 5
Lastly, I added a light leak as an overlay. To better fit my image, I flipped it, enlarged it, and repositioned it.
And that's it! Give it a try yourself, and explore all the different nostalgic and vintage effects you can create in Neo.

Ana Mireles is a Mexican researcher that specializes in photography and communications for the arts and culture sector.
👋 WELCOME TO SHOTKIT!
🔥 Popular NOW:
