


How to Use Lookup Tables (LUTs) for Color Grading Video
This guide on how to use lookup tables (LUTs) for color grading videos will help you understand why LUTs are useful, how to use them, and how to make your own.
Shotkit may earn a commission on affiliate links. Learn more.
This guide on how to use lookup tables (LUTs) for color grading videos will help you understand what LUTs are good for, how to use them, and how to make your own.
It’s not always easy to end up with hours of video footage that flow seamlessly together.
Everyone wants tones to look like they match a consistent grade, and that’s where the color grading process comes in.
Color grading entire videos or even films can be a tricky task.
There are many ways to maintain consistency and colors throughout all the frames.
This is where lookup tables, or LUTs, come in handy.
Read on to learn more.
What Is a Lookup Table?
A lookup table for color grading is a group of color presets you can use universally.
Typically, you can break down a picture into color values, using a lookup function, and the table changes those values around along with the color information. It works in the same way that After Effects, color presets, or other editing programs work.
Briefly, a lookup table translates one set of colors into another using a preset conversion index.
When and Why Use a Color Lookup Table?
Once footage goes from the production team to the post-production team, the latter checks for any videography hiccups in the various color grading spectrums.
These include an actor being in an area with too much shadow during a particular shot, lighting hot spots in some frames, and improper calibration of the white balance.
In instances like these, color correction becomes a necessity. However, the tricky part is that applying LUTs to the wrong footage brings out the shortcomings instead of fixing them.
To clarify, LUTs can work with one color correction issue, but if there are multiple problems underlying the footage, applying a single LUT might bring out the issues more than fix them.
That’s why editors or colorists typically use LUTs after the footage has gone through color correction, then you can apply a color grade to your entire footage.
And while cinematographers and directors put a lot of effort into ensuring they capture the right effect and emotional tone, the production team may not always be able to hit their vision just right—and that’s when LUTs shine.
Using LUTs in Filmmaking
While LUTs are a post-production tool, they can be practical if you try them on set too. If you’re working with monitors that don’t display the camera input accurately, using a LUT means that you can turn the footage you shoot into something your monitor or computer can output.
In a way, LUTs enhance the consistency of cameras and unify the color grade. A “True Blue” on a Nikon can be different from that on a Sony, and LUTs help us align both.
This is especially true if you’re using multiple camera brands during production.
Using LUTs will help you make up for the discrepancy and give you a consistent look throughout all the shots, regardless of which camera you use to shoot them.
What Software Programs Can I Use With LUTs?
LUTs are used to change the output image by fixing up the color grading, and they’re a pretty ubiquitous tool among photographers and visualizers. It works for multiple purposes, and not only in professional setups like filmmaking.
Accordingly, any motion graphics program, nonlinear editor system, and coloring software will likely use LUTs.
The most popular options you can use are the following:
- Skylum Luminar
- Final Cut Pro
- DaVinci Resolve
- Avid Media Composer
- Adobe Photoshop
- Adobe After Effects
- Adobe Premiere Pro
See more alternative video editors to Premiere Pro.
Who Makes LUTs?
It’s only natural to wonder where a preset group of colors comes from, especially with all the mathematical formulas involved, which need a high degree of creativity.
While camera manufacturers commonly make LUTs, they’re not the only source. For example, Photoshop and Adobe Premiere Pro come with LUT libraries, although they’re limited.
Moreover, some individuals create their LUTs to control the color grading they apply. Many filmmakers also make, share, and put their LUTs for sale.
If you’re searching around for LUTs, you’ll find plenty of websites that offer them for free, including:
- RocketStock
- Premium Beat
- Motion Array
- Lutify.me
- Ground Control
- FixThePhoto
- FilterGrade
- Color Grading Central
- Bounce Color
These websites offer a variety of LUTs, including calibration, correction, stylistic, and utility LUTs.
It’s worth mentioning that LUTs can be 1D or 3D, so make sure you know which type you’re using.
The key differences are that the former works on transforming a single value setting, while the latter gives you more control over the color values with singular indices for qualities like brightness, saturation, and hue—the same way a hash table works.
Using a 3D lookup table instead of 1D gives you a more sophisticated ability to transform your footage, which you can use for enhancements like desaturation.
No matter the type or source, downloading a LUT or a LUT pack is as easy as pressing a button, but the outcome of your pictures can be entirely different combined with enhanced color grading.
Are 3D LUTs Better Than 1D LUTs?
1D LUTs have more limitations than 3D LUTs since they work on a single variable, which doesn’t apply to many operators.
To clarify, the luminance operator turns colored pixels into grayscale equivalents of themselves. Since each output value is converted into a weighted average of three inputs, using a 1D LUT would make the process almost impossible.
Similarly, any operator that relies on “crosstalking” is inexpressible, which would make the color grade inconsistent along the same scene.
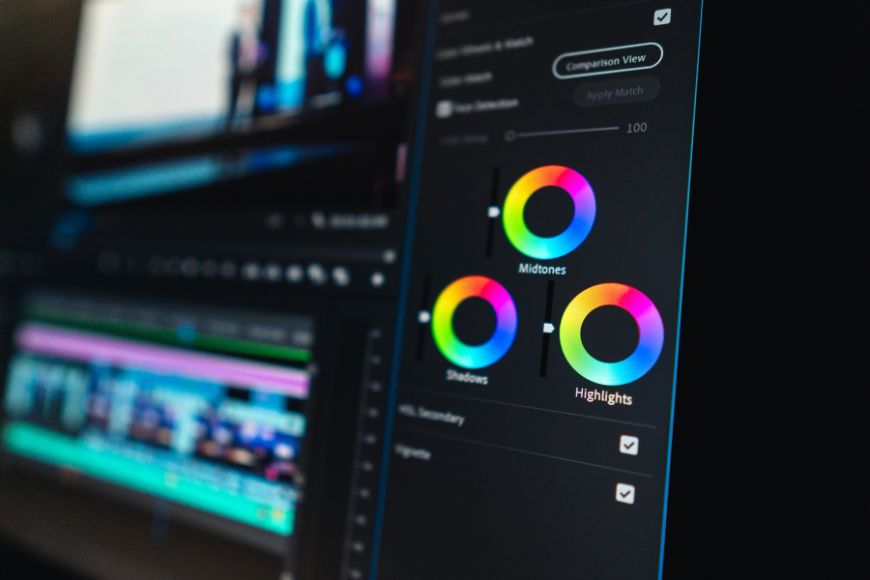
How to Activate LUTs
You can’t use LUTs the same way you do footage or by importing them into programs; there are dedicated plugins and utilities for them.
How you can use your LUTs depends on the video editing software you’re working with, but let’s check out the process with Adobe Premiere Pro since it’s one of the most popular platforms where you can use LUTs.
Here’s a step-by-step breakdown:
- Click the color tab to open the color workspace.
- Press the clip you want to adjust.
- Open the Basic Correction tab from the Lumetri panel.
- Select “Input LUT” from the dropdown menu.
- Press “Browse.”
- Choose a LUT from Premiere Pro’s library or another one that you’ve previously downloaded.
- Check out how your picture looks with the applied LUT to make sure you like it.
It’s worth mentioning that one LUT can change the footage differently from one video editing software program to the other. So, make sure to test out the LUT before you decide on it.
Things to Keep in Mind While Applying LUTs
LUTs are calibration-dependent, so a LUT that’s created for a Nikon camera wouldn’t suit footage shot with a Sony camera. This goes back to the initial calibrations and makes LUTs not exactly device-agnostic.
Another thing is that applying LUTs without first applying color corrections on your footage will only make existing issues stand out.
Regardless of whether the LUT is for the correct camera, you have to apply the color correction process first for your LUTs to work out.
Finally, LUTs have a huge advantage, which is working in real-time. This means that you can see whether the effect you’re aiming for is being accomplished or not. If it isn’t, try tweaking the footage or using a different LUT that might suit the vision you have better.
How to Create Your Proprietary LUT

You can create your LUT without being a professional videographer or colorist. All you need is an image editing application where you can adjust colors to a captured image.
Use one shot that represents the entire scene you’re working with and open it in GIMP or Photoshop.
Go to the “Adjustments” tab above the Layers panel and check out the icons that represent changes such as saturation, hue, contrast, and brightness.
Add a layer where you can make your adjustments with different levels of contrast, brightness, and vibrance.
Once you have those presets in your Layers panel, select them to check their properties. Otherwise, you can right-click and look for a button to “Edit” adjustments. When you get to the color levels you need, you can add them to the neutral LUT.
Finally, save your LUT with a proper name and import it into the editor by dragging and dropping it into the Content Browser or by importing it via the import button.
Tips on Maximizing the Benefits of LUTs
In this section, you’ll learn some tips that’ll come in handy whenever you’re using LUTs.
Envision the Output
If you don’t already have a clue how you want your footage to turn out during production, LUTs might not be as helpful in post-production.
Opt for trying a LUT during shooting, but even if you don’t, make sure you plan how you want to use the footage in the end.
Avoid Common Footage Hiccups on Set
If you capture high-quality footage, you’ll end up with the best possible outcome. Double-check the white balance calibration and keep the shadows and hot spots in mind.
Make sure you choose an appropriate time of day if you’re shooting outdoors. For example, if you’re planning to use a day-for-night LUT, avoid shooting during the hours of high noon.
Even if the LUT successfully manages to make the footage appear as though it was shot during nighttime, the shadows may still give away when the sun is strongest.
Don’t Entirely Depend on LUTs
LUTs aren’t magic, so you can’t rely entirely on them to fix poor footage. If the shots aren’t good, to begin with, no number of LUTs will help you fix them.
So, make sure you use the best equipment, a proper time of day to shoot, and LUTs will seal the deal.
Final Thoughts
Whether it’s adding a hue to the scene or amplifying the shadows for a proper dramatic impact, a LUT can help video professionals achieve the exact results they want.
It spares the production crew from having to bend over backward to get the effect on the set naturally.
Regardless of whether you opt for pre-existing LUTs or decide to make your own, a LUT would help you save a lot of time and editing during post-production.
Lookup tables make the entire job of coloring and editing easier, turning excellent footage into high-end, stellar videography.

Check out these 8 essential tools to help you succeed as a professional photographer.
Includes limited-time discounts.

Jeff Collier is an experienced film photographer who enjoys experimenting with modern digital photography equipment, software and apps. He’s also an ex-world champion triathlete and avid cyclist, clocking hundreds of km each week in the beautiful Tweed Valley of northern NSW, Australia.
👋 WELCOME TO SHOTKIT!
🔥 Popular NOW:
