


How to Crop Layers in Photoshop (2 Quick Methods)
Discover the quickest methods to crop layers in Adobe Photoshop, an essential skill to enhance your photos and designs.
Photoshop | Software | By Judyth Satyn
Shotkit may earn a commission on affiliate links. Learn more.
This guide will give you the easiest ways to crop layers in Photoshop.
I’ve been using Adobe Photoshop for many years and often need to crop layers independently of the main project.
Photoshop is a fantastic tool for creative projects, and by using layers effectively, you can create intriguing artistic collages.
This tutorial teaches you two different ways to crop individual layers without cropping the canvas.
Even if you already know how to crop an image in Photoshop, I guarantee you'll learn something new about cropping layers.

Download a free copy of Adobe Photoshop to follow along with this simple tutorial.
How to Crop a Layer in Photoshop: Two Different Methods
Using the Crop tool in Photoshop usually crops the entire canvas, including all the project's layers.
This tutorial shows you how to use the Crop tool to crop individual layers without affecting the canvas size or other layers.
Step 1 – Open the Document
To begin, open Photoshop. Once Photoshop is open on your desktop, head to the top menu bar and click on File > Open.
A pop-up dialogue window will appear. Locate the file you wish to use and click on it to open it.
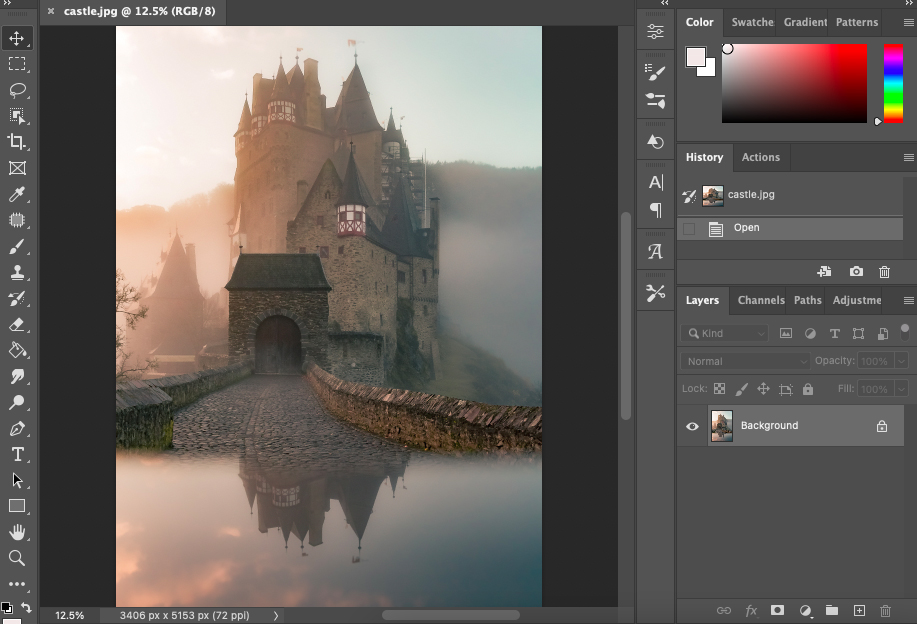
The file will open as a background layer.
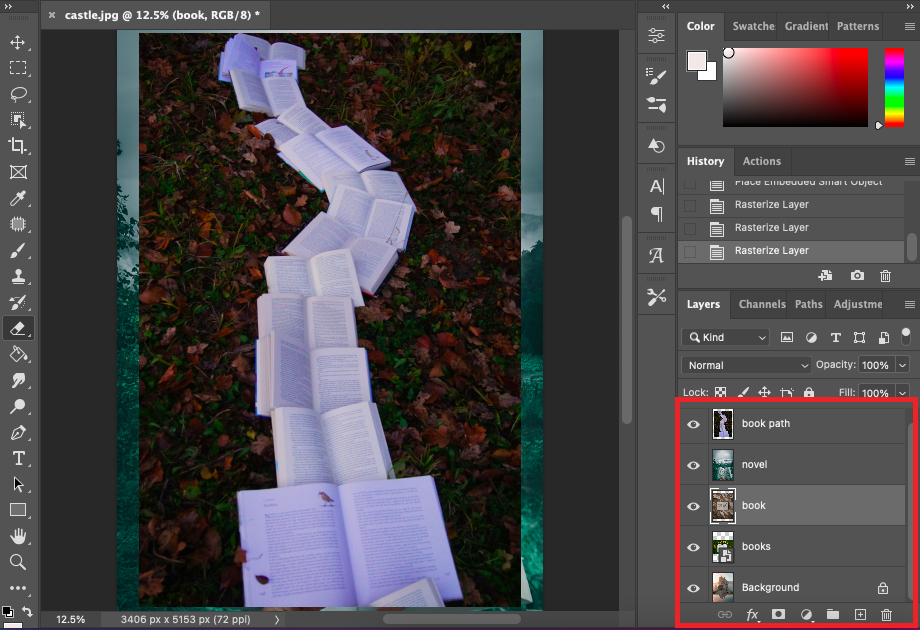
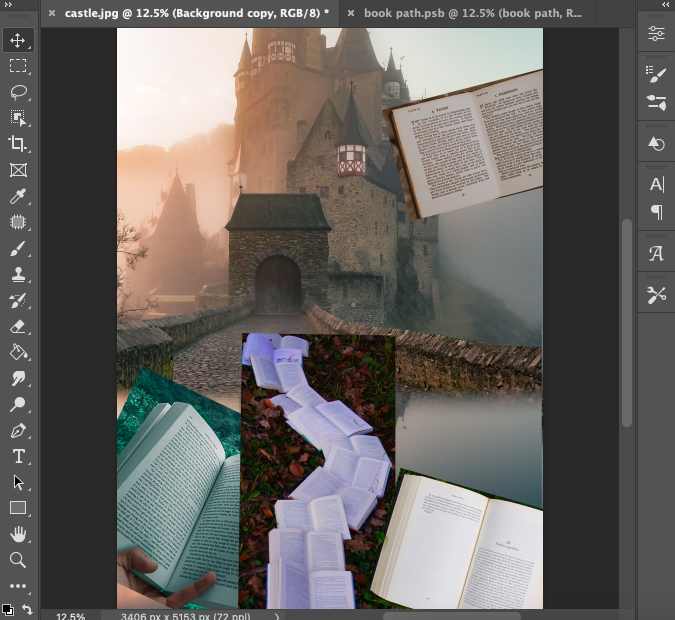
Step 2 – Create a Multilayer Document
We will add the extra image layers to create a multilayered Photoshop file.
You can simply drag the new images onto the canvas window to add extra layers.
Here, in the image below, you can see the new layers have been added to the layers panel.
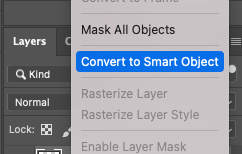
Step 3 – Convert to Smart Object
To crop the layers independently of the main project, we will first convert them to smart objects..
To do this, right-click beside the layer's thumbnail in the layers panel.
Once clicked, a dropdown menu will open. Scroll down and select Convert to Smart Object.
When a new layer is added by dragging and dropping it into Photoshop, it will usually be converted to a smart object.
If a layer is a smart object, it will have an icon in the lower right corner of its thumbnail.
- Related: How to Align Layers in Photoshop
Step 4 – Open the Layer in a New Tab
When a layer is converted to a smart object, it will only be possible to edit it when opened in a new tab.
Any edits made to an image in a new tab will only affect the individual layer, not the entire PSD project.
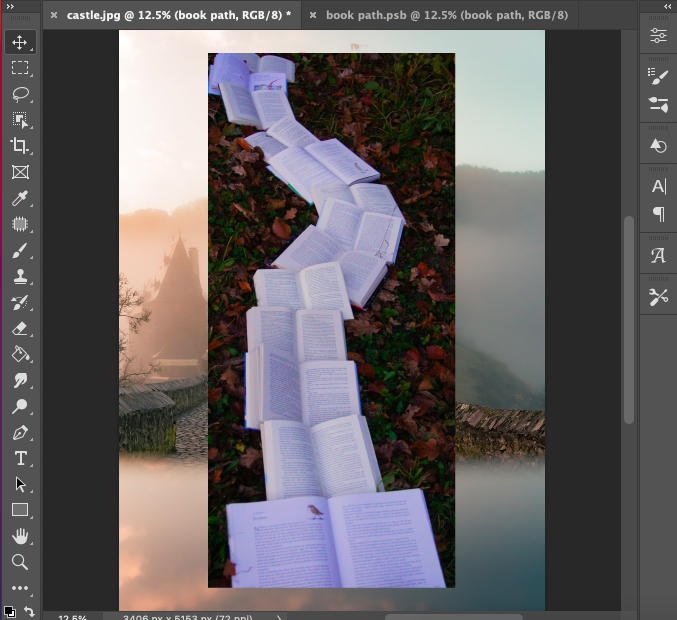
Double-click on the layer's thumbnail to open the layer in a new tab.
As you can see in the image below, the layer has been opened as a tab independent of the main project.

Any edits you make to the image in this tab can be saved to the layer in the original Photoshop document.
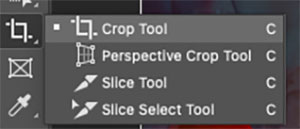
Step 5 – Select the Crop Tool
Select the Crop tool from the toolbar to the left of your canvas workspace.
Alternatively, hit C for the keyboard shortcut.
When the Crop tool is active, the image will be surrounded by a cropping border.

This cropping border can be dragged into position to reduce and clip the image or to increase the image's canvas size.
Step 6 – Set Crop Measurements or Ratio
Above the canvas workspace, the Crop tool’s option bar will open.
Here, you can fine-tune and enter the specifics for the crop.
![]()
Enter the measurements and resolution of the crop you wish to make.
Alternatively, choose a set ratio by clicking on the downward arrow and selecting a ratio from the drop-down.
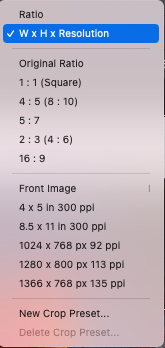
Or, you can choose to clear the value boxes beside W x H x Resolution to create a free-hand unrestricted crop.
Step 8 – Create the Crop
To crop the layer, use your cursor to drag the cropping border into position.
There are eight hot spots on the cropping border, the four corners, and the middle points between the corners.
Click down on the border beside these points and drag the border inwards or outwards to change the border's size.
If you have set a ratio or measurement in the Crop tool's option bar, the crop handles will be locked to this dimension.
If you have left the value boxes empty, you will have complete freedom to create any sized rectangle.
Step 9 – Reposition the Crop Box
You can reposition the entire border by clicking inside the crop frame and dragging the box into a new position.
Relocating the corp box this way will not alter its dimensions.
Only its location within the canvas workspace will be changed.
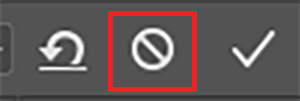
If you wish to cancel or delete the crop, click the Cancel button in the options bar, the circle icon crossed with a diagonal line.
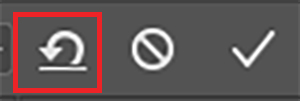
If you wish to reset the crop to the last crop position, click the reset button, depicted by a bent arrow.
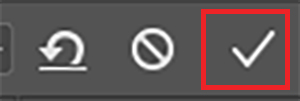
When you have completed the crop, and you are ready to save it, click the tick icon.
Step 10 – Save the Crop
To save the crop edit to both the tab and the layer in the main PSD file, click Command plus S (for Macs) or Ctrl plus S (for Windows).
Alternatively, head to the top menu bar and select File > Save.
Remember that when you save the crop edit, by default, Photoshop will delete all the clipped areas of the image.
You can retain the pixels in the clipped areas for future edits if you want.
To do this, untick the box beside Delete Cropped Pixels in the Crop tool's option bar.
![]()
Now, the extra pixels will be hidden instead of deleted, and you can access the clipped pixels later to edit.
Step 11 – Adjust Layer Size
Head back to the main project and check the layer is cropped.
As you can see in the image below, the layer is now cropped to the same size in the main project as it was in the independent tab.
If you wish to resize the layer, you can use the Transform action to adjust the size and location of the layer.
With the Layer active in the layers panel, head to the top menu bar and select Edit > Free Transform.
A bounding border will be placed around the edges of the layer. Drag the edges to resize the layer.
Step 12 – Repeat
Repeat this process to other layers you wish to crop.
When you are finished, all the layers will be cropped and resized, making an interesting collage.
The Crop tool is great for cropping layers if you want to crop them into rectangles, but how do you crop them into random shapes?
Often, we need to crop a layer to remove excess areas, and the crop isn't a perfect rectangle.
Follow the next method and learn how to use the Layer Mask if you want to crop the layer to a shape that isn't a rectangle.
Step 1 – Select a Layer
When your multilayered project is open in Photoshop, select the layer you wish to crop in the Layer panel.
The active layer will change from dark grey to light grey.
Step 2 – Select the Object Selection tool
Using the Object Selection tool, you can create an accurate selection around the part of the layer you wish to crop.
Select the Object Selection tool from the toolbar or hit W for the keyboard shortcut.
Step 3 – Create a Selection
The Object Selection tool's options will open above the canvas workspace. In the options bar, tick the box beside Object Finder.
This will set the tool to find and select the object you make a rough selection guide around.
Ensure the tool's mode is set to Lasso and untick Sample all Layers.
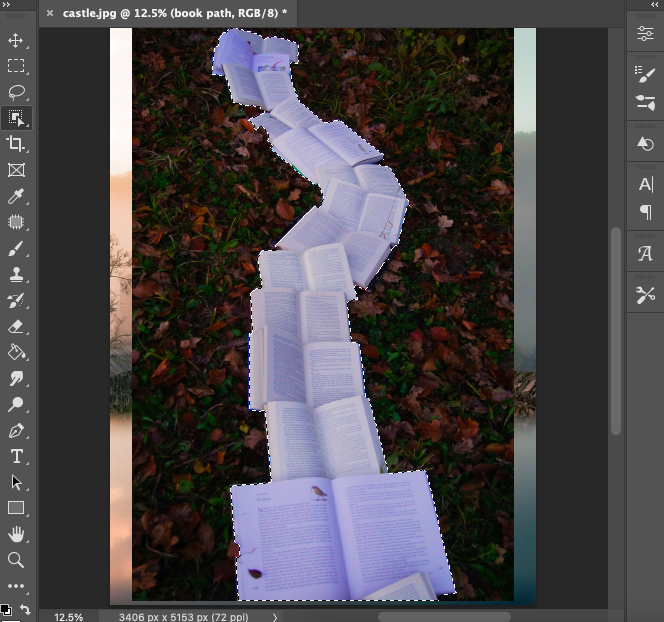
Click on the canvas and drag your cursor around the object to create a rough guide to indicate to Photoshop where to create the selection.
As you can see in the image below a rough outline has been created using the Object Seletion's Lasso tool.
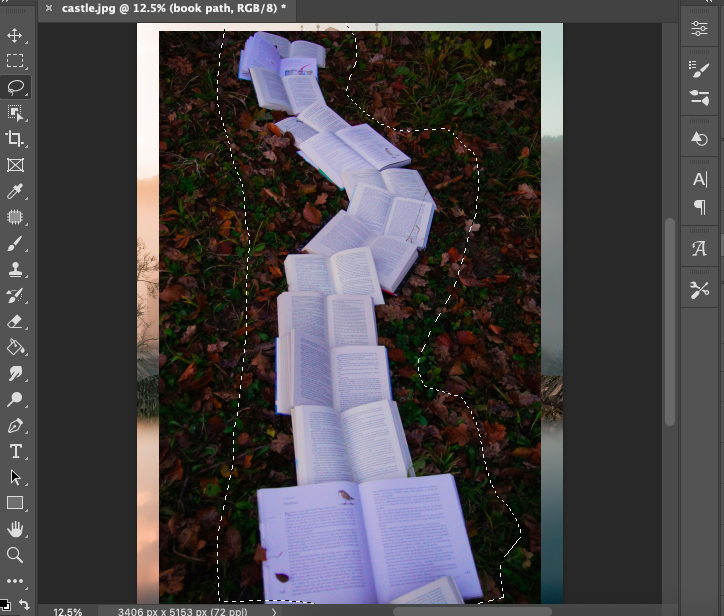
When you have completed the selection outline, Photoshop's AI will determine where the object's edges are.
And generate an accurate active selection, as can be seen in the image below.
Step 4 – Create the Layer Mask
We will now create a Layer Mask from the active selection.
To create the Layer Mask, head to the top menu bar and select Layer, and from the drop-down menu, select Layer Mask > Reveal Selection.
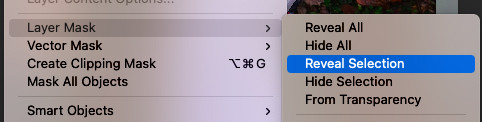
Alternatively, hit the Layer Mask button at the bottom of the Layer panel, the white rectangle icon with a circle inside.
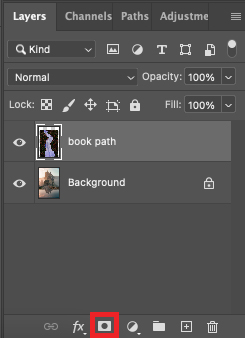
Once the Layer Mask button is clicked, Photoshop will automatically create a layer mask using the active selection.
A layer mask thumbnail will be added in the Layer panel.
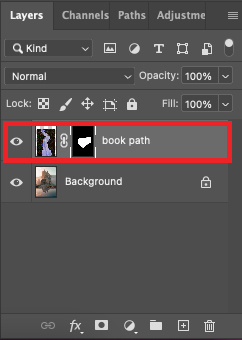
And the layer will be cropped.
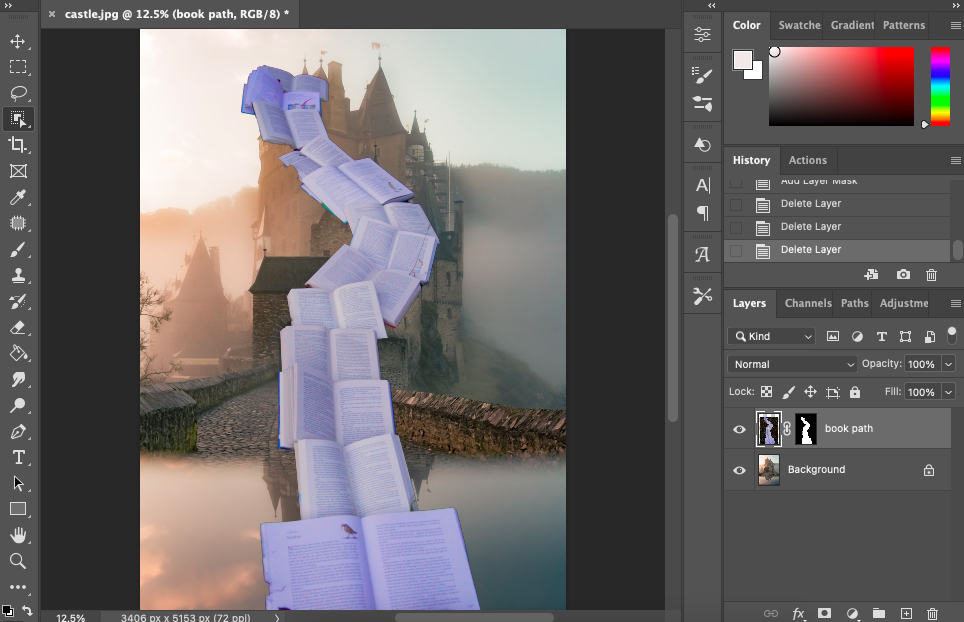
The image below demonstrates how the Object Selection tool combined with the Layer Mask creates a perfect selection and crop of the books.
Step 5 – Resize the Layer
You can use the Transform tool to resize the layer.
Head to the top menu bar and select Edit > Free Transform.
A bounding border will surround the object and drag the edges to resize the layer.

You can see we have created a fantastical collage using Photoshop's tools.
The books run like a path to the door.
Have fun creating different hyperrealistic collages using these techniques.
Step 6. Repeat with all Layers
Repeat these steps to crop any other layer you need to crop.
I hope you enjoyed this tutorial and are now inspired to create new and fantastical images.
Have fun editing.
If you enjoyed this tutorial and want to try another, check out – How to Photoshop someone into a picture.
FAQ
How do I crop and resize in Photoshop?
To crop and resize a canvas, you can use the Crop tool.
To crop and resize a layer separately from the canvas, first convert the layer to a smart object.
Next, open the layer in a separate tab using the Crop tool.
How do you crop a layer to a specific size in Photoshop?
To crop a layer to a specific size in Photoshop, turn the layer into a smart object, then open the Layer in another tab.
Select the Crop tool. Enter the measurements beside the W x H x Resolution box in the Crop tool's options bar.
What is the shortcut for cutting layers in Photoshop?
The shortcut to cut layers in Photoshop is
How do I cut all the layers in Photoshop?
To cut all layers simultaneously, you will need to merge the layers first.
Once they are merged, cut the layers using the crop tool.

Judyth is an experienced studio photographer and glass artist. When she isn’t Photoshopping comedians into the bellies of sharks, you can find her cooking delicious treats for her guests.
👋 WELCOME TO SHOTKIT!
🔥 Popular NOW:
