


9 Tips for Unique and Mesmerising Crystal Ball Photography
Master the art of crystal ball photography with this guide. Find out about gear, the Lensball, creative ideas, plus our 9 expert tips for nailing it!
Shotkit may earn a commission on affiliate links. Learn more.
Crystal ball photography is a popular and fun activity for photographers of all levels and experience. Whatever type of photography you specialise in, you may be looking to try something a little different in terms of your creative process.
Refraction photography using a crystal ball is great for exactly this – an extension of creativity. It doesn't have to be the main focus of any shoot – it's an adaptable piece of equipment that can stay with you in your camera bag at all times.
Then when you're next photographing a landscape, a portrait or a still life, you can get out your crystal ball to shoot an extra shot or two that will make your work really stand out.
In this article, we'll explain exactly what crystal ball photography is, and give some hints and tips on how to do it. We'll also be answering the common question: what is the best crystal ball for photography?
Let's dive straight in!
What Is Crystal Ball Photography?
Crystal ball photography (aka glass ball photography) is a form of refraction photography. The simplest explanation of refraction is that it bends light as it goes through one substance to another substance.
An obvious example of refraction in nature is a rainbow – the rays from the sun bend as they pass through raindrops and this is how rainbows are created.
You can cause refraction yourself, with just a glass of water. Place a piece of card with bold writing on it behind the glass, see how the writing looks bent and warped – this is evidence of refraction.
Crystal balls cause refraction as water does, but rather than searching for elusive raindrops to shoot through, a crystal ball is an accessory you can take with you anywhere. Think of it as an extra, external lens to use with your existing lenses.
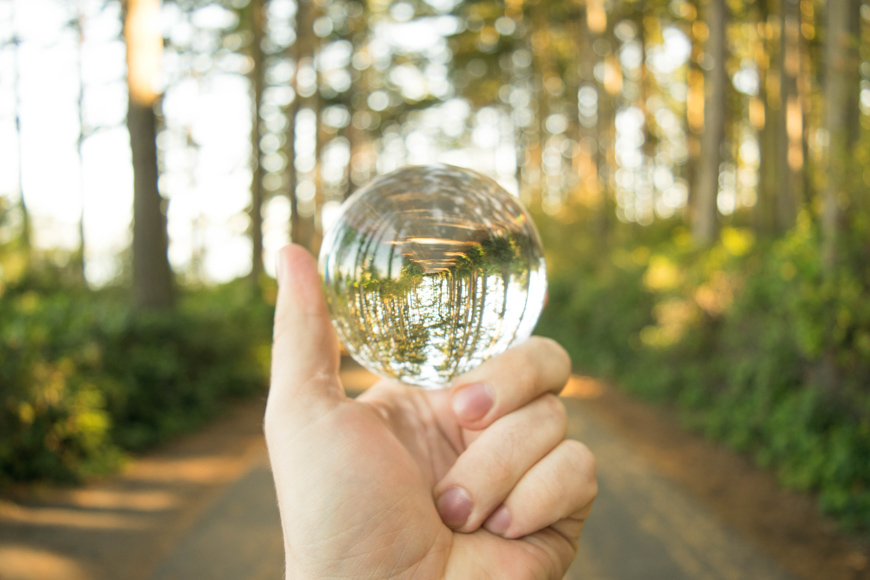
The light inside your crystal ball will be refracted and it will invert the image you can see through it. This inverted – or upside down – element to the crystal ball is one of the things that makes crystal ball photography really stand out.
Crystal ball photography has become increasingly known as LensBall Photography in recent years. LensBalls are also the best known and most respected manufacturers of Crystal Ball accessories for photography – we'll discuss this in detail below.
You might also like to read our article on how to take pictures of glass without reflection.
What Do You Need for Crystal Ball Photography?

You may be wondering exactly what you need for crystal ball photography. Here's a list of all the things we recommend to get you started:
- First of all, you'll need a Crystal Ball! We highly recommend a Lensball. These come in both 60mm and 80mm sizes.
- Your choice of camera lens. We recommend using a macro lens or wide-angle lens. A wide-angle (such as a 20mm prime) will allow you to place context around the ball; a macro will allow you to fill the frame with your crystal ball image. (How to fill the frame in photography.)
- Tripod. This is optional, but if there's nowhere safe to position your crystal ball, you can place your camera on a tripod with your timer release selected, then hold the ball in the frame yourself.
A common question photographers ask is, what is the best size Lensball? The answer really comes down to your creative preference.
The smaller Lensball (available here) is lighter and easier to carry around but gives you less space to nail your focus for a distortion-free image.
The larger ball (here) isn't as pocketable, but the extra size gives you more area of focus to play with and you can more easily fill up a frame with it even on a non-macro lens.
Now, let's tackle the next question: how do you shoot with a Lensball?
9 Tips for Crystal Ball Photography
Now you have your Lensball and camera setup ready, you'll want to get shooting creative Lensball photography!
Below you'll find nine tips for getting the best out of your glass ball photos.
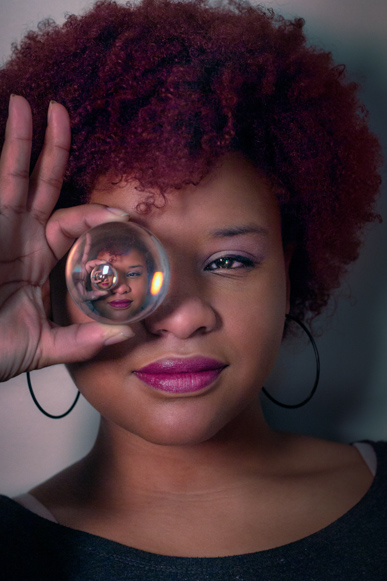
1. Consider the subject
Credit: Brad Switzer
The subject in crystal ball photography is the image that will be seen directly inside the ball. So, consider an interesting and eye-catching subject to try out first.
If you're a landscape photographer, you may want to take it on your shoot, to add an extra dimension to your landscapes. But whatever the type of photography you love, a crystal ball will really expand your options. Just pick your subject carefully.
If you want to avoid too much distortion, centre your subject within the crystal ball.
Crucially, ensure your subject is not too far away. If your subject, say a mountain range, is miles away, the image just won't work.
You'll capture the scene but the subject will be really small, negating the impact of shooting through a Lensball.
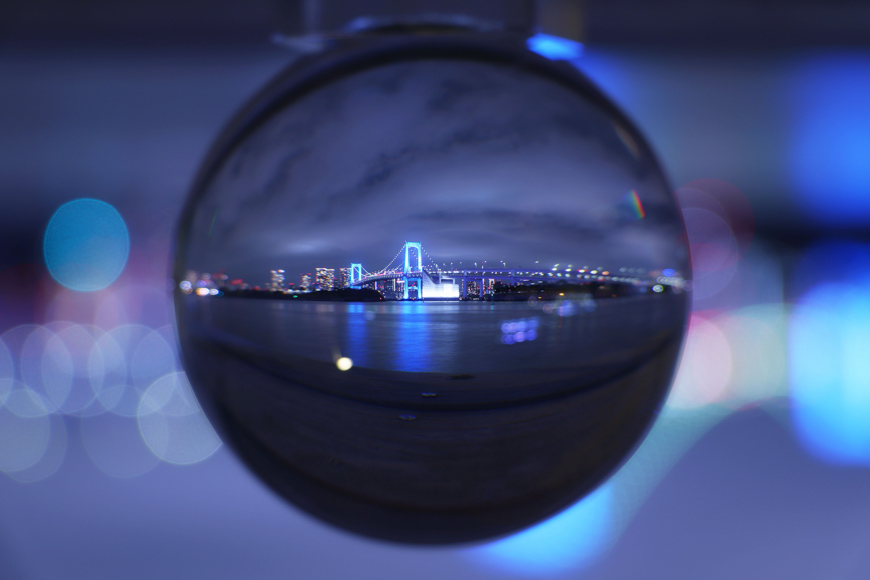
2. Consider the background

Credit: Chris Grafton
Choosing the right background is everything – with glass ball photography, the background is often the subject as well. So, choose carefully!
There's no rule here at all – you could try a cityscape at night, or an interesting structure, or a beach. Take your Lensball wherever you go with your camera and try different backdrops.
As well as choosing the right background, choose the right lens to capture it. By using a wide lens you will show more of the background, as well as your Lenball as the main focus of the image.
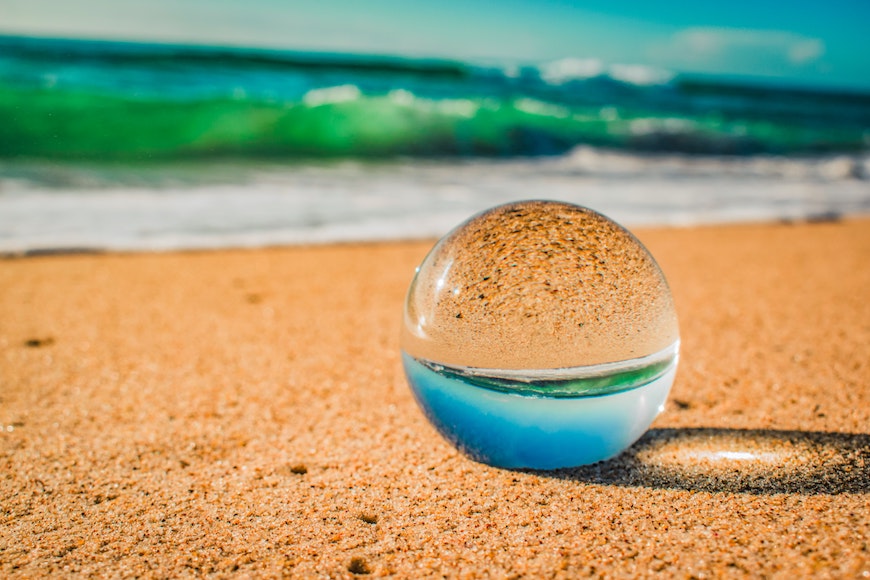
3. Consider the elevation

Credit: Jamie Street
Considering where you place your Lensball to capture your subject is really important.
You can place it down low and even look for a pool of water – this way you can utilise the reflection and flip your subject around so it's the right way up in the reflection.
Or, you might want to place it higher – find a fence, or other flat, sturdy surface to place it on. You could even hold the ball yourself or have someone else hold it for you.
4. Position crystal ball carefully
Credit: PM Villa
There is, of course, a real chance of your crystal ball moving or even rolling away. This means it could get broken or damaged – it's perfectly round of course! So, before you start shooting please ensure you're 100% happy it won't roll away.
The only person who can decide whether it's safe to start shooting is you. You can invest in specialist crystal ball holders too.
These are great little accessories and help to lessen the chance of your crystal ball running off mid-shot!
5. Important – be aware of fire hazards
Credit: Nicole Avagliano
It might be surprising, but a crystal ball can present as a fire hazard in some situations. It's up to you to ensure your crystal ball doesn't start a fire – so ensure you take all the necessary precautions when photographing or storing your crystal ball.
Your crystal ball is very similar to a magnifying glass, and though it would take a little time in the sunlight, it's because of this that it could actually start a fire. So we recommend you do not place your crystal ball in direct sunlight when photographing it.
If your crystal ball is in the sun, it can get hot and may burn you, so be aware of this when picking it up.
Also, when storing it inside or outside, be aware of the fire risk. Many people recommend keeping your crystal ball inside a sock – not only will this offer protection for the ball, but it will also keep it away from the sunlight.
6. Use post processing to flip your image
Credit: Jonathan Sebastiao
One of the standout features of photographing through a crystal ball is that it presents the image within the ball completely upside down. For some images, you will want to preserve this effect entirely.
However, sometimes, you may want to flip just the subject (with the crystal ball) around so it's the right way up, along with the background.
To do this, use photo editing software – such as Photoshop or Exposure X6 – to draw around the subject within the ball. Then, you can rotate it completely around so it's the correct way up.
There's no rule here at all. Try this out on some images – experimentation is key with crystal ball photos!
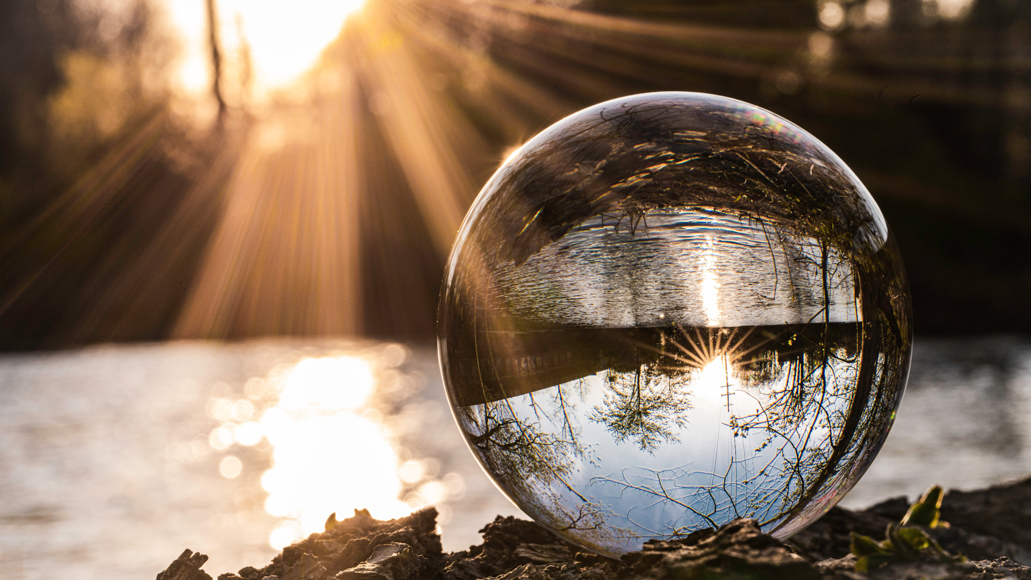
7. Try shooting a sunset or sunrise

Credit: Elijah Hiett
Sunset – in particular the golden hour – brings with it such soft light and is a great time to try out glass ball photography.
The soft light will soften the edges of the background, creating an ephemeral image and drawing the eye even more directly to the subject.
This is an ideal opportunity to try flipping the subject within your ball, to spin the sunset the right way up.
8. Create beautifully abstract imagery

Credit: Ramiz Dedakovic
A glass ball creates an image that's almost like a fisheye lens. So, in any usage, it's an abstraction of the world.
You can push this abstract element even further. Try photographing different subjects – it doesn't all have to be sunsets and landscapes.
Find some bright lights, textures or patterns to photograph and take your abstract imagery further.
Finally, how about having a go at some abstract macro photography?
9. Choose the right aperture for your crystal ball images
Credit: Trevin Rudy
As with any image, this is subjective. There's no right or wrong with your choice of aperture – however, there are things to consider.
If you shoot with a shallower aperture keeping the background soft and blurry, you'll draw all attention to the glass ball and the subject within it. However, you may wish to stop down and aim to have the background more in focus.
You do need to be careful when using a shallower aperture, as, if it's too shallow, the subject might not be sharp enough. We recommend starting at f/6.3, then adjusting from there.
What Is the Best Crystal Ball for Photography?
There are many things to consider when purchasing a glass ball. Primarily you will no doubt be considering size, weight and above all, quality.
As mentioned above, the most failsafe choice is to get a Lensball. Lensball have become the leading brand in crystal ball photography due to their superior quality coupled with their affordability.
It's for this reason that the word ‘Lensball' has also become synonymous with crystal balls in the photography world.
We highly recommend the Lensball Pro as the best option for crystal ball photography. There are two sizes of Lensball Pro – the 80mm Lensball, then the 60mm Lensball – see them both here.
For a lightweight, easily transportable Lensball, go for the 60mm model – it would even fit in your pocket!
The 80mm model is bigger and will show more of the scene you're capturing in full sharpness. Overall, the 80mm does give superior image quality, however, the 60mm is so lightweight it makes a perfect travel companion.
Whatever size you go for, each Lensball is beautifully crafted and each one is checked several times for quality. As it's made out of K9 crystal – the same crystal used for camera lenses – it produces exceptional quality images.
Overall, we highly recommend both the 80mm and 60mm Lensball models – as we said above, it's down to you which one works best for what you want to capture!
Crystal Ball Photography FAQs
Which size Lensball is best for crystal ball photography?
We recommend either the 80mm or the 60mm Lensball Pro, depending on your needs. The larger ball captures more of the scene, while the smaller 60mm is more pocketable for travel.
How do you shoot with a Lensball?
You can either hold up your Lensball in front of the scene you want to capture, or position it there using a tripod and stand. Then, simply shoot your photograph through the ball.
Why do things get turned upside down when looking through a glass ball?
The glass not only reflects but also refracts the light passing through it. This refraction is a form of distortion that causes the image to be inverted.
Final Words
A Lensball is such a fun accessory to have in your camera bag. It's also challenging in a good way – using a glass ball will make you consider your angles, your light, and your settings, and take the time to compose your images.
Above all, it's such a versatile tool as you can adapt it to any kind of photography you can imagine. You can also take it anywhere – the 60mm Lensball model being particularly easy to transport.
It's a great accessory for professionals and enthusiasts alike, and such a unique photography idea. So, take a Lensball with you on your next professional job, day out or holiday and start creating!
Experiment with your settings, your location and the time of day you shoot at, and above all, have fun! Any questions whatsoever, please do feel free to leave them as a comment below.

Check out these 8 essential tools to help you succeed as a professional photographer.
Includes limited-time discounts.

Patrick Mateer is an award-winning photographer who lives in Yorkshire, England with his wife (wedding photographer Hollie Mateer) and two children.
👋 WELCOME TO SHOTKIT!
🔥 Popular NOW:
