


Guide to Sunrise Photography (Camera Settings, Tips & Ideas)
Want to take incredible sunrise photos? From gear to settings to techniques like focus stacking and HDR, this guide has it covered!
Learn | Photography Guides | By Ana Mireles
Shotkit may earn a commission on affiliate links. Learn more.
You see all those breathtaking sunrise photos online… and yet, when you try your hand at sunrise photography, yours just don't match up.
People think that taking a great photo of the sunrise is easy because it's so naturally beautiful. I mean, how could you go wrong?!
In reality, though, there's much more to it than you'd think.
If you're not prepared, you risk coming back home with nothing but an overexposed ball as a sun in a boring, underexposed scene.
To avoid this situation, here are some photography tips that will help you to up your game and get those breathtaking images you've always wanted.
15 Tips for Amazing Sunrise Photography
Photographing the sun rising sounds so enticing that you might head out on the spur of the moment and miss some great opportunities.
Sunrise photography is a complex subject that requires preparation and a plan of action that starts way before the sunrise and finishes well after what is considered the ‘golden hour'.
From finding the location to editing your images, this article is about giving you photography tips and advice so you can make the most out of your photoshoot.
1. Plan

Credit: Michal Parzuchowski
All photo shoots need organization, and shooting a sunrise or sunset is no exception.
When you're working outdoors and have a short time span before the conditions change completely, you should do some prep work.
I’ll be going into details about all the tips you should consider before heading out, but for now, let’s just say that you shouldn’t leave everything to luck.
2. Select and Scout the Location
Location can make or break your image, so look for a unique vantage point.
You wouldn’t want to get up early one morning, pack up your gear, and miss the sunset because you were driving around looking for the right place to set up.
You should look for a location beforehand that has an interesting view and allows you to see the horizon facing east.
Preferably, look for a place where you can stay for a couple of hours without being disturbed or asked to move.
Then, scout the location to determine what kind of images you’re going to take, and based on that you can decide on the gear.
Also, find different spots where you can position yourself. The morning of the shooting might be dark and it’s better if you already know the best sites.
3. Check the Weather

Checking the weather is helpful because it will allow you to know if you need to bring any special protection for your gear.
Also, think about what you’re going to wear since you’re going to be staying still for a while. If the weather is chilly, you'll want to stay warm and comfortable.
Weather also has an impact on the type of photography you’ll be doing. If there are going to be many clouds and dramatic skies you might want to do some wide landscapes.
If the sky is dull and clear, maybe you’d want to focus on details or use different elements to create silhouettes.
4. Pick the Right Gear
Credit: Jakub Gorajek
Ok, now that you have all the elements to make an informed decision, you should start packing your gear.
- Camera
Basically, any camera that can be operated in manual mode and has exchangeable lenses will do. However, there are some cameras that will give you an advantage.
I’m going to list just a few of them to get you going, but they're not the only ones – and you definitely shouldn't be deterred from using the one that you have.
For Canon users, the EOS 5DS and EOS 5DS R are famous for the sharpness and dynamic range that make great landscape pictures thanks to the low-pass cancellation function. They also have an intervalometer built-in for beautiful time-lapses.
If you’re a Nikon photographer, then the D850 is also a great choice because it has a 45.7-megapixel full-frame sensor with a wonderful dynamic range.
The Olympus OM-D E-M1 Mark III is greatly appreciated for sunrise photography because of its integrated ND filter. It also has an improved stabilization that comes in handy in these low-light situations.
In addition, if your camera can be set to shoot at ISO 100 (or lower), this can be advantageous when cutting out as much ambient light as possible, especially when shooting long exposures. If you can't go as low as ISO 100, you can use neutral density filters as a way of ‘blocking' some light.
- Lenses
The lens you use for sunrise photography depends greatly on the type of pictures you want to take.
If you're going to photograph open landscape scenes, then you’ll need a wide-angle lens.
If you want to focus on the details, have the sun take up most of the frame, or take photos of fiery clouds, then you need a telephoto lens.
If you have a prime lens for each focal length, you’ll ensure the best quality and sharpness in your photographs.
Alternatively, with a zoom lens, you’ll have more versatility but you might have to compromise with the aperture and the sharpness. Having both a wide-angle and a telephoto in the one lens does provide great versatility, though.
To maximise your depth of field (the amount in focus), or to cut out as much ambient light as possible, you may need to shoot at apertures as small as f/16 or f/22, so it's helpful to know if your lens can perform at these settings.
- Accessories
Using a tripod is important because this will give you more freedom to determine your settings. There’s no special tripod that you need, just make sure it's heavy enough to stay steady since you’re going to be out in the open and there could be wind.
If the weather forecast predicts a particularly windy day, you should consider bringing a sandbag to add extra weight and keep your tripod grounded. (Check out our guides for more helpful tripod tips.)
A graduated neutral density filter can come in handy to deal with extremely contrasting scenes. For example, when the sun is already illuminating the sky but not yet reaching the foreground. See our article on are ND filters worth it?
A polarizing filter can be useful too. Normally you wouldn’t want to darken an extra step or two in a low-light situation, but it can help with extreme highlights if the scene has any reflective surfaces.
5. Get Up Early
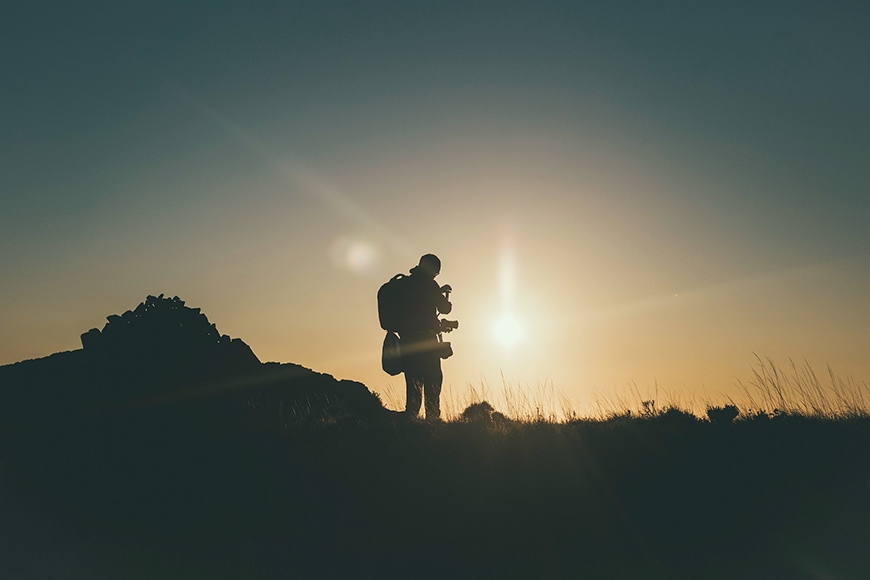
Credit: Joseph Pearson
Ok, you’ve prepared as much as you can and now the day to try out your sunrise photography is here.
Sunrise obviously happens early in the morning, but the exact time depends on your location and the time of the year. Know what time the sunrise will happen and rise early so you can get to your location with ample time to spare.
The first half of your time can be spent setting up, and with the rest, you can start taking some photos.
The moments before the sunrise can be just as magical as the sunrise itself, as the morning light creeps in with a soft glow. You can also use this time to shoot some trial photos to determine the correct settings.
If you’re not much of a morning person though, you can give this type of photography a try in the days before and after the winter solstice.
This happens around the 21st of December in the northern hemisphere, and 21st of June in the southern hemisphere.
You don’t have to photograph the sunrise exactly on the day of the solstice, you can take advantage of the late sunrise for several days around that period.
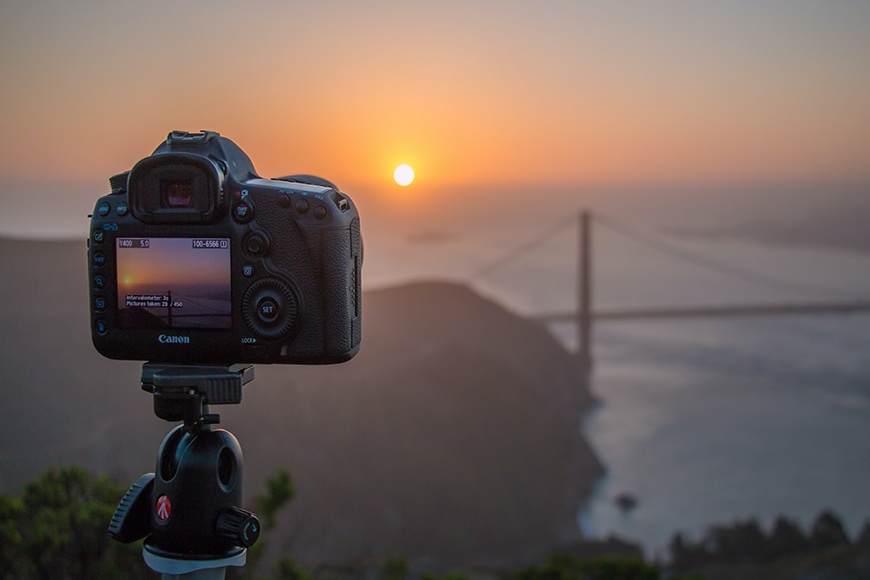
6. Get the Right Camera Settings
Credit: Sergey Pesterev
The camera settings you use for your sunrise photography will depend greatly on what you want to achieve, the gear that you have, and the specific situation.
Nonetheless, there are some guidelines that can help you out.
Let’s see how you can determine the best settings for your photo. The light changes constantly during sunrise – often very quickly – so remember to adjust your camera settings accordingly.
- ISO
It's always best to keep the ISO as low as possible to avoid noise. So if you can keep an ISO of 100 that's great.
If this isn't possible, I suggest that you don’t go over 400. Some cameras can handle higher values better than others. But it’s safe to say that 400 should be ok no matter what camera you use.
- Aperture
This will depend on the result that you’re after. If you want to have everything in focus, you should aim for the sweet spot of your lens. This is usually between f/8 and f/11.
On the other hand, if you want to create a bokeh effect or a graded blur as the background gets further away, you need a wide aperture.
Prime lenses can easily have an aperture as wide as f/1.4, while a good zoom lens might be f/2.8. Use whatever aperture is possible with your equipment.
To stay in full control of your aperture, you can also try setting the camera to Aperture Priority mode. This way, the camera will adjust the shutter speed accordingly (see our complete guide to shutter speed here).
- Shutter Speed
The shutter speed you use also depends on your creative view. If you’re looking to capture some motion from the clouds or waves, you need a long exposure.
According to the speed of the subject and the desired result, you can set the shutter speed to 10 or 20 seconds. For this, you need to make sure that the tripod is very stable or you might end up with a blurry mess.
If you want to freeze any moving element, you need to use a faster shutter speed. Depending on the scene, 1/400 should be enough.
- White Balance
This is a setting that often gets overlooked. As you probably know, some lights have more yellow cast, others are bluer, and the natural light of sunny midday is considered white light.
White balance is measured in Kelvin degrees. The lower the value, the warmer the light and vice versa – the middle point being around 5,500 which is white light (noon).
Sunrise and sunset are in the low part of the Kelvin scale with a red-yellow light. To keep the warm tones in your picture you can set the White Balance to Cloudy Day Photography.
Of course, your white balance can also be corrected in post-production, but it’s always better to have the most accurate color to your image right from the start.
- Focus
Depending on what you're shooting, it may be best to keep your focus in manual mode. For example, when shooting in low light, your camera may struggle to auto-focus.
If, say, you're photographing moving subjects such as people silhouetted against a beach sunrise, auto-focus will help you to track them.
- File format
Something that you should always keep in mind regardless of the settings you're shooting with is to stick to RAW mode.
This way you can have the most unprocessed information available, so you can make even major edits while still maintaining the quality of your image.
7. Shoot to Edit

Credit: Tyler Whitehead
This doesn't mean you should take a bad photo thinking that you'll just correct it in post.
It refers to photographing with specific characteristics for the post-production effect that you'll create. A couple of examples are focus stacking and HDR.
- Focus stacking
When you have a scene where it’s impossible to keep both the foreground and the background in focus, you can use this technique to achieve it digitally.
To be able to do this, you need to photograph the entire scene many times while moving the focus point.
Set the aperture to the sweet spot of your lens to ensure the sharpest result. Then focus on the closest element that you have.
Next, continue taking pictures while moving the focus point slowly towards the back in each photo until you reach the end.
Afterward, you can blend them together in Lightroom or Photoshop to have infinite depth of field.
- HDR
This stands for High Dynamic Range. This technique is used when you have a highly contrasted scene.
Instead of compromising and losing detail either in the shadows or the highlights, you make three (or more) photographs with different exposures.
One of them will be perfect for the highlights but have underexposed shadows, another one that is the opposite of this, and a third one in the middle. Most cameras offer the feature Exposure Compensation to automatically make the three images.
If you want to do it manually, you can take more images and get a better result. Start by exposing correctly for the highlights. Then make another photograph for each step until you reach the point where the shadows are well exposed.
Then blend them all together in software like Photoshop or Aurora HDR to create an HDR image.
8. Composition

Credit: Arnaud Mesureur
The composition can make or break an image, so make sure you keep it in mind for every shot.
Here are some composition photography tips to try on your next sunrise photography shoot:
- Rule of thirds: Imagine your frame is divided by a 3 x 3 grid. Some cameras have this included in the LiveView. Then position the elements in the dividing lines and intersection points.
- Symmetry: if you prefer to keep the subject centered, then play with symmetry photography, for example including a reflection.
- Planes: Add elements in the foreground to create different planes and give depth to your image.
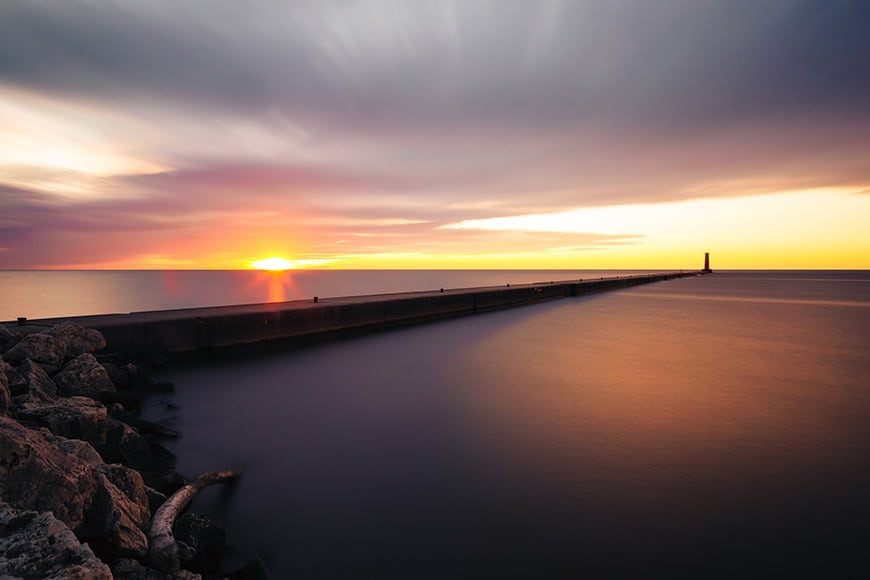
- Lines: Use lines to guide the viewer's gaze throughout the picture. These lines can be natural elements like trees or streams, or artificial like a pier or a road.
9. Go Abstract
Credit: Ales Krivec
Who said that sunrise photography needs to feature always a perfect horizon with the sun peeking out?
You can try doing some abstract photography using the wonderful shapes and colors of the sky as your subject.
For this, you'll need to use a telephoto lens. Keep in mind the composition rules to make your images more interesting.
10. Look Around

Credit: Johnny Mcclung
Another big mistake is to get so enchanted by the majestic sun, that you forget to look around.
Of course, the sunrise itself makes a wonderful photo, but don’t miss out on the other opportunities the gorgeous lighting conditions present you with.
Look behind, above, around and below you, paying attention to how the light plays on different surfaces.
The sunrise can bathe other parts of the scenery with a unique quality of light.
11. Move Around

Changing positions can be the key to creating your masterpiece. Even if you feel like you have a great image already, keep on looking.
By changing positions during your sunrise photography, you allow for other elements to come into play. Maybe the branch of a tree or the rocks from the shore.
It doesn’t matter if they're not facing directly to the sun – as I was saying in the previous tip, you don’t necessarily have to capture the sun itself in your image to make it a great sunrise photograph.
12. Stick Around

Credit: Aliko Sunawang
Continuing from the previous point – you should always be patient. Don’t pack up your things and go as soon as the sun comes out or whenever you feel that the last photo was great.
Stick around and see how the light changes, how the clouds block parts of the light, or even to see if an unexpected subject shows up.
The first hour of light after the sun rises is known as the golden hour – if you've ever wondered what is the best time to take sunrise photos, this is it. Keep shooting and experimenting with your settings, your position, your focal length, etc.
13. Use Technology to Your Advantage

Credit: Joshua Kirshner
We live in the age of technology and there's an app for everything you can think of. Why not take advantage of that fact to improve your photography?
Here are some of the most popular apps and websites for sunrise photography.
Accuweather: With an hour-by-hour prediction and a minute cast to keep an eye on the rain, this is a must. You can also use it to find out the specific time of sunrise or sunset on any given day.
Photo Pills: This will help you to keep tabs on the sun, the moon, the milky way… basically anything you need if you’re photographing the sky. It also has a location scouting tool.
Photo Tools: A photographic assistant in your pocket to calculate everything from the depth of field to the golden hour.
TPE: The Photographers Ephemeris is a sun tracker that can be used as an app or on desktop. It can predict when the best colors of the sunrise and sunset will happen and calculate the length of the shadows according to the position of the sun.
GPS Kit: This will keep you from getting lost even if your phone loses signal. If you're like me and get easily disoriented, this is a must-have.
Tide Graph: If you're planning to catch the sun rising above the perfect wave, then you'll need to keep track of the tides and this is the perfect app for it.
14. Experiment
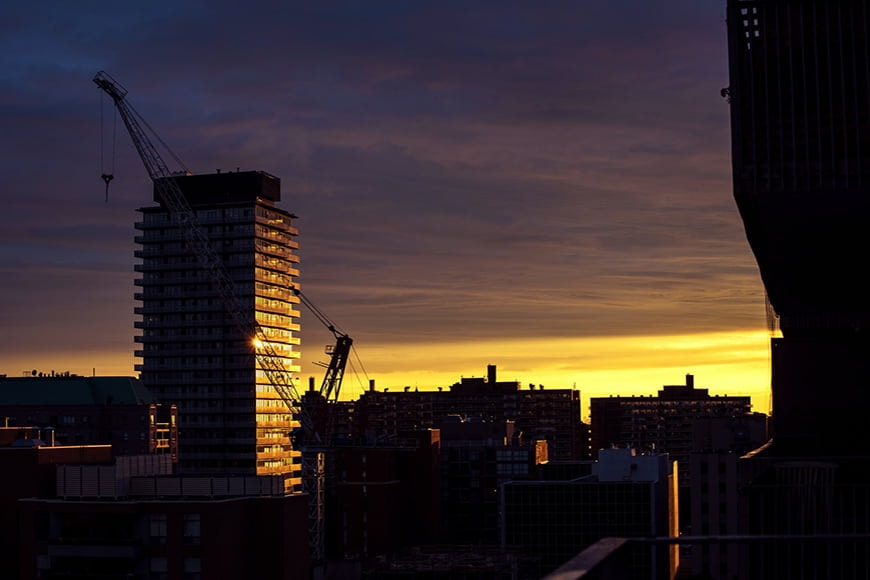
Credit: Alex Shutin
Most people think of the beach or the mountains as the places to capture sunrise and sunset photography. But you can also go urban, find interesting skylines, and keep experimenting.
Try out different techniques. Check out what other great photographers are doing, and find inspiration.
There are many things that you can do to keep improving and innovating.
15. Edit
Credit: Hakan Aldrin
Editing can be as simple or elaborate as you want it to be. You can correct the exposure if you need it, or you can create special effects like turning your sunrise photography images into watercolor paintings.
There are no rules or limits to your creative process.
You might want to start with some basic adjustments like sharpening and white balance, then check the exposure and adjust the saturation to your liking. After that, you can start making some local adjustments.
Cropping is sometimes helpful to make a better composition. Also, don't be afraid to try out presets. There are some amazing ones, sometimes even for free, that can really make your images pop.
Sunrise Photography FAQ
What is the best time to take sunrise photos?
Start half an hour before the sun rises and keep going for about an hour after.
How long after sunrise is golden hour?
There's a golden hour every day at both sunrise and sunset. The morning golden hour happens right after the sun has risen and lasts for anywhere up to an hour (though it's usually shorter).
What is the best camera setting for sunrise?
The best settings depend on the result you want. But as a starting point: ISO between 100-400; aperture of f/2.8 for bokeh effects or f/11 for sharp images; 10-second shutter speed for long exposure and 1/400 for fast photography.
Better Sunrise Photography | Final Words
There’s a lot of creative flexibility in sunrise photography. I hope you found these tips helpful, but most of all, I hope they encourage you to go out and experiment.
A final word to the wise – keep safety on your priority list. Don't risk getting hurt to get a beautiful picture. Don't look directly at the sun and don't wander around in dangerous places because it will be dark out.
Beyond that, enjoy the process of perfecting your sunrise photography, and go take some amazing pics!

Check out these 8 essential tools to help you succeed as a professional photographer.
Includes limited-time discounts.

Ana Mireles is a Mexican researcher that specializes in photography and communications for the arts and culture sector.
👋 WELCOME TO SHOTKIT!
🔥 Popular NOW:
