


How to Freeze Motion in Photography (on Phone or Camera)
Freezing motion in photography using a fast shutter speed is an exciting way to create compelling photos, and it's easier than you think. Here's how to do it.
Shotkit may earn a commission on affiliate links. Learn more.
Frozen motion photography is a popular technique that uses a fast shutter speed and a wide aperture to freeze the motion happening in a scene.
This type of photography is popular because it suspends movement and puts the main subject in complete focus.
If you want to improve action photos and capture moving subjects in low light conditions, frozen motion photography is a great option.
This shutter speed cheat sheet is a good starting point when learning the simple technique of freeze motion, but I'm about to delve much deeper.
In this guide, I'll take you through the art of capturing a moving subject with faster shutter speeds and continuous focus.
See for yourself how a fast enough shutter speed can produce amazing freeze motion on your phone or camera.
What is Frozen Motion Photography?
Frozen motion photography is a simple technique using high shutter speeds to freeze action without any blur.
Photographers are able to freeze motion by adjusting camera settings, including speed, aperture, and ISO.
With a wide aperture, more light enters the sensor. This gives you sharp image quality, perfect for action shots like kids playing on the beach or athletes scoring a goal.
While professional photographers perfected this technique, nowadays, anyone with a newer smartphone can freeze the motion on their phone camera.
Whichever camera you're using, keep the background conditions in mind. A well-lit indoor environment or ample sunlight provides the ideal backdrop for freeze-action mode.
What is Shutter Speed?
Shutter speed is one of the most important settings for photographers, as it helps determine how dark or bright a photo is.
It refers to how long the camera shutter stays open, exposing light to the sensor.
Depending on shutter settings, you can either freeze action or blur motion for the desired effect.
A slow shutter speed with moving subjects typically results in blurry images. 1/2 second, 1/4 second, and 1/8 second are all considered slow speeds.
- Read more: How do you take a slow shutter shot?
There's less motion blur with a fast shutter speed, as the motion is frozen in time. For example, 1/250 second, 1/500 second, and 1/1000 second are fast shutter speeds that let in less light.
What Shutter Speed Should I Use to Freeze Motion?
1/250 second is the minimum shutter speed required to freeze motion.
However, depending on the speed of your subject, you may need much faster shutter speeds, especially in low light conditions.
Keep these suggested shutter speeds in mind when shooting movement photos:
- 1/250 sec – kids playing
- 1/500 sec – soccer players running
- 1/1000 sec – action sports (read more about what shutter speed to use for sports photography)
- 1/2000 sec – birds flying
- 1/4000 sec – ultra-fast subjects
Remember, photography is all about experimenting.
If you try to capture a moving subject and notice blur in the images, increase the shutter speed and try again.
Other Important Camera Settings for Freezing Motion
In addition to shutter speed, you must consider the aperture when shooting a moving subject.
Aperture is measured in f-stops and refers to the opening of the lens for light to pass through.
You will be able to freeze motion with a wide aperture of f/5.6 or wider. This should blur the background and support the fast shutter speed.
Some automatic cameras offer shutter priority, where you set the shutter speed and the camera selects the correct aperture.
The third key point is ISO, which is the camera's sensitivity to light.
Try raising the ISO if you want brighter results in frozen motion photography.
For example, a photo with a flying bird as the moving subject may need a shutter speed of 1/1200 second, an aperture of f/4.0, and an ISO of 400.
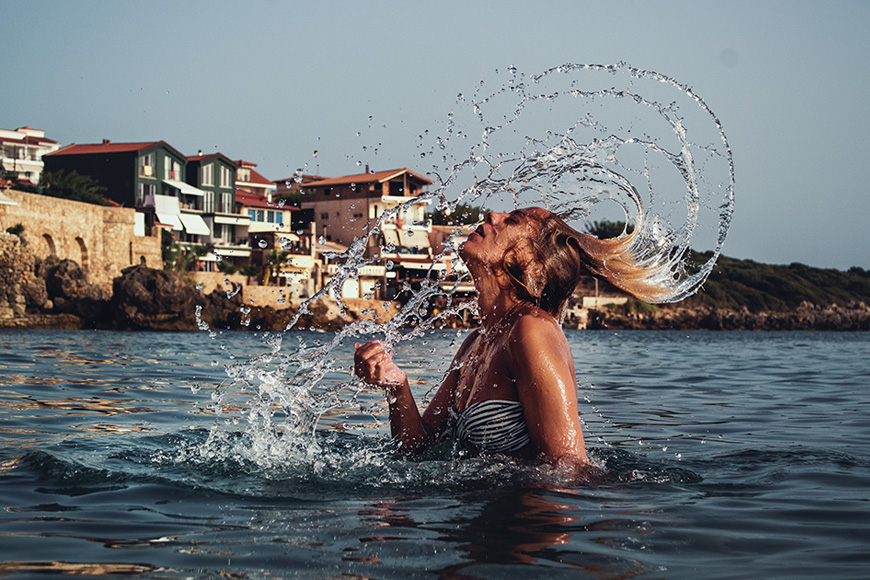
Compare that to a photo of a surfer, where a faster shutter speed of 1/2000 second is required to freeze the movement.
An aperture of f/5.6 and an ISO of 200 should achieve the desired results, effectively capturing the wave's motion.
How to Freeze Motion in Photography
With frozen motion photography, you need to either manually set a fast shutter speed and wide aperture or use shutter priority to obtain the correct settings.
Don't forget to increase the ISO and find your focus point to capture the movement on camera.
Depending on the lens, you may want to start in semi-automatic mode and see how a test image turns out.
If you need to tinker with the settings to improve focus, try manual mode for sharp, crisp action photos.
Either way, you can capture these images without a tripod, as the fast shutter speed means there shouldn't be much camera shake.
Let's take a closer look at three common ways to shoot frozen motion photography.
Freezing Motion Outside the Studio
Step 1: Find natural lighting
When photographing outside, look for areas with abundant sunlight if possible.
You may need to adjust your mode and blur the background slightly so the subject stays in focus.
Step 2: Adjust the shutter speed
Consider the subject you're photographing, and use manual mode to set the shutter speed accordingly.
Remember, with the freeze motion technique, you need a minimum 1/250-second shutter speed to get the right shot.
The required shutter speed to achieve frozen action may be much higher, depending on how fast the subject moves.
For example, a 1/4000 shutter speed is used to get the perfect shot of an extremely fast-flying object.
If your first test photo turns out wrong with lots of blur, you know to increase the shutter speed.
Step 3: Change the aperture and ISO
Next, widen the aperture and increase the ISO element to help capture the subject in prime focus.
Remember, you don't want the sensitivity to be so high that the photos turn out grainy.
Go for a balanced approach and take a few more test shots to make sure you're on the right track.
One of my favorite tips is to zoom into the image and see if the subject looks a bit fuzzy or perfectly crisp.
If there's any fuzziness, the shutter speed wasn't quite fast enough to totally freeze the movement.
Update your settings accordingly and try another shot.
Freezing Motion in a Photography Studio Using Strobes
Step 1: Set up studio strobes
Strobe lights deliver a short, sharp flash, giving photographers enough time to achieve the desired action shot.
The key here is flash duration, which spans the initial trigger, peak flash power, and eventual tail-off.
When photographing a moving subject, you need to dial down the strobe power so the flash duration is shorter.
- See also: How to do water drop photography
Step 2: Select the shutter speed
Next, use button focus to find the appropriate shutter speed.
Increase shutter speed until the image is clipped, meaning it's noticeably under or overexposed.
That's your sign to slow the shutter speed slightly by one stop.
For example, if the image clips at 1/1000, slow the shutter speed to 1/500. If you have a small aperture, make sure to widen it as well.
Step 3: Shoot peak action
To capture the best frozen motion photography inside using strobes, watch carefully for the opportune moment.
If the subject is running or jumping, wait for a moment when they are perfectly in frame and airborne to snap the photo.
You'll see how two photos taken in the same place can look different with adjusted focus and flash.
How to Freeze Motion Using an Android or iPhone
Step 1: Set up your phone camera
It's pretty cool how you can freeze the motion in photos using a modern smartphone.
The first step to taking frozen motion photos on your phone is to increase the shutter to a 1/250 speed or greater.
Adjust the exposure element and sensitivity too. Be mindful that a fast shutter may lead to underexposed photos on the first few tries, so a bit of adjusting is usually required, especially on your phone.
Step 2: Select focus mode
Continuous auto-focus is best for a frozen motion photo shoot on your phone. This mode allows you to maintain focus on the subject.
Look for manual or pro mode. Otherwise, try downloading a third-party application such as VSCO, Open Camera, or Lightroom.
Step 3: Change the aperture
New smartphones make it easy to widen the lens and let more light in while freezing the motion.
See if you can make the aperture wider, otherwise you'll need to experiment with the other settings to obtain the perfect lighting for frozen motion.
Frozen motion photography tips for studio or outdoor shoots apply to phone cameras as well.
You'll likely need to play with each setting to achieve optimal conditions, but once you find the right shot, you can suspend the action over and over again for super fun and intriguing images.
Final Words
Frozen motion photography may sound like a wild idea, but it's been used for many years to capture motion in incredible images.
There are many ways to try frozen motion photography, whether you're in a studio or outside in bright natural lighting.
With the push of the shutter button, photographers of all levels are able to freeze motion and make moving subjects stand out.
Remember to use a high shutter speed, at least 1/250 second, and continuous focus to effectively freeze motion with minimal blur – no tripod necessary!
These tips apply to sports, animals, family, and nature shots, just to name a few examples of awesome moving subjects for frozen action photography.
I hope these suggestions help you capture action shots and enjoy frozen motion photos.
What do you think of frozen motion photography? Share your thoughts with us in the comments!

Check out these 8 essential tools to help you succeed as a professional photographer.
Includes limited-time discounts.
2 Comments
Leave a Comment
👋 WELCOME TO SHOTKIT!
🔥 Popular NOW:

thanks for your information on freeze motion
Excellent article man … thank you …