


Guide to Shutter Speed for Beginners
Learn all you need to know about camera Shutter Speed, including how to use it creatively to enhance your photography. (Includes printable chart !)
Learn | Photography Guides | By Athol Hill
Shotkit may earn a commission on affiliate links. Learn more.
Shutter speed is one of the 3 elements of the exposure triangle (along with Aperture and ISO) and is an important concept to master as a photographer.
Changing your camera's shutter speed can result in a brighter or darker photo, but it can also be used for creative effect.
A fast shutter speed can freeze motion, while slower shutter speeds can introduce motion blur to your image.
Every camera has a shutter that opens and closes to expose the camera's sensor to light. The amount of light is proportional to the exposure time.
Sound confusing? Don't worry!
We'll show you fast and slow shutter speed examples to make everything easy to understand.
(We've even included a shutter speed chart that you can print out for quick reference.)
So let's get stuck in!
Downloadable Shutter Speed Chart (Cheat Sheet)
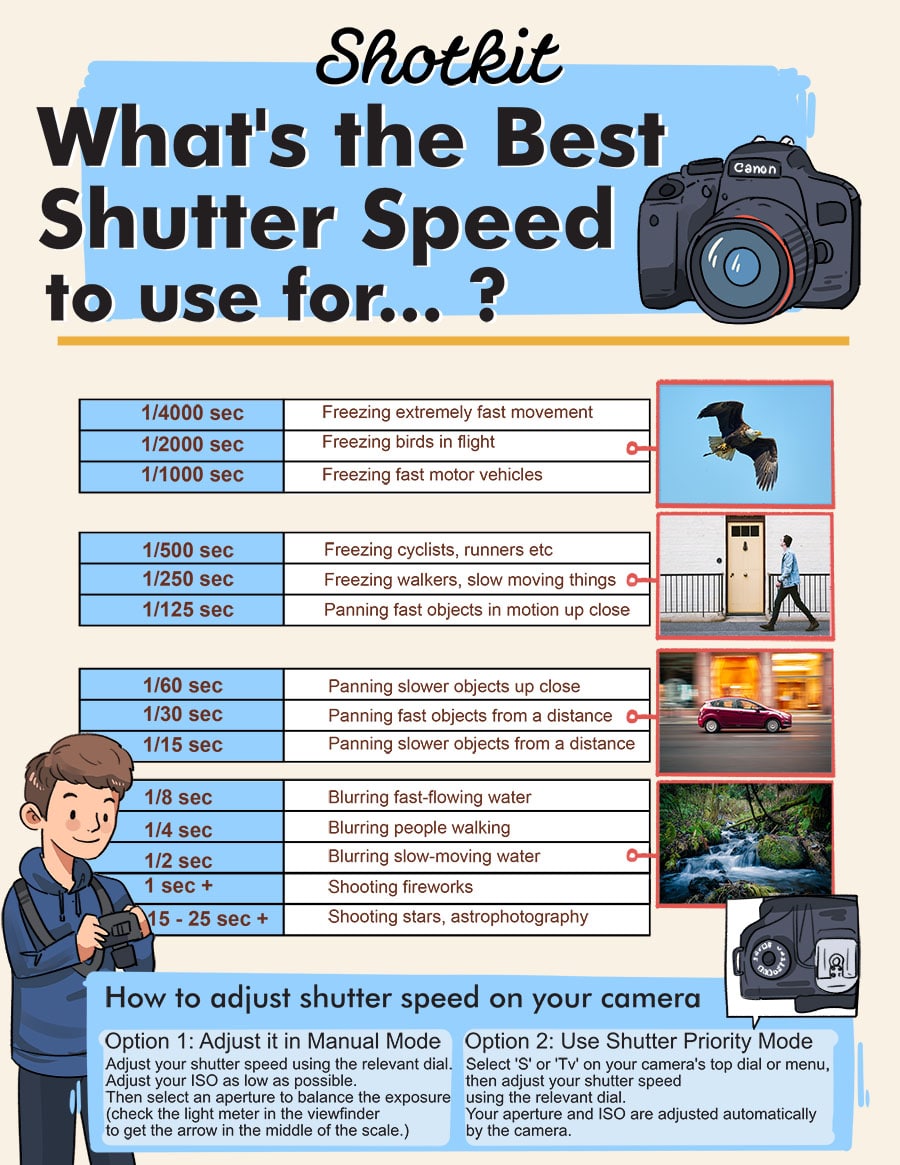
Shutter Speed Chart showing the effects of various shutter speeds.
The shutter speed chart above should help you visualise the effects of choosing various shutter speeds. Having this shutter speed diagram handy as a beginner lets you quickly make adjustments on the fly.
If you'd like to embed it on your website, simply copy the code below and paste it in the HTML of your post (‘Text' tab in your WordPress editing screen.)
What is Shutter Speed in Photography?
In order to take a photograph, your digital camera needs to expose its sensor to light (or to the film, on an analogue camera).
The ‘shutter' is a part of the camera that keeps out the light when you're not taking a photo.
When you press the shutter button (aka ‘shutter release') to take a photo, the shutter opens – this is when the image is ‘recorded' – then closes, usually automatically, stopping the ‘recording'.
Shutter speed controls 2 main things:
1. The amount of light that enters your camera, resulting in a bright or dark photo.
The longer the shutter is open, the more light that can enter your camera. More light = brighter photo! Less light? Darker photo!
2. The ability to ‘freeze' or ‘blur' any movement in your picture.
The longer the shutter is open, the more moving objects will be blurred in your picture. Short shutter speed = less blur. Long shutter speed = more blur.
Being able to control your shutter speed allows you to influence the brightness of you final image, and also have some fun with creative effects by freezing or blurring various elements of your photo.
To summarise:
Shutter speed is the duration of time that the camera shutter stays open to record an image. It influences the amount of light entering the camera, and also you to freeze or blur any moving elements in the picture.
Shutter speeds range from milliseconds (i.e. ‘fast' shutter speeds) which result in ‘short exposures', to minutes or longer (‘slow' shutter speeds), which create ‘long exposures'.
An example of a short exposure would be using a fast shutter speed of 1/500 to freeze a runner mid-stride.
As for a long exposure, you might use a shutter speed of 1/2 to blur the water cascading down a waterfall.
(Don't worry too much about the numbers – we'll discuss how shutter speed is measured in a moment.)
Understanding shutter speed is crucial when learning photography since it's one of the 3 elements of the exposure triangle, alongside ISO and aperture.
You as the photographer are in full control of the shutter speed by using Manual mode or Shutter Priority mode.
Any change you make to shutter speed has to be ‘compensated' via ISO and/or aperture adjustments – you can control this via Manual mode, or let the camera decide it for you by using Shutter Priority Mode, which we'll discuss later.
How to Change the Shutter Speed (Nikon, Canon, etc)
- Set the Mode Dial to <M> (Manual Mode)
- Turn the < > dial to set the desired shutter speed
How is Shutter Speed Measured?

Shutter speed increments (Bulb to 1/4000)
Shutter speeds are measured in fractions of seconds or full seconds.
e.g. 1/2 means the shutter is open for half a second. 1/500 means it's open for one-five-hundredth of a second. 1″ means one second, etc.
Most modern DSLRs and mirrorless cameras offer shutter speeds up to 1/4000th or even 1/8000th of a second, making them ideal for high speed photography tasks.
(Mirrorless cameras also offer an ‘electronic shutter' in conjunction with a regular ‘mechanical shutter', which allows them to shoot at even faster speeds.)
These faster shutter speeds are useful for letting very little light* into the camera and/or freezing fast-moving action.
* On a very sunny day, if you wanted to use your fancy f/1.4 or f/1.8 lenses (i.e. shoot at a ‘wide' aperture to blur your background), a fast shutter speed would let you do this (since it would restrict the light entering the larger aperture you've chosen to shoot at).
On the flip side, the longest available shutter speed on most cameras is usually 30 seconds.
(Some cameras also offer a ‘Bulb Mode', which forces the shutter to remain open until the photographer presses the shutter button for a second time. This is useful for longer exposures of over 30 seconds.)
On film cameras and some professional digital cameras, you can find the various shutter speeds labelled on a physical dial.
However, usually, you're only able to see them within your digital camera's menu, or on the rear LCD screen.
What are the Range of Shutter Speeds?
Fast speeds (for stopping action)
1/8000, 1/4000, 1/2000, 1/1000, 1/500
Moderate speeds (regular handheld photography)
1/250, 1/125, 1/60, 1/30
Slow speeds (for blurring action – tripod required)
1/15, 1/8, 1/4, 1/2, 1 second
Very slow speeds (for creating more blur – tripod required)
2+ seconds
What is the Best Shutter Speed for…
Night photography
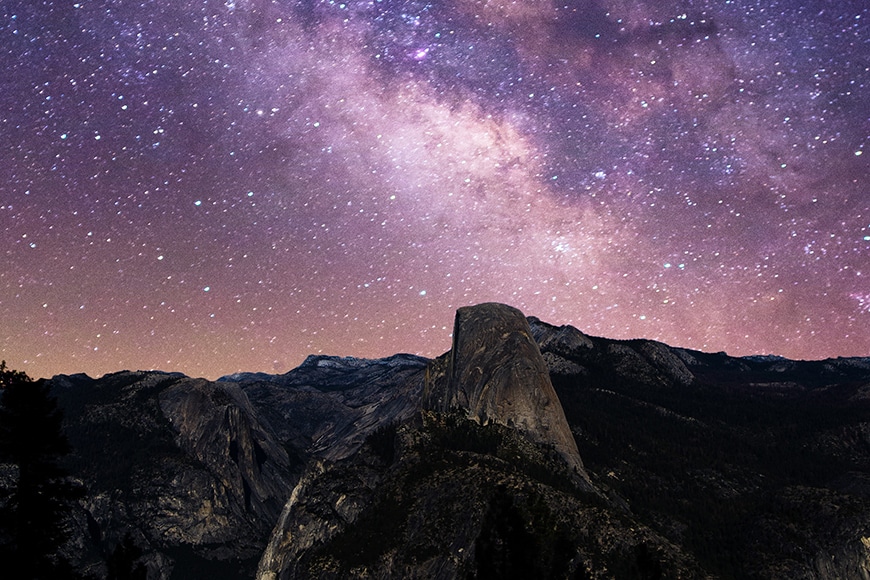
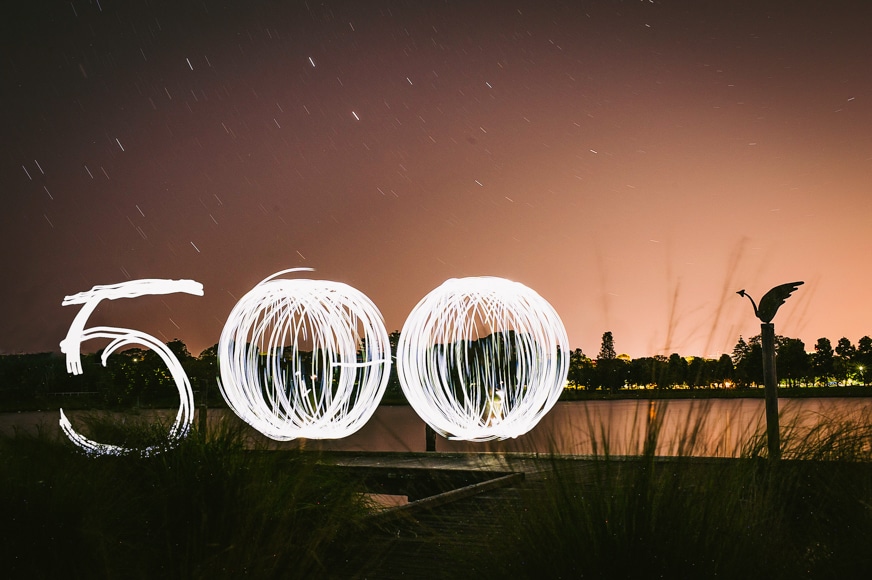
Photos of the night sky require slower speeds. Credit: Kyle Cottrell
This usually requires a shutter speed of over 1 second, but it depends on how dark the situation, and whether you're ‘ok' with any movement in your image blurring, due to the slow shutter speed.
Many creative photos are taken at night by using longer exposures – whether that's to blur moving car headlights, or capturing star trails in the sky.
If your images usually get ‘noisy' when you shoot at higher ISOs at night, you can use a slower shutter speed in an attempt to keep your ISO low. Just remember to use a tripod to minimise any camera movement.
Portraits
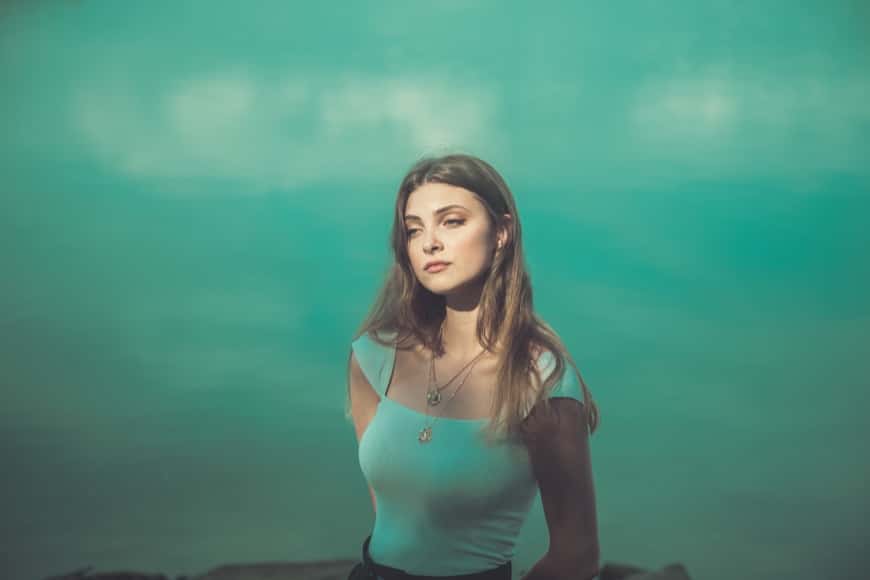
Static portrait subjects don't require a fast speed. Credit: Roman Denisenko
Typically, portrait photography in natural light favours shots taken at your lens' maximum aperture, in order to blur the background, separating your subject from potentially distracting elements in the image.
In bright light, you'll need to use a faster shutter speed to reduce the larger amount of light entering the camera as a result of shooting the lens at a wide aperture.
(You can also use a lens a neutral density filter in order to reduce the light entering the lens.)
The best shutter speed for portraits would be the fast ones. If you're capturing portraits of a moving subject, a fast shutter speed sure as 1/500 will help to freeze any movement.
Outdoor photography
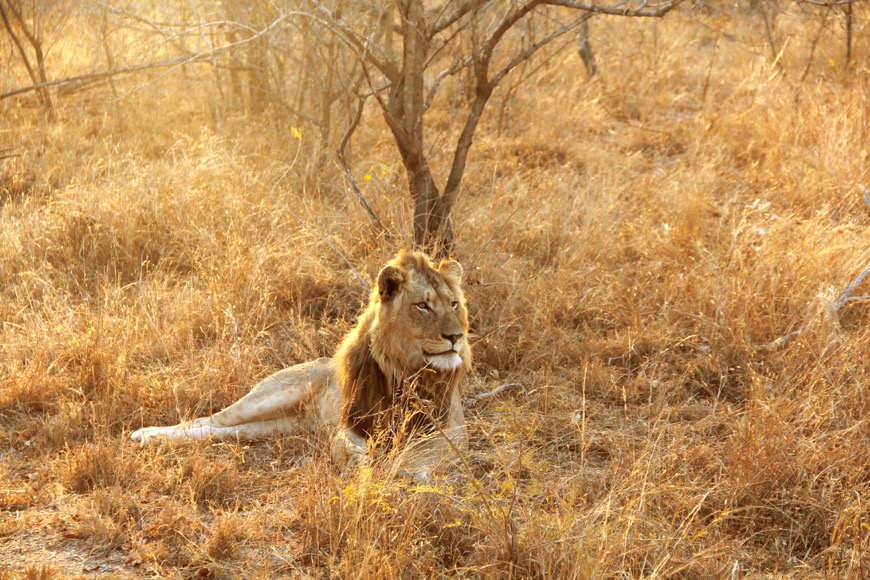
When using telephoto lenses, you'll need faster speeds to minimize camera/lens shake. Credit: Juanma Clemente-Alloza
This obviously depends on the amount of available light. On a bright sunny day, you'll need to use a faster shutter speed, in order to reduce the amount of light entering your camera.Many photographers rely on a camera shutter speed chart to help them make these decisions quickly. When considering what shutter speed to use, it's essential to gauge the amount of available light. On a bright sunny day, especially when shooting fast-moving objects, you might find that a 1/2500 shutter speed is optimal to sharply capture motion without overexposing the image.
If, however, you're outdoors in a situation with less available light (under the shade of a tree, for example), you'll be able to use a regular shutter speed such as 1/250. In more dynamic lighting, you might even consider using a shutter speed scale to gauge the best settings.
If, however, you're outdoors in a situation with less available light, such as under the shade of a tree, a more moderate setting, like a 1/30 shutter speed, might be more appropriate. This slower speed allows for more light to enter the sensor, balancing out the reduced ambient light.
If you use a telephoto lens for sports or wildlife photography, for example, you'll need to use faster shutter speeds to minimise the chance of any camera/lens movement (since a ‘zoomed in' shot amplifies any movement created by the photographer). This is where image stabilization can come in handy, be it in-camera or in-lens.
Moving Objects
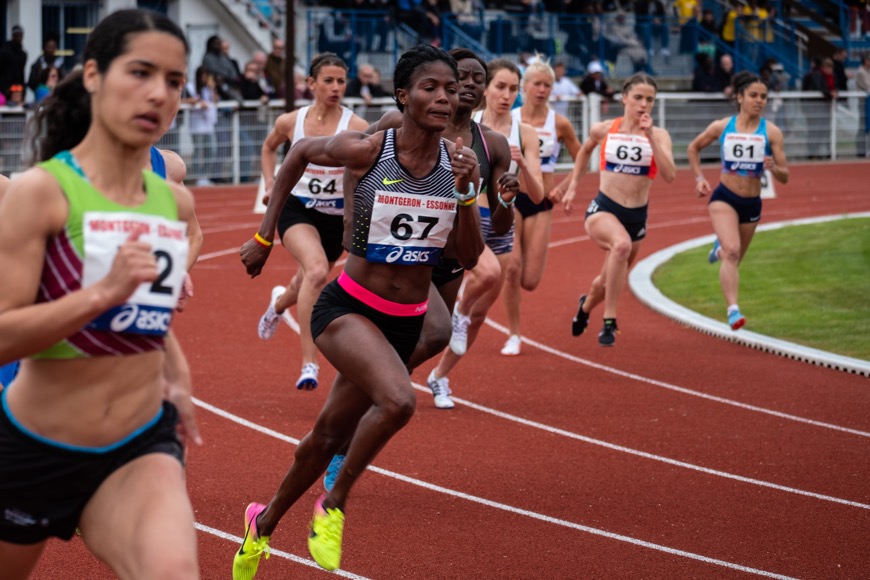
Freezing a sprinter in motion requires a faster speed. Credit: Nicola Hoizey
Depending on how fast the object is moving, you'll need to use a fast shutter speed of 1/500 upwards if you want to capture a sharp shot of the object frozen in motion. To capture the fluid movement of a bird taking flight or an athlete in motion, a shutter speed around 1/1250 shutter speed is often advised. It provides a balance between freezing the action and allowing a touch of natural motion blur.
To freeze the movement of a runner, for example, 1/500 shutter speed would be adequate. For a moving car, 1/1000+, but this will depend on your distance from the car. This ensures a crisp capture without motion blur.
For beginners, using a shutter speed guide can be immensely helpful. It provides a shutter speed comparison, letting you see the effects of various settings on similar shots. This can be especially enlightening for understanding the relationship between speeds like 1/250, 1/1250, and 1/2500.
Digital photography allows for infinite ‘free' experimentation, so choose a shutter speed to shoot your subject, then review it on your camera's LCD screen – zoom in to 100%, and if there's any motion blur, increase your shutter speed.
Motion Blur
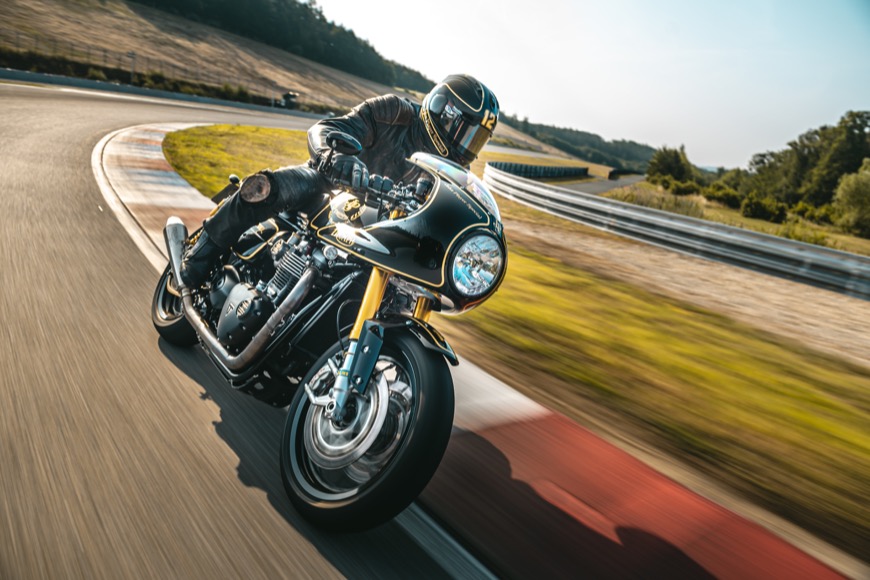
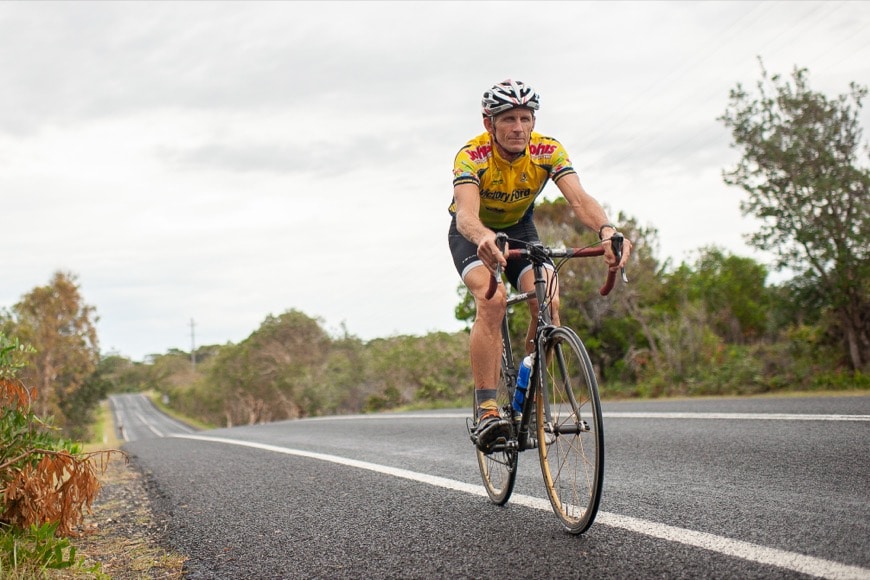
To freeze the movement of the bike but blur the background, the photographer would have been travelling at the same speed at the bike, simulating a ‘panning' effect. Credit: Jan Starek
To deliberately capture motion blur in an image, you can experiment with slower shutter speeds of 1/15 and lower. This will depend on the speed of the object and your distance from it. If you're new to this, a shutter speeds chart can serve as a useful reference to understand how various speeds impact the outcome of the shot.
It's important to remember that motion blur is different to camera blur. The former relates to the movement of an object in your frame, while the latter is due to camera movement.
You can experiment with a technique called ‘panning', where you choose a slow shutter speed, then try to ‘match' the speed of the moving object by moving your camera while pressing the shutter button at the same time.
It can take a few attempts to get right, but the end result should be an image with a background blurred in motion while the subject is in sharp focus – even though the subject is moving, by ‘matching' its speed with your camera, you ‘cancel out' the movement.
Video
The general rule when deciding your shutter speed for video is to double your frame rate. e.g. if you're shooting at 24fps, your shutter speed should be 1/48, rounded up to 1/50. If you're shooting at 60fps, your shutter speed should be 1/120.
If who want to shoot video at wide apertures in bright light, 1/50 or even 1/120 won't be a fast enough shutter speed to prevent enough light from entering your camera – even by lowering your ISO to the minimum (ISO50 or 100), your scene will still be far too bright.
In these cases, you have a couple of options: you can simply compromise and adjust your aperture to something smaller – f/5.6, f/11 etc; or you can use a lens filter to ‘block out' some of the light.
This is the most common option since most video shooters love the Hollywood-look of a blurred background!
5 Slow Shutter Speed Examples
To help you visualise the effect of slower shutter speeds on long exposure photography, here are some examples I took along with the camera settings used to produce the effects.
Light painting with a torch | 15-second exposure at f/10
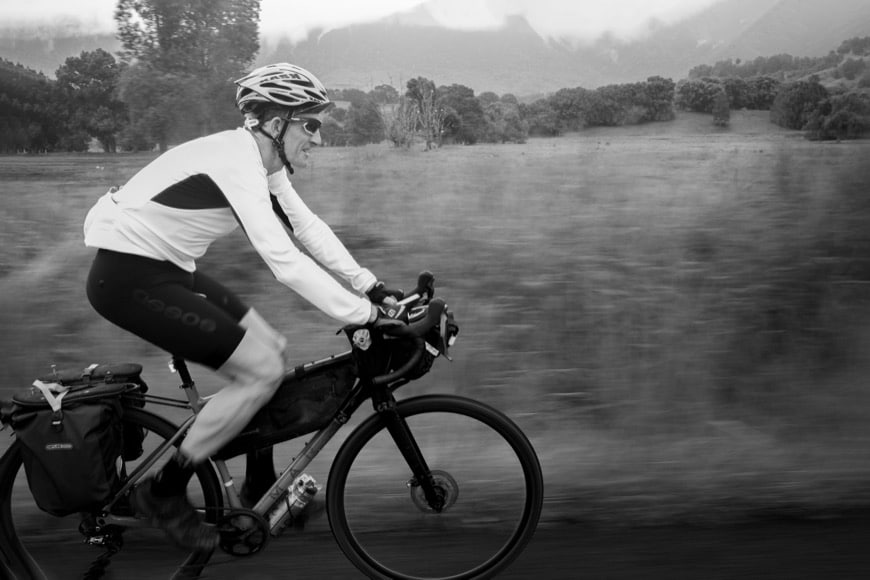
Cyclist & Photographer moving at same speed (panning) | f/6.4 at 1/60

Beach at dawn | f/11 at 1/2 second exposure handheld with image stabilization.

Osaka at night | f/2.8 at 1/16 handheld
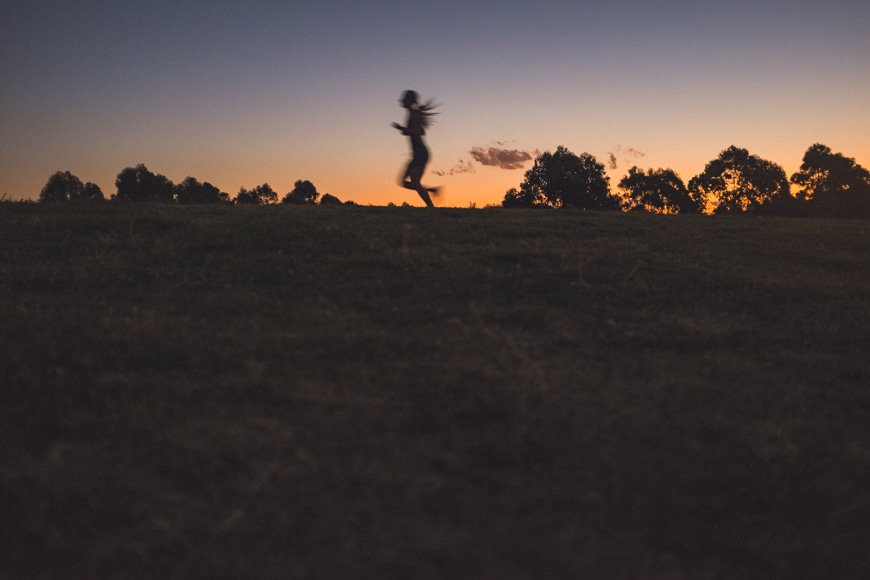
Jogger | f/2 1/30 to blur the subject's movement
5 Fast Shutter Speed Examples
To help you visualise the effect of faster shutter speeds to freeze movement, here are some example images I took. This will give you an idea of what setting to use whenever you ask the question “What should my shutter speed be?”
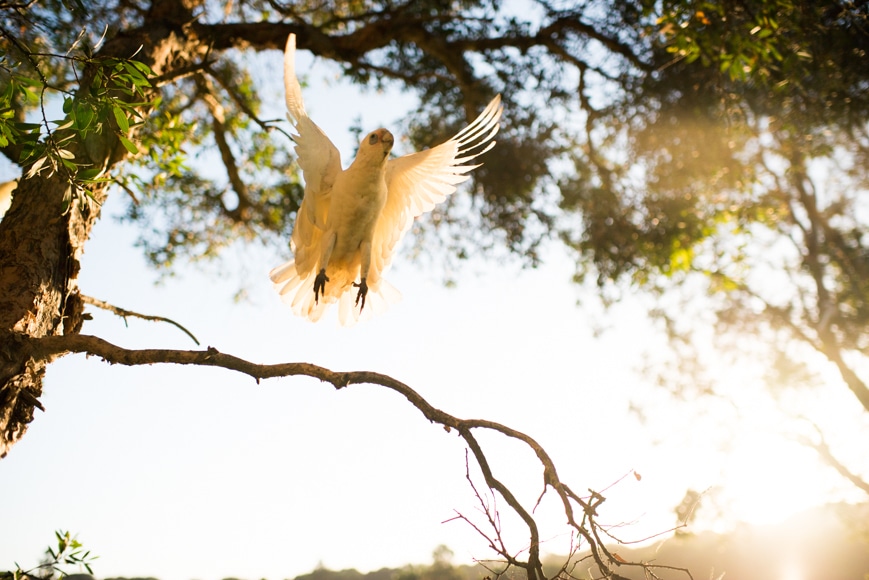
Bird taking off | f/2.2 at 1/4000
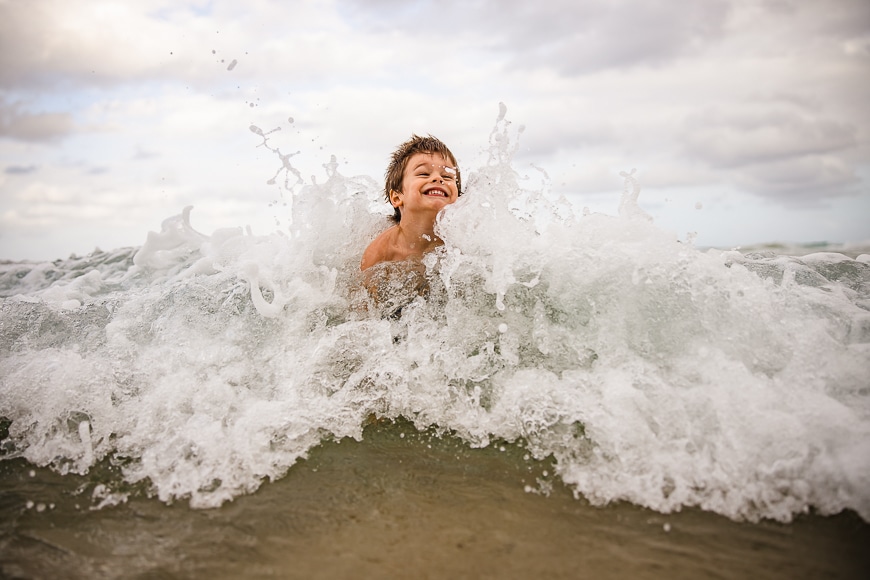
My son Harry playing in waves | f/2 at 1/2500

Fast shutter required to shoot my daughter Edie at wide aperture in harsh sun | f/2 at 1/1250
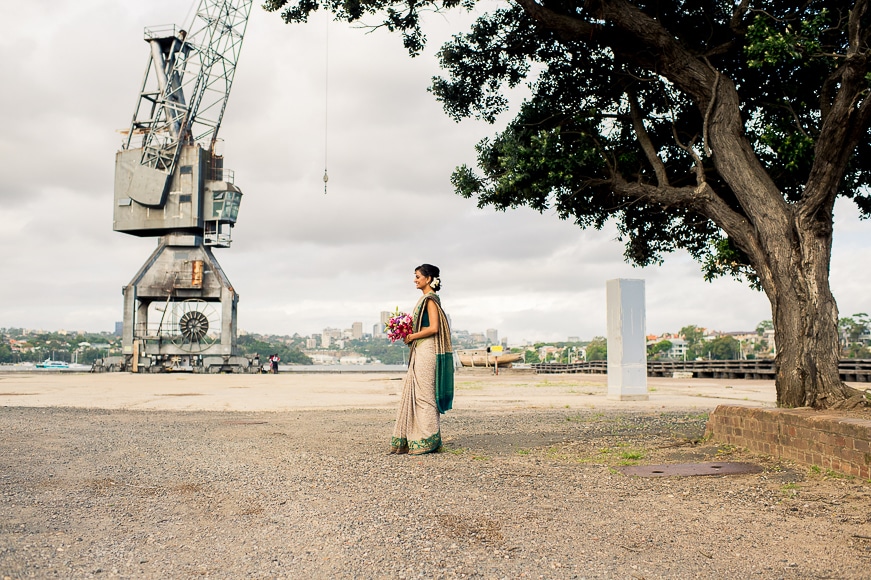
Despite the subject standing still, a fast shutter was required to be able to shoot at as large an aperture as possible in bright sunlight | f/3.2 at 1/8000
Pedalling fast towards camera | f/2 at 1/8000
How & Why to Use Shutter Priority Mode
Shutter Priority Mode is one of the shutter speed settings that all photographers need to grasp.
You can access shutter priority mode by selecting ‘S' on Nikon, Sony and Fujifilm cameras, and ‘Tv' on Canon cameras. (Tv stands for Time Value.)
While adjusting your shutter speed in Manual mode can be useful in some situations, it's also a slower, more involved process – the photographer needs to manually adjust both aperture and ISO to compensate for changes made to shutter speed.
With shutter priority mode, the photographer is in full manual control of the shutter speed, while the camera decides the ‘best' ISO and aperture to produce the ‘correct' exposure.
This is a far simpler and faster way to shoot and is especially beneficial for types of photography that require frequent changes to shutter speed, without much thought given to aperture and ISO.
An advanced technique is to use shutter priority mode with Auto ISO – in this way, you can set a range for your camera's ISO, limiting the maximum ISO to something that doesn't produce too much noise in your image, for example.
The camera will still decide and adjust the ISO for you but within your predefined range. This allows you to concentrate on making your shutter speed adjustments, safe in the knowledge that any ISO choice your camera makes will be a ‘safe' one.
If you want to go deeper, read more in this guide to shutter speed priority mode.
Shutter Speed and Flash Photography
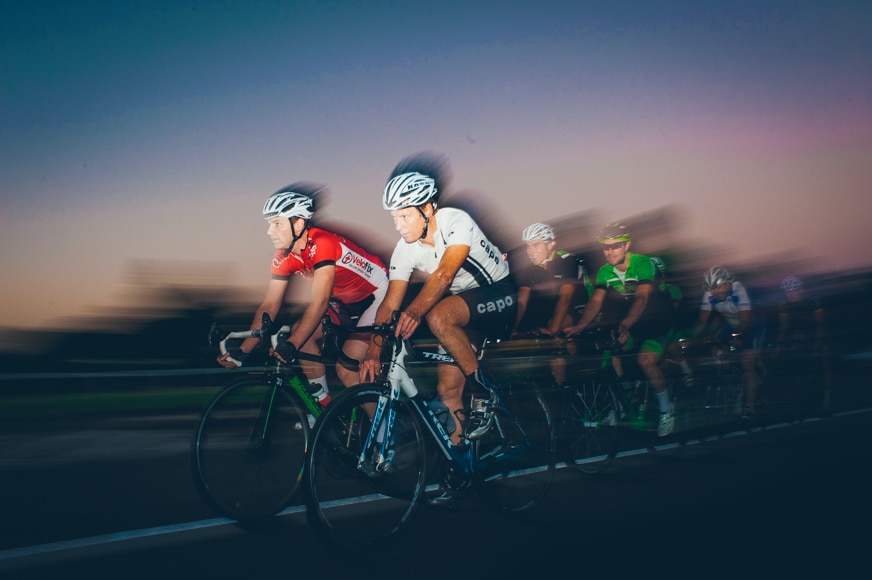
Cyclists moving fast | f/14 at 1/15 with slow shutter sync flash
Using flash limits your shutter speed, due to the ‘maximum sync speed' of your camera. Most cameras have an MSS of around 1/250, meaning that the fastest shutter speed you can use in conjunction with a flash is 1/250.
(Some mirrorless cameras offer a ‘leaf shutter', which has a much faster MSS.)
As we've learned, 1/250 isn't a particularly fast shutter speed – not fast enough if you want to photograph and freeze any fast-moving objects.
It also isn't fast enough to prevent much ambient light from entering the camera – portrait photographers who often want to shoot their lenses at large apertures in conjunction with flash will struggle to do this outdoors.
The two solutions are to use a lens filter to block some of the ambient light from entering the camera, or to use the ‘high-speed sync' setting on your flash.
High-speed sync forces the flash to fire multiple times extremely quickly, allowing you to use faster shutter speeds, and thus, a larger lens aperture.
If allother variables remain constant, aperture controls the amount of light the flash delivers, while shutter speed controls the amount of ambient light that can be captured.
In other words, any increase or decrease in your shutter speed won't affect the flash exposure. It'll only influence how bright or dark the rest of your scene appears – slower shutter speed = more ambient light = brighter scene.
A larger or smaller aperture on the other hand will make the light of your flash look brighter or darker respectively.
When photographing a moving subject as in the image of the cyclists above, a slow shutter used in conjunction with a flash can still freeze moving subjects.
This can be a confusing concept to grasp since we know that slow shutter speeds usually blur motion.
Without wanting to confuse you too much, just remember – the flash's light is what's freezing the movement in this instance. The shutter speed is controlling the amount of ambient light in the image.
If I used a faster shutter speed in the above image, the front cyclists would still be illuminated in the same way, but the overall scene would be darker.
FAQs
What is shutter speed measured in?
Shutter speed is measured in seconds. This can either be whole seconds or fractions of it as in the case of faster speeds.
What does shutter speed control?
Shutter speed controls how long the shutter stays open which, in turn, determines how much light is allowed to hit the sensor or film.
What is the Relationship between Shutter Speed and Aperture?
They can both be used to control the exposure of an image, but it's a reciprocal relationship – you get the same amount of light entering your camera if you change the shutter speed and aperture settings at equivalent amounts, e.g. 1/30 f/5.6 is the same as 1/8 at f/11. Changing the aperture also affects the depth of field, just as changing the shutter also affects the amount of blur due to movement in the scene.
What is the Relationship between Shutter Speed and ISO?
This is also a reciprocal relationship, where you can affect the amount of light entering the camera by adjusting either variable. Raising the ISO can also have negative repercussions, introducing ‘noise' to an image, especially in low light. Usually, it's preferable to decrease shutter speed or increase aperture before increasing ISO for this reason. For beginners, have an iso chart handy so it's easier to adjust settings on the fly.
What Shutter Speed should I use for Video?
If you're wondering what is the best shutter speed for DSLR video, there's no precise answer, but in general, for a scene shot at 24 FPS, you should use 1/50. If you're shooting at 60 FPS, use 1/120. The rule is to double the frame rate to decide the best shutter speed for video.
Final Words
In summary, the faster the shutter speed, the greater your ability to freeze motion, and the less light can enter your camera. A slower shutter speed will allow you to blur motion as well as let in more light.
If you only remember those two things, you're most of the way there. Everything else to do with your camera's shutter will come with experience, so get out there and start experimenting!

Check out these 8 essential tools to help you succeed as a professional photographer.
Includes limited-time discounts.
Athol Hill is a sports and portrait photographer based in Melbourne, Australia
3 Comments
Leave a Comment
👋 WELCOME TO SHOTKIT!
🔥 Popular NOW:

THIS WAS GREAT BOOK I LOVED THE NOISY YESSSSSSSSSS!!!!!!!!!!!!!
Thanks, I noted down your notes. You explained it very well. Brilliant. Your tried to understand it in your own words really impressed me lot. Wish you good Luck. Thanks
Rina Fernandes
Excellent information and advice.
And you wrote very well, making it easier to understand.
Thank you.
Tome