


How To Shoot Full Body Photography (19 Pro Tips & Ideas)
Learn everything there is to know about getting an awesome full-body shot in this guide for models, photographers and everyone else.
Shotkit may earn a commission on affiliate links. Learn more.
Full-body photography presents a unique set of challenges.
It's much more difficult to fit your subject's entire body into the frame while avoiding background distractions, giving your shot context, and matching a flattering pose with the right camera angle.
That said, once you know the right lenses to use, how to set up your camera, and how to pose your subject, you'll be a master at full-body portraits in no time!
Read on as we answer all your questions and give you 7 pro tips for shooting full-body portraits.
We'll also give you posing tips to make sure you get the most flattering shot every time.
So, let's get started.
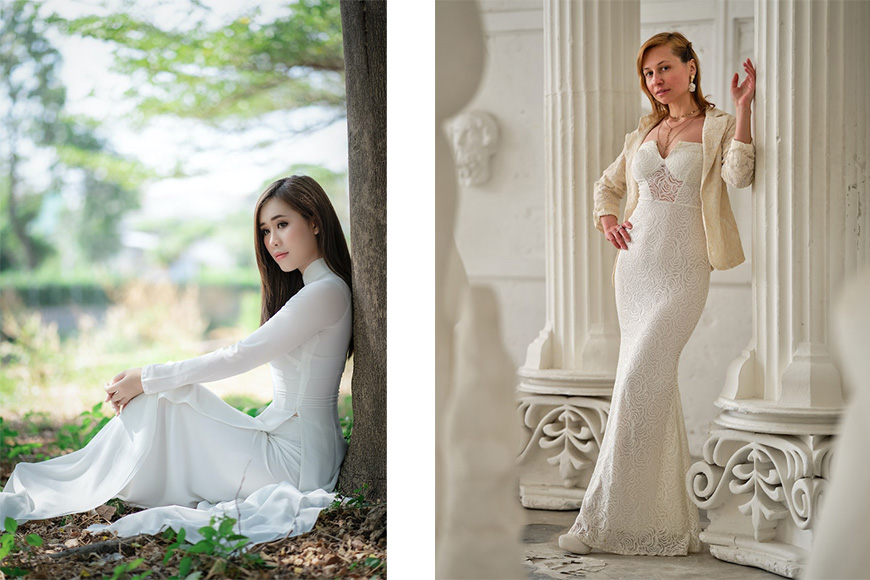
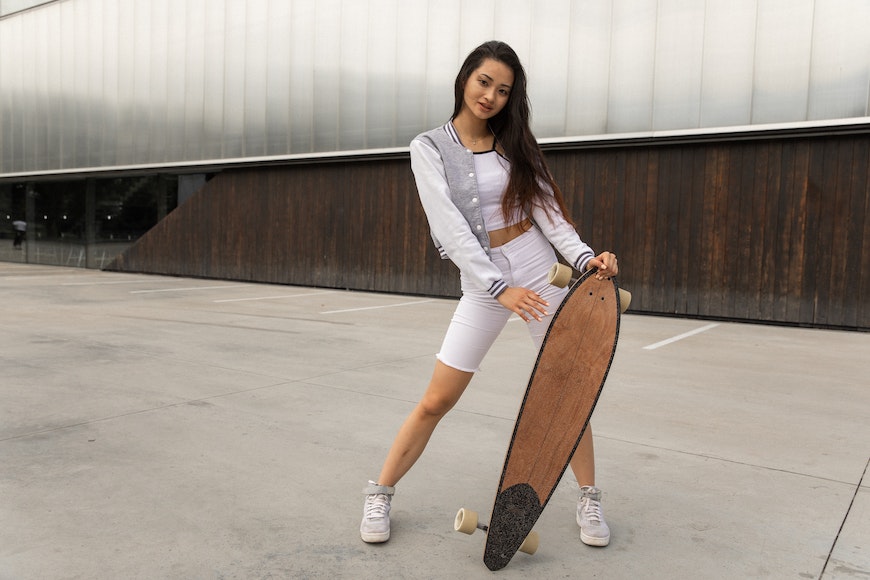
What Is a Full Body Shot in Photography?
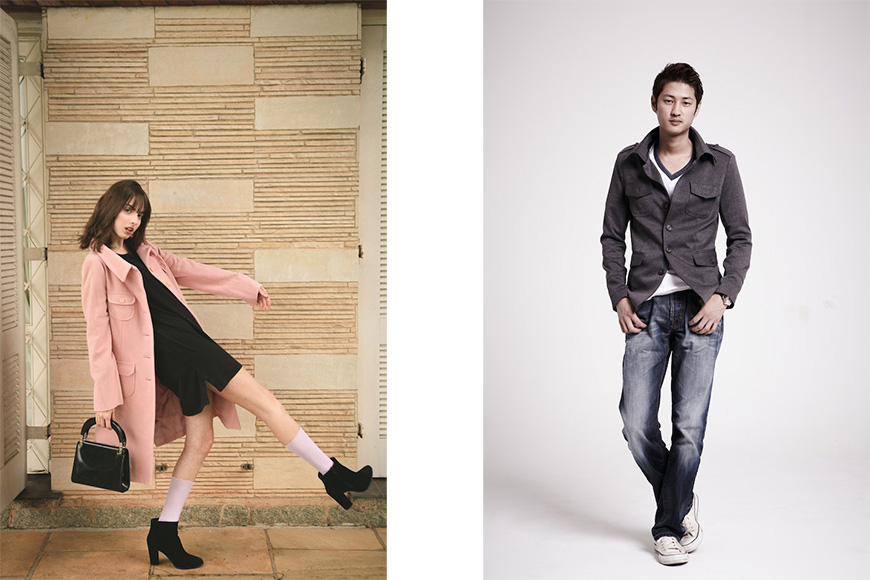
Credit: Athena (left) / JT Kim(right)
A full-body portrait or full body picture is when you frame the model in such a way that you capture the whole body.
This type of portrait is also called wide shot, full shot, or full-length photography.
As long as the entire body is in the frame, you can do all sorts of portraits and still be considered full body.
It can be done in a studio portrait or an environmental shot. It's perfect for wedding portraits and lifestyle photography.
7 Tips For Shooting Full Body Photography
Here are some tips to help you with the most common challenges of full-body photographs.
1. Choose the best lens for full-body portraits
The best lenses for full-body portraits depend on your style and available space.
To find the right lens for you, you need to know its pros and cons.
24mm / Credit: Maya_ 7966
Many people think they need a wide-angle lens for shooting full-body portraits.
This is because a short focal length allows you to fit more into the frame.
However, a wide-angle lens can distort the body – especially if the subject is very close.
The subject shouldn't be close to the edges to diminish the problem. So, you can use it for lifestyle photography.

57mm / Credit: SJJP
A nifty fifty or a short telephoto is the best portrait lens for full-body portraits.
While it doesn't cover as much as a wide-angle lens, it's certainly enough to fit a full body.
The best focal length lens for portraits to avoid distortion is 50mm. These lenses are the closest ones to our normal view. They are also quite affordable.

200mm / Credit: Sebastian Arie Voortman
You can also use telephoto lenses for full-body photography. However, you need to have more space between you and the subject.
This may be a challenge when shooting indoors.
- Zoom lenses
Of course, you can also choose a zoom lens. This allows you to change the lens focal length without having to change lenses.
On the downside, the maximum aperture in zoom lenses is not as wide. This makes it more difficult to achieve the blur of the background.
They are also bigger and heavier. However, they are very versatile for portrait photography.
For example, we said that wide-angle lenses aren't ideal because they create distortion. On the other hand, if the space is very small, you might be forced to use a short focal length.
If this is the case, you can use a wide-angle zoom. It will allow you to zoom in and out until you find the best compromise.
The best lenses for full-body portraits range from a wide angle to a short telephoto. They can start at 24mm or 35mm up to 70mm or 85mm.
When you're choosing, keep an eye on the maximum aperture.
2. Use the right camera angle
Credit: Bruno Mendes
Many people wonder what the best angle for full-body photos is.
The most traditional choice is to lower your camera so that it's more or less in the middle – more or less at waist height.
This allows you to fit the subject's body in the frame without tilting the camera. As a result, you won't get any distortions.
You can experiment with another camera angle for a more dynamic full-body portrait.
If you use a low camera angle looking up, the subject appears taller, and the legs seem longer. A high camera angle will have the opposite effect.
The truth is there is no definitive list of best angles for full body pictures. Only the best angles that suit you.
3. Decide on the orientation for your full body portrait
Credit: Rodrigo Feksa
Photographs can be horizontal or vertical. These orientations are known as landscape and portrait, respectively. They keep the same name regardless of the subject.
Most full-body portraits are vertical – so, with portrait orientation. This is when the subject is standing.
You can do an environmental portrait if you wish to include more of the background. In this case, you should use landscape orientation.
This is also helpful when making full-length portraits of a large group of people.
You should also consider that the subject doesn't need to be standing. Full-body portraits involve the entire body, but it can be in different positions.
If your subject is lying down, it may be better to photograph them in landscape orientation. The same applies if the body is extended to the sides, for example, if the model extends the arms.
In the end, you can shoot a full-length portrait with any orientation. You just need to consider the amount of background you want to show. In other words, how much of the frame is covered by the subject?
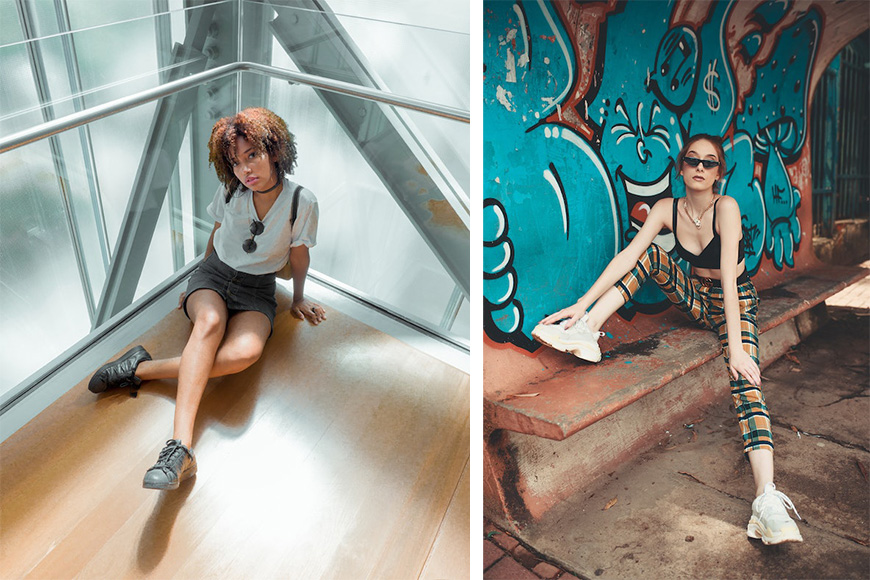
4. Think about the composition

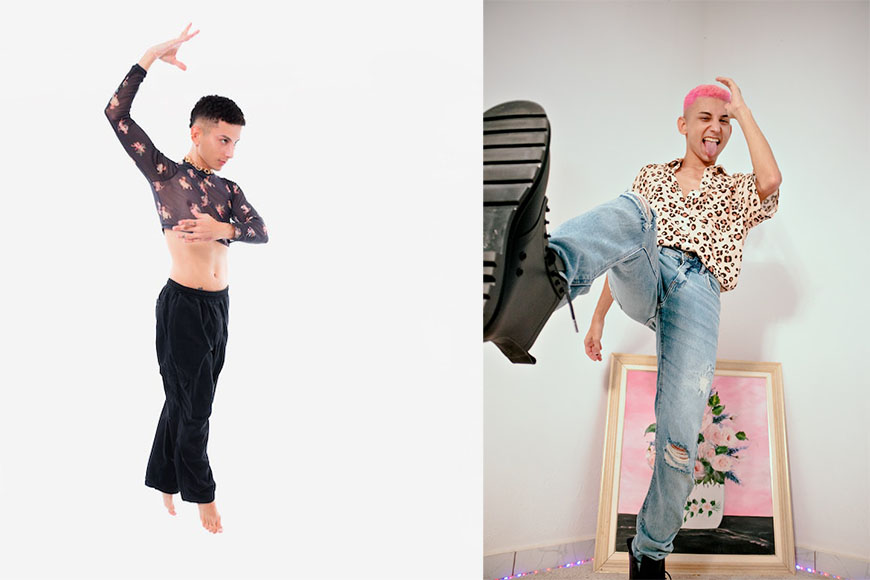
Credit: Ivan Samkov (left) / Marcus Silva (right)
Closely related to the orientation is the composition.
In a full-body portrait, the composition has to do with the pose. But also with the placement of the subject in the frame and its interaction with other elements.
Full body picture poses must be paired with good composition to make the whole shot look cohesive.
With the pose, you can create shapes and lines that make the image more dynamic.
You may also use the rule of thirds. If the crop is tight, you can use it to place the face or the eyes in the intersection points.
When the crop shows more of the environment, you can use the rule of thirds to place the body along one of the lines. Otherwise, you can do a symmetrical composition placing the subject in the middle.
Many composition rules fit full-body portraits. It's just a matter of finding the one that better fits your creative style.
That is why when asking other experienced photographers how to take good body pics, the usual answer would be to understand good composition.
5. Find the correct depth of field
Credit: Tuấn Kiệt Jr (left) / Victoria Akvarel (right)
Most full-body portraits have a blurred background. This doesn't mean you'll want to go directly to the maximum aperture.
First of all, you might not want the background to be completely blurred. For example, in environmental portraits is helpful to have some context.
You'll also want to consider that the focus plane runs parallel to the sensor plane.
This means that you might not want a narrow depth of field if the body is not straight. For example, if the model is leaning forward.
The next consideration is that the aperture is not the only factor in determining the depth of field. It also depends on the focal length you're using.
Also, the distance between you and the subject and the subject to the background makes a difference.
This is helpful to remember if your lens doesn't have a super wide aperture. You can still achieve the blurry background effect.
So, try different apertures when you make a full-body portrait to find the perfect DOF. If you're unfamiliar with your camera's manual mode, you can use the aperture priority mode.
This semi-automatic mode allows you to choose the aperture. Then, the camera will compensate to keep the correct exposure.
Also, to help you find the right depth of field, you can use a DOF calculator.
6. Lighting setups for indoor full-body portraits
Using natural light, you should have your model close to the window. You can use a second light or a reflector if you want to fill the shadows.
However, if you're using artificial lights, there are many setups you can use. Don't worry; even one light is enough to light full-body portraits.
Flash units cast harsh lighting. So, to widen the light beam and soften it for a full-body portrait, you can use light modifiers.
Strip boxes are great for elongating the light and illuminating the entire body. This is perfect for side lighting.
You can also use an umbrella to cast a broad light. In this case, you can position the light higher up and more to the front.
Remember that the further away you place the light source, the wider the beam will be. Also, bigger light sources will work better for full-body portraits.
7. Use props

Credit: Dayvison de Oliveira-silva (left) / Gustavo Fring (right)
In any portrait photography, props can help you improve your images.
For example, props can add information about the subject and the context. Also, they give the model something to do to make them less nervous when posing.
This is especially important in full-body portraits. Since you have to worry about every aspect, props can help you with the most challenging parts.
For example, holding something gives the model something to do with their hands. You can also use stools or steps to try some exciting poses.
4 Key Posing Tips For Full Body Portraits
One of the most challenging parts to master in portrait photography is posing. Full-body shots are no exception.
So, here are some posing tips to help you with your next photoshoot.
(You should also read our guide on how to post people for some more key tips.)
1. Understand body language
Credit: Rodnae Productions (left) / Elisa Guarneros (right)
In full-body portrait photography, you shouldn't just care about flattering poses.
With full-body pictures, we're also communicating. That's why understanding body language is key to a good portrait.
For example, standing straight with an open torso shows confidence and openness. Instead, crossed arms might be interpreted as someone being unapproachable.
2. Keep a fast pace

Credit: Faruk Tokluoğlu
Taking whole body pictures should be done at a fast pace.
If you take too long posing subjects, they'll end up looking stiff. Not to mention that they will get bored quite quickly.
I know you have to take care of the subject's entire body. However, once you have a good starting pose, make minor variations at a fast pace.
3. If it bends, bend it!

Credit: Anna Shvets
Full-body portraits with the model straight as a King's Guard outside Buckingham Palace look very stiff.
Flexing the joints makes the body look more natural. It also makes for better composition.
Whether you pop the hip, tilt the head, or bend your arms to reach the pockets, you'll get better full-body pictures.
Remember: generally in full body portrait photography, you want your subjects to look alive!
4. Help your model relax

Credit: Anna Shvets
Most people feel awkward standing in front of the camera. In full-body portraits, this feeling is even greater.
This is because you need to be aware of every part of your body. You need to think about your posture, your gesture, the position of your feet, the placement of the hands… it can be stressful.
So, you need to make your model feel comfortable and help them relax. There are many ways to do this.
You can engage in casual conversation, for example. A very efficient way is to have some poses ready.
This way, they will have some guidance and feel more comfortable. They'll also recognize that you are prepared and feel they are in good hands.
To that end, next, we'll look at some full-body posing ideas for your next photoshoot.
8 Ideas for Full Body Poses
1. Standing with crossed legs
Credit: Marina Abrosimova (left) / Davide de Giovanni (right)
This is one of the most flattering full-body poses. Females usually use it, but you can also use it with a male model.
The most important thing is to place weight on the back leg. Then, cross the other leg in front.
2. Leaning with one leg bent
Credit: Raul Reynoso (left) / Ksenia Teres (right)
This is one of the most popular full-body poses. Simply have your model lean on a wall or a surface. It may be a car or a desk.
Then, ask them to bend one of their legs to put one foot against the wall.
The pose is comfortable because it gives them physical support. It also creates a dynamic composition thanks to the bent leg.
3. Hands in your pockets

Credit: Ali Mnttzri (left) / Olga Divnaya (right)
Hand placement is one of the biggest problems when posing someone. An excellent way to solve this issue is to ask them to put their hands in their pockets.
It doesn't matter if it's the jacket pockets or the pants. It allows them to do something natural and not worry about how their hands look.
Also, when they put their hand in their pockets, they bend their arms. This creates a small gap between the arm and the body.
4. S Curve
Credit: Monstera
This pose is all about hip placement. Ask your model to shift the weight into one of the legs; this will pop the hip to one side and the torso to the other.
To complete the S shape, the subject's head should be tilted to the same side as the hips.
5. Sitting with legs forward
Credit: Filipe de Azevedo(left) / Ana Ferreira (right)
A good pose for full-body pictures is to sit down and extend one or two legs toward the camera.
This is comfortable for the model and gives the image depth.
6. Lying on the side
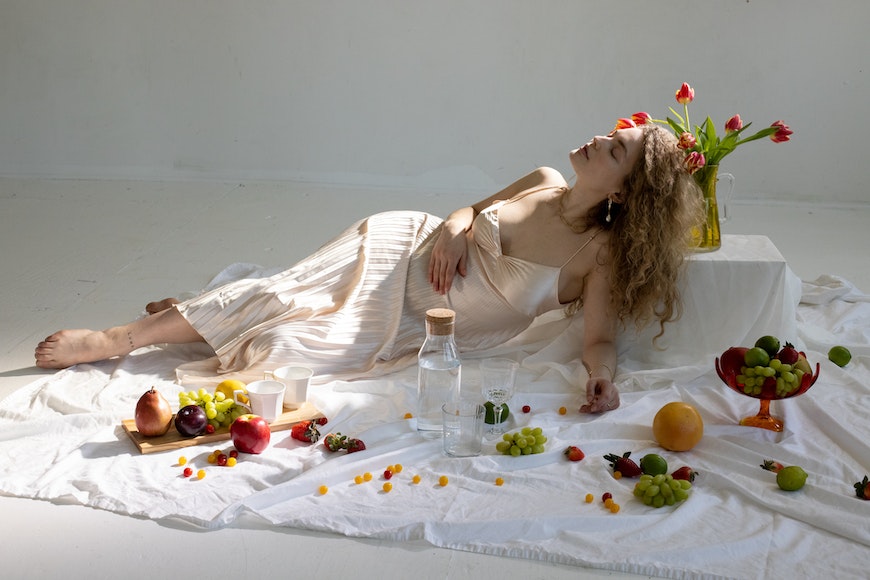
Credit: Jill Burrow
Another comfortable yet flattering pose is to be lying on your side.
You can lift the upper body by bending the elbow and supporting yourself with the arm. Otherwise, you can extend the arm and be fully extended.
In the same way, you can bend the legs or extend them. You can also have one extended and flex the other. It's a personal preference.
You can make all these variations and choose the one that looks best.
7. On your back

Credit: Ferdinand Studio
Having the model on their back is another way to make a full-body portrait.
For a more original take perspective, you can photograph them from a higher angle or even from the top down.
8. Walking

Credit: Rachel Claire (left) / Arthouse Studio (right)
Sometimes still poses make people uncomfortable. Especially for people who aren't used to being in front of the camera. Also, for those who don't like being the center of attention.
In this case, you can use an action instead of a pose. The most popular is walking. Simply ask your model to walk toward the camera.
You can put your camera on burst mode and start taking images as they move. It also works with the person walking away from the camera.
This idea is good for single models, couples, and even for groups.
Full Body Photography FAQs
- How do I take a good full-body picture?
Use a good portrait lens. Something between 50mm and 70mm avoids distortions so that you can see the body in a normal way.
Also, use big light sources or light modifiers to have a light beam that wraps around the body. Lastly, practice the poses considering every part of the body – even posing hair is important.
- What do you wear for a full-body shot?
When taking a full-body portrait, you should consider everything from shoes to hair accessories.
Make sure you do a good combination of colors instead of making everything match. Wear clothes that are comfortable and fit you.
Most importantly, choose your wardrobe according to the context and mood. For example, if it's a corporate portrait, wear professional clothes.
- What settings should I use for full-body photography with a blurred background?
You need a wide aperture to have a blurry background on your full-body portraits. Something between f/1.8 and f/4 should be fine. The exact f/number depends on your lens selection.
Wide apertures let it more light. So, you'll probably need a low ISO and a fast shutter speed. Of course, it depends on the light available at the scene.
- Is a 50mm lens good for full-body shots?
Yes. A 50mm lens allows you to stand closer to your subject and still fit the entire body in the frame. This makes it better than a telephoto lens.
Also, you won't get any distortion as this focal length renders the scene as close as possible to our natural view.
Finally, you can get 50mm lenses with very wide apertures at affordable prices. This will help you to keep a shallow depth of field.
Final Words
As you can see, full-body portraits can be a little tricky. However, you can create very creative images with just a few considerations.
Using the entire body gives you more photo opportunities than just the head, for example. That's why I like full-body photographs more than headshots.
There might be some challenges when you don't have the right lens or need more space. But finding creative ways to solve them makes you a better photographer.
Keep experimenting and see how it goes. Let us know if these tips and tricks helped you out. If you have any other advice, share it in the comments below.

Check out these 8 essential tools to help you succeed as a professional photographer.
Includes limited-time discounts.

👋 WELCOME TO SHOTKIT!
🔥 Popular NOW:
