


Portrait Photography Tips, Techniques, Settings & Ideas
Find out the best portrait photography tips in this must-read guide! Learn how to get started or take your shots to the next level.
Learn | Photography Guides | By Mark Condon | Last Updated: September 28, 2025
Shotkit may earn a commission on affiliate links. Learn more.
Are you a people person? If the answer is yes, then portrait photography is for you.
Being able to connect with a person and make them feel comfortable is already a good start.
The rest can be learned through practice and research. This is where this article can be of help.
Keep on reading for some tips that can help you improve and build a portrait photography business around your passion.
You'll learn techniques which can be applied to all the different types of portrait photography.
- Related: Quotes about portrait photography
What is Portrait Photography?
Portrait photography features people as the main subject, who are usually not professional models.
Nonetheless, the subject is aware that they are being photographed and the photographer has control over the lighting and the direction of the scene.
Portrait photography techniques range from minimalistic “office” portraits to an elaborate high-concept portrait shoot. You can how to do portrait photography whether you are just getting started on your smartphone or if you have thousands of dollars in professional portrait photography equipment.
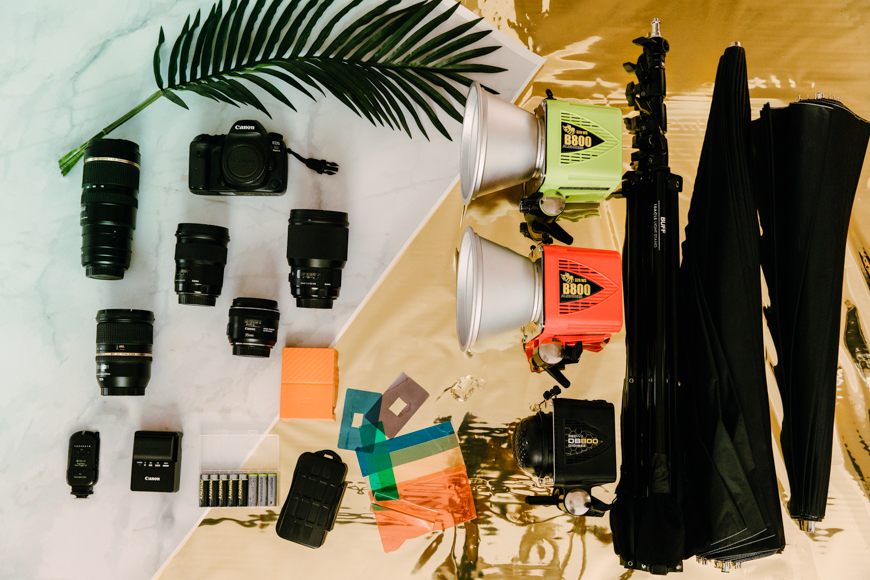
What are the different types of Portrait Photography?

Credit: Designecologist
Portrait photographers can specialize in different areas; here are some of the most common.
- Lifestyle Portraits
Lifestyle portrait photography features people doing everyday activities. The subject looks casual and appears to be unaware of the camera. This type of portrait is often used for stock photography.
- Corporate Portraits
Corporate portrait photography is business-oriented. These photographs are used for corporate magazines, internal communications and events, or the company’s website.
- Environmental Portraits
Environmental portrait photography photoshoots are taken in the person’s normal environment and not in a photographic studio. The idea is to show the subject's personality through the location and props. For example, photographing a chef in the kitchen.
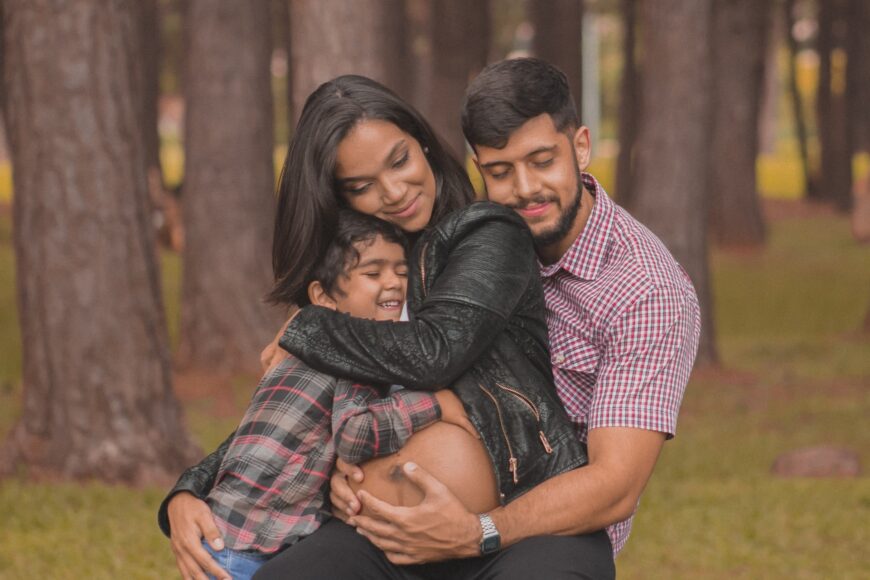
- Family Portraits
Family portrait photography features family members as the subject and focuses on emotion, love and their relationship. The photo shoot can be in the family’s home, in your photography studio, or on location.
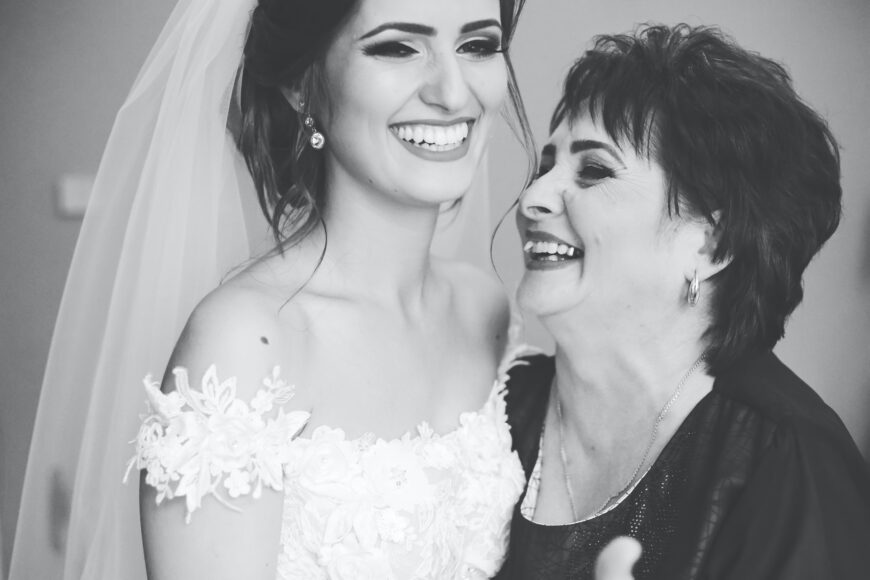
- Wedding Photography
While this is mainly an event type of photography, it's customary that the bride and groom have portraits taken separately and together. Often close family and friends are invited to a wedding portrait photography photo session too. Wedding photography tends to capture the emotions of the guests.
It's also common to offer pre-wedding photoshoots and photography mini-sessions to wedding clients.
Have a browse around Shotkit for some great wedding photography tips – just click on the ‘photographers' link in the menu above, then navigate to ‘wedding photography' to see a whole host of talented photographers showing off their best wedding and portrait photography, the gear they use, and sometimes even their camera settings.
- Children Portraits
As the name says, child portrait photography shoots are focused on photographing kids. It’s a separate type of branch because the approach, skills, and often the gear are different than those needed for adults.
Remember that you can use photography prompts to get the most out of the kids you're photographing – a classic one is, “Can you touch your nose with your tongue?!”
- Artistic Portraits
Artistic portrait photography is a very broad category that can be conceptual, surreal, sublime, or extremely realistic portraits. The technique can also range from experimental to traditional. In general, you could say that a portrait belongs in this category when the end goal is to be observed and appreciated as a work of art. These are often shot in black & white.
- Group portraits
From a school class to a football team, any portrait that includes more than two people can be considered a group portrait.
- Self-Portrait
As you can interpret from the name, this refers to a photograph that the photographer takes of him/her self. Doing self-portraits is a great way to practice portrait photography. Self-portraits are a great way to work on your portrait photography skills while improving your social media selfie game!
See here for the best photo editing software for portrait photography.
What makes a good Portrait Photo?
There isn’t a single answer to this question. Several things can create a good portrait, and this can be a subjective thing.
In my opinion, a good portrait needs to be technically correct and communicate something about the person in it.
The only bad portrait photo is one that fails your goals as an artist or your client's goals if you happen to be on a portrait photoshoot. Outside of that, you're free to explore your creativity and push the envelope for portrait pictures.
How much money does a Portrait Photographer make?
This will depend on the area where you work, and the type of portrait photography that you do.
According to the Bureau of Labor Statistics, portrait photography services are quoted at $15.15 per hour. It also reports that the annual income is between $30,000 – $40,000 for the average photographer and up to $70,000 for 10% of them.
Although this is not specific about portrait photographers, this can also be very different depending on where you live and the outlet of your photos.
You can increase your income by diversifying your portrait photography work. For example, do family portraits year-round, plus the yearbook of local schools which happens once a year, plus studio photoshoots to create images to sell in stock photography websites, etc.
If you're just starting out, work portrait photography is a solid way to start earning money as a photographer. You can reach out to local businesses, organizations, and even advertise on social media for a lightning round of affordable headshots for people to use on websites or places like LinkedIn.
Keep in mind that this is just an average income and you can also reach for the stars. For example, in 2018, Nova Scotia offered Annie Leibowitz (one of the most famous portrait photographers of our time) $2 million for exhibiting her work.
What is Needed for Portrait Photography?
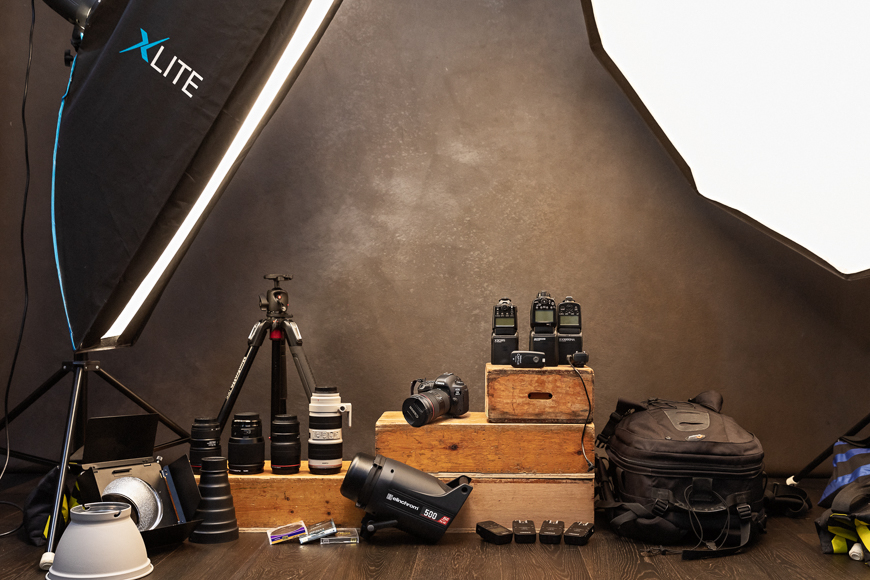
Portrait photography camera gear of Brett Ferguson
While a portrait can be done with just a smartphone, professional portrait photographers have a great deal of equipment that ensures the quality of their work.
Here's a list of the equipment needed for portrait photography to get you started.
-
Camera
Most cameras can be used for portrait photography. It’s important that you can change the lens on your camera though, so a mirrorless camera or a DSLR will be best.
Remember that whatever camera you use, be sure to master your camera settings for portraits – there's nothing worse during a photography portrait session than to be fumbling around with dials and buttons. It can look unprofessional, and can disrupt the flow of the shoot.
If you want some recommendations on the best cameras for portrait photography, you can check here for a complete guide.
-
Lenses
It’s not something written in stone, but some focal lengths work better than others for portrait photography.
The first thing you want to avoid is distorting the face of the subject. So, super wide-angle lenses are not the best choice.
When you’re photographing children, a wide-angle lens can make them look more adorable as it would accentuate their big eyes, for example. But it needs to be used carefully.
As a rule of thumb, you shouldn’t use anything under 35mm for portrait photography. A 50mm lens would be an ideal lens to use as it is the closest to how we see the world.
Also, 50mm prime lenses usually have a good aperture of f/1.4 to create a nice bokeh and are not very expensive.
A medium telephoto can work too. Something between 85mm and 105mm. This will create a compression effect that is flattering for facial features – essential for portrait photography.
It will also blur the background with not so wide apertures. However, you do need to have enough space in the studio or location to use them.
On the downside, being further away from the subject creates less intimacy and might be more difficult to break the ice and make your subject feel comfortable and relaxed.
You can check our guide to the best lenses for portrait photography here.
-
Tripod
Portrait photography camera gear of Ambej Williams
Some photographers prefer to shoot handheld to keep the spontaneity of the photoshoot. If this is the way you want to go, make sure that you’re always using a fast enough shutter speed to avoid camera shake.
Using a tripod for portrait photography has many advantages. If you’re using a wide aperture, you can use the viewfinder to zoom in and make sure that you keep the eyes in focus.
It’s disappointing when you open your photos later on the computer and find that you had the focus on the nose and the eyes are a little blurry.
Also, you can create the perfect composition and leave it there. Then take your eyes away from the viewfinder so that you can create a connection with the subject.
Finally, if you’re shooting portrait photography in low light situations, a tripod allows you to keep everything sharp without having to raise the ISO so much.
-
Reflectors
These are a great way to fill in the shadows without having to add extra light. They are perfect for softening the light when you’re shooting under strong sunlight, for example.
Are reflectors needed for photography? Well, not in every situation, but where there's light, a reflector can be a really handy accessory to own.
They come in different materials and colors according to what you need. Usually, they are sold in sets, one of each color: white, silver, and gold.
They can be foldable and convenient to carry; you just have to decide on the size. The small ones are great for portrait photography headshots, but they won’t help you if you’re doing a full-body portrait.
I consider reflectors to be portrait photography essentials. Even if you want to shoot outdoors with natural light, reflectors can help you shape that natural light for more striking portraits.
-
Flashes
On-camera flashes can be used as a fill light. For example, a ring flash will give the skin a nice smooth look and reflect on the eyes in a flattering way.
Other speedlights are also used if you put a diffuser or a softbox on them. In any case, this will depend on the lighting setup you’re going to be using if you’re outdoors or indoors, and the final result that you’re looking for.
-
Backdrops
If you’re doing portraits in the studio, a backdrop is a must-have accessory. There’s a great variety on the market, sometimes that makes it difficult to decide which one to get.
You need to consider color and material. They can range from simple, seamless paper, to elaborate patterns or scenes. It will depend on your personal style and the type of clients you have.
You should also consider the size; if you often do portrait photography of groups or families, you’ll need a bigger backdrop than the one you would use for professional headshots.
12 Portrait Photography Tips for Better People Photos
Portrait Photography Credit: Anna Baker
The next time you make a portrait session, try out some of these portrait photography tips to achieve better results.
Remember that the best way to improve is through experience, so practice them every time you can. You can learn portrait photography whether you're just getting started with your iPhone or if you are an established wildlife photographer.
You’ll see that in time you won’t even have to think about it, and things will come more naturally.
1. Use a wide aperture
When you use a wide aperture, you’re narrowing the depth of field. This will create a blurred background that will make your subject stand out.
Photographers call this piece of portrait photography information “bokeh.”
This is a simple trick to separate your professional portraits from a snapshot that anyone can take. To achieve this, you need to adjust your camera settings.
If you're not very comfortable switching camera settings and using it in manual mode, choose aperture priority. With it, you can choose the aperture that you want, for example, f/2.8, and the camera will automatically choose the shutter speed and ISO that will fit for correct exposure.
2. Use a grey card
Portrait Photography Credit: Anna Shvets
One of the hardest things to do with portrait photography is correcting the white balance on skin tone, and it's often overlooked when you are choosing your camera settings.
An easy way to solve this problem in post-processing is by taking a first shot where the subject is holding a grey card.
Then, you can use Lightroom to correct the white balance in that first image and later apply it to the rest of the photos from that session.
A grey card works for indoor and outdoor portrait photography, but here's one of the best tips for portrait photography: If you are shooting black and white portraits outdoors, grass is considered to be roughly equal to an 18% grey card!
3. Choose the right lighting
As a photographer, lighting is the most important thing you have to work with. In portrait photography, you want something that is flattering for your subject, but also communicates what you’re trying to say.
First, you need to decide if you're going to use natural light or artificial light. Remember that this decision isn't necessarily decided because of where you're going to be shooting (outdoors vs indoors?).
For example, you can use natural light when you are indoors by using window light. Then you can use a reflector on the opposite side to fill in the shadows.
You can also use artificial light outdoors. This is particularly common if you are shooting at dawn or night (see our night portrait photography examples).
Another matter to consider is whether you want hard light or soft light (see examples). This refers to the type of shadows that you want to have.
If you want a lot of drama, you should add dark, hard shadows. This can be flattering as long as they are positioned correctly in relation to your subject.
Otherwise, soft light is the norm for portrait photography. If you are outdoors you need a cloudy day, shoot early or late avoiding the midday sun, or position your subject under a shade.
If instead, you are using artificial light, then you can soften it with some modifiers. You can use diffusers or softboxes.
Several lighting setups are already proven for portraits, for example, Rembrandt light, three-point lighting or Butterfly light. For a more moody look, check out chiaroscuro lighting too.
No one portrait photography guide can encompass everything there is to know about lighting. You can take lighting lessons learned from other styles of photography and apply them to what I'm covering today to really enhance your portraits.
4. Shoot on location
Photographing portraits is not just about the people; it's also about the environment. If you’re not going to be working in the studio, choosing the right place to do the photoshoot is extremely important.
This is not only important for the lighting that you’re going to need, but also for the mood of the portrait. It’s a very different outcome placing the subject in the middle of a lavender field as opposed to in front of a graffiti wall.
Talk to your client, get a sense of what they like and what they want to communicate with the portrait. Be open to their suggestions on where you want to go and decide together.
Learning portrait photography means diversifying your style. If you always shoot in the studio, this is your sign to get out into the world and change up your usual locations.
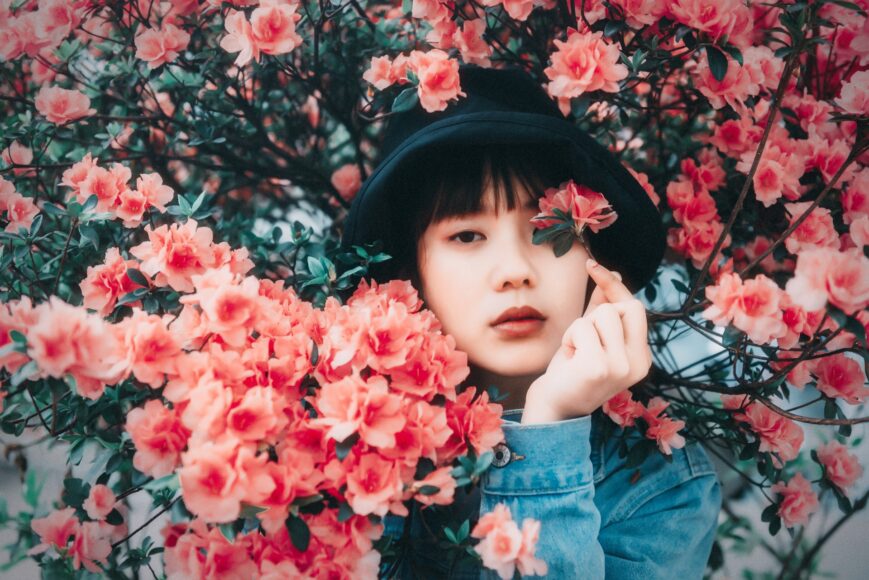
5. Use the right background

Portrait Photography Credit: Fezbot2000
Don’t forget to look at what’s behind your subject before pressing the shutter button. Often it's easy to forget because you get too involved in the lighting and the posing and capturing the right expression, but the right background is crucial.
Even if you are going to blur it, you don’t want it to be distracting from the subject. And especially if you want to keep it in focus, it needs to complement it. Keep an eye on the color and pattern.
When you are working outdoors, it's often enough to rotate the scene to find a better background. If you are doing portrait photography in the studio, you can buy different backdrops to keep on hand.
6. Relax your subject
Portrait photographers need to have good people skills. Since it's often done with non-professional models, it’s your job to make them feel comfortable to take a better portrait.
A frozen smile and a tense body will hardly make a good portrait unless you’re doing that on purpose for conceptual reasons.
Be friendly and professional that will make them feel safe and less self-conscious.
Know your camera settings so well that you don't need to keep fiddling with buttons and dials, and can maintain eye contact with your subjects, guiding them through the session to make fun and meaningful pictures.
These photography tips for portraits are as much about mastering your camera gear as they are about learning to work with your subjects. I find that it often helps to chat with my subjects while taking some test shots to get them used to being in front of the camera!
7. Learn to pose
Portrait Photography Credit: Laercio Cavalcanti
Posing models, especially non-professionals, is one of the most difficult things to master for portrait photographers.
You need to know different strategies for each subject because it’s not the same to pose women, men, couples, or groups.
For example, the male body is more about angles, so you can accentuate the jawline by asking them to push the chin out. The shoulders should look broad and squared; you can then pose him looking towards the camera.
This is the opposite of what you need to do for women, where the emphasis is on curves. You’d want to pose her body sideways and lean back a little.
For groups, you can pay attention to the figure formed by the group as a whole. For example, create a triangle by placing more people in the front sitting down, and fewer people behind them standing up.
Compile a collection of your favourite portrait photography images as a reference to use as a go-to guide. Keep it in your mobile phone so you can show it to the model too.
Often it’s easier to show them what you mean instead of trying to explain it with words. Also, remember that you should never touch them without asking for permission.
It’s natural to have an impulse to move them or position them if communication is not going well, but you should be aware of their personal space and respect it.
It’s your job to communicate effectively, and that’s when visual aids can come in handy – check out Together Cards as a great way to direct your couples into natural-looking poses.
8. Use props
Props are a great way to fill the composition and make the portrait more interesting. If they are of a personal nature, they will add an emotional touch too.
They can say something else about the person being portrayed, and they can help them relax when the posing isn't coming naturally.
Make sure that they are appropriate to the type of portrait that you’re doing though. For a couple’s photo session, it is OK to use romantic things (perhaps rose petals), but they wouldn’t be suitable for a corporate shoot.
Anytime you are choosing the framing of your photo, you need to consider the composition. This is especially important if you're going to include more elements.
Remember that the person is your main subject with portrait photography (i.e. the props are secondary), so place them wisely inside the frame. There are a number of composition guidelines that you can follow to help you out with this.
Some of the most common are the rule of thirds and the golden rule. Of course, you are always free to experiment and make different choices based on your previous experience.
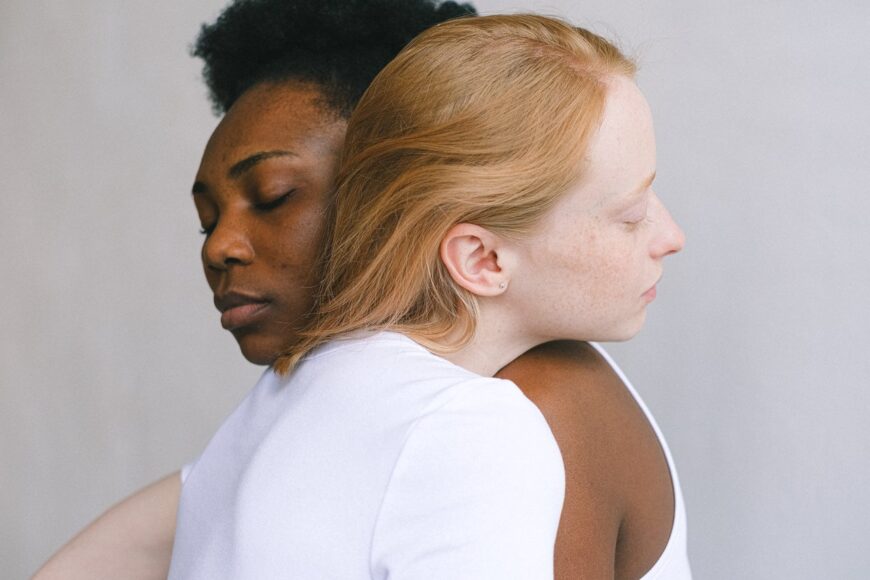
9. Capture the emotion
Portrait Photography at Weddings | Credit: Marius Muresan
One of the most interesting things about photographing people is the emotion that you can capture in their expression. This is particularly important in wedding photography.
That’s what makes the difference between a good portrait that shows joy and a bad portrait with an awkward smile.
The sincerity of the emotion is what makes the viewer connect with the people in the portrait, even if they are strangers – maybe you've looked at wedding photography in the past and felt a connection with the couple, even if it's people you don't know.
Of course, joy is not the only emotion that you can capture; again, it depends on the type of portrait. Honesty, love, surprise, pride, grief… all of these feelings can be communicated through your images.
Wedding photography in particular is an excellent opportunity to capture a myriad of emotions, experiment with poses, techniques and a whole variety of shots.
10. Try faceless portraits
Most people assume that a portrait needs to include the face of the subject, but that’s not mandatory.
You can experiment and focus on the hands, the feet, a full body with the person looking away from the camera, and so many other choices.
Don’t be afraid to explore the full potential of the human body during your next portrait photography session and make that the main subject of your images.
11. Change perspective
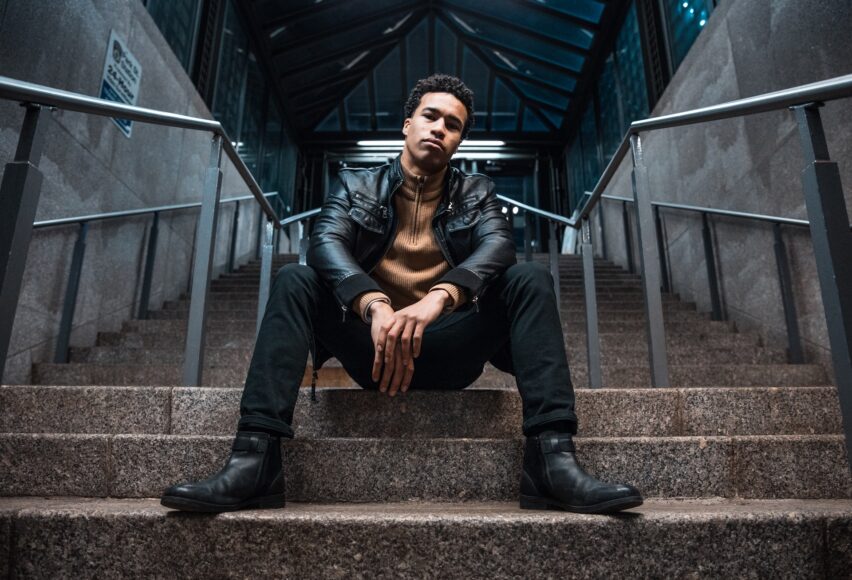
Credit: Alex Iby
Moving around and changing your point of view can dramatically change a portrait and make it more interesting.
Depending on where you are and the subject you're photographing, you can get down on the ground or position the subject on a higher plane, for example, at the top of the stairs.
You can do the opposite too with your portrait photography – climb on a tree or shoot from the window looking down at the subject on the ground.
The possibilities are endless but make sure you have some variety and not just shoot at eye level. This can make the difference between a beginner and a professional portrait photographer.
12. Don't be afraid of retouching
Post-production, i.e. the photo editing process, is an essential step for creating engaging portrait photography.
There's a huge selection of editing software available, but Capture One Pro is commonly used in the portrait industry for its accurate colour reproduction, particularly with skin tones.
Photoshop is used for more intensive retouching, using the liquify tool among other powerful photo manipulators. Lightroom is another favourite, for its time-saving batch editing functionality.
Exposure X7 offers interesting filters and styles, and then there's Luminar with its artificial intelligence powered facial recognition.
Whatever software you choose, remember not to go overboard with the edits. It's easy to overdo things like skin smoothing, which can create an unnatural looking portrait.
Portrait Photography FAQs
What settings should I use for portrait photography?
You ideally want a low ISO (around 100-400), a fast shutter speed (around 1/200), and a wide aperture for nice background blur (e.g., f/2-f/4). It's best to use autofocus and have your drive mode to single shot.
What makes a great portrait?
That's open to interpretation, but generally speaking, a great portrait is one that's technically well photographed with eyes in focus and that shows the character of the subject.
What F stop is best for portraits?
Individual portraits usually look best with nice subject separation and background blur; for that, an aperture of around f/2.8 is a good place to start. For group portraits, you'll need more in focus – so opt for around f/4-f/8.
Is 50mm good for portraits?
Yes, nifty fifty lenses can be great for portraiture, especially for shooting full length and three-quarter length shots. 50mm lenses are usually affordable and offer a wide aperture for nice bokeh.
Final Words
I hope this article showed you how you can improve your portrait photography.
If you have any questions or you want to share some of your portrait photography tips with us, feel free to write them in the comments section. I'm always here to write fresh portrait photography articles to help you improve your work as a photographer!

Check out these 8 essential tools to help you succeed as a professional photographer.
Includes limited-time discounts.

Mark Condon is a British wedding photographer and editor of Shotkit. When he’s not taking photos or reviewing the latest camera gear and software, Mark can be found cycling around the northern rivers.
7 Comments
Leave a Comment
👋 WELCOME TO SHOTKIT!
🔥 Popular NOW:

I’m an amateur photographer for the US Coast Guard Auxiliary who frequently do portrait photos for the active duty “Coasties” . (of which I take grate pride in doing this for them)
Great advice on the 3 point!. I learn everyday and seek more. THANK YOU>
I’m a portrait photographer from Brighton in East Sussex and I LOVE reading other photographers tips and tricks. Thanks so much for this great article!
Nice snap of FatBoy Slim, Hannah!
It possible to shoot with joom Lens to keep at 50 mm because I have not fix Lens
Absolutely!
Interesting tips, thank you for sharing :)
Great Tips.
Thanks for sharing