


How To Make a DIY Photo Keychain (Wood or Plastic)
Discover how to create a DIY photo keychain with this simple tutorial, turning your favorite images into personalized, portable keepsakes.
Learn | By Ana Mireles
Shotkit may earn a commission on affiliate links. Learn more.
Have you ever thought about making a DIY photo keychain?
Transforming your favorite photo into a keychain is the perfect way to make sure you'll always have it with you.
It's also a great idea for party favors or to personalize the keychains to your B&B room keys.
Whatever your reason for doing it, I can help you out with this easy-to-follow tutorial.
Here, I'll show you how to transfer your photo to a piece of scrap wood and how to turn that into a DIY keychain.
If you're not feeling so crafty, I'll also give you a simpler photo keychain alternative in the end. So, let's get started!
More fun DIY photo projects:
Materials To Make a Wood Photo Keychain
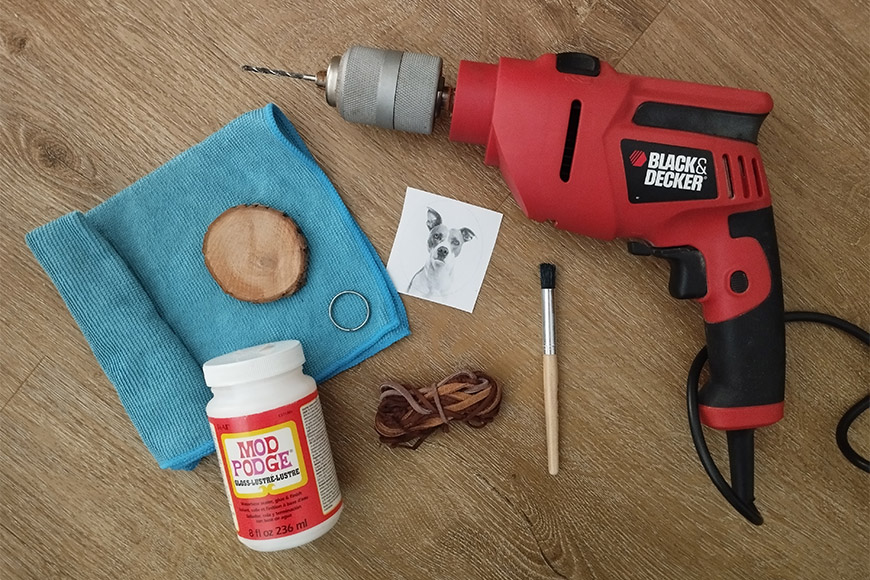
- Photo
- Photoshop
- Wood scrap
- Cord / Chain
- Mod Podge
- Scissors
- Brush
- Cloth
- Water
- Drill
- Keyring
How To Make a Wood Photo Keychain
Following this process, you can create a photo key chain by transferring your favorite photo onto wood.
However, you can do this in different ways. You can find other Shotkit tutorials to transfer photos onto other materials, such as fabric.
Also, if you're not feeling that crafty, you can find a tutorial for making a photo keychain without the DIY part.
Step 1
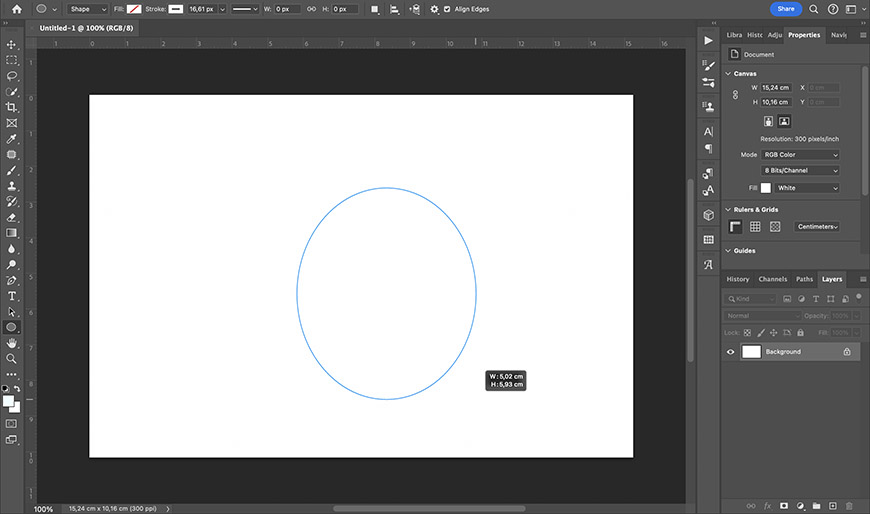
Start by measuring the surface of the keychain where you're going to transfer your photograph.
Then, open a blank document in Photoshop (or your Photoshop alternative of choice). The size doesn't matter as you'll crop it to size once the photo is ready for print.
Grab the Shape tool and set it to a circle. This is, of course, if you're using wood scrap like the one I'm using or another circular surface.
If your keychain is square or rectangular, you can use the Rectangular shape or skip directly to sizing and cropping your photo.
Back to the circular shape, you can add a shape to the canvas by clicking and dragging. You'll have Photoshop's guidelines to tell you the size as you drag the cursor.
Alternatively, draw the circle without caring for the size and input the measurements on the Options panel.
Make sure the Fill is set to none and the edge is thin as this will only serve you as a guide to cut out the shape on your print.
Step 2

Photo credit: Gilberto Reyes
Now, add your photo to your Photoshop document. You can do this by using the menu File > Place Embedded.
Any photo works regardless of the subject or whether it's color or black and white.
Make sure the layer containing the photo is between the background and the shape you draw on the first step. Now, resize it and position it inside the shape.
You can also mirror your image – this is especially necessary if there's text.
Once it's ready, you can flatten the image and crop it to remove the unused canvas.
Step 3
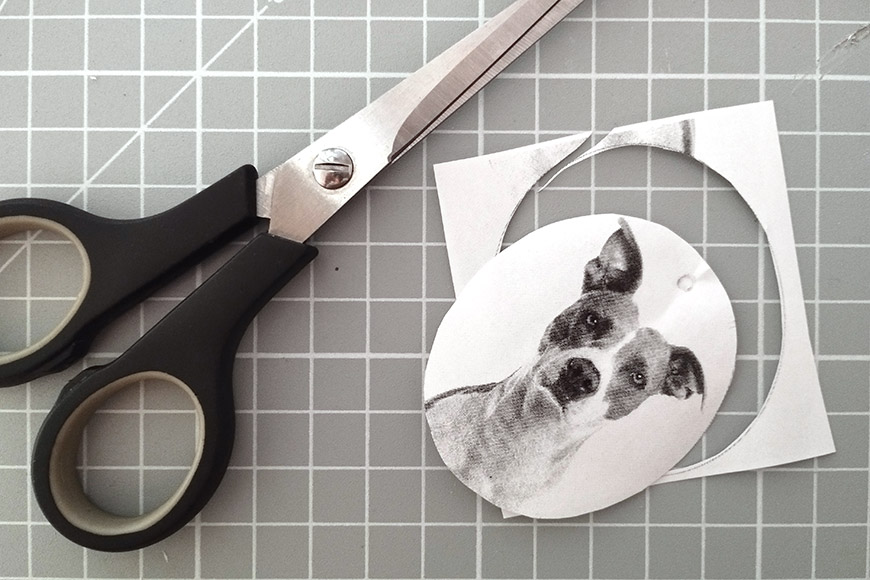
Now, print the photo using a laser printer.
Then, cut the image following the circular line you drew in Photoshop.
Step 4
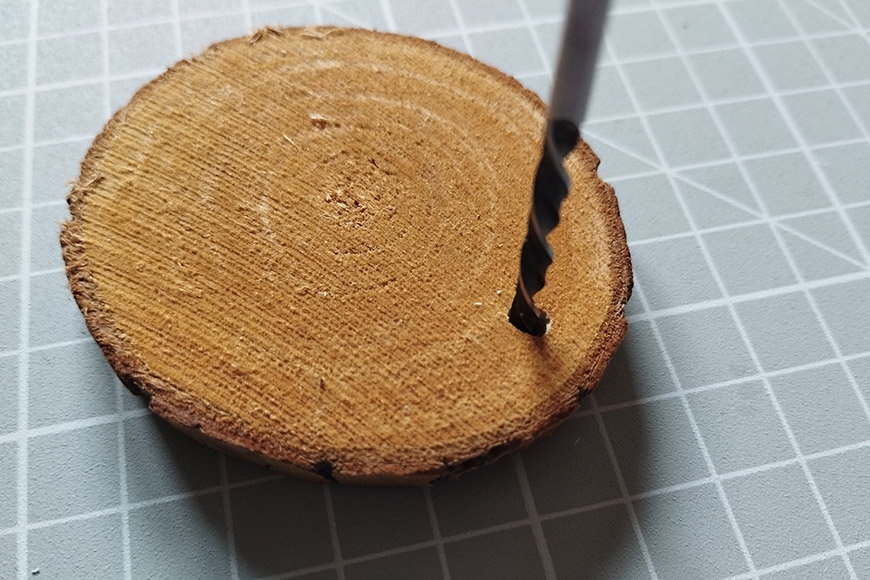
Now, you have to prepare the wooden scrap so you can transfer the photo onto it. To do this, you need to make the hole where the cord or chain will pass.
You can also do this after you've transferred the photograph. However, I prefer to do it now so I don't risk damaging the image.
Simply find a wood drill bit that's as wide as the cord, ring, or chain you'll use to make your keychain. Then, drill a hole in the wood scrap.
I prefer to have it close to the edge, but you can also have it centered – it depends on how you like it.
Since you're drilling all the way through the wood, don't work directly on your table or something that can get damaged. Instead, place another piece of wood or a cutting mat underneath.
Step 5

Next, cover the photo with Mod Podge using a foam or regular brush. Make sure you use a generous amount to cover the entire area.
Then, put it face down on the wood and gently pass your fingers over it to push out all the air bubbles. Make sure you clean all the extra Mod Podge.
Note: If you want a more detailed guide on how to transfer photos to wood, you can check out this tutorial.
Let it dry for at least 24 hours.
Step 6
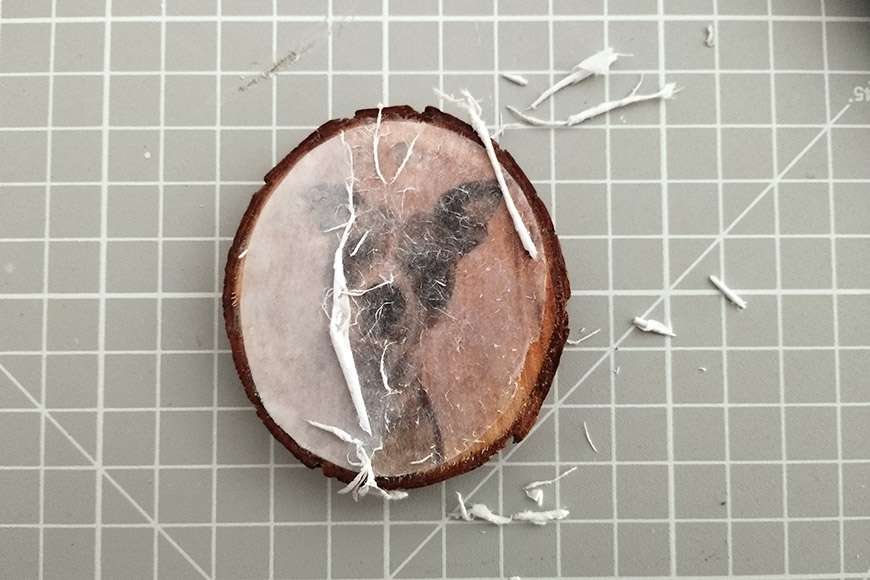
Once it's dry, put a damped cloth on top of the print and leave it there for 10-15 minutes. Once you can see the image through the paper, it means that it's wet enough.
This is when you can start peeling off the paper to reveal the transferred photo. You can do this simply by rubbing your finger on it.
Keep going until you remove all the paper and you can clearly see the photo transfer.
Step 7
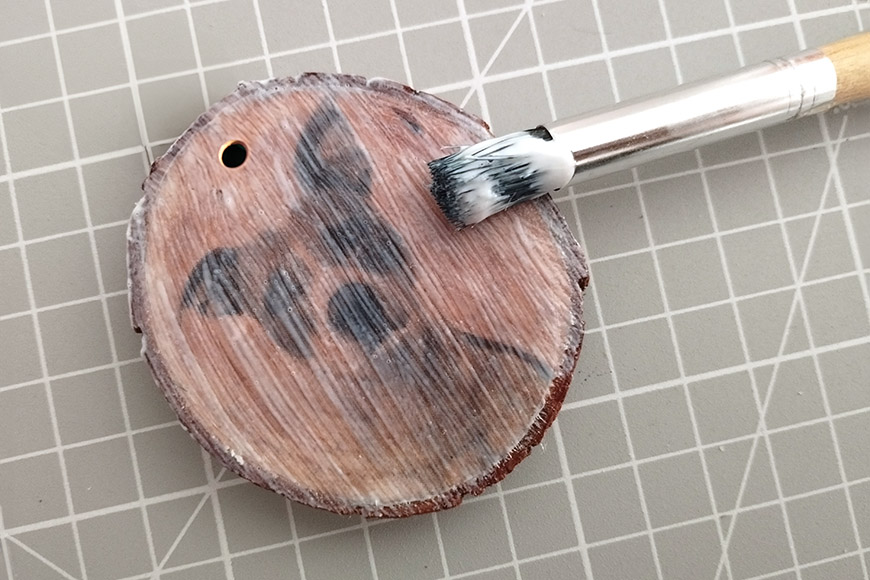
Now, give it another coat of Mod Podge to seal the picture. I'm using Glossy Mod Podge, but there's a matte version if you prefer – they both work great for this project.
Make sure you don't cover the hole with Mod Podge.
Don't worry if it looks white now, as it dries it will become transparent.
Step 8
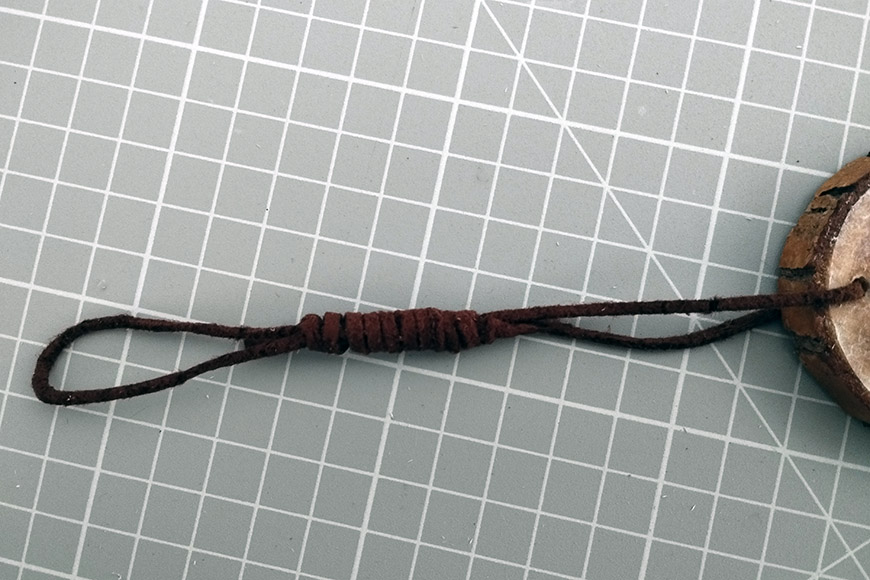
Once the sealing coat of Mod Podge is dry, pass the cord through the hole. Then, create two loops with the cord – one should be longer than the other.
The exact measurement will depend on the size of your keychain. Then, tie a single-strand, two-closed-loop knot. This is a video tutorial on how to do this type of knot.
I'm using a necklace cord, but you can also use a parachute cord – it depends on the final look you want for your keychain.
It's also possible to use a metal chain, which you can buy or reuse from another keychain.
Step 9
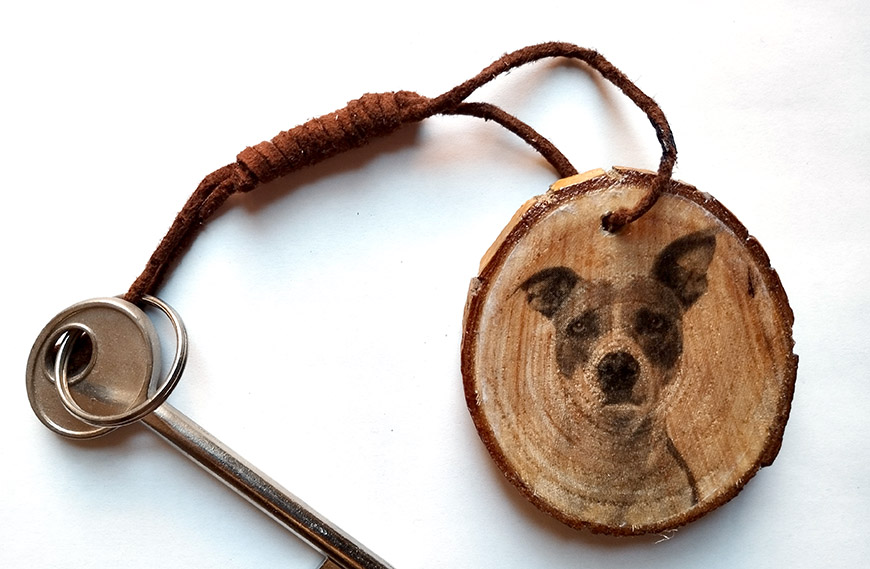
Lastly, put the key ring on the second loop. That's it – your photo keychain is ready to use.
Photo Keychain Alternative Without DIY-ing
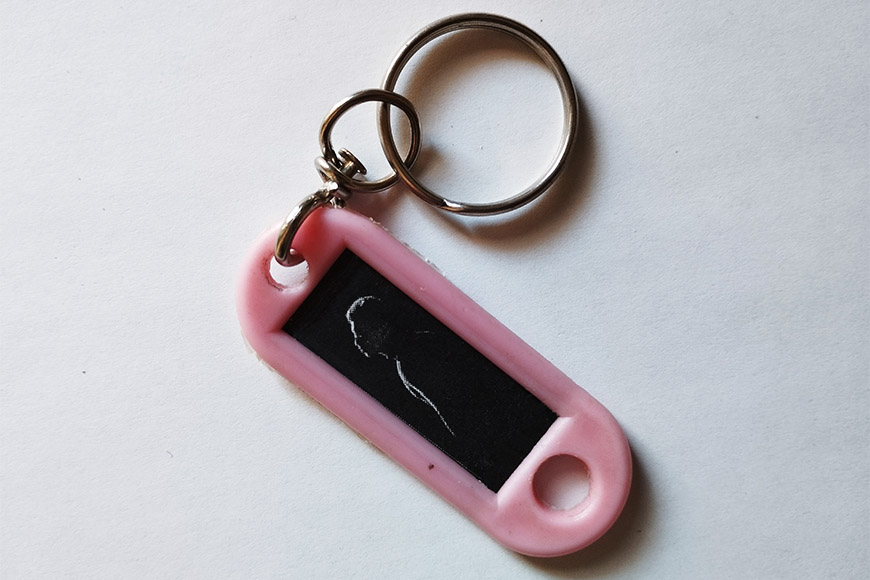
If you don't like DIY but want a photo keychain, this is how you can do it.
Buy a plastic key tag. You can easily find them at any locksmith shop, one-dollar shop, or even Amazon. You may find different shapes and colors – choose the one you like best.
Then, resize your photo using Photoshop or any photo editor. There are many online options as well where you can do this.
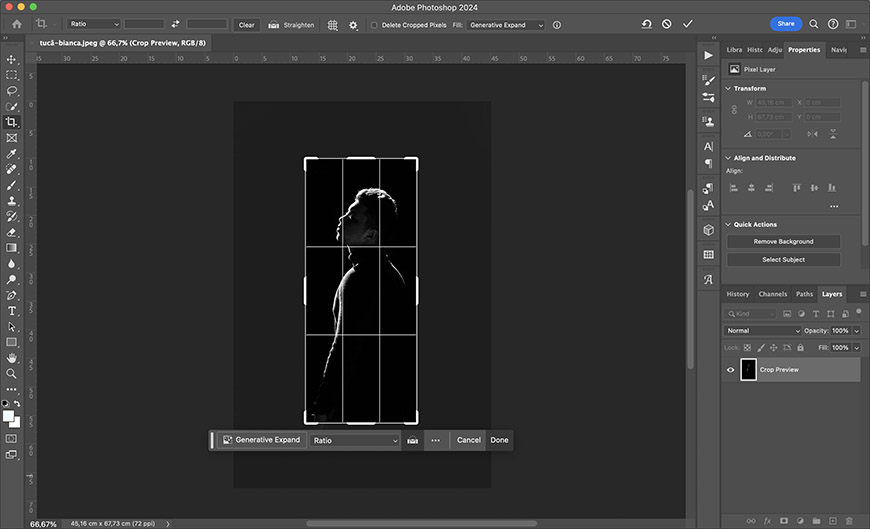
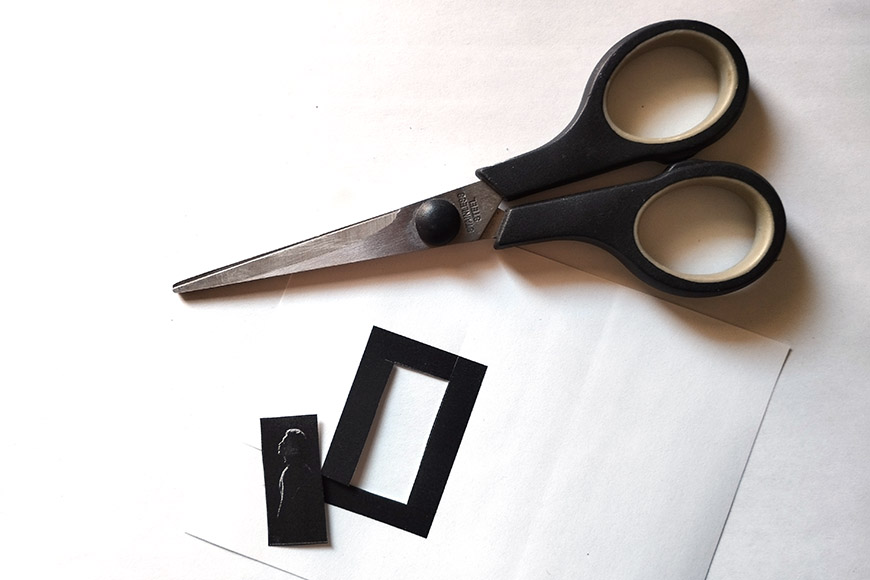
Photo credit: Tucă Bianca
Now, print the photo and cut it to size.
Lastly, insert it in the display window of the photo tag.

And that's it – your super simple photo keychain is ready to go.

Check out these 8 essential tools to help you succeed as a professional photographer.
Includes limited-time discounts.

Ana Mireles is a Mexican researcher that specializes in photography and communications for the arts and culture sector.
👋 WELCOME TO SHOTKIT!
🔥 Popular NOW:
