


What Is an Intervalometer? (And How to Choose One)
Learn everything you need to know about intervalometers and get expert tips on selecting the right one to enhance your photography and time-lapse projects.
Shotkit may earn a commission on affiliate links. Learn more.
In today’s post, I’ll discuss everything you need to learn about intervalometers. I’ll also throw in some tips for choosing your first intervalometer.
If you’re new to photography, the term “intervalometer” can sound extremely technical and intimidating.
I, too, remembered feeling vaguely unnerved the first time I heard and used it.
Still, if you’re serious about your photography career, sooner or later, you’re going to need an intervalometer.
So, it’s best you learn about intervalometers beforehand—what they are and their purpose in photography.
Intervalometer: Quick Overview
An intervalometer is a device set up to measure time intervals. It sends time-accurate signals to control other devices, including cameras.
In simpler words, it acts as a timer and a trigger, sending the “stop” and “go” signals to other pieces of equipment.
It also lets you program the intervals between the cues.
One excellent example of this technology in play is in home exterior lighting. In this case, it typically uses a timer (built-in intervalometers) and motion sensors to turn the lights on or off.
What Is The Purpose of an Intervalometer in Photography?
An intervalometer is an essential camera accessory for professional photographers. And you can find it as a built-in feature in cameras or as an external device.
As its name suggests, an intervalometer allows you to execute complex shooting sequences.
A basic intervalometer has five primary functions: shutter speed setting, time-lapse interval, shutter delay, remote shutter release, and setting the number of shots.
With these features, photographers use intervalometers for different purposes.
And if you’re a newbie, there are many scenarios in your photography career when you’ll need an intervalometer.
Here are three examples of when you’ll need an intervalometer:
1. Time-lapse Photography
Most photographers use intervalometers for capturing a series of photos.
So, if you’re into capturing moving or changing subjects, you’ll certainly need one.
An intervalometer’s custom shutter speed allows you to take hundreds of images without touching the camera you use for time lapses.
This capability makes it the perfect partner for timelapse photography projects like capturing nature changes and construction sites.
You’d only need to input your desired interval for each shot or shutter speed, including the amount of frame you want, and the intervalometer will do the rest.
Intervalometers can also help you shoot hyper-lapse videos.
2. Long Exposure Photography
If you’re into long-exposure photography, having an intervalometer ready could prove beneficial. It’s especially useful when capturing motion shots or still subjects.
When shooting long exposures, you’d want to avoid sudden camera movements.
However, pushing the camera’s buttons risks shaking the frame, which would harm the output.
If you have an external intervalometer, you can use its remote shutter release feature and capture the images from a distance.
This feature will prevent shaking and ensure your captures remain sharp and crisp.
Additionally, most cameras have around 30 seconds of exposure time limit. But with an intervalometer, photographers can extend the time exposure to over 240 seconds.
3. Astrophotography
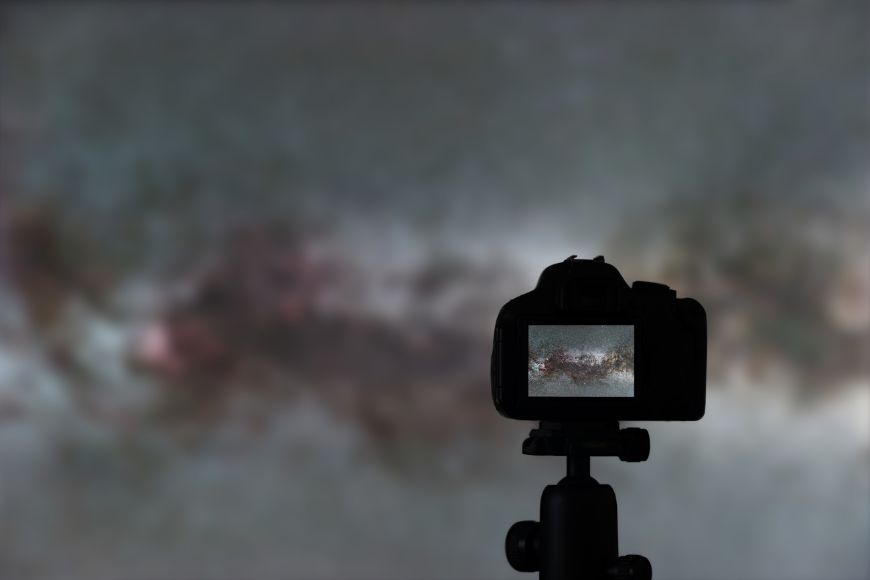
Are you a fan of capturing photos of the moon, nebulae, clusters, the galaxy, and star trail images?
Then, consider investing in an intervalometer for your next astrophotography project.
Nightscape photographers use the interval setting of the device to take 15 to 20 photos in succession. This technique will help you reduce noise in your Milky Way captures.
Another helpful feature of the intervalometer for night photography is its time delay capability.
With this setting, you can target the exact hour, minute, or seconds you’d want it to shoot.
The shot number option lets you decide how many pictures to take for each sequence. You can choose between one and infinity, which is a valuable tool when taking photos of star trails.
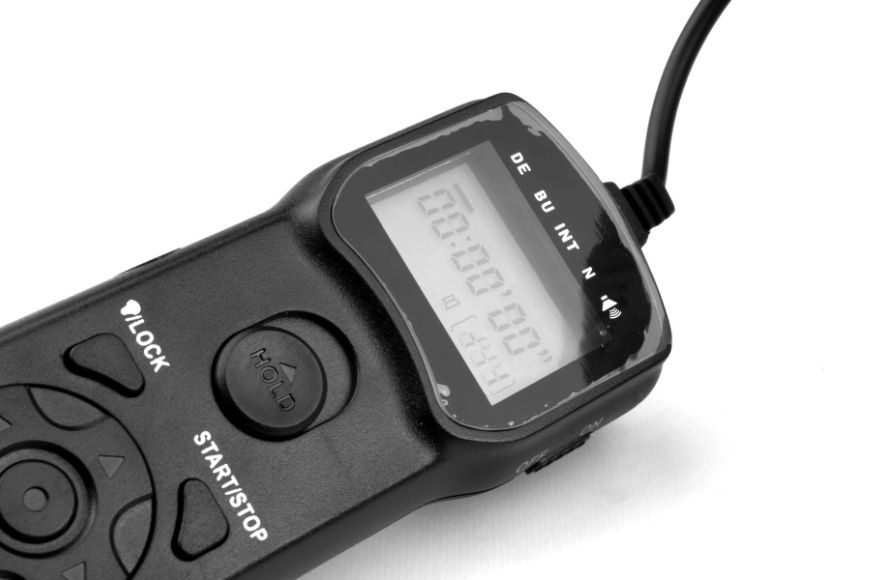
How to Use an Intervalometer
Most intervalometers have the same function.
It means most brands and software will have virtually the same setup with five options: Self, Long, Number, Beep, and INTV.
So, whether you’re using an intervalometer for Canon, an intervalometer for Nikon, an intervalometer for Fujifilm, or an intervalometer for Sony cameras, they’ll definitely have the following:
Option 1: Self
The Self is typically the first setting in most intervalometers. It’s the one controlling the self-timer or delay of the device.
You use the Self to set the time (hours, minutes, or seconds) before it takes the first shot.
This preset only affects the time before the first photo. So, it won’t change the interval between shots or exposure time.
Option 2: Long
The Long setting is the dedicated control for your camera’s shutter speed.
In other words, it sets how long of an exposure the device allows before taking a picture.
With this preset, you can set the duration you want to shoot your timelapse or night shoot sequences.
Turn your camera’s bulb mode when using the intervalometer for extended exposure. But if you choose zero in your intervalometer, it’ll adapt to the shutter speed you have in your camera.
Option 3: Number
Number, as its name implies, controls the amount of frames your camera will shoot for a given time.
Using this option, you can change the number of pictures to one, two, three, or more. You can even set it to capture photos until the camera’s battery runs out.
Adjusting the frame number is easy:
You use the up and down buttons to navigate the numbers. If you want continuous shooting, set the indicators into a double dash.
Option 4: INTV
The INTV is simply a shortened word for “interval.” Tweaking this option will allow you to set the time in between your shots in a sequence.
For instance, if you set it to five seconds, the intervalometer will trigger the shutter release every five seconds.
You can set it to take photos for as short as one second or as long as an hour. Once done, you only need to click the start button on your intervalometer device.
Option 5: Beep
The Beep, often represented by a music note sign, lets you control the device’s sound whenever it's working.
In general, your intervalometer will make a beeping sound each time the camera takes a photo. But this feature can sound disturbing to other users.
To set it on or off, you only need to click the far right corner of the right arrow button.
Tips for Choosing Your First Intervalometer
Some modern cameras have intervalometers built-in in their software. For certainty, you should check yours if it has one.
If you’re sure your camera doesn’t have one installed, here are some tips when purchasing one:
Consider Suitability
The first and most crucial factor to consider when choosing a photography accessory is whether it’s compatible with your camera.
To do this, read your camera’s manual and check if the intervalometer can connect with it. Or, contact the manufacturers and ask for recommendations.
That said, these devices typically work with most cameras, with a few exceptions made for specific brands.
Examine Features
Intervalometers have identical functions. Still, device features constantly evolve, so it’s worth checking what you’re getting.
Is it easy to use and install? Does it come wired, or do you get a more convenient wireless remote control?
Most importantly, observe how well the device controls your camera shutters.
If you need it for professional use, some advanced models, while more expensive, come with practical features like HDR support, ramp-up, mirror-up mode, and more.
Assess Cost
As with any purchase, you should assess the cost before buying your first intervalometer. Think about the features you’ll need and how often you can use them.
For example, if you’re new to this aspect of photography, the smart move is to pick an affordable option to learn your way around intervalometers without costing too much.
Intervalometer Apps

If you’re using a smartphone in your photography sessions, you’ll be glad to know there are apps you can use.
You’ll have plenty of options whether you want an intervalometer for iPhone or Android.
That said, most flagship and midrange smartphones typically have the time-lapse feature built into their camera software.
Still, if you’re unsatisfied with how yours is performing, these third-party apps are a must-try.
Frequently Asked Questions
Still curious about this quirky piece of photography tool? Below are some frequently asked questions about intervalometers that might help you:
What is the best intervalometer for time-lapse?
There are plenty of brands and models with top-notch time-lapse features. Some of the most popular brands when it comes to intervalometers include Vello, Nikon, and Canon.
Do I need an intervalometer for astrophotography?
No, you don’t need an intervalometer for taking Astro images. Still, the features of these devices do help a lot if you’re into taking time-lapse sequences and high-exposure aerial shots.
What does interval in time-lapse mean?
Interval in time-lapse simply means the duration in between your shots.
For instance, if you set your intervalometer’s INTV setting to five seconds, each shutter release for that sequence will take five seconds.

Jeff Collier is an experienced film photographer who enjoys experimenting with modern digital photography equipment, software and apps. He’s also an ex-world champion triathlete and avid cyclist, clocking hundreds of km each week in the beautiful Tweed Valley of northern NSW, Australia.

👋 WELCOME TO SHOTKIT!
🔥 Popular NOW:
