


Long Exposure Photography Tips
Check out the ultimate guide to long exposure photography. Discover how to make star trails, make water look silky-smooth, or capture streaking car lights.
Shotkit may earn a commission on affiliate links. Learn more.
Long exposure photography is an eye-popping way to capture a real photo in an unreal way, resulting in an image that is impossible for humans to see with their own eyes!
A long exposure is a clever way to use the passage of time, and the light-sensitive nature of a film or digital sensor, to capture the movement of different subjects within a static scene.
You can also capture an abstract image of total blur.
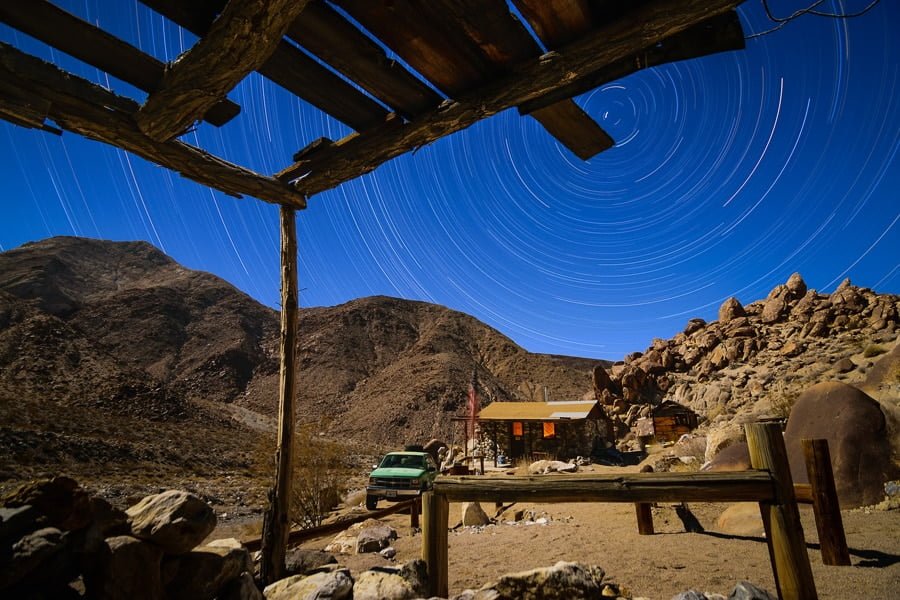
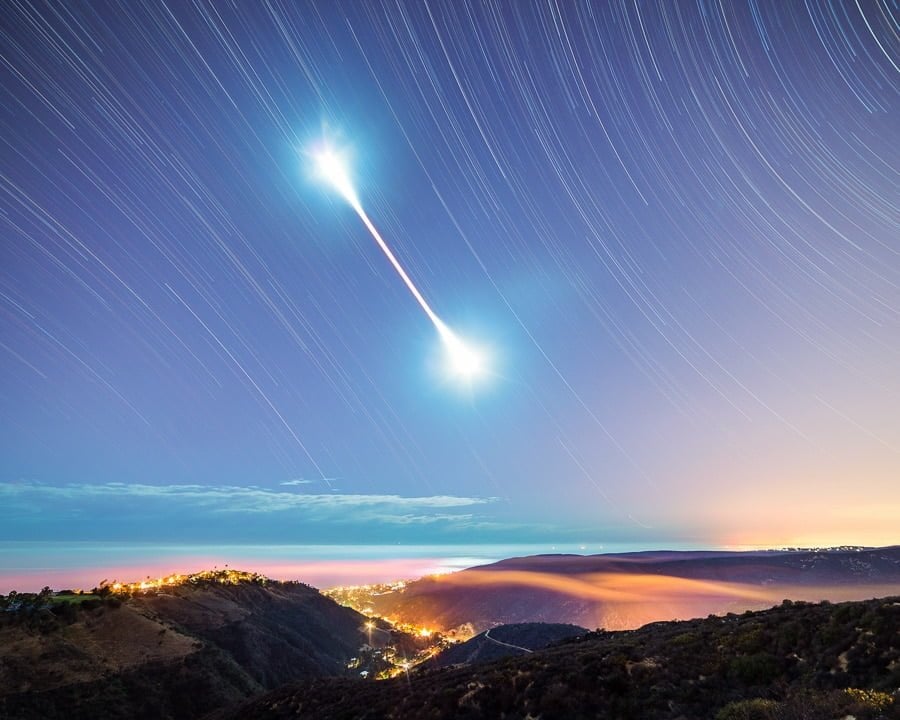
At night, long exposure photography is powerful enough to depict Earth’s rotation itself.
During the day, a long exposure can turn familiar sights into a visually accurate yet mind-bending final image.
In this article, I’ll showcase some examples of various creative long exposure ideas, such as capturing star trails at night or motion blur in bright sunlight.
I’ll explain the technical details that go into each type of shooting condition, and offer any extra tips that will help you achieve amazing imagery!
13 Long Exposure Photography Tips
1. Steady Your Tripod

First and foremost, make sure your tripod legs and ball head are locked tightly.
Make sure your tripod feet are stable and secure on solid ground, and not sinking slowly into sand, snow, or anything else “squishy”. (Never stick your tripod feet IN a tidepool! Always be respectful of the local flora and fauna.)
NOTE: Doing long exposure photography of waves on rocks is a beautiful but dangerous activity. Always pause for a few minutes before approaching the rocks at first, to see what the cycle of the swell is.
There may be “sleeper” waves that are much bigger than the rest.
Then, any time you are near crashing waves, always keep observing the incoming waves, and be prepared to back away from anything dangerous long before it gets to you.
2. Set Your Composition and Focus
As a general rule, you want to frame your shot and set your focus before you start taking very long exposures.
Nobody wants to wait 5 minutes only to find that their shot isn’t in focus, or is terribly exposed, or the wrong composition!
If you’re using a very dark neutral density filter, (any darker than 3-5 EVs) you should frame your composition and set focus without the filter.
This will save you so much time and frustration in the long run! Just be careful not to bump your lens’ focus or zoom rings when you put the ND filter on after framing the shot.
3. Choose the Total Amount of Time You Want to Expose

How much motion do you want to capture in your shot? The right exposure length will vary greatly, depending on whether you’re shooting star trails, fast-moving vehicles, or something in between.
(See the creative inspiration examples above for suggested exposure times.)
The trick is to balance your other exposure settings (aperture and ISO) with your desired creative effect (shutter speed).
You might have to compromise a little bit on one of your settings, using a slightly higher ISO or a slightly faster aperture, if there's too little ambient light or if you don’t have the right ND filter.
(You can read more about this in our article: Who makes the best ND filters?)
4. Grab Your ND Filter for Daytime Long Exposures
In broad daylight, or even just before sunset or just after sunrise, you’ll need an ND filter for most long exposures.
Why? Because even at f/22 and ISO 100, you'll probably over-expose an outdoor daytime image by the time you get to ¼ or ⅛ sec, or 1-2 whole seconds if you’re shooting around sunset.
Any longer than that, and the image will be completely blown out.
So, you’ll need a neutral density (ND) filter. In fact, you’ll need a very dark one. To achieve a 15-30 second exposure in broad daylight, you’ll need about a 10-stop ND filter.
To reach shutter speeds measured in minutes instead of seconds, there are 13 and 14-stop ND filters. Again, see the specific recommendations in the above creative inspiration examples.
What about variable neutral density filters?
Unfortunately, most of them develop an “X” pattern, or some sort of uneven illumination, when they are set to their darkest setting such as 9-14 EVs.
So, you’re better off just getting a dedicated 10 or 14-stop ND filter even if you also own a variable ND filter for use at around 3-6 EVs.
Here are my recommendations for the best ND filters on the market:
- Best Neutral Density Filters: Breakthrough Photography X3 Solid Neutral Density Filters
- Best Budget ND Filters: Hoya Pro Neutral Density Filters
5. Set Your Camera’s Bulb Mode
Pretty much all cameras these days, even beginner cameras, have what's called “Bulb Mode”.
Some cameras put this exposure mode on its own exposure mode dial next to “PSAM” (Canon) while other cameras (Nikon) just put bulb mode after the 30-second exposure point.
(Note: On some Sony cameras, you’ll have to make sure that your camera is in single-shot mode and mechanical shutter, otherwise bulb mode is unavailable.)
On most cameras, here’s how bulb mode works: You hold the shutter down the whole time!
Unfortunately, this means that if you try to do it by hand, with your finger on the shutter the whole time, you’ll probably wiggle your camera and tripod a little bit during the exposure, blurring it.
This is why having a cable release is critical. With a cable release (wired or wireless), you can simply lock down the shutter release, and then unlock it when you want to end the exposure.
One last note: on Nikon cameras, and maybe some others, there is one additional mode, which used to be called “Time” exposure, but is now just labeled as “–” on the shutter speed scale.
This feature/setting allows you to leave the shutter open without holding down the shutter! Just hit the shutter button once, and the shutter will open, then hit the shutter button again to end the exposure.
If your tripod is solid enough, and you are very gentle, you can usually start and finish the exposures using this trick without shaking the camera.
It’s a quick-and-dirty way to shoot a long exposure on Nikon if you forget your cable release.
6. Check Your Histogram Quickly Using ISO 6400 Instead of 100
As I mentioned, you never want to sit around waiting for a 4-minute long exposure only to find that it is totally underexposed or overexposed.
So, here's where the magic of the exposure triangle will be extremely useful: Set your aperture to your ideal setting for the scene, put your dark ND filter on if necessary, and then set your ISO to 6400.
Shoot test exposures until your histogram looks right, and then note the exact exposure settings.
The reason to use ISO 6400 is that it’s exactly six stops above ISO 100. Which means you can shoot a 1-second test exposure at ISO 6400, and it would equal a 1-minute exposure at ISO 100.
It’s just an easy-to-remember number translation that allows you to skip six stops!
Of course, a 2-second test exposure at ISO 6400 equals a 2-minute final exposure at ISO 100, or a 5-second test exposure equals a 5-minute final exposure, and so on and so forth.
Why test your exposure with the ND filter on, if you know it’s a 10-stop ND filter? Well, because unfortunately, don’t all seem to perfectly match their stated rating.
You may find that the particular ND filter you bought is actually off by a stop or so, especially the super-dark ones.
As another example, a shutter speed of 1 second, f/2.8, and ISO 3200 would equal a 30-second exposure at f/5.6 and ISO 400.
Calculating these exposures quickly in your head is a simple matter of understanding what is the exposure triangle.
My secret? I count the stops on my fingers. Hey, it works!
7. How To Stack Multiple Shorter Exposures for One Long Exposure
If you don’t have the right ambient conditions or the right ND filter, you might not be able to capture a single exposure that has the ideal shutter speed for your creative vision.
However, you can always blend multiple exposures in post-production!
This is very common for star trail photos at night: shooting 30-second or 1-4 minute exposures back-to-back for an hour or more, and then layering them all together for one long star trail.
During the daytime, let’s say you only have a 3-stop or 5-stop ND filter, but you want to create the effect of a 2-4 minute long shutter speed.
You can shoot back-to-back ~5-second exposures by using your external trigger and locking the shutter button down…and then let the camera run for 2-4 minutes.
Then, in post-production, layer all the images together, set each layer’s blending mode to “Lighten”, and watch them all meld together into one long exposure!
8. Long Exposure Photography with a Smartphone
Yes, you can absolutely take long exposure shots on your phone! The key will be to treat your phone like a professional camera: clamp it to a tripod or other means of stabilizing it (they make phone clamps with tripod clamp adapter feet (!) or check out our full review of smartphone and iPhone tripods to help make your choice).
Then, it will depend on how much manual control your camera offers. Some camera phones offer total manual control and shutter speeds as long as 30 seconds, while other camera phones may not.
You can try download a specialized app that allows you to control the exposure, or check out this guide to using Live Photos to create a long exposure with your phone.
If you want to shoot a long exposure during daytime on an iPhone or cell phone, all you need is a tiny square of ND filter gel sheet.
With a bit of gaff tape, cover the lens completely with the ND filter gel square, and be sure to avoid any light leaks!
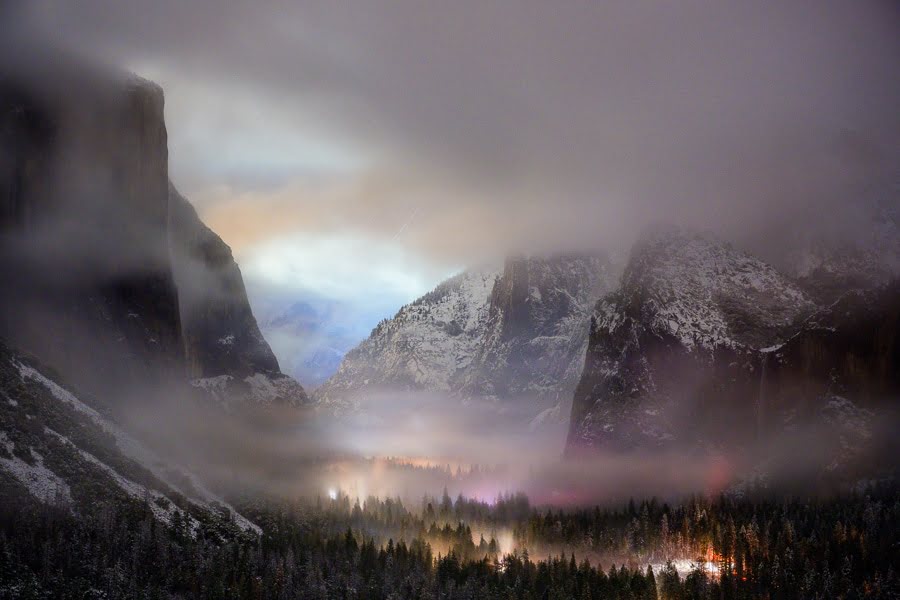
9. Creating Long Exposure Motion Blur in the Clouds
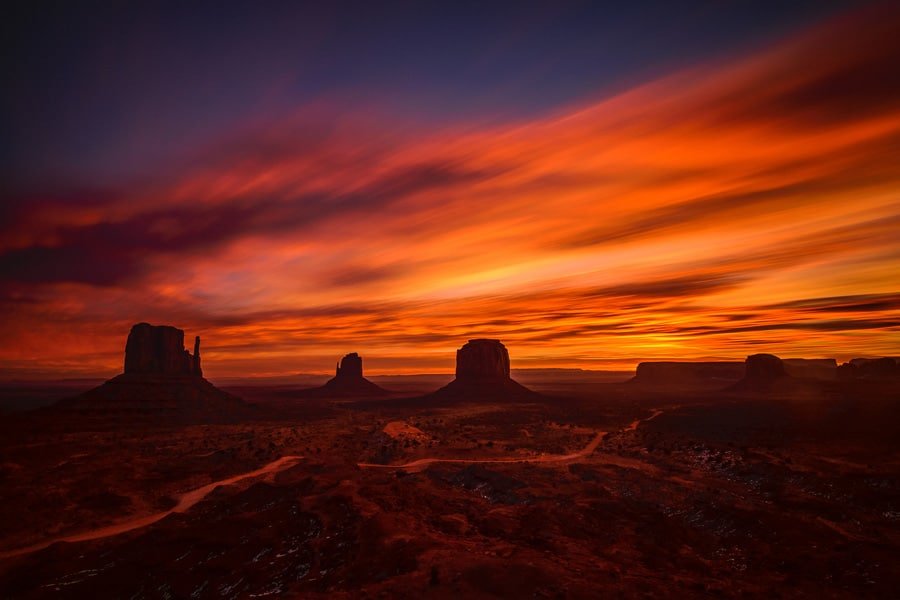
One of the coolest things to see in a photograph is the motion of the clouds. Unlike crashing waves or moving cars, clouds usually move so slowly that we can barely notice it.
However, with an exposure that's measured in minutes, you’ll see clouds appear in a truly incredible series of shapes and streaks that “move” across the sky.
- Ideal Shutter Speeds: 2-4+ minutes
- Ideal ND Filter: 5-9 stops for sunrise/sunset, 10-14 stops for bright sun
- Aperture: f/5.6-11
- ISO: 100-400
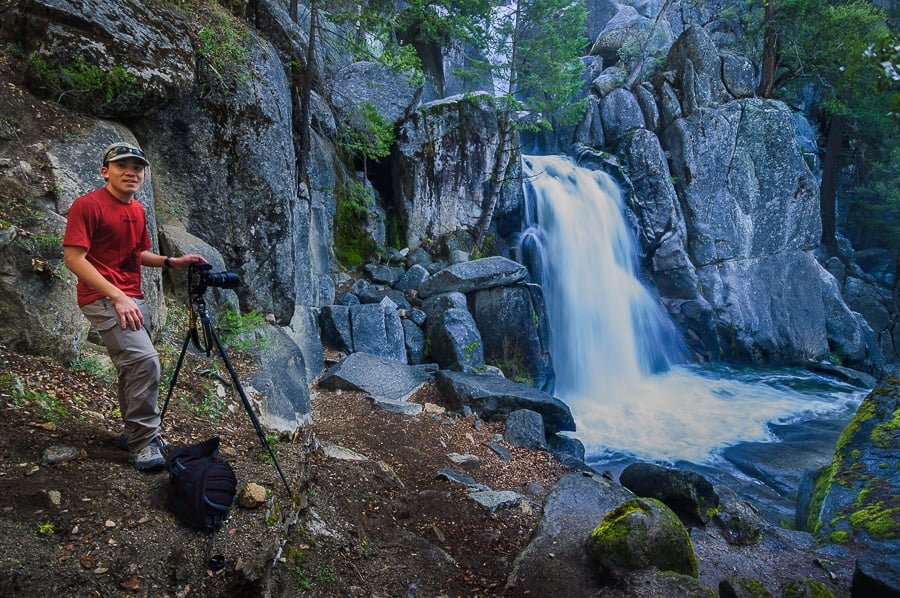
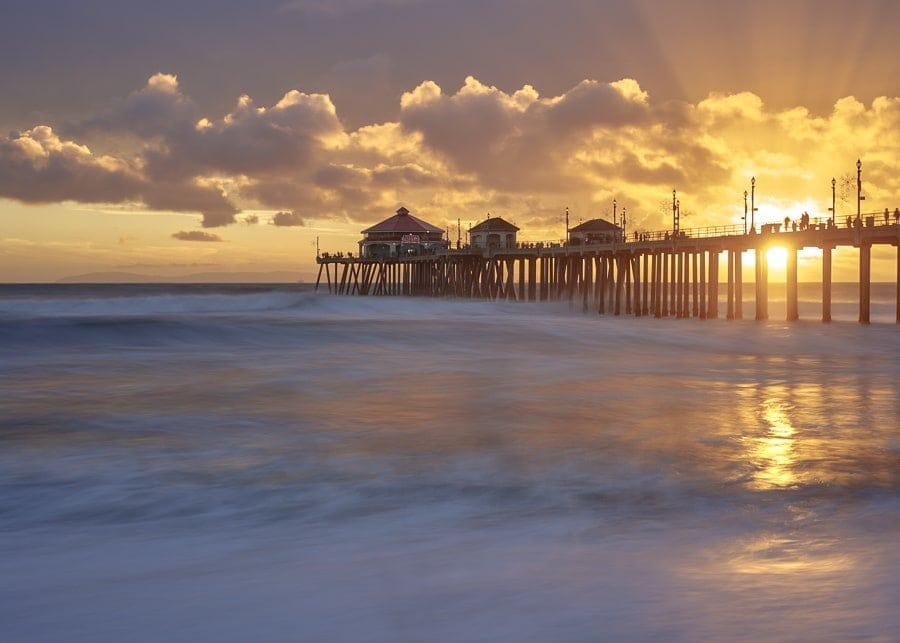
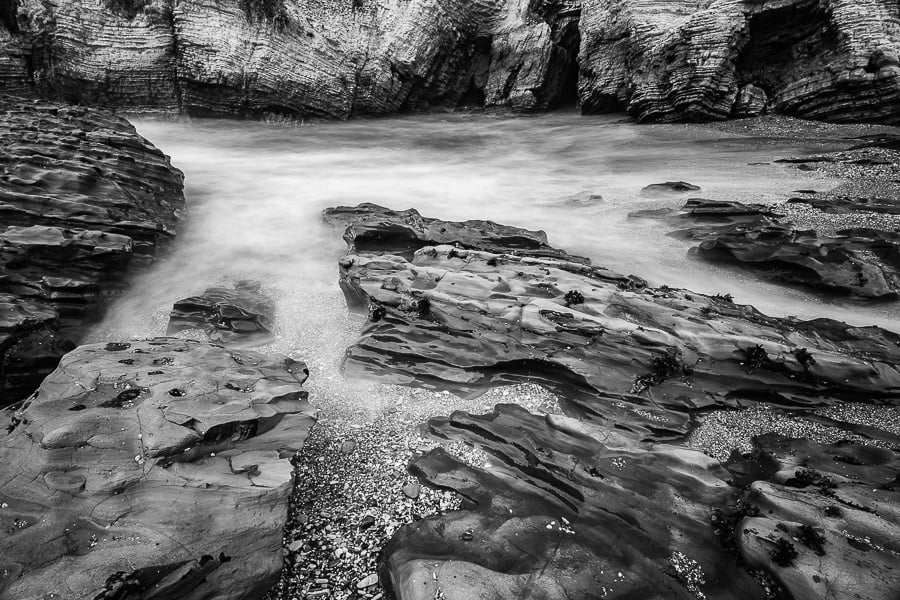
10. Creating Silky Smooth Water with a Long Exposure
The motion of water is one of the easiest things to capture in a long exposure. In fact, just after sunset or before sunrise, you may not even need a neutral density filter!
(See guide: Sunrise photography)
Water that is moving swiftly will begin to blur with a shutter speed that is just a few seconds long, and will turn silky smooth when you start to expose in minutes instead of seconds.
- Ideal Shutter Speeds: Anywhere from 1 sec to 30 sec, or longer!
- Ideal ND Filter: 3-5 stops for sunrise/sunset, 5-9 stops for bright sun
- Aperture: f/8-16
- ISO: Your lowest native setting (64, 100, or 200. Avoid “LO” ISOs to avoid clipping highlights)
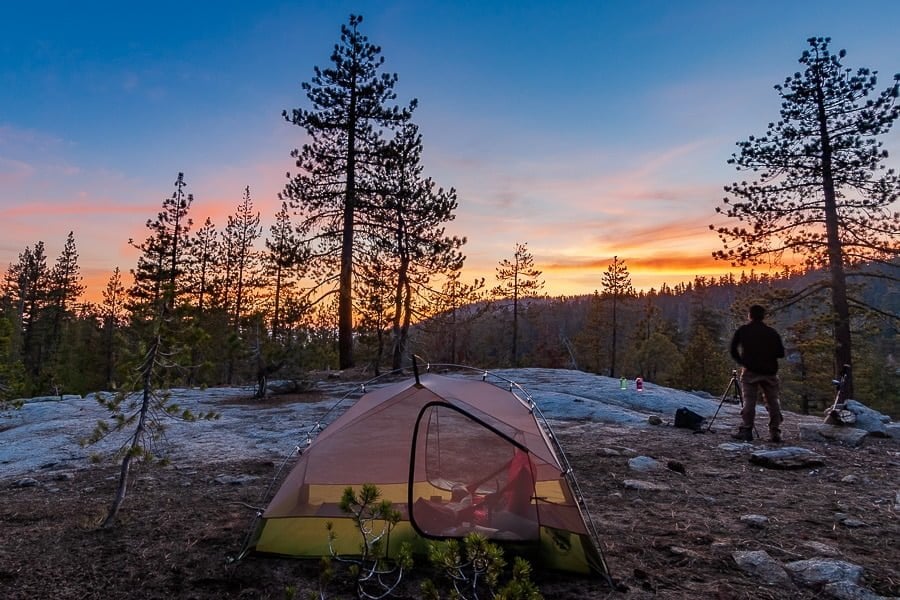
11. Long Exposure Motion with Human Subjects
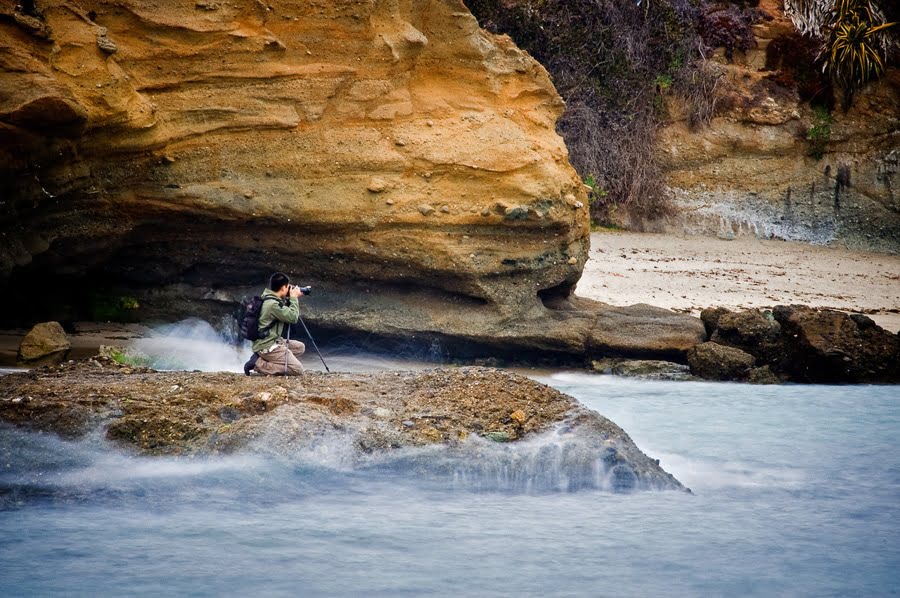
If a person holds very still, then you can create a single exposure which depicts some elements of blur, such as water, and some elements of perfect sharpness (the human subject).
It helps if the subject can brace themselves against something, or maintain a pose that allows them to hold very still for at least 2-4 seconds depending on how fast the other elements of motion are.
- Ideal Shutter Speeds: 1-5 sec
- Ideal ND Filter: 3-5 stops for sunrise/sunset, 5-9 stops for bright sun
- Aperture: f/4-8
- ISO: 100-400
12. Long Exposure Light Drawings
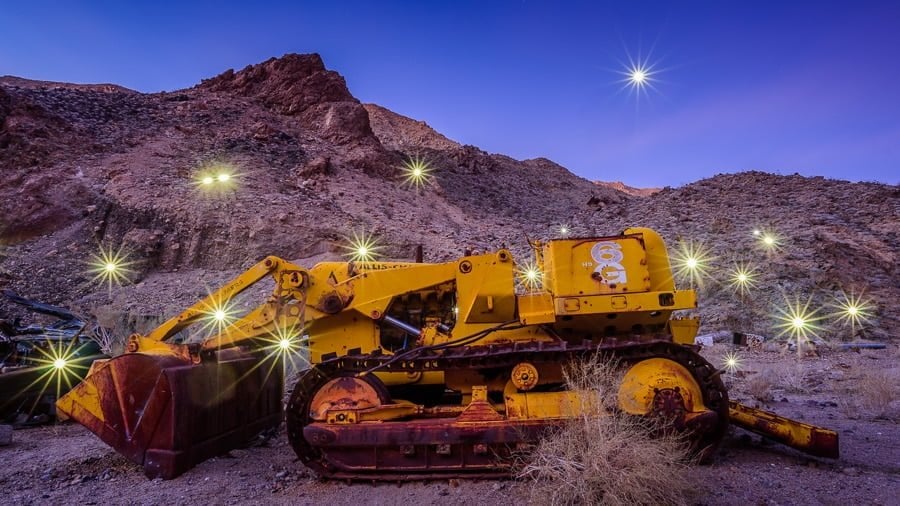
Long exposure light drawings are a lot of fun, and a creative way to “paint” in a photograph. Simply open the camera shutter, and then use a very bright light to “draw” in the air around your scene.
Then, close your shutter whenever the ambient light is well-exposed, too.
For the above image, I opened my shutter and then ran around and popped a flash (at medium-low power, probably 1/8 or 1/16) aimed right at the camera.
Because my aperture was set to f/11, each pop of the flash turned into a starburst! I was “invisible” to the camera because I never held still; I moved constantly the whole time.

The movement of vehicle traffic and other manmade objects can easily make for dramatic, interesting long exposure imagery, without any special techniques or tools besides your tripod.
Heck, at the right time of day, you could even make long exposure images like this using an iPhone or other cell phone, as long as it offers manual exposure control with slow shutter speeds!
13. Using a Cable Release for Long Exposures/Shutter Speeds

Cable releases come in a few different types. You can get a very basic wireless remote trigger that is compatible with most cameras.
However, depending on the camera and the trigger, it may be difficult or impossible to take exposures longer than 30 seconds using bulb mode.
It could require holding down the shutter release during the entire exposure. Your fingers might get cramped!
So, it’s usually best to get an actual cable release or interval timer that plugs into a port on your camera.
These physical triggers will usually have a lock-down mechanism for the shutter that lets you hold down the shutter release for as long as you want without having your finger on the button the whole time.
(We’ll talk about “bulb” mode soon!)
Lastly, for star trails, you may need to actually use the interval timer to capture multiple exposures, back-to-back, so that you can merge them together later in Photoshop.
You want to avoid having to capture a single 3-hour long exposure, because such long exposures will potentially introduce severe noise with most digital cameras.
Disclaimer: All recommendations are impartial and based on user experience, with no bias to the products or the brand. The products in this post may contain affiliate links.

Check out these 8 essential tools to help you succeed as a professional photographer.
Includes limited-time discounts.

Matthew Saville is an astro-landscape and adventure landscape photographer based in California.
2 Comments
Leave a Comment
👋 WELCOME TO SHOTKIT!
🔥 Popular NOW:

Thanks for the great tips
Great tips that I am going to implement from now on. Thanks for sharing