


Astrophotography for Beginners – How to Create Stunning Images of the Night Sky
Find out the best Astrophotography tips and ideas in this must-read guide! Learn how to get started or take your night sky shots to the next level.
Learn | Photography Guides | By Greg Cromie
Shotkit may earn a commission on affiliate links. Learn more.
Astrophotography began as the exclusive realm of astronomers with high-powered telescopes. Now, however, the right gear and knowledge can also lead you to capture stunning images of star clusters, planets and even deep-sky objects.
In this guide to astrophotography tips, we'll point you in the right direction to explore this other-worldly photography genre.
Let's take a look at the best ways to make the most of capturing the night sky, star clusters and even deep-sky objects as a photography pursuit.
What is Astrophotography?
There are an estimated 300 billion stars in the Milky Way galaxy alone, and yet we can only see around 5,000 of them with our naked eyes.
Plus there are likely hundreds of billions or even trillions of galaxies in the universe – that math starts to hurt your brain.
Astrophotography captures as many stars in an image as possible to show what our eyes can't see – to capture images of the universe and display the vastness and beauty of our existence.
It's a fun photography genre that's more involved than a simple point-and-shoot scenario.
What are the Types of Astrophotography?
There are many types of astrophotography that all use a similar approach and process. With our comprehensive guide to astrophotography tips, you can apply the same methods to any of these styles.
- Astrophotography – a broad term used for photographing stars and the objects in space. Astrophotography uses long exposure to optimize the number of stars in an image.
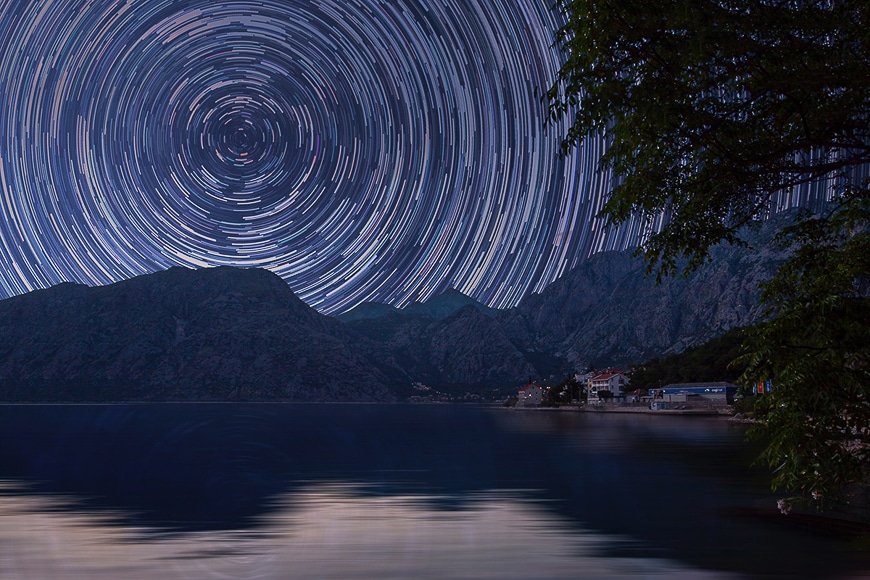
- Star Trails – star trails requires much longer exposures and the rotation of the earth. With your camera pointed in the right direction, the rotation of the earth results in the stars spinning around a central point. That rotation appears as bright circular lines of stars. For more information about star trail photography, check out our guide.
- Nightscape – another form of astrophotography that includes earth-based landscapes in the composition. You get the best of both worlds with a stunning night landscape and a mesmerizing starfield above. Check out our in-depth guide here.
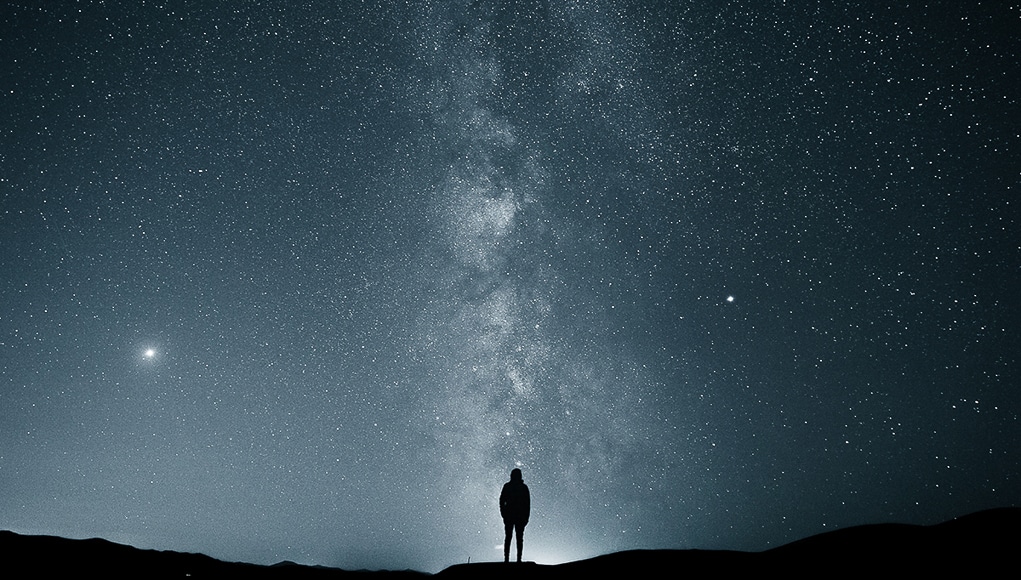
- Wide Angle Milky Way – the Milky Way is the galaxy that our solar system sits within. Photographing our nearest galactic neighbours has long held the fascination of photographers. You can capture incredible images of the galactic core as it spreads across the night sky. Check out our Milky Way guide right here.
- Deep Sky – this is astrophotography elevated to the level of astronomy. Attaching a camera to a telescope extends your range with deep-sky images of the universe including galaxies and celestials structures.
- Planetary – capturing clear images of the planets within our solar system is rewarding. It's especially the case during rare celestial events or alignment of planets that stretch into the deep sky.
- Moon Surface – our nearest celestial neighbour has held our fascination since the dawn of time. Capturing sharp and clear images of the surface of the moon is still prevalent. Check out our guide on how to shoot the moon for more tips.
What do I need for Astrophotography?

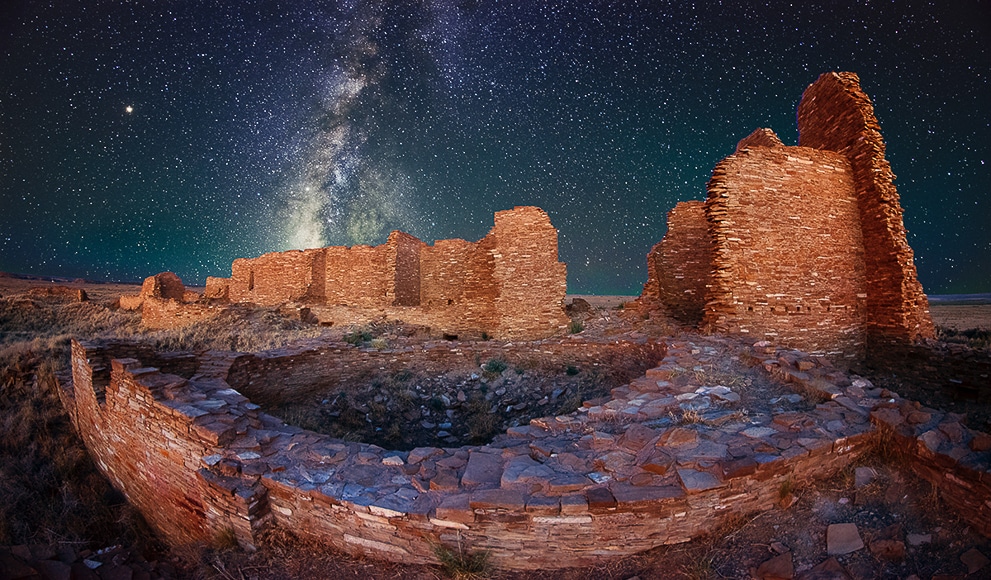
Credit: Ivan Pedretti
There's a lot more to astrophotography than heading outside to grab a star-shot with your phone. There's a lot of planning and necessary photography gear to make astrophotography successful.
Obviously, you need a camera and suitable lens that's capable of capturing clear astrophotography images. Plus, there are some essential bits of kit necessary for astrophotography.
Best Camera for Astrophotography
Ideally, you need a DSLR camera or mirrorless camera that has manual control settings. Having manual control over aperture, shutter speed, and ISO will create perfect night sky images.
When shooting long exposures, the camera sensor remains open for a long time to pull in all the available light and capture individual stars. Long exposure work, especially in mirrorless cameras, can cause the camera to get very hot – while this happens in a DSLR camera, it's not as extreme. A camera that overheats can sometimes stop working, and a hot sensor results in image degradation.
For astrophotography, it's more important to understand the camera's operating temperatures and how it handles overheating.
Also, choose a camera that handles low light extremely well and can capture light in the darkest of settings. Plus, at high ISO, it shouldn't generate excessive image noise.
With the camera pointed up at the night sky, it can be challenging to see through the viewfinder or see the LCD. With an articulating screen, you can tilt it upwards for a more comfortable viewing angle.
Some cameras are dedicated astrophotography variants of popular models – but they're expensive and hard to find.
For example, the Canon EOS Ra is purpose-built for astrophotography with a giant 30-megapixel full-frame sensor featuring an infrared-cutting filter and 30-times zoom on the viewfinder and LCD.
Alternatively, the Sony a7 III is less specialized and features a 24.2-megapixel full-frame sensor with high ISO capabilities up to 204,800. You can see our review of the Sony a7 III here.
Ideally, the camera will feature a time-lapse mode – as for calculating time-lapse duration, there are many online calculators and apps that can help with this.
Best Lens for Astrophotography
Choosing a fast wide-angle lens is a good starting point. A wide focal length prime is the preferred lens for astrophotography. Primes generally get sharper image output and wider apertures than zooms. However, a wide zoom with a focal length range of around 10-24mm will also work.
Being able to pull in a large stretch of the night sky with a lens with a wider focal length allows you to create stunning images. You'll be able to include ground elements in the frame and still capture a brilliant expanse of sky.
The wider the aperture of the lens, the better – the wider your aperture, the more light captured.
For deep-sky images, you would need to consider a telephoto prime or zoom – or even a telescope for pro-level outcomes.
(Check out this guide to the best lenses for astrophotography across all major brands.)
As you'll be mounting your camera and lens to a tripod, image stabilization is not required. Placing an image-stabilized lens on a tripod tends to cause instability and can result in image blur
Read our guide to travel tripods here to find some affordable, lightweight options.
Other Recommended Equipment for Astrophotography
- Tripod – Long exposure photography needs a stabilized camera to prevent any sign of camera shake in the final image. Using a sturdy tripod to support the total weight of your kit is best – an aluminium or carbon fibre one will make all the difference when hiking. Adjustable legs and centre column allows you to set the height to suit your comfort.
- Remote shutter release – Camera shake is the enemy of astrophotographers. Even with a tripod, you still need to touch the camera to open the shutter – this action alone can ruin an image. Using a wired or wireless remote shutter release (see guide) is the best tool for the job. Plus there are smartphone apps that pair with cameras via Bluetooth or Wifi.
- Batteries – Long exposure photography can quickly drain batteries – especially in mirrorless cameras. Astrophotography drains batteries faster, especially with exposures times of minutes and even hours. Pack all of your spare, fully charged batteries and a power bank if your camera charges off USB-C. Alternatively, fit a battery grip with two additional batteries installed.
- Memory Cards – Make sure you have high capacity and fast memory cards, so you don't run out of space partway through a shot.
- Software – free apps like StarStaX and Light Trails can help you merge together multiple images for stunning star trail shots.
8 Tips for Better Astrophotography
Two key players in astrophotography are patience and practice, so please learn each of these tips and work with them to find the best outcome for you.
1. The best camera settings for Astrophotography
The right gear for astrophotography is only as useful as the camera settings you dial in. That's why a camera with full manual control is the best for this genre.
One of the handiest astrophotography tips is to practice dialling in your camera settings until you can do them blindfolded.
Get to know your camera well enough so that when you're freezing on the top of a hill at 3 am, you can still dial in the camera settings without looking.
- Aperture
Having a lens with a fast aperture is ideal for astrophotography as it will allow you to open the aperture up wide.
A wide aperture means that the lens can accept more light that will then pass to the camera sensor. As you're shooting in the darkest of conditions, the more light that you can extract from the deep sky, the better.
Start with the widest aperture your lens has and then if you're finding that your images are showing too much brightness, dial it back to narrow the opening. The benefit of being flexible with the aperture is that some lenses are sharper at f/2.8 when compared to their f/1.8 outcomes.
See our guide to aperture here.
- ISO
The ISO setting on any camera is a function that controls the sensitivity of the available light captured by the sensor. (See our full guide to ISO here.)
Some cameras are exceptional at high ISOs and performing in low light conditions – such as the cameras we mentioned earlier. Others are not so good at limited light performance. Some cameras will boast high ISO performance, but when you view the images shot at these levels, there's considerable noise and image degradation.
If you're wondering what ISO should you use for astrophotography, set ISO 800 and dial-up to ISO 1600 to suit the lighting conditions. The darker the scene, the higher the ISO – review your images for excessive noise.
You can also use specialist software to reduce image noise – here are some of the best options.
- Shutter Speed

The best shutter speed for astrophotography is going to depend on several factors. As a result, my first piece of advice with shutter speed is to have patience and be sure to practice with a range of speeds.
The delicate balance that astrophotographers have to achieve also depends on if they want pin-point accurate star points or if they want star trails.
The earth is in constant rotation at 460 meters per second, so if you have too long an exposure, your stars will start to blur. Too short and all you get is a dark night sky.
I am a big fan of starting with 10 seconds and checking the results before doubling the exposure time for each new shot. Do this until you reach a point where you're happy with the sharpness of the stars.
If you want to obtain star trails, then you're going to have to use a much longer shutter speed – instead of seconds you're going to use minutes and potentially hours.
See our full guide to shutter speed here.
- Manual Focus
Using autofocus in astrophotography can be a very tricky thing, so you're far better using manual focus and dialling in the appropriate setting.
You need to focus your lens to infinity either via the mark on the lens barrel and then finely tune the focus on the largest star in the night sky. If your camera has live view, then use the focus assist feature that magnifies the picture to ensure crisp focus.
You can find more tips on focusing on stars and other astrophotography-related techniques on the social network/image hosting platform Astrobin.
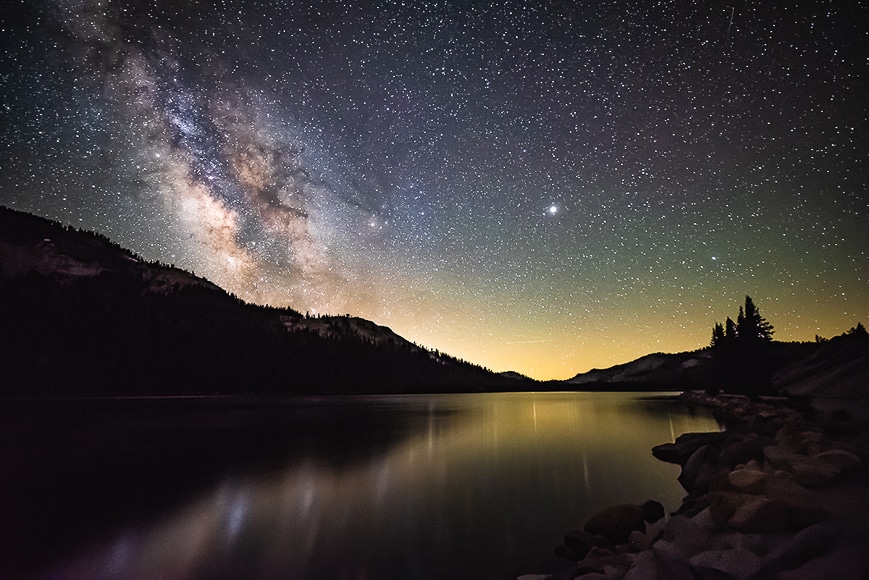
2. Look for dark skies and avoid light pollution
As counter-intuitive as it sounds, in astrophotography, you purposely avoid the light. You need to have dark skies that are clear and free of any ambient light impacting the scene. Plus, you need to shoot on a night where the moon is not visible at all.
With this genre, you need to avoid light pollution caused by street lights, traffic, houses, shopping centres and sports fields. It's why most astrophotography takes place in rural settings free of the constant glow of light from urban and city areas.
With a dark sky, you have a far better chance of capturing as much detail as possible from the galactic core. Those tell-tale signs of countless distant deep-sky objects are only possible with truly dark skies.
While you can use your common sense to find dark skies, there are also sites online such as this one that will help you locate your nearest dark sky location.
3. Check the weather forecast

As with any outdoor photography, it's critical to check the weather forecast of your intended shoot. With astrophotography, you need to view a detailed forecast that covers the full duration of your time.
In some rural areas, weather can change quickly, and the incoming clouds can impede your astrophotography success. Plus, knowing the weather forecast will help you to prepare for your comfort and the elements.
Also, look for the number of particulates in the atmosphere – a recent bushfire or intense smog cause particulates to hang in the air and reduce your dark sky visibility.
4. When to shoot Astrophotography
The stars are on show every single night – this hasn't changed for billions of years. And with clear and dark skies, you can photograph them and capture stunning images.
In some cases, the time of the year can play a massive part in your success. If you're a constellation hunter, these can be more or less visible at different times of the year.
Or, if you enjoy shooting planetary astrophotography, the alignment and visibility of certain planets are limited. For example, the Milky Way and galactic core are best viewed between March and October regardless of the hemisphere you're in.
The best captures of deep-sky objects are when the conditions and position are right. In essence, you can head out any time as long as the conditions are right plus there are sites and apps available to guide you on timing your next shot.
5. Use light painting on foreground subjects
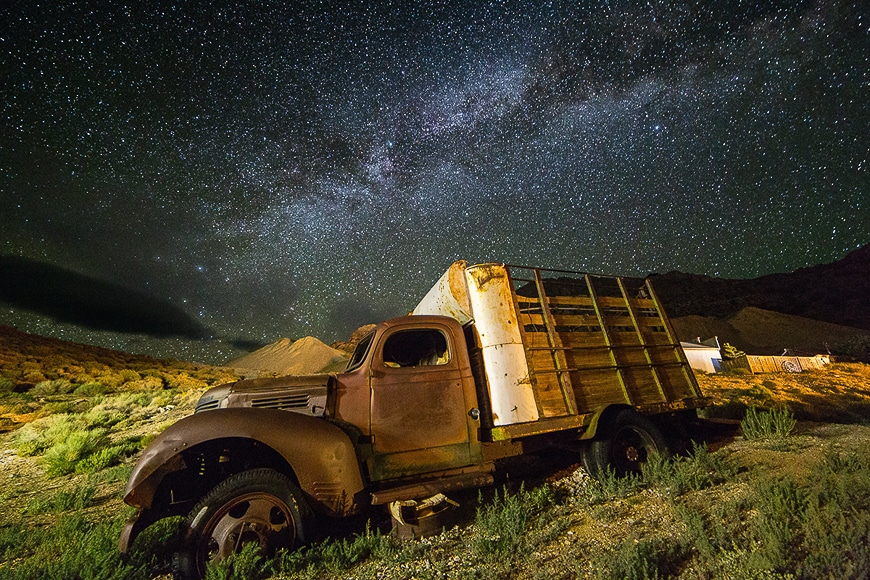
A fun experiment that will deliver fantastic astrophotography shots is to use light painting to add drama to your narrative.
If you're in a location and you intend to introduce foreground subjects, then you should be on the lookout for derelict barns, rusted farm machinery and even abandoned cars. With a long exposure, you'll have no trouble capturing the light emitted by the stars in the night sky.
But with no other light source, ground elements will struggle to be seen. A simple way to make these stand out is to use light painting.
As you have the camera shutter open for a long time, introduce a light source such as a torch and paint light across the surfaces of your subject. The camera sensor will capture each of those light brush strokes.
Suddenly, a dark and formless boulder appears bright and prominent.
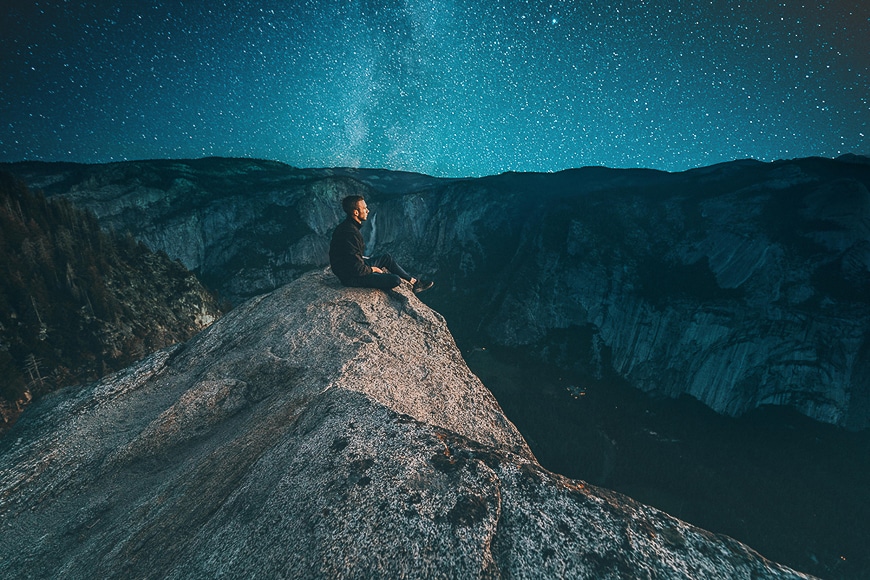
Another option is to introduce a person into the composition and have them point a high powered torch up at the night sky. The particles in the air will reflect the light and appear as a beam of light pointing up at the night sky.
Your subject will also appear brighter as they catch the residual light cast by the torch. You could again try this with the person holding a lantern or flaming branch for added drama.
You can check our full guide to light painting here.
6. Research your location and composition
Consider doing your research in the daylight as it's far easier to locate a vantage point when compared to scouting around in the pitch black.
As you'll be away from the lights and glow of urban areas, it's going to be very dark at night. By scouting during the day, you'll also locate points of interest that will make for great landscape backgrounds.
If you plan on light painting, you can identify trees, boulders, abandoned farm machinery and buildings to paint.
Find a way to mark the spot so you can locate it by torchlight when you return at night.
A crucial part of establishing your location and composition is to be aware of where in the night sky the galactic core will appear. Use an app and get your bearings so you can frame a composition including your landscape, background and foreground elements – there's no point setting up the perfect shot only to discover that the galactic core is behind you!
Introducing humans or even resting livestock in a field adds to your composition. Imagine an astrophotography image where the galactic core soars above a sandy desert with a single explorer standing atop a dune.
7. Pack essential personal gear
Aside from your camera and all your accessories, you're going to need a few necessary items for your comfort.
Astrophotography usually requires you to travel to the countryside to avoid light pollution and to have excellent landscape backgrounds in your images. It's not the same as heading into town for a little golden-hour street photography.
A great astrophotography tip is to use a reliable and comfortable camera backpack (see the best models here) – load only the gear you'll need to keep the weight down. Plus, a neatly packed bag makes it much easier to find items in the dark of night.
A backpack with external straps allows you to carry a tripod and strap on a ground blanket or folding stool – you definitely won't want to spend all night sitting on the cold ground! Also, pack some snacks and a good-sized bottle of water to keep up your energy and stay hydrated.
What you wear is just as important as what you pack. At night, in exposed areas with little to block the wind, you'll find the temperature drops considerably. Wear lots of layers, including thermal undergarments – layers allow you to add or remove clothing to manage your body temperature better.
Wear a pair of warm gloves, thick socks and a beanie as your extremities always feel the cold first.
Finally, it's worth investing in a quality headlamp as it'll keep your hands free to set up your gear, camera settings and work with ease. Also, pack a powerful torch to guide your way and for light painting.
8. Stay safe doing Astrophotography

Astrophotography tips should always include the need to look after your safety while out capturing the night sky.
Always let someone know where you're going, your travel plans and also take a fellow astrophotographer along with you – you'll have company during the long night, and you're safer in numbers.
In daylight, work out where to park your car and familiarise yourself with any hiking paths. Take note of treacherous terrains such as rubble, steep drops and fallen trees across the track.
Research local wildlife or predators and how they respond to humans in their environment. Take all the necessary precautions and have a little knowledge of how to handle yourself in such a situation.
Astrophotography FAQs
What is the 500 Rule in Astrophotography?
The 500 rule is a way to ensure that stars in a photo don't appear blurred. To apply it to your photography, start with the number 500, then divide it by the focal length at which you intend to shoot – this will give you the shutter speed in seconds.
e.g. if you're using 12mm lens: 500/12=41 (ish). So, 41 seconds could be an acceptable shutter speed.
You should experiment with the 500 rule since depending on the size of your final image, stars may still appear slightly blurred when zoomed in. It's often preferable to choose a slightly faster shutter speed, just to be safe.
How do you focus on stars?
First, set your lens to focus at infinity if you're able to. If not, don't worry – just follow the steps below.
Using live view, zoom in to 100% and find a bright star in your image, and then adjust your lens to set focus manually. (If the star is particularly bright, you may even be able to use autofocus, but be sure to take some test shots first, zooming in to 100% to check what's in sharp focus.
Final Words
There's a lot of fun and reward to be found in astrophotography.
It's a photography genre that everyone should attempt at least once. The acquired photography skills and practice alone will make them better at their art.
If you have experience with astrophotography or have questions on the topic, leave them below and join in the educational process.

Check out these 8 essential tools to help you succeed as a professional photographer.
Includes limited-time discounts.

I’m a Melbourne-based street photographer and blogger. I love to travel to Japan to photograph and document its dynamic people and culture.
2 Comments
Leave a Comment
👋 WELCOME TO SHOTKIT!
🔥 Popular NOW:

Hello
Great article about astrophotography
I have a Sony A6000 and i am going to
shoot the Geminid meteor shower tonight
do you have any great camera setting advice?
Thank You
Thanks for checking out my article. If you have any questions or want to join the conversation then please comment below and I will get right back to you. Cheers. G