


Guide to Star Trails Photography
Create awe-inspiring star trail images with this complete and up-to-date guide! Learn tips, gear, settings, and the 2 best methods for amazing images.
Learn | Photography Guides | By Greg Cromie
Shotkit may earn a commission on affiliate links. Learn more.
In this guide to star trails photography, we'll provide a breakdown of everything you need to know about this otherworldly genre.
Star trail images create awe and wonder in the viewer because they highlight just how vast our universe is. Getting them right takes practice, which makes this a rewarding pursuit for any photographer.
To help you master the art of capturing star trails, we'll provide you with the necessary knowledge, terminology, gear and settings. So let's get started.
What is Star Trail Photography?
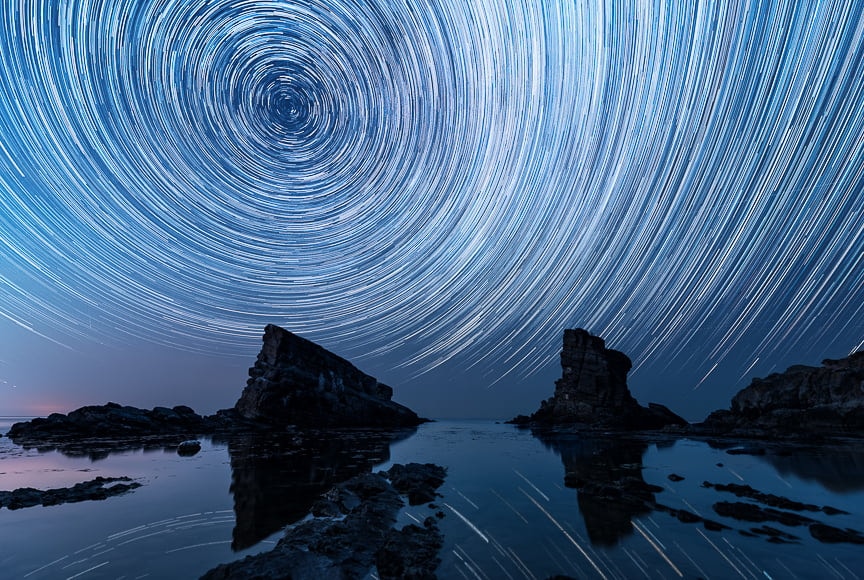
Star trail photography is a form of astrophotography that involves capturing a picture of a clear night sky with thousands of lines of stars streaking across the view.
The stars are not moving, but rather the Earth is rotating on its axis. Because your camera is on a fixed point grounded to the Earth, the stars appear to be in motion.
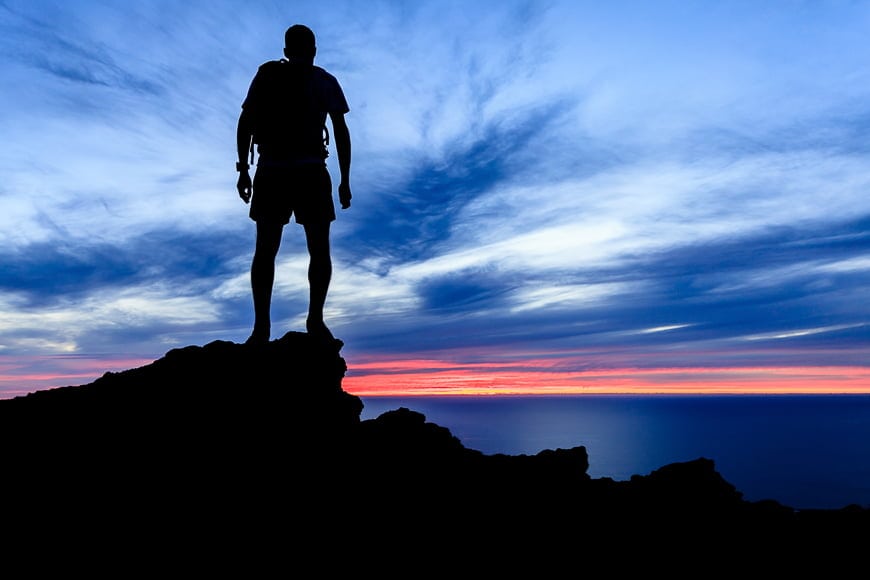
Star trail images usually feature a foreground subject such as a tree, derelict building or monolithic rock. This creates a visual anchor for the viewer and gives them the sense of being grounded while the stars swirl overhead.
There are two main effects you can get with star trail photography.
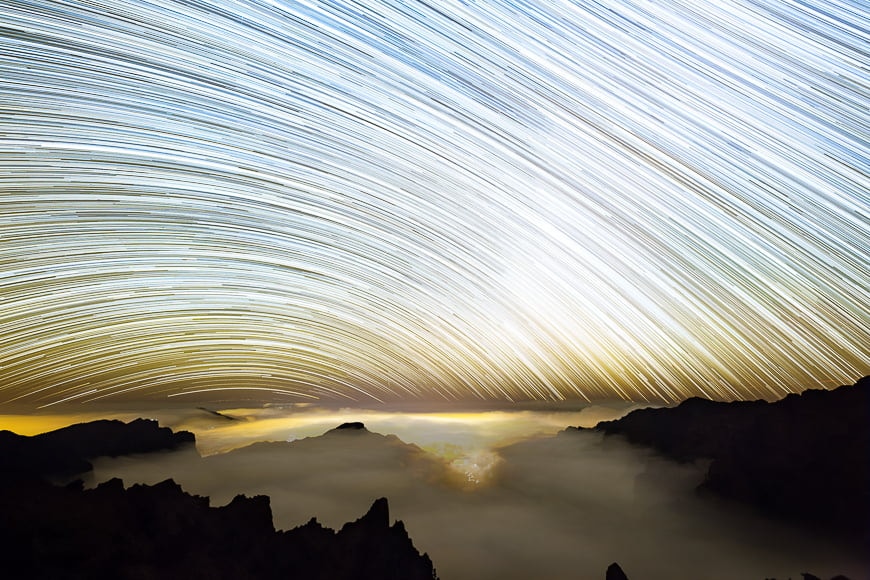
The first is star lines, which are achieved by pointing your lens in an east or west direction to capture straight star trails. As the earth rotates, your camera will move with the earth in a straight line.
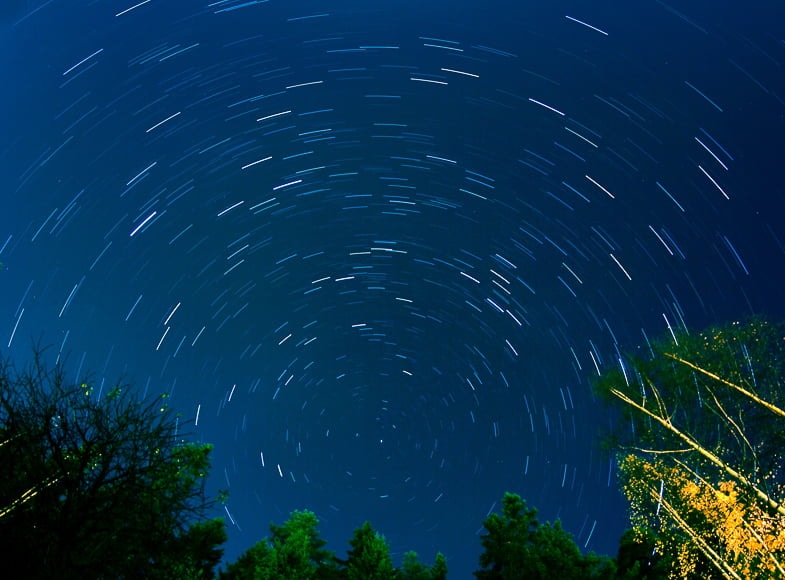
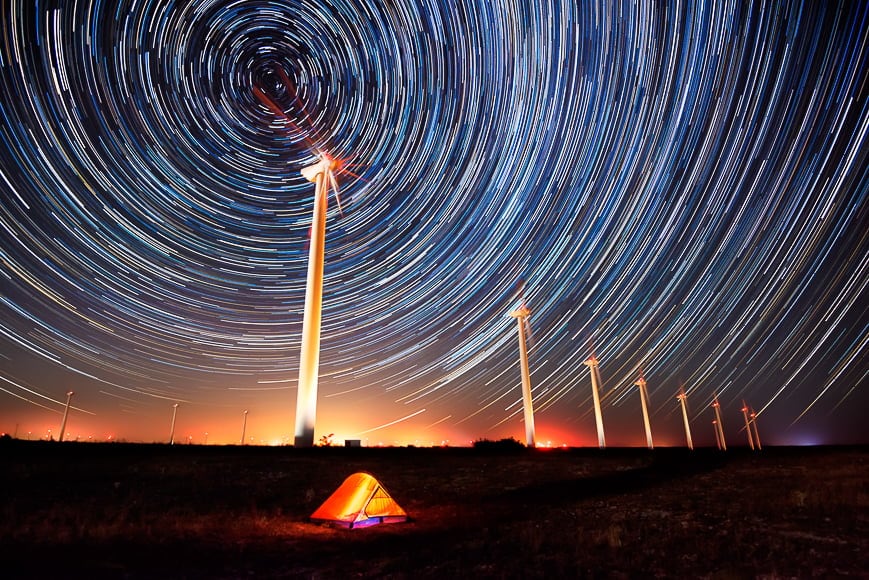
Star circles photography, meanwhile, captures images with the celestial bodies appearing to move in an arc or even in a complete circle. It's trickier as you have to point your lens at the celestial pole in your hemisphere.
With a sense of radial balance and something not visible with the naked eye (without a camera and the techniques discussed here), this form of photography is incredibly alluring.
Preparing for Star Trails Photography
There's a lot of prep work involved in star trails photography before you even pick up your camera.
Understanding what you're looking for, where to look and which direction to shoot in takes a little know-how.
Fortunately, we've prepared the necessary steps to make the process simpler.
Step 1: Locate Your Point Of Reference
If shooting a circular star trail, then the first step is to locate your point of reference.
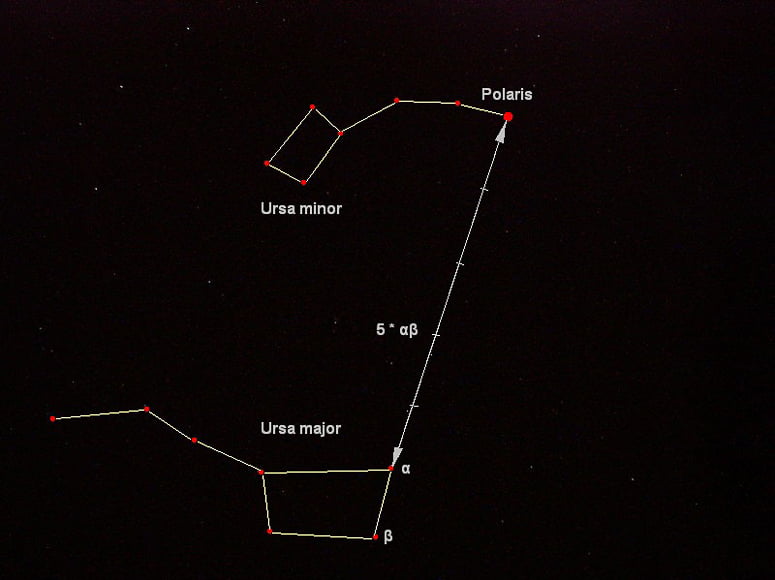
The best reference point for star trails is the stars themselves. If in the northern hemisphere, locate the North Celestial Pole, which is the North Star or Polaris – it's in direct alignment with the earth's axis.
When pointing your camera at the North Star, the earth's rotation spins the other stars around that point.

For those in the Sothern Hemisphere, it's a little more complicated. Sigma Octantis (also known as Polaris Australis) is a tricky star to spot, so first locate the Southern Cross and then draw a line along its top and bottom stars.
Next, locate The Pointers (Alpha Centauri and Beta Centauri) and draw a line between these two stars. Halfway along that line, create a perpendicular line running towards the one from the Southern Cross.
Where these two lines meet is where you'll find Sigma Octantis or the South Celestial Pole.
Sigma Octantis lines up with the earth's axis and so pointing your camera at it results in the stars spinning in an arc.
Further on, we'll highlight some apps that can help you with mapping and locating stars.
Step 2: Avoid The Moon
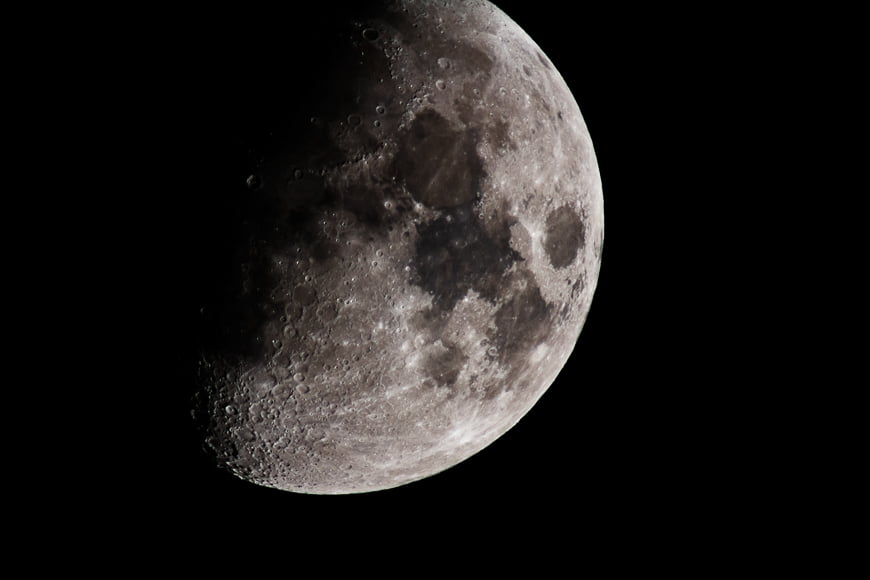
In the case of star trails, we're going to avoid the moon at all costs.
Photographing star trails requires a dark sky and the moon's reflected light makes a dark sky impossible.
As many of the stars you'll capture in your image are almost invisible to the eye, you need as much darkness as possible; the moon will make those stars very faint.
To avoid the moon, you need to do a little research on its phases. A web search provides all the moon phase information relevant to your location – this includes future forecasts also.
The moon phase follows this path:
New Moon > Waxing Crescent > First Quarter > Waxing Gibbous > Full Moon > Waning Gibbous > Third Quarter > Waning Crescent.
When shooting star trails, you want to make sure you have as little moon visible as possible. To make it simpler, anything around the Waning Crescent > New Moon > Waxing Crescent is best.
See also: why is it hard to photograph the moon?
Step 3: Seek Dark Skies

City lights and traffic cause light pollution, which can interfere with capturing clear star trail shots.
One of the biggest challenges of star trails photography is light pollution. In cities and urban areas, it's a byproduct of the light cast by cars, street lights, houses and sporting fields.
If you ever drive to the country at night and look back at the city, you'll notice a glow hanging over it – that's light pollution.
The more light pollution, the brighter the sky will be. Moving away from it, the skies will be darker – making them perfect for capturing star trails.
Driving further out into rural and country areas thus provides the best locations.
Step 4: Check The Weather
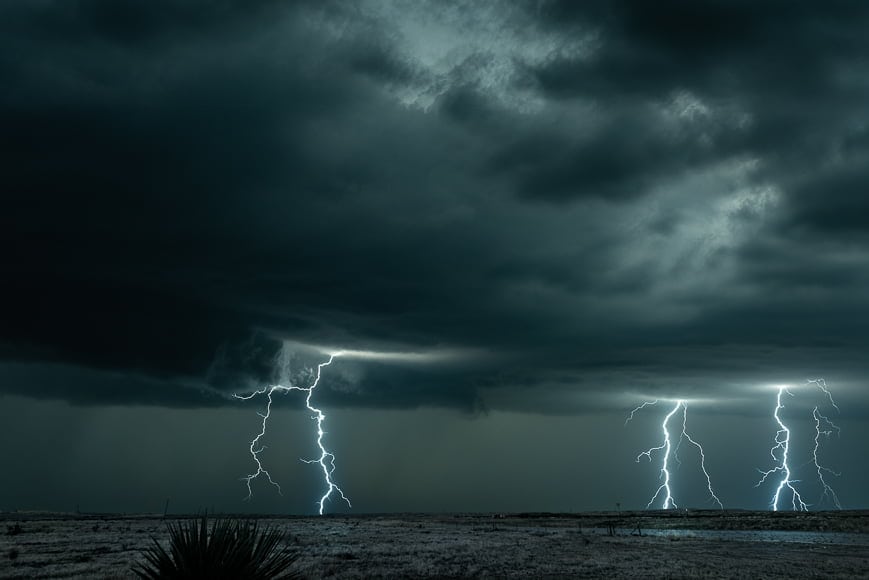
Checking the weather is a necessary habit for photographers. You need to know the conditions of your travel route and intended location so you can prepare accordingly.
To shoot perfect star trails, you must have a clear night sky free of clouds.
Checking the news forecast provides base information. I suggest you always go a step further and check the government weather bureau for specific details.
You're likely to be on location for several hours, so look out for changing weather patterns throughout the night.
Step 5: Select Your Location

Before you take a single exposure, find a location with an interesting foreground subject.
As mentioned above, to get the best quality star trail images you need a clear night sky free of light pollution.
Ideally, head out into the country to a safe location that's away from the main roads. You're going to be at that location for several hours so it must be a secure site – think about wildlife, exposure to the elements and not falling off a cliff.
Consider the composition you wish to build for your star trails photography. Having a fixed subject in the frame helps to ground the image and allow the stars to spiral above.
Using a foreground element in this way is a key element of night landscape photography, giving the viewer a sense of scale and ‘anchoring' their viewpoint.
Country locations are best for this as you can use natural subjects such as trees, large boulders, a lake or even a distant mountain range. Plus, featuring a rusted farm tractor or a derelict barn can add a narrative to your image.
Step 6: Use An App
Thanks to the advancement of mobile technology, you can effortlessly achieve all of the above steps through a range of apps.
Everything from star guides and weather forecasts to moon phases and maps are now in the palm of your hand.
Here are a few of the apps we recommend for star trail photography:
- Dark Sky Finder – This app displays a light pollution map for your immediate area. It helps you find the best location for dark skies.
- Deluxe Moon – This app provides you with detailed information about the location and phase of the moon based on your site.
- The Photographer's Ephemeris – This is a popular and well-known app designed for tracking the Milky Way and galactic core.
- Go Sky Watch – This app allows you to locate and track specific stars and constellations – ideal for finding the celestial pole.
- PhotoPills – This is a comprehensive app for all your astrophotography needs, including tracking stars and even determining ideal camera settings.
- StarStaX – This free Windows and Mac app allows you to merge multiple images – handy for creating those amazing star trails photos you see on Instagram!
Check out our Astrobin review for another handy online resource which is a goldmine of information for astrophotographers.
What Gear Do I Need for Star Trails Photography?
An essential part of the preparation checklist for star trails photography is to have the right gear. Having suitable gear for this type of astrophotography is vital and goes a long way to ensuring your success.
- Camera – You'll need one with Bulb Mode. Bulb keeps the shutter open for as long as you want and only closes upon triggering the shutter button again. Your camera must also have Manual Mode, so you can manually adjust the relevant settings rather than letting the camera do it for you. I also recommend you go for a body with a high-resolution sensor and good low-light performance. See also, what is the best ISO for night photography.
- Lens – The best lens is one with a wide-angle focal length. It can be a prime (fixed focal length) or a zoom (variable focal length). Image Stabilisation is not essential as you'll have your gear mounted to a tripod. With a wide-angle lens, you capture a more extensive section of the sky plus any ground elements you wish to include.
- Tripod – This is essential for mounting your camera and keeping it entirely stable for the duration of the shoot. Camera shake will ruin hours of work. Use a collapsable tripod to set the comfortable working height.
- Remote Shutter Release – A remote release triggers the shutter button without you having to touch it. Remote shutter releases vary – some are wired and others are wireless using InfraRed or Bluetooth. Some cameras pair with mobile apps that act as remote shutter releases.
- Intervalometer – Modern cameras feature a built-in intervalometer which allows you to set the exposure duration and intervals. This allows you to capture multiple images of the star trails without touching the camera. For older cameras, attach an intervalometer device that performs the same function. Here's how to use an intervalometer.
- Batteries – Shooting star trails drains your battery quickly, as you'll shoot for hours. Make sure your batteries are fully charged and pack as many as you own. Use a battery grip that holds multiple batteries to optimise your camera performance.
- Memory Cards – As with batteries, make sure your memory cards are fresh and empty. Use cards with high memory capacity and fast write speeds. Shooting long exposures puts the camera buffer to the test – fast cards minimise image management delays.
- Camera Bag – Having a suitable bag will make all the difference as you'll likely need to hike to an appropriate location. A comfortable and supportive camera backpack that carries a tripod is a must. Your bag also needs great organisation so you can find gear in the dark.
- Other Essential Gear – Aside from your camera kit, these next items maximise your experience and avoid disaster. If you're in a cold environment, dress for the conditions like an arctic explorer – wear layers of clothing including thermal undergarments. Hands and feet are most affected by the cold so layer socks, gloves and wear boots to suit the terrain. Wear a headlamp and pack a second torch to find gear in the dark and ensure you don't fall off that cliff. Finally, pack snacks, water and some necessary first aid gear.
What Camera Settings Should I Use for Star Trails Photography?

Photographing star trails or any other form of astrophotography is a lot different to shooting anything else. During the day, you have a lot of light to aid in composing your image, gauging exposure, ISO and aperture.
But when it comes to shooting star trails, it's a whole new ball-game. Here's a brief run down of the camera settings you should be adjusting.
-
Aperture
The lens aperture is either dialled-in directly via an aperture ring, or within the menu functions of the camera. The aperture or f-stop dictates how wide or narrow the lens diaphragm opens for the shot.
An aperture such as f/1.8 or f/2 creates a wide opening that allows more light in through the lens to hit the camera sensor. A wide aperture creates a shallow depth of field, meaning that subjects close to the camera are in focus while those distant are blurry.
An aperture such as f/11 or f/16 results in a narrow opening that limits the amount of light hitting the camera sensor. A narrow aperture creates a much broader depth of field where all elements are in crisp focus.
For star trails photography, you want to make sure you set the aperture as wide as possible. Start with the widest your lens will allow and always take a few test shots to check for image sharpness, especially in the corners.
This way, your image sensor is exposed to as much available light as possible.
-
Shutter Speed
The shutter speed controls how long the physical shutter opens to expose the image sensor (also known as exposure time). A short exposure or fast shutter speed only exposes the sensor for a fraction of a second.
In daytime settings, short exposure time is necessary; otherwise, you'll capture too much light.
However, in nighttime photography, you need a longer exposure time to allow more of the available light to hit the sensor. The darker the settings, the longer the exposure time needed.
-
Bulb Mode
Some cameras only allow a shutter speed of up to 30 seconds, which is where Bulb Mode comes in.
By selecting the Bulb Mode, you open the camera shutter and have it remain open until you trigger the shutter button once again. This way, you can have the shutter exposed for as long as you like.
Some cameras allow you to have a Bulb Mode with a far slower shutter speed so that the camera will automatically close the shutter at the end of a set period of time.
Always start by using the standard camera shutter speed settings and examine the outcomes. Since this probably won't allow for a long enough exposure time, switch over to Bulb Mode once you're feeling more confident.
-
ISO Settings
The ISO function controls the sensitivity of the light hitting the camera sensor.
With a low ISO, the camera is not making any special effort to enhance the light level. During daytime photography, an ISO of between 200 and 800 is standard.
In nighttime photography, you elevate your ISO to higher settings such as 3200 or 6400 to increase the light.
The downside is that higher ISO settings result in exposure noise on your image. Noise appears as groupings of pixels that ruin the integrity of the image detail.
While the temptation in star trails photography is to crank up ISO to compensate for the dark conditions, the opposite is required.
Keeping the ISO low ensures your images are free of noise, and due to the longer exposure times, more light will be captured by the image sensor – making the ISO function less critical.
-
White Balance
The White Balance setting controls the colour tone of the overall image.
Depending on the lighting conditions, some images may appear with a warmer or colder hue. In other words, warmer shades appear slightly red, yellow or orange while colder hues appear blue or green.
When shooting star trails, you can get unwanted colour hues due to the nature of long exposure work. Set your white balance to the ‘tungsten' setting as this delivers a more blue tint to your star trail images.
Don't stress if you take a long exposure shot and the white balance is off; you'll correct most white balance issues in editing software.
What should white balance be set at? See our guide.
-
RAW Mode
The reason why we recommended using high capacity and fast memory cards is due to shooting in RAW mode. RAW is an image file format that you set in-camera that creates larger files.
These files hold all of the data captured by the image sensor, as opposed to JPEG that only takes a surface-level skim of the information.
RAW files contain a vast amount of data that will be of benefit during the editing process. With RAW files, you have greater control of correcting white balance, recovering highlights and pulling detail out of deep shadows.
-
Inbuilt Noise Reduction
As mentioned, high ISO values cause image noise. Noise can also happen a result of the heat generated by the image sensor during long exposures.
The sensor cannot cope with excessive heat and so cannot accurately capture data. This results in noise and dead pixels appearing in your image.
To deal with high ISO and noise, you should turn off the noise reduction functions within your camera's menu.
Most cameras come with both a High ISO Noise Reduction and a Long Exposure Noise Reduction function. These can actually cause a loss of detail in your stars.
Long Exposure Noise Reduction also takes two exposures instead of a single exposure (one “live” and one “dark”) meaning that using this feature doubles your shooting time.
-
Histogram
The camera histogram displays a graph indicating the pixel density of the high and low exposure areas of the frame.
With it, you can identify spikes in highlights and shadows that appear in your composition. Keep in mind that with star trail photography, your histogram is going to show a lot of dark pixels.
The histogram in photography aids you in identifying the correct exposure of the ground elements included in your composition.
-
Metering
Camera metering is an automated function that determines how the whole image will be exposed.
Cameras have several metering modes, but in star trail photography, the best option is centre-weighted or average.
Centre-weighted metering focuses on the centre of the frame to decide how to expose the image. It reads the light in the middle of the frame but ignores the conditions in the corners.
This way, you get an even level of exposure during your star trails photography.
How to Focus your Lens to Photograph Star Trails
Despite your expensive lens having super-fast autofocus, it's next to useless when it comes to star trail photography.
Remember that you're shooting in near-absolute darkness – for autofocus to work it needs to detect a subject through phase or contrast detection. Without light, it cannot identify what to focus on and will always hunt.
Plus, should you achieve autofocus, the camera will continue to evaluate if it's locked on and could lose focus at any time.
The solution to this dilemma is to switch your camera to manual focus. Here are some simple steps to nailing the focus for star trail photography every time:
- First and foremost, switch the lens or camera body to manual focus.
- All lenses feature an infinity point – turn the focus ring to that point.
- Set the shutter speed to around 30 seconds, aperture as wide as possible, and ISO to 1600.
- Take a test shot.
- Use the LCD to zoom in on the image and check the sharpness of the stars.
- If they have clean, sharp edges with no fringing, you're ready to go.
- If they're slightly blurry or have evident fringing, the focus is not perfect.
- Make tiny adjustments to the focus ring and then repeat the above, taking test shots each time until you get one that has perfect focus with sharp-edged stars.
How Do You Photograph Star Trails? (2 Methods)
Shooting star trails is a unique photography experience, and as a result, there are some unique methods involved.
Let's take a closer look at the two best methods for capturing stunning star trails photos.
1. Stacking Photos For Star Trails
The first method is to use a process known as stacking.
When stacking, you take multiple images of the stars with much shorter exposure or shutter speeds. You then take the collection of photos and stack them together in your editing software to create a single image.
Each image is a portion of the star trail and stacking them together is like stacking transparent overlays to create a single image.
With this method, the risk of your camera sensor overheating and causing noise is reduced. You'll need an intervalometer function or device to ‘set and forget' multiple shots with the same duration and interval.
Step 1: Position Your Camera
Set your camera on the tripod with the desired composition in place. Set the lens focus to manual and acquire sharp focus.
Step 2: Dial-In Settings
Using manual settings, adjust the aperture to the widest it can go and set your ISO to around 800.
Step 3: Set Exposure Time
The key to stacking is to have shorter exposure times repeated with a brief interval between each shot. Set the shutter speed to 30 seconds and set the intervalometer to capture 100 images with an interval of 1 second between each.
Step 4: Check The Results
Once you have completed your first sequence of shots, check the image sharpness and brightness. Make the necessary adjustment and repeat as many times as you can – the more attempts you make, the more you have to work with in post-processing.
2. Using a Long Exposure For Star Trails
Where stacking photos requires a large volume of images, using a long exposure for star trails requires only a single image with a more prolonged exposure.
A single long exposure is far less complicated than stacking and far easier to edit later on. But it's not without its risks – the biggest being the introduction of excessive noise due to the sensor heating up.
It can be tricky to determine the right exposure time for the conditions you're facing. Let's take a look at the basics, and with trial and error, you're sure to figure out the rest – that's half the fun.
Step 1: Position Your Camera
Set your camera on the tripod with the desired composition in place. Set the lens to manual focus and acquire sharp focus.
Step 2: Dial-In Settings
Using manual settings, adjust the aperture to the widest it can go and set your ISO to 200.
Step 3: Set Exposure Time
If your camera will not allow shutter speeds longer than a few minutes, use Bulb Mode. Set the bulb timer or your phone timer to 30 minutes and trigger the shutter.
Step 4: Check The Results
Once you have completed your first shot, check the image sharpness and brightness. Make the necessary adjustment and repeat as many times as you can – the more attempts you make, the more you have to work with during the editing process.
StarTrails FAQ
Why are star trails circular?
With the camera pointed at the northern or southern celestial pole and the earth rotating on its axis, the stars appear to circle the central focal point. It's the earth that's moving and not the stars.
How many photos do I need for star trails?
For the long exposure method, you only need one extended exposure photo. However, for the stacking method, you need around 100 short exposure photos.
What is the 500 rule in photography?
The 500 rule is a simple equation used to determine the shutter speed or length of exposure to avoid star trails. You use this rule if you want to capture star points as opposed to star trails.
What lens is best for star photography?
The best lens for star photography is a wide-angle lens with a wide maximum aperture. A lens with a focal range of between 10mm and 24mm and a maximum aperture of around f/2 is ideal.
Night Sky Photography | Final Words
Night sky and star trails photography takes a lot of preparation and even more trial and error to master. But in time you'll discover that the rewards of your time and effort are well worth it.
Plus, your star trail images will both amaze and delight anyone that gazes upon them.
Now check out our article on how to take dramatic pictures of the sky.

Check out these 8 essential tools to help you succeed as a professional photographer.
Includes limited-time discounts.

I’m a Melbourne-based street photographer and blogger. I love to travel to Japan to photograph and document its dynamic people and culture.
2 Comments
Leave a Comment

👋 WELCOME TO SHOTKIT!
🔥 Popular NOW:

Thanks for checking out my article. Please leave any comments or questions below and I will get back to you. Cheers. G
Thank you Greg for this timely post! I am wanting to try my hand at astrophotography this weekend and have been looking for good resources to learn from. Two questions for you if you don’t mind…
1) One image I am wanting to take is slightly complicated. My camera will be facing west and my foreground will be somewhat bright. How would I go about correctly shooting this scene? Take a few pictures of the foreground first to get the correct exposure then move on the the stars and stack later in post?
2) Which program do you use to stack your images? My understanding is there are better options than PS for these situations.
Thanks again!
Scotty S.