


How to use Adaptive Presets in Lightroom
The weakness of regular Lightroom presets has always been their static nature. Now, Adaptive Presets change automatically based on the contents of your photo.
Lightroom | Software | By Ana Mireles
Shotkit may earn a commission on affiliate links. Learn more.
Adaptive Presers were first introduced to Lightroom Classic back in June 2022.
Since then, they've been improved with new masking updates to further enhance their functionality.
Popular course reveals the simple tricks to getting incredible results with Lightroom in record time. Give Your Photos The Look They Deserve!
![]()
They're a powerful tool that I really encourage you to try.
In this article, I'll explain how to use adaptive presets in Lightroom.
This will save you lots of time in your regular workflow, so keep reading!
What are Lightroom Adaptive Presets?
Adaptive Presets are one of the latest additions to Lightroom Classic. They are powered by AI, and they will adapt to each image – hence the name.
Using regular presets, the same masks would be applied every time you used them. This means you would need to manually adjust the mask to fit the new photo.
Instead, adaptive filters will automatically detect the elements in the picture and adjust the mask to fit it. If you have a Lightroom update that contains adaptive presets, you'll find them on the preset menu above the regular presets.
Many people don't know that Adaptive Presets not just available in Lightroom Classic. You can also find them in other Lightroom versions and even in Photoshop via Adobe Camera Raw.
If you're not working with a raw file, Photoshop won't launch Adobe Camera Raw automatically, but you can use the Camera Raw filter.
Note also the difference between Lightroom profiles and presets.
Adaptive Portrait

These new adaptive presets select individual portrait attributes such as lips, teeth, iris, pupil, etc. This way, you can choose one that applies to the entire portrait or one for local adjustments.
If you choose one for the overall portrait, it will still create individual masks for each facial feature. So, you'll be able to make a few tweaks in each one and make it just how you like it.
For example, using the glamour portrait, adaptive portraits creates seven different masks. So, you can go in and further whiten teeth, darken eyebrows, etc.
You can use them on single-person portraits or ones with more than one person.
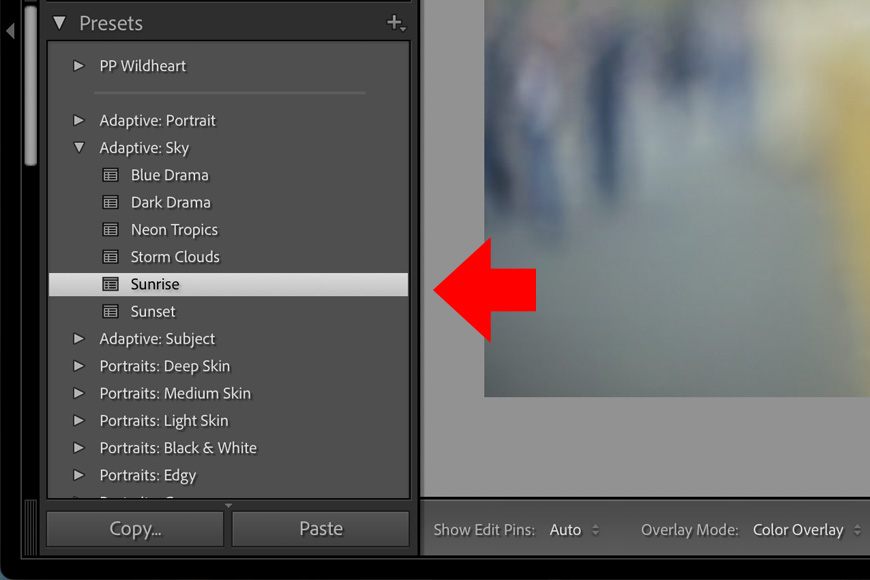
Adaptive Sky

The adaptive sky presets will mask the sky to apply the edits. With regular presets you could use the Select Sky Mask on each picture.
Instead, with the adaptive sky, Lightroom makes the mask each time, considering the horizon and other elements, such as trees or people that might be in the picture.
Adaptive Subject

You don't need the adaptive preset to select individual portrait attributes when your subject isn't a person. You simply need it to separate the subject from the background – just like the Subject Select Mask.
This is how the subject adaptive preset works. It selects the subject, but instead of using the same masks on each photo, it uses AI to make a new mask each time.
How to use Adaptive Presets in Lightroom Classic

Open the presets panel and choose the adaptive preset you want. Hovering over each one, you'll see a preview.
Let's say you want an adaptive portrait, perhaps Glamour Portrait.
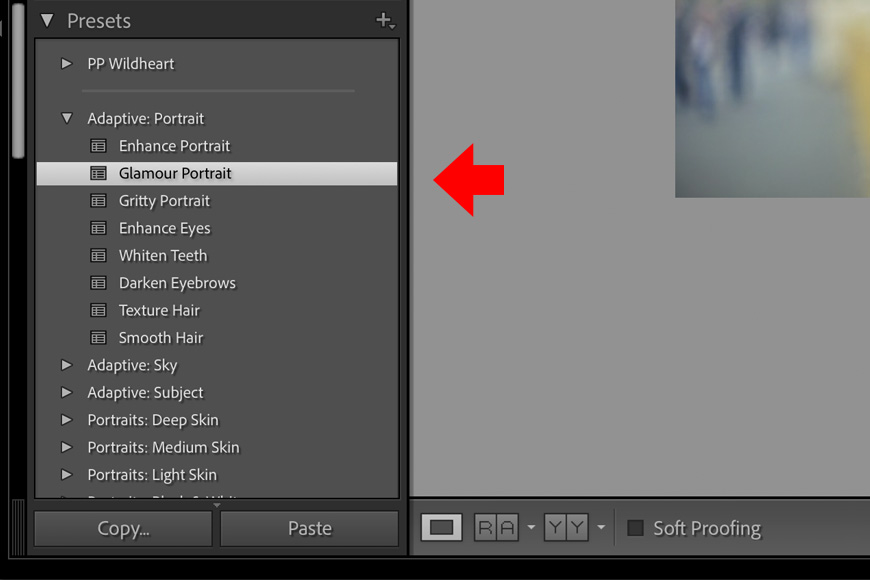
The Glamour Portrait presets make multiple masks so that you can make a few tweaks. To do so, go to the Mask tools panel. Here, you can click on each mask and adjust it.

You can also choose another adaptive preset such as Darken eyebrows or Whiten teeth for making local adjustments.
It's also possible to add another adaptive preset that affects the portrait overall, for example, Gritty portrait or Enhance portrait.
Then, instead of using the Select Sky tool to modify it with a preset, you can choose one directly from the adaptive sky presets. This way, you can add a warm pop or create drama in my portrait.
If necessary, you can adjust the intensity of each preset using the Amount slider on top of the panel.

Overall, Lightroom Adaptive Presets are a powerful way to make local adjustments to your images using the power of AI to speed things up and make everything much easier than before.
Often times you can use them as a one-click solution to improving a photo, but most likely, they'll be the starting point for which you'll get a big headstart on editing your photo.
Compared to regular Lightroom presets, the adaptive versions are a huge leap forward, so I encourage you to give them a go.
You may also like to learn how to make a gradient preset in Lightroom.

Ana Mireles is a Mexican researcher that specializes in photography and communications for the arts and culture sector.

👋 WELCOME TO SHOTKIT!
🔥 Popular NOW:
