


How To Take A Professional Headshot With Your Phone
Did you know you can use your smart phone and the tips in this article to get a professional-looking DIY headshot photo in minutes? Here's how.
Learn | Photography Guides | By Greg Cromie | Last Updated: January 11, 2025
Shotkit may earn a commission on affiliate links. Learn more.
So you need a DIY professional headshot… but all you have is your phone?!
Have no fear! This guide will help you take a great photo headshot with whatever gear you have.
From camera settings to what photo editing apps to use, I'll show you everything I know about headshot photography.
Obviously, getting a professional to photograph headshots will give you better results, but it'll also cost a lot of money.
But there's no need to reach for your wallet because, with the tips in this guide, you'll be taking photos that look like you're a pro in no time.
What's more, you don't even need any fancy headshot backgrounds either.
You can achieve professional quality headshot photos with an iPhone or Android phone, then upload them to LinkedIn or wherever you need a new profile picture.
If you're lucky enough to have a fancy DSLR, I've also included some tips for great headshot results using a regular camera.
I'll even show you how to use AI to generate professional headshots, saving you hours of time.
Let's jump in and take your first DIY professional headshot.
How To Take a Professional Headshot With Your Phone
Step 0: Consider Creating an AI Headshot

Before we delve into the ‘manual' tips for taking headshots on a phone, it's worth considering the most time-saving solution available.
By far the easiest solution (if you’re willing to spend $25) is to upload any photo of yourself to an AI headshot generator like ProPhotos.ai which can create your professional headshots for you.
ProPhotos.ai can generate a high-quality and photorealistic AI headshot in about 90 minutes, and it only needs a couple of iPhone-quality photos to model your entire face!
You don’t need to be wearing a suit, be in front of a nice background, or use any fancy lighting equipment – the AI does all of the work for you.
Step 1: Clean Your Phone
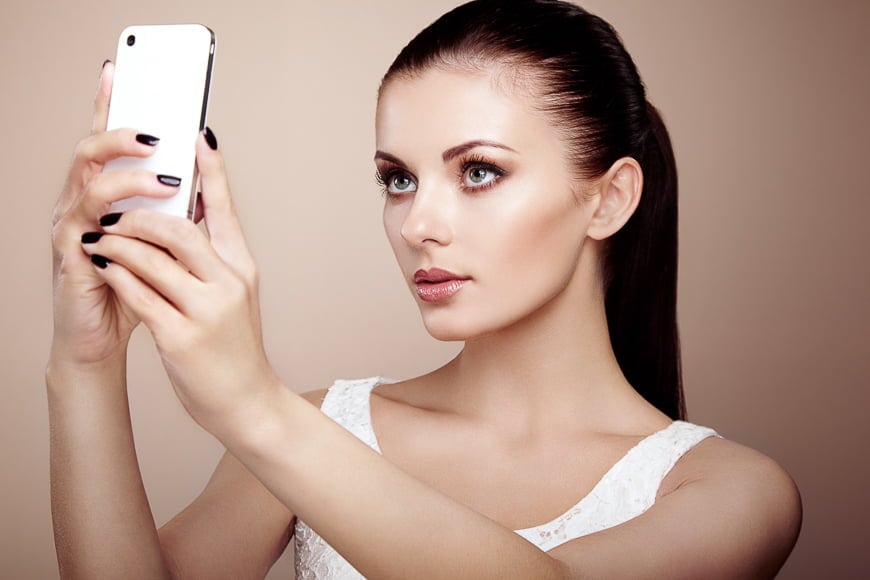
Taking photos and selfies with a phone is super easy – but achieving professional-quality headshots takes more effort. Before you even take your first headshot, you need to ensure that your phone is set up correctly.
A great start is to give it a good clean including the front and rear camera as well as the screen. This way your images will be clear and crisp and you can review them accurately on your screen.
Step 2: Set Up The Camera App
Most current models of smartphones have the ability to change settings on the camera app. I recommend that you turn off the flash first – flash can wash out the face and cause unwanted background shadow.
Next, you should activate the HDR or High Dynamic Range setting if your phone supports it. HDR allows your camera to handle the low and highlights better and makes your image punchy.
If you want to control the aperture, you can change this to around f/2.8 – this will result in your subject in focus but the background slightly blurry. Don't use the built-in portrait mode as this can result in the subject having out-of-focus areas.
Also, don't use filters when taking photos – you can always apply these later. Make sure to take a couple of practice shots and check the outcomes so you don't end up with all your shots looking wrong.
Step 3: Use A Tripod
Holding a phone in your hands to capture a professional headshot will work fine. But for the best results and the sharpest images, do yourself a favour and purchase a small and inexpensive phone tripod.
The quality and the value are irrelevant as long as it holds the phone upright and stable.
This is even more important for taking a selfie as holding the phone out at arm's length for an extended period will result in fatigue and camera shake.
With a tripod, you can compose the image and have everything stay where it should be ready for the shot.
Step 4: Check Lighting
As mentioned earlier, check your lighting to ensure that there's adequate light falling on you/your subject. It can be difficult to correct extreme lighting impacts such as deep shadows and blown-out highlights in editing.
If you're using a separate light source like an LED panel, make sure that it feels natural and doesn't cast unwanted background shadows. Most importantly, ensure that there's adequate light on the face.
Soft light is also great for a flattering portrait and a professional photo result.
If you want to try something dramatic, check out our guide to Rembrandt Lighting which can give your headshots some drama.
Step 5: Take Your Shot
Regardless of if you're photographing someone else or yourself, you should take a large number of images. Everyone moves or blinks or squints when having photos taken – that's why professional photographers take hundreds of shots when on the job.
By taking lots of shots you can sort through them to pick out the photo that's just right. However, I recommend doing so in short bursts.
This way, you can review what you've already taken to check for any problems with the pose, lighting, and sharpness. Imagine taking dozens of photos and not checking them only to find out that they were all out of focus.
It also gives your smile a chance to relax!
Step 6: Edit And Publish
One of the best things about shooting a professional headshot on your phone is that you can edit your photos right there and then.
What's more, once you're done editing, you can publish the image directly to your Facebook, LinkedIn or other social media profile.
But before you go posting your images, it pays to make some moderations to your image.
Check out my advice in the Edit section above – you'll want to fix the exposure, contrast, colour and framing of your image.
Fortunately, phones make these tasks incredibly easy, plus you have the option to apply some great filters. My only advice with filters is to not go too crazy – you want your image to look professional after all.
If you want to take it a step further from the default editing app on your phone, check out the recommendations for the best photo editing apps for iPhone – most of the apps are also available for Android devices too.
How To Take a Professional Headshot With Your Camera
Using a DSLR or mirrorless camera to take your own headshot will yield better results than a phone.
With that in mind, here's how to take a headshot:
- Choose the right lens: For headshots, a medium telephoto lens with a focal length between 85mm and 135mm is ideal. This range helps to create a pleasing compression of facial features and a shallow depth of field that blurs the background.
- Dial in your camera settings: Put your camera in manual mode to have full control over the exposure settings. Start with an aperture around f/2.8 to f/5.6 to achieve a shallow depth of field and create a nice background blur. Set the ISO to the lowest value possible to reduce noise, and adjust the shutter speed accordingly to achieve proper exposure.
- Frame the shot: Position yourself or the subject in the frame, making sure to leave enough space around the head and shoulders. The focus should be on the face, so leave some room at the top and sides of the frame. You'll need a tripod to frame your own headshot.
- Focus on the eyes: The eyes are the focal point of a headshot, so ensure they are in sharp focus. Use a single autofocus point or switch to manual focus to have precise control over the focus point. Aim for crisp, clear eyes that draw attention. Remember, the eyes are what draw people into the head shot.
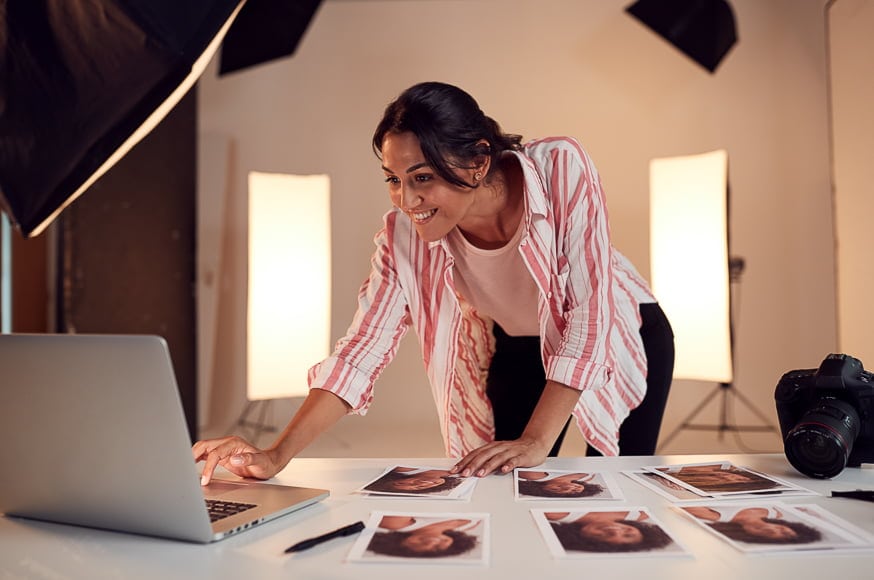
- Review and edit: Once you have taken the shots, review them on a computer to choose the best ones. Pay attention to sharpness, exposure, and overall composition. Use photo editing software like Adobe Lightroom or Photoshop to fine-tune the selected images, adjusting exposure, contrast, color balance, and cropping if necessary. You'll have more dynamic range and megapixels to play around with by using a camera, so make the most of the editing stage.
As mentioned before, by using a dedicated camera, you can more easily produce a great professional headshot than by using your phone.
How to Pose for a Professional Headshot
Professional headshots should reflect your personality and professionalism. Recently though, business headshots have become less rigid than in years past so you can take more liberty when getting it done.
With that in mind, here are some tips for posing for headshots:
- Relax and be confident: Start by taking a deep breath and relaxing your shoulders. Confidence is key in a headshot, so try to exude a positive and relaxed energy.
- Posture: Good posture is crucial for a head shot photo. Stand or sit up straight with your shoulders back. This will help convey confidence and give you a more professional appearance. Avoid slouching or leaning too far forward or backward.
- Face the camera: Position your body towards the camera, keeping your chest and shoulders facing forward. This will ensure that the focus is on your face.
- Chin position: To avoid a double chin, elongate your neck slightly by pushing your forehead forward and gently tucking your chin down. This can help define your jawline and create a more flattering angle for your face.
- Eye contact: Maintain good eye contact with the camera. Look directly into the lens or at the photographer if they're positioned behind the camera. This will help create a connection with the viewer.
- Facial expression: Aim for a natural and friendly expression. Avoid extreme or forced smiles and opt for a relaxed, genuine smile. Experiment with different expressions to find the one that suits you best.
- Hair and grooming: Ensure your hair is well-groomed and styled neatly. Avoid excessive use of styling products that may make your hair look greasy or unnatural. Also, check for any flyaways or frizz that might distract from your face.
- Clothing and accessories: Wear appropriate attire that aligns with the purpose of the headshot. Opt for solid colors or subtle patterns that won't distract from your face. Avoid busy or overly flashy jewelry or accessories.
- Background and lighting: In corporate headshot photography, lighting plays a key role in making images look good. Pay attention to the background and lighting setup. Ensure that the lighting flatters your features and that the background is clean and uncluttered, allowing you to stand out.
- Practice and review: Before the actual shoot, practice your poses in front of a mirror or take test shots using a smartphone. This will help you understand how different angles and expressions look and allow you to make adjustments as needed.
Remember, professional headshots should reflect your personality and professionalism.
Here are some more portrait-posing tips.
Post-Processing Your Headshots
Once you're done with taking the headshots, it's well worth the time to apply even some basic editing to the images.
While images straight out of the camera can look good, it's amazing the difference even a few little edits will make.
Whether you edit your images on a mobile or a computer, your headshots will pop and stand out from the crowd.
Here's how you can optimise the quality of your DIY headshot, no matter what editing software you use.
- The first step in any editing workflow is to ensure that the image is aligned properly. There's no point using a headshot where it appears that you're leaning backwards. Using a cropping tool will allow you to straighten your image and crop the frame so that the person's head and shoulders sit comfortably in the image.
- We can't always control the quality of light when taking a photo. Being able to edit the exposure or brightness of an image is a quick win for great photos.
- When changing the exposure, you need to ensure that you don't end up with parts of the photo that are overexposed or far too bright. Also, you don't want areas of the photos that are underexposed or too dark.
- Depending on your editing software, you can also finely adjust the detail in the shadows and highlights.
- With your exposure just right, adding a little bit of contrast to an image adds a lot of depth and character. Changing the contrast alters the variance between lighter and darker parts of the image. It also creates a more dynamic play on tones within the image, making them far more appealing.
- All too often images straight out of a camera will be a little dull and washed out. The best way to manage this is to either apply a colour filter within your phone or to manage the colour manually.
- Being able to gently boost the vibrance and saturation of the colour will add a great deal of warmth and character. Headshots look much better when the colour is up as it makes the subject look healthy and happy.
Now your professional headshots are done and ready to be shared on websites and social media.
What is a Professional Headshot?
A professional headshot is a high-quality photograph of an individual, typically focusing on the head and shoulders, that presents a professional and polished image.
These photos are used for various professional purposes, including corporate websites, LinkedIn profiles, business cards, resumes, and promotional materials.
‘The goal of a professional headshot is to convey an individual's professionalism, confidence, and personality in a visually appealing manner. Key characteristics of a professional headshot include:
- Clarity and Quality: High-resolution images with sharp focus on the subject's face.
- Lighting: Well-lit to highlight the subject's features without harsh shadows or overly bright spots.
- Background: Typically simple and unobtrusive, ensuring the focus remains on the individual.
- Attire: Professional or business attire that matches the individual's field or the image they wish to project.
- Pose and Expression: Natural, approachable poses and expressions that convey confidence and professionalism.
- Post-Production: Minimal and subtle retouching to remove distractions without significantly altering the individual's appearance.
Why Do We Need Headshots?
In the past, it was very rare for working professionals of any kind to require photo identification. Getting in and out of your place of work didn't require a swipe card or a badge to show security.
Today, however, we live in a world where identification and security are essential – especially at work. As a result, the best way to confirm your identity is with a photo of yourself – just like with a driver's license.
Headshots are the best style of photo for this kind of application as they show a clear and current image of your face and head. Of course, headshots can be used for much more than just security passes.
As we dive deeper and deeper into a digital world, having an online presence is important for both social and professional branding.
Your face is your most important brand asset as it's how people identify you and associate with what you do and say.
Also, in many professional settings, it's critical to have an online presence with a photographer bio and a picture of your face – that's why headshots are always taken for business (corporate) photo shoots.
If you run a business, head a team or deal directly with the public, then you want people to know who you are. Having a great photo of your face makes you both identifiable and relatable.
Also, with social media platforms being so powerful, a great headshot is a core element of your online persona.
In applications like LinkedIn and Facebook, having a professional or suitable headshot builds familiarity with your audience.
What Equipment Do You Need to Take Your Own Professional Headshot?
To take your own headshot, you will need the following equipment:
- Camera or Phone: Use a dedicated camera with good image quality, such as a DSLR or mirrorless camera. While not mandatory, having manual control over settings will allow you to fine-tune the image to your liking. You can also use a phone to take a headshot.
- Lens: Choose a lens with a focal length between 85mm and 135mm, preferably a medium telephoto lens. This range helps create a pleasing compression of facial features and a shallow depth of field.
- Tripod: A sturdy tripod will help you maintain a steady shot and ensure sharpness. It's especially useful when taking self-portraits as it allows you to position the camera and frame the shot precisely.
- Remote or Self-timer: If you're taking self-portraits, a remote shutter release or the self-timer function on your camera will allow you to trigger the shutter without touching the camera. This helps prevent camera shake and ensures sharper images. Here's how to set the timer on your iPhone camera.
- Lighting Equipment: Good lighting is essential for professional headshots. You can use natural light by shooting near a large window or invest in artificial lighting equipment. Options include a softbox, umbrella, or ring light to diffuse the light and create even illumination on your face.
- Background: Choose a clean and uncluttered background. A plain wall, a professional backdrop, or a well-manicured outdoor area can work well. Ensure the background complements and doesn't distract from the main subject, which is your face.
- Reflector (optional): A photography reflector can help bounce light back onto your face and reduce harsh shadows. It's particularly useful when shooting in natural light or with a single light source. Reflectors come in various sizes and colors, such as silver, gold, or white, each offering different lighting effects.
- Image Editing Software: Once you've captured your headshots, you may want to edit them for fine-tuning. Software like Adobe Lightroom or Photoshop allows you to adjust exposure, contrast, color balance, and other aspects of the image.
What phones would be best suited to taking high-quality headshot photos?
Several smartphones on the market offer excellent camera capabilities for capturing high-quality headshot photos.
Here are a few models that have the specifications needed to take professional-quality headshots.
- iPhone 14 Pro/Pro Max: The latest iPhone models come with a triple-camera system that includes a dedicated portrait mode. They offer advanced computational photography features, including Deep Fusion and Night mode, which enhance image quality and low-light performance. The Pro models also have a LiDAR scanner that improves depth sensing for precise portrait effects.
- Google Pixel 6 Pro: The Pixel series has been praised for its exceptional camera performance. The Pixel 6 Pro boasts a powerful camera setup, including a large primary sensor and an ultra-wide lens. Google's computational photography algorithms, such as HDR+ and Night Sight, help produce stunning images with great dynamic range and low-light capabilities.
- Samsung Galaxy S21 Ultra: The Galaxy S21 Ultra features a versatile quad-camera system with a high-resolution main sensor and a dedicated depth sensor. Its advanced camera features, like 100x Space Zoom and Single Take, allow for creative and high-quality portrait shots. The device also offers good low-light performance and extensive manual controls.
- OnePlus 9 Pro: The OnePlus 9 Pro boasts a partnership with Hasselblad, a renowned camera brand. It features a quad-camera setup developed in collaboration with Hasselblad, offering enhanced color calibration and improved image quality. The phone's main camera and ultra-wide lens work well for headshot photography, and it supports RAW image capture for greater editing flexibility.
- Sony Xperia 1 III: Sony smartphones are known for their excellent camera technology, and the Xperia 1 III is no exception. It features a triple-camera system developed with Zeiss optics, allowing for sharp and detailed headshot photos. The device offers advanced manual controls, including the ability to shoot in RAW, which is beneficial for post-processing.
Specific Headshot Advice for Different Platforms & Uses
When planning your DIY headshot, you should keep in mind where you plan to upload it:
- LinkedIn Headshots: LinkedIn is a professional networking platform, so your headshot should reflect a professional image. Dress as you would for a job interview or a business meeting. Make sure your face takes up about 60% of the frame. Use a neutral or clean background that doesn't distract from your face. A smile can make you seem approachable and friendly.
- Acting Headshots: For acting, your headshot should reflect your type or the roles you could play. It should be a clear, high-quality image of your face, showing your eyes clearly as they are the most expressive part of your face. Natural light is often best for these types of headshots. Avoid heavy makeup and let your natural beauty shine through.
- Business Profiles: Similar to LinkedIn, business profile headshots should be professional. However, depending on the culture of your industry, you might have a bit more flexibility. For example, if you're in a creative field, you might opt for a more creative or artistic headshot. Regardless, make sure the photo is high-quality and your face is clearly visible.
- Social Media Platforms: For more casual social media platforms like Facebook or Instagram, you have more freedom with your headshot. It should still be a clear, high-quality photo of your face, but you can show more of your personality. This could be through your clothing, the background, or your facial expression.
- Dating Platforms: Dating apps like Tinder require attractive and inviting headshots. It's important to look approachable and friendly. A genuine smile can work wonders. Make sure the photo is clear, high-quality, and well-lit. Avoid group photos as your main picture, as it should be immediately clear who you are. It's also recommended to avoid overly edited or filtered photos, as authenticity tends to be valued in online dating.
FAQs
- How much should I pay for professional headshots?
The average cost to pay for headshots is around $150 per hour. Of course, this price can vary depending on the skillset and reputation of the headshot photographer. You can expect to pay between $100 and $250 per hour for a professional photographer and this may or may not include the rights to your prints.
- What makes a good professional headshot?
A good professional headshot is one that's technically well taken (i.e., well exposed, crisp, and in focus), and well-composed with no distracting elements and the subject drawing the eye. It also conveys the subject in a way they'd like to be seen.
- What is a professional headshot?
Professional head shot photography is taking a photo used to identify you with your organization or business. Many corporate organizations require all staff to have professional headshots for security passes and corporate websites. If you run your own business, a professional headshot can help to promote the connection between you and your business.
- How do you take a professional headshot?
You can take a professional headshot of yourself with a camera and tripod. Set up the camera in landscape orientation on the tripod and stand or sit opposite. Set the self-timer on the camera to 10 seconds to provide enough time to get in position and strike your professional pose.
- Where should I take professional headshots?
Professional head shots should be taken in a location that best represents the business you are working with. Corporate headshots should be photographed in an office environment provided there is suitable lighting. Headshots for a gardener should be shot with a garden in the background.
- Where can I get professional headshots taken?
Many photographers specialize in professional headshots and are easy to find by conducting an internet search in your area. Many portrait photographers are also more than skilled enough to take professional headshots.
Final Words
Taking a headshot doesn't need to be a daunting task.
Even if you're taking a DIY headshot, it's possible to get a professional result while acting as both photographer and subject. In fact, you have maximum control over all aspects of the image and can take as much time as you want – so don't think of it as a bad thing!
You can even get a great shot by using your smartphone.
Just make sure to relax, smile and get your face in focus. If you can do that, you're already halfway to an awesome photo.
If you're taking a photo of someone else, remember to help them relax and don't be afraid to experiment with different poses and backdrops.
Follow the rest of the tips above, and you'll have a killer headshot or profile pic in no time.

Check out these 8 essential tools to help you succeed as a professional photographer.
Includes limited-time discounts.

I’m a Melbourne-based street photographer and blogger. I love to travel to Japan to photograph and document its dynamic people and culture.
5 Comments
Leave a Comment
👋 WELCOME TO SHOTKIT!
🔥 Popular NOW:

Creative Klick is a full service creative agency that specializes in quality headshots & photography. Are you ready to look your best? Take a look at our portfolio. We specialize in making all of our clients feel super comfortable giving them the confidence they deserve.
Hi Greg.
Wonderful article.
Have you tried to compare the result of AI-based photography?
http://www.tiktak-studio.com
This seems to be top notch quality in very low-price…
I wonder, what do you think about it?
Hi Greg.
Thank you for your amazing article.
I am a Los Angeles based professional headshot photographer. Please pay attention at my portfolio.
Best regards
Seda
Why don’t you try submitting, Seda? Check the link at the bottom of this page ‘Submit your Kit.’ Good luck!
Thanks for checking out my article. If you have any questions or comments then please leave them here and we will respond. Cheers. G