


What is Ghosting in Photography? (And How to Prevent It)
Photo Ghosting is a type of flare that occurs when light repeatedly reflects off the surface of the lens making images look hazy. Here's how to prevent it.
Learn | Photography Guides | By Ana Mireles
Shotkit may earn a commission on affiliate links. Learn more.
Photo Ghosting is a type of flare that occurs when light repeatedly reflects off the surface of the lens and makes images look hazy with little contrast.
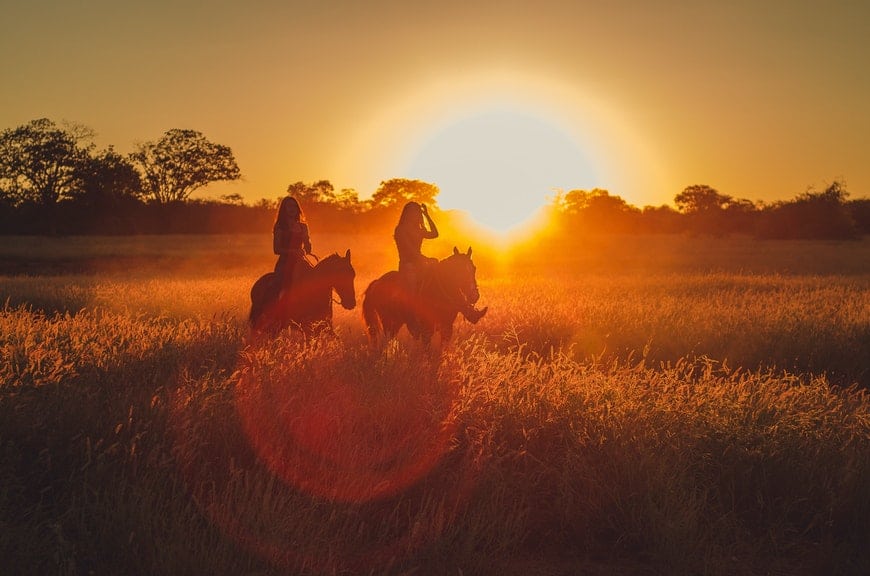
Ghosting flare is caused by a strong light source and appears as a clear artefact that's located symmetrically opposite to it, with multiple orbs of different shapes and colours that can span across the entire image.
These artefacts/orbs are referred to as ‘ghosts', with the number varying based on how many elements are in your lens – the more lens elements, the more ghosts!
Ghosting in photography is usually something you'll want to avoid, but occasionally it can be used for creative effect.
Whether you want to completely eliminate ghosting, correct it with editing, or even use it deliberately in your images, this guide will show you how.
What Influences Lens Flare and Ghosting?
Credit: Willsantt
Understanding what contributes to excessive ghosting flare in your photos will help you avoid it in the future… or it may help you deliberately look for it!
Here are the factors that influence veiling flare and ghosting:
The elements inside your lens – A camera lens has multiple lenses inside to correct spherical aberrations and other types of optical issues. The different lens elements determine how the light is reflected repeatedly and whether or not this reflection has an actual artifact created.
Lens coatings – the lens elements on a lens not only change in number and shape, but they also have different coatings. The type and quality of the coating impact lens flare and ghosting.
Focal length – Telephoto lenses create more flare than wide-angle lenses, so you can change the focal length and see if the ghosting appears or not.
Lens aperture – Changing the aperture can prevent or cause ghosting. Also, the ghost will be shaped differently according to the shape of the aperture, so try using different lenses.
Light source – Using a bright source in a direct line is vital. The position of the light source and how it hits the lens surface is one of the most important factors that create visible ghosting.
How To Prevent Ghosting

Credit: Hassan Ouajbir
Excessive light rays shining directly into your lens can contribute to photography ghosting and degrade image quality.
If you've ever asked yourself, how do I stop lens ghosting, here are the steps to take:
Use high-quality lenses – Camera lens manufacturers have developed some amazing coating technologies when designing lenses. For example, Canon lenses with Subwavelength Structure Coating (SWC) and Air Sphere Coating (ASC) are great to eliminate flare issues.
So, what lens prevents ghosting? All pro-grade lenses and some entry-level lenses with good anti-reflective coating.
Use lens hoods – A lens hood is an accessory you can attach to the front of the lens. It's designed to protect the front element from light rays coming from the side. Lens hoods exist in different shapes and sizes. If you don't have a lens hood, try blocking direct sunlight rays using your hand.
Remove any unnecessary filters – All optical elements increase lens flare because light reflects on them – having fewer elements greatly reduce flare. So, take off anything you don't need for a specific shot, as the UV filter.
Change your position – Avoid shooting directly into bright light sources. Just by changing the angle of view, you can prevent lens flares. If you can't avoid it, at least block the bright point with your subject – this way, you might introduce a diffuse glow, but you'll prevent different artifacts.
How Do You Fix Ghosting in Photoshop?
Credit: Marta Wave
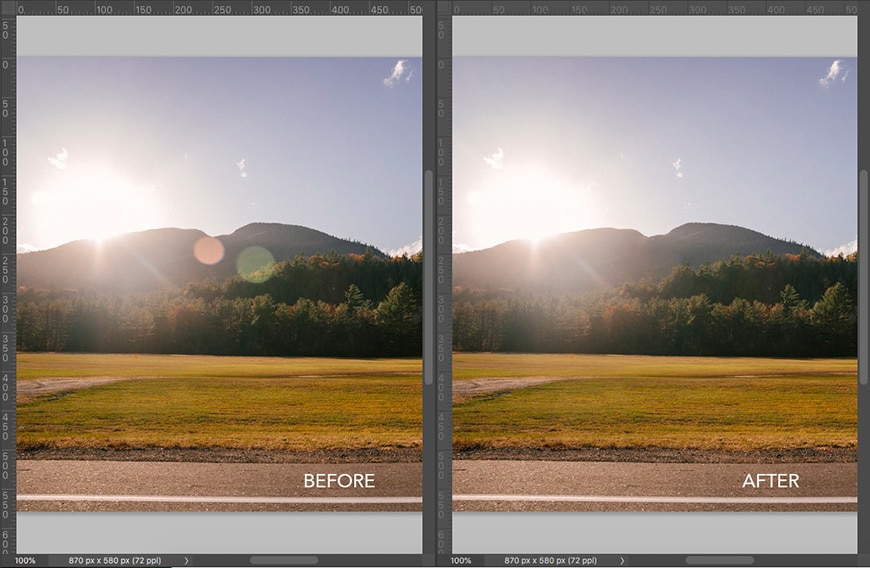
Removing flares and ghosts from your photos isn't as hard as you might think, but it does require you to use editing software such as Photoshop.
You can't fix all lens flare with the same post-processing method. Here are some techniques that can help you to remove or reduce ghosting.
Content-Aware:
This is a very simple method you can use when the ghosting occurs on solid colours or patterns.
Step 1: Select the area around the ghost.
Step 2: Go to the menu Edit > Fill.
Step 3: Choose Content-Aware from the drop-down menu.
Step 4: Deselect.
Clone Stamp:
You can use this technique if you want to have complete control over the pixels you want to paste over the ghost.
Step 1: Select the Clone Stamp tool.
Step 2: Adjust the size and hardness of the brush.
Step 3: Pick a source point by clicking on it while you hold the Alt key.
Step 4: Click on top of the ghost.
Keep in mind that usually, there's also a veiling flare when there's ghosting that can drastically reduce image contrast. So, once you've taken care of all the unwanted objects from ghosting – add a Brightness and Contrast Adjustment Layer and increase the contrast of the whole image.
Final Words
Flare and ghosting can diminish image quality when they aren't used on purpose as a creative tool. Now you know how to prevent it or fix it. This way, you'll avoid chromatic aberration and image degradation.
Instead, if you want to experiment with ghost photography, use the elements that create flare to your advantage. I hope this article was helpful – if you have any questions, leave them in the comments section.

Check out these 8 essential tools to help you succeed as a professional photographer.
Includes limited-time discounts.

Ana Mireles is a Mexican researcher that specializes in photography and communications for the arts and culture sector.
1 Comment
Leave a Comment
👋 WELCOME TO SHOTKIT!
🔥 Popular NOW:

Thanks for reading my article, let me know if you have any questions.