


How to Undo and Redo in Photoshop (Three Methods)
Learn the smartest methods to undo and redo in Photoshop by using the History Panel, the menu bar and handy keyboard shortcuts.
Photoshop | Software | By Judyth Satyn
Shotkit may earn a commission on affiliate links. Learn more.
If you're anything like me, you make your fair share of mistakes when editing images in Photoshop.
Sometimes they're not even mistakes – I simply change my mind when I realize the background looked better when it was pink rather than blue!

Download a free copy of Adobe Photoshop to follow along with this simple tutorial.
In this Photoshop tutorial, I'll show you three methods to use when you want to change edits.
You'll learn how to undo and redo in Photoshop using the History Panel, the menu bar, and some quick-fix keyboard shortcuts.
Read on and find out how to undo and redo Photoshop.
How to Undo and Redo in Photoshop – 3 Methods
Photoshop's default setting is to record your last 50 changes. In other words, you can rewind at any time during the editing process and undo up to 50 edits.
For most jobs, 50 edits are more than enough, but if you need more the limit can be changed to 1000 in Photoshop's customized settings. It's worth noting that this may affect the amount of RAM Photoshop uses.
Some actions won't be saved such as scrolling and zooming actions as they don't affect the image's state.
Swapping tools or changing colors in swatches won't be saved as edits either.
Method 1 – How to Undo and Redo in Photoshop using Shortcuts
There are a couple of keyboard shortcuts that are worth knowing as they allow you to quickly undo and redo edits as you work.
These shortcuts are very handy to know when you're editing and accidentally cut or paint over a subject.
With a quick flick click you can undo an incorrect edit, or you can redo an edit.
To use the keyboard shortcuts to undo a previous edit, press Command+Z (for Macs) or Ctl+Z (for Windows).
To use the keyboard shortcut to redo an edit, hold Shift and press Command+Z (for Macs) or hold Shift and Press Ctl+Z (for Windows).
You can repeatedly click and rewind through all the previous edits Photoshop has saved. You can also click repeatedly to redo edits.
Method 2 – How to Undo and Redo in Photoshop using the Menu Bar
You can undo and redo edits using the Edit Menu in the menu bar.
The Edit Menu option isn't as handy as the keyboard shortcuts but is still worth knowing.
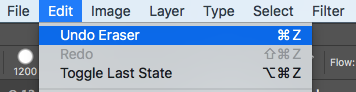
Navigate to the Menu Bar above your workspace and select Edit.
In the drop-down menu underneath Edit select Undo.
Your previous edit will be displayed as the action that was taken. In the example shown below the previous action was the Photoshop Eraser Tool, so Undo is displayed as Undo Eraser.
When the Undo Command is clicked, the image will be reverted to the previous state before being edited.
Likewise, you can select to Redo an action. Select Edit > Redo and the action will be displayed.

In this case, it was the Eraser Tool edit that was deleted. To revert to the previous state click Redo Eraser and the previous image state will be recovered.
You can work back through your previous edits using the Edit Menu and undo or redo multiple steps.
However, each time you wish to step backward or forward with your edits you will have to reenter the Edit Menu, making it the most cumbersome and time-consuming of the methods.
Method 3 – How to Undo and Redo in Photoshop using the History Panel
The History Panel is the go-to when you have to go back through many previous edits to find that one pesky edit that needs to be corrected.
The History Panel gives you an overview of all recorded edits. You can scroll up or down to see previous edits.
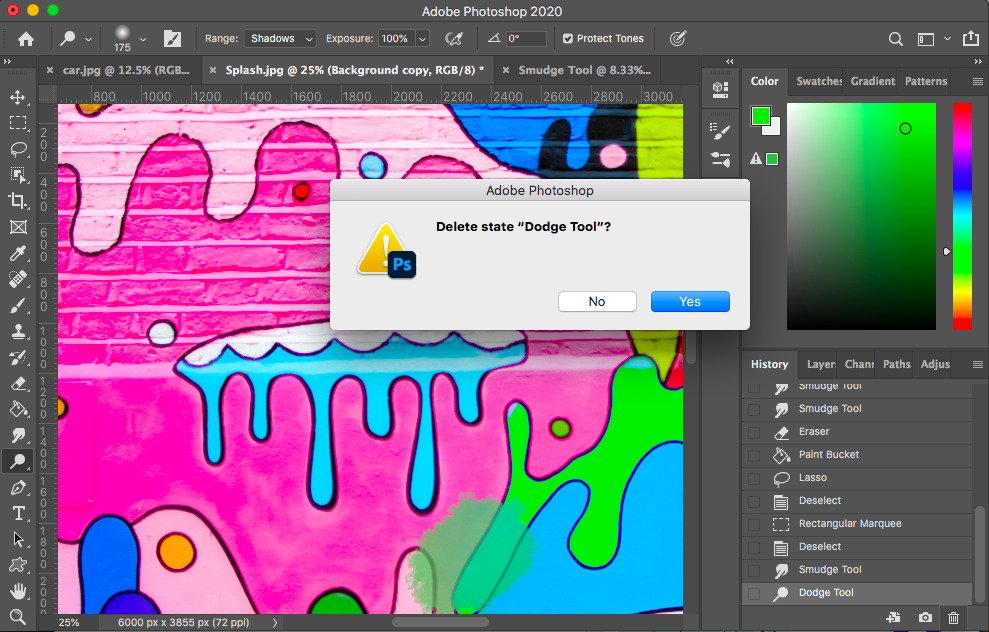
If you want to delete the last history state, click on the bin at the bottom of the History Panel.
When the trash can icon has been clicked, a pop-up window will appear, asking you if you want to delete the previous state.
Click Yes if you want the state to be deleted or No if you do not.
This is the most time-consuming way to undo and redo using the History Panel, and not advised.
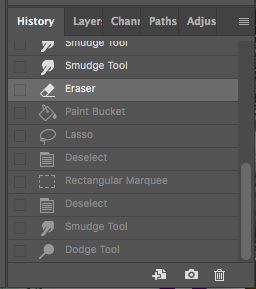
A quicker and easier way to undo or redo is to click on the edit as it is displayed in the History Panel.
Each edit will be displayed by the name of the action. If you erased the edit will be named Eraser. If you used the smudge tool, the edit will be named Smudge Tool, and so on.
Click on the edit you wish to Undo – this can be as far back as 50 edits. Just keep scrolling until you find the edit.
When clicked, your image will be reinstated to its previous state before this edit was made.
To redo edits, click on the edit which has been removed in the history panel.
When you undo edits you will not be able to selectively choose one single previous edit to remove. All edits that were created after the edit you wish to remove will also be removed.
How to Undo in Photoshop Multiple Times
If you want to undo in Photoshop multiple times, the best option is to use the History Panel.
The History Panel gives you an overview of all the image's previous history states. You can simply scroll up or down in the History Panel to view your previous edits.
Click on a history state in the History Panel and you will remove the multiple edits that follow it.
Alternatively, you can use the keyboard shortcut. Simply hit the shortcut repeatedly to undo multiple edits rapidly.
Hopefully, you found this tutorial on how to undo and redo in Photoshop handy for your next photo editing project.
If you want to continue expanding your Photoshop skills, here's another tutorial to check out: How to Change DPI in Photoshop.

Judyth is an experienced studio photographer and glass artist. When she isn’t Photoshopping comedians into the bellies of sharks, you can find her cooking delicious treats for her guests.
👋 WELCOME TO SHOTKIT!
🔥 Popular NOW:
