


How to Upload Fonts to Canva (Step-By-Step Guide)
This easy Canva tutorial will walk you through how to upload fonts to Canva so you can use them on all your design projects.
Canva | Software | By Judyth Satyn
Shotkit may earn a commission on affiliate links. Learn more.
Canva has an incredible array of fonts on offer, one for almost every purpose and occasion. But sometimes you find a font outside of Canva that just cuts the mustard in a way that no other can.
So why not upload your custom font and use it in Canva? Using your own uploaded fonts means you're not restricted in your style choices.
This easy step-by-step Canva tutorial will walk you through how to upload fonts to Canva to save and use for all your design projects.

Get a 16% annual discount to Canva Pro for UNLIMITED access to all the best design content!
How to Upload Fonts to Canva
There are many reasons you might want to upload new fonts to Canva.
You might have designed custom fonts as part of your brand kit to use in all your marketing materials, or maybe you've found free fonts online that you'd really like to try.
Whatever the reason, follow this step-by-step guide and we'll help you add custom fonts to Canva.
Note that uploading custom fonts to Canva requires a Canva Pro account.
Step 1 – Font Download
Download the font file you've purchased or found free online and have it ready to upload into Canva.
If the font file is in a Zip file, make sure that you unzip it first.
Step 2 – Open a Design
Open a new design by clicking on “Create a design” in the right-hand corner of the top menu bar.
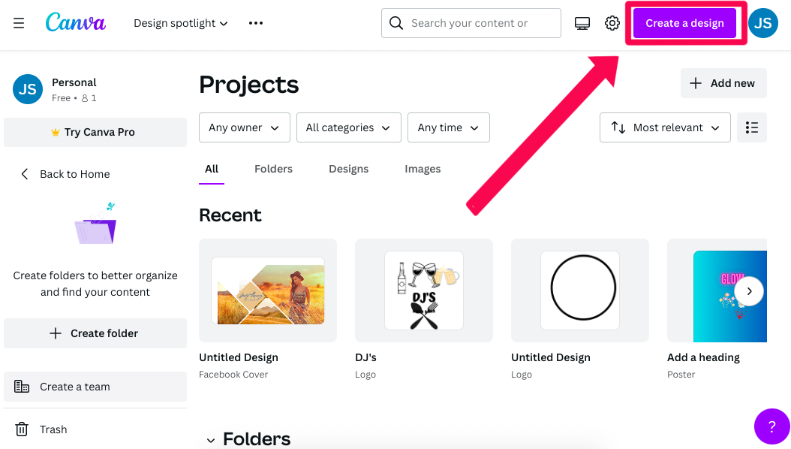
For this tutorial, we're going to create a poster, but you can choose any other design you wish.
When you've clicked “Create a design” your workspace will open and you can select a template from the left-hand side panel.
Select your choice of template and it will open in your workspace.
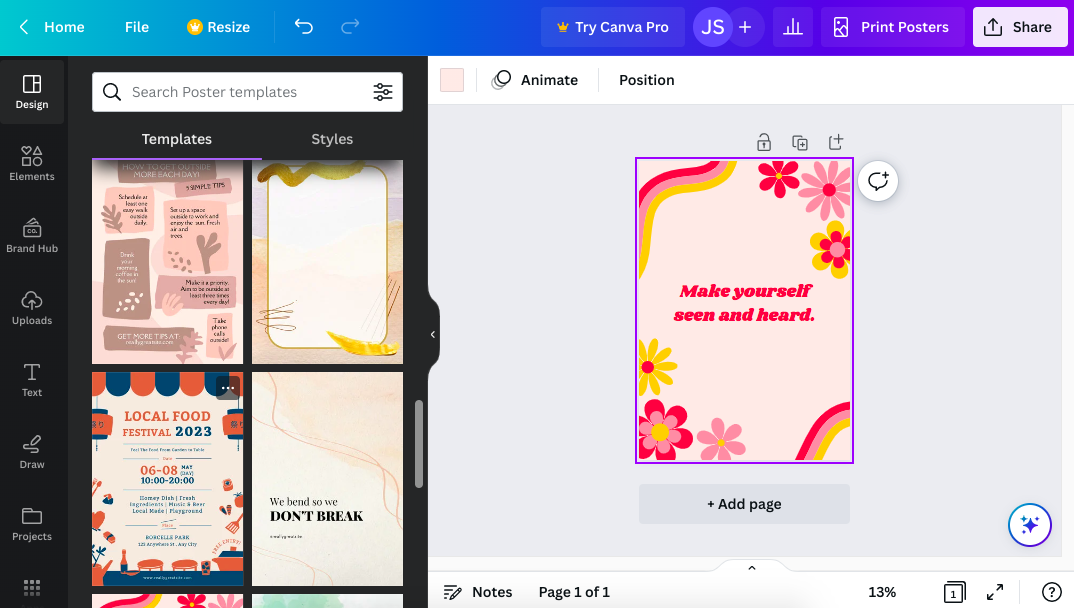
Step 3 – Select Text
Click on the Text icon in the panel to the left of your workspace. Once clicked, the text layout options will open.
Here you can add new headings, subheadings and body text, but we're going to skip this for now and head straight to uploading the new font.
- Read more: How to highlight text in Canva
To activate the option to upload fonts, click on the text in your canvas workspace.
If there is no font in your design you can click on “Add a heading” in the text layout panel.
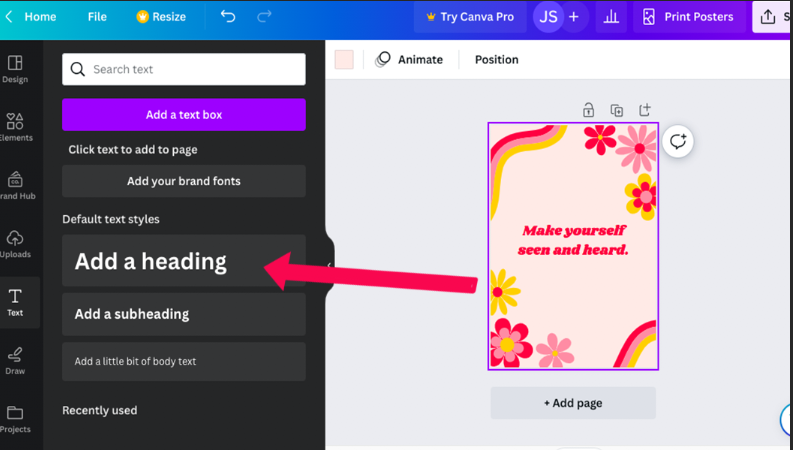
In the top left of your workspace, the font styles will appear.
Click on the font style choices and the text layout option panel will be switched over to a choice of fonts panel.
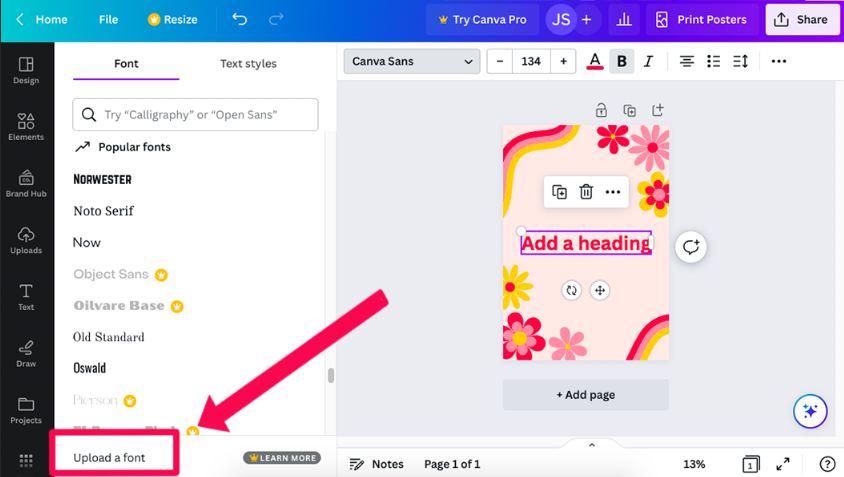
Step 4 – Upload
At the bottom of the font panel you'll find the “Upload a font” button – click on this.
Canva only offers the option to upload fonts to Canva Pro accounts.
So, if you have the free version you will be prompted to upgrade to a Canva Pro subscription.
If you have a Pro account, a pop-up window will appear. Click “Upload a font” again.
Now you can locate your font file and click to upload it.
When you have clicked to upload, another pop-up window will appear asking if you have permission to use this font.
Click “Yes, upload anyway”.
- Read more: How do I make text curve in Canva?
Step 5 – Use your Font
Now your font will be stored and accessible in the uploaded fonts folder, ready for you to use.
You can use your font for personal design creations or as part of your brand kit for promotional materials – the choice is yours.
Simply click on the folder, select your font from the uploaded fonts, and start using it.
You can now type text on any of your designs and use your own uploaded fonts.
When your custom font has been installed into Canva you will be able to resize, color, and use all of Canva's text effects.
Troubleshooting – Upload Fonts to Canva
There are a few reasons why you might be having problems uploading a font to Canva.
1. The font file you are using is corrupted and unreadable. You can try finding a new file of the same font and uploading this instead.
2. There is no upload button under text when you attempt to upload fonts. This would be because you don't have a Pro subscription.
3. Your font is not in a format that Canva supports. Make sure the font is in OTF, TTF, or WOFF format.
4. There is a license issue with the font you are using and thus it's being blocked.
How to Upload Fonts to Canva Using Brand Kit
If you're a Canva Pro subscriber, you will be able to easily upload custom fonts through the Brand Kit feature.
It's useful to upload and add brand fonts to your Brand Kit so they're ready to use when creating your unique marketing material.
Canva will store up to 500 fonts in your Brand Kit and supports OTF, TTF and WOFF font files.
Make sure you have permission to use the font – Canva won't allow you to upload unlicensed font files.
To add brand fonts:
- Click “Brand Hub” in the left-hand side panel.
- Select the “Brand Kit” tab. If you have more than one Brand Kit, choose the one you want to add fonts to.
- Under “Brand Fonts” choose “Upload a Font” and select the font you wish to upload.
- Press “Confirm” and your brand font will begin to upload to the Brand Kit.
How to Upload Font for Free to Canva
If you have the free version of Canva you won't be able to upload your own fonts, instead, you will be prompted to upgrade to a Canva Pro account.
When you are subscribed to a Canva Pro account, uploading fonts will not cost you anything.
Want to keep brushing up your Canva skills? Check out this tutorial on how to create your own eBook in Canva.

Judyth is an experienced studio photographer and glass artist. When she isn’t Photoshopping comedians into the bellies of sharks, you can find her cooking delicious treats for her guests.
👋 WELCOME TO SHOTKIT!
🔥 Popular NOW:
