


Easy Guide to Making Cyanotype Prints at Home + DIY Examples
Whether you want to make a cyanotype print onto a shirt or fabric or you want to turn an image into cyanotype, we'll teach you everything you need to know.
Learn | Printing Guides | By Ana Mireles
Shotkit may earn a commission on affiliate links. Learn more.
If you want to try and make a cyanotype print at home, this is the guide for you. The good news is that it's not actually that hard to do!
Whether you want to make a cyanotype print onto a shirt or fabric or you want to turn an image into cyanotype, we'll teach you everything you need to know.
We'll also answer all the most common questions about this exciting printing process that produces its iconic cyan-blue print.
Also, stick around for some cool cyanotype print ideas straight from TikTok for your inspiration!
How do you Make a Cyanotype at Home?
If you've been wondering how to do cyanotype photography at home, here's an easy-to-follow tutorial:
The easiest way to make a cyanotype at home is by getting pre-coated sheets. However, you can also mix the solution and coat your own paper.
I'll do the latter, but if you bought the cyanotype paper, then you can start at step 4.
Please note that I'm using the Jacquard Sensitizer Set. If you're using a different cyanotype kit brand or product, make sure you check their instructions. They might be slightly different to the one I'll describe here.
What you'll need:
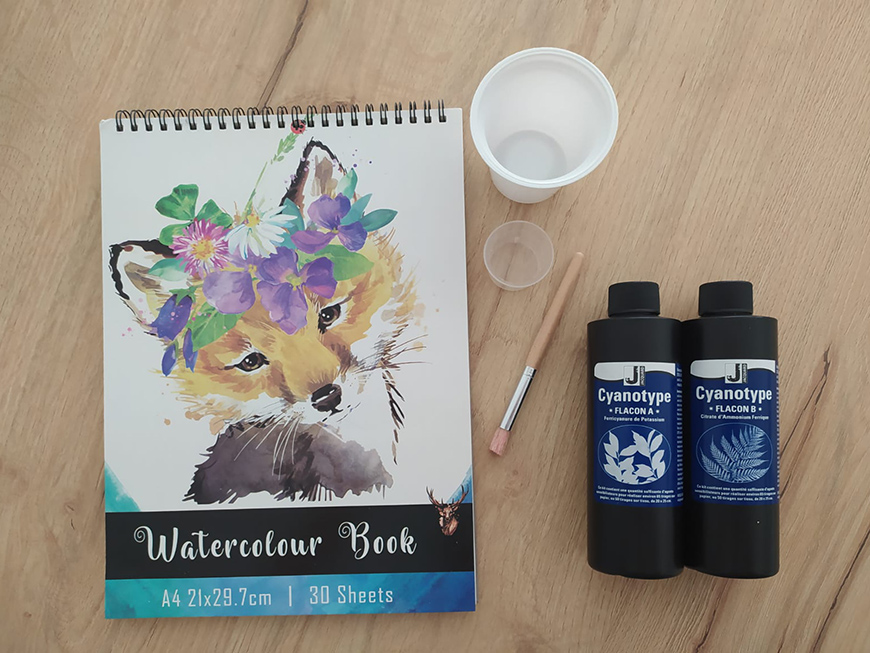
- The Jacquard Sensitizer Set
- Watercolor paper (or another absorbent surface to print your cyanotype)
- A brush
- A container for mixing
- A graduated container
- Water
Making the Cyanotype: How-to Guide
Here's how to make cyanotypes at home:
Step 1: Prepare the stock solutions

Open the Jacquard Sensitizer Set. Each bottle has different powder ingredients inside.
You need to fill each of them with water, shake them, and let them rest for 24 hrs. These are the stock solutions.
Step 2: Create the cyanotype sensitizer

Prepare all your materials in a room with low light. Then, pour equal parts of both stock solutions into another container and mix them. You can use the graduated container to be more precise.
Keep in mind that once you mix them, you need to use them within two to four hours. So, only mix the amount that you'll need. It's always better to mix some more if you need to than overdo it and waste the product.
Step 3: Coat your paper
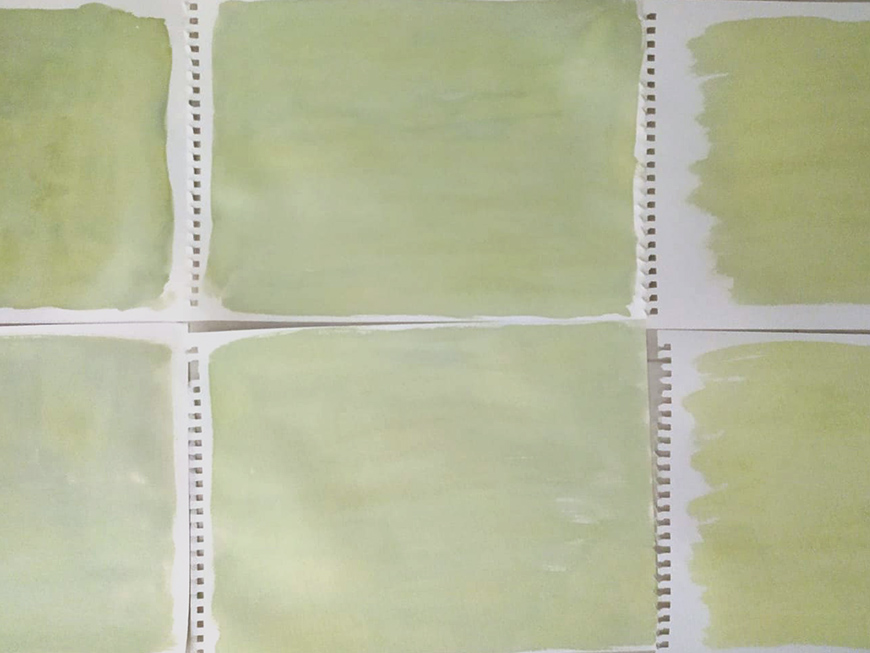
Using a brush, coat your paper with the mixed solution. I'm using watercolor paper, but you can use any other – or even fabric and other materials.
Let the paper dry on its own, hanging in a dark or low-light space. Normally, this should take around 30 min.
Each material will have different times, though. You can repeat this step if you want a denser print.
I mixed 10ml from each stock solution. That was enough for six A4 sheets.
Step 4: Expose your cyanotype
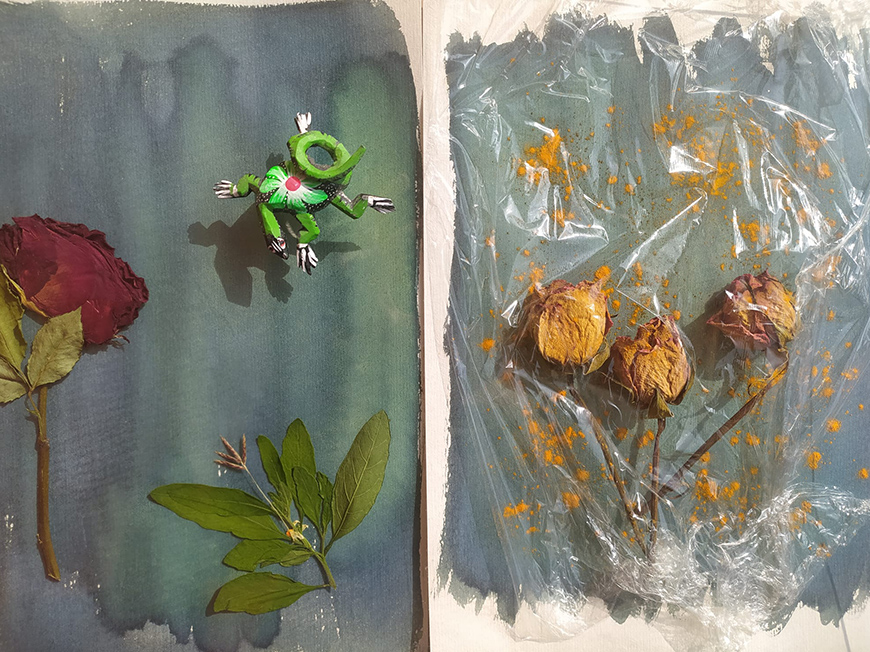
Place objects or a negative on top of your pre-coated paper. You can ensure everything stays in place by using clamps or putting a glass on top.
Then, put it in direct sunshine or under a UV light to expose it. The exact time depends on the amount of light. In my case, it was 25 minutes.
The weather cast indicated a UV Index of 1 (Low) and a cloud cover of 94%. Although, as you can see from the strong shadows, there was some direct sunlight – it just wasn't very strong.
You can use apps like Accuweather to plan when you should do your cyanotypes.
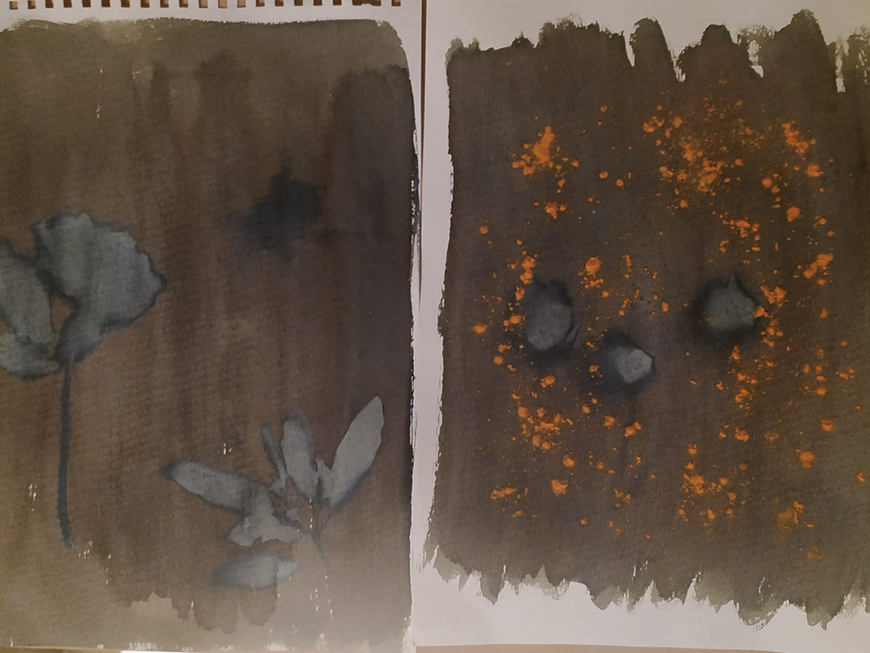
This is how it looks after 25 minutes.
You'll know that your cyanotype it's ready when it gets a bronze color. Avoid moving the objects to check the exposure. It will be almost impossible for you to put them exactly as they were and you will have blurred edges.
If you want to be more precise, you can do test stripes. So, use coated paper and cut it into stripes. Then, expose them to the sun and process one every ten minutes. This way, you'll know which result you'll get with different exposure times.
Also, the website Alternative Photography did a survey of cyanotype exposure among photographers. You can search for your location and season and see if someone has already shared their data.
Step 5: Process the cyanotype
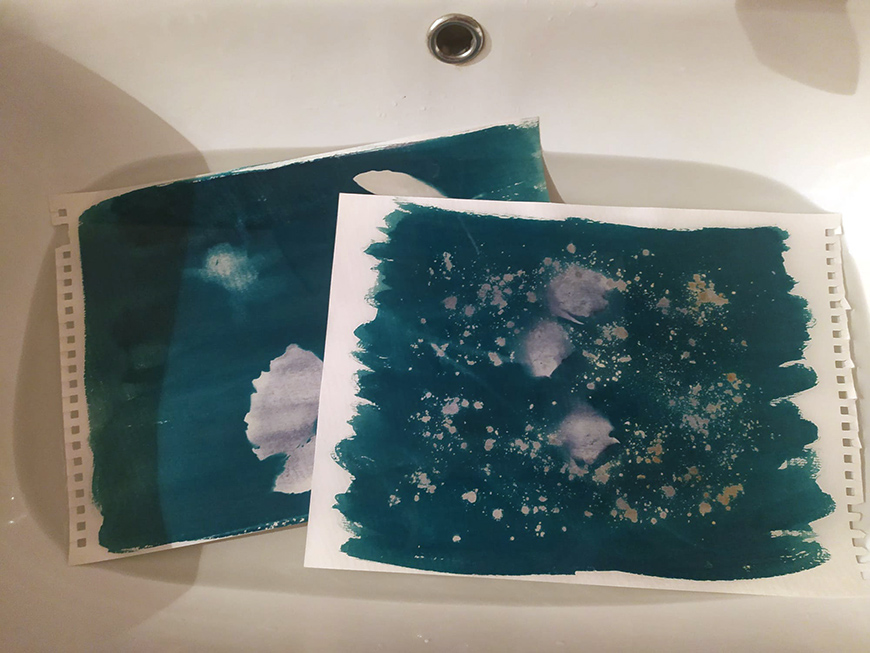
To process your cyanotype, you need to submerge it in cool water. You can use a tray or a bucket and change the water a couple of times.
There's no need to waste water by having the cyanotype under a running faucet. Do this for about 5 minutes, and the water comes out clear.
During this process, your prints will change from bronze to blue.
Step 6: Dry your cyanotype

Now, leave your cyanotype print to dry. Over the next 24 hours, the blue color will get deeper until it reaches the final tone.
As you can see on these final prints, not all objects left a distinct imprint. Anything that's not in direct contact with the paper doesn't work – especially if it's above the glass.
Also, an uneven coating on your diy cyanotype is very evident once the final toning sets after drying. So, be mindful of which brushes you use and the pattern of your strokes.
Extra tips for creating great cyanotypes:
- When choosing the objects for your composition, consider the size, shape and transparency.
- You can try the wet cyanotype technique by placing the objects right after you coated your paper.
- If there isn't enough sun for you to make cyanotypes with natural light, try using UV lamps. Just consider that it takes longer exposure times.
- To get even more creative, you can do some double exposure. Do the first cyanotype following steps 3 to 6. Then, repeat the steps by placing different objects or the same but arranged in a different composition.
How do I Turn an Image into a Cyanotype?
One of the wonderful things about cyanotype is that you can print any image on it. Here's how to make a cyanotype image.
The first thing you have to do is to create a digital negative.
Start by scanning the image if it's not already a digital photograph. Then, open it in Photoshop. You can probably do the same thing with other photo editing programs, though – here's a list.
Once it's open, you need to turn your image to black and white. You can do this by going to the menu Image > Adjustments > Black and White. This will open up a window with sliders for you to control the greyscale.
Now, go to Image > Invert. This will turn it into a negative. So the highlights will be the shadows, and vice-versa. This is because cyanotype is a contact printing technique; you need the negative to be as big as the final photo.
Then, make sure it has enough contrast. If it's not, you can use a Curves or Levels Adjustment layer to optimize your image. I find Levels easier to use, but some prefer Curves. You can even find some Curves presets available for download.
Finally, you need to print it in transparent material. If you have a laser printer, you can use an acetate sheet. For ink printers, you can use transparency film. You can buy transparency materials specifically designed for digital negatives. They give the best results.
The last step is to flip your image horizontally. This is because some transparency films need to be with the print side down. So, without the flip, your image would print mirrored.
Cyanotype Prints: 3 Cool Examples from TikTok
Here are a few great cyanotype examples for inspiration:
@heathersteckler Cyanotypes from start to finish! #printtok#photography#cyanotype ♬ The Winner Is – DeVotchKa & Mychael Danna
@daisybow_craft Cyanotype printing a war ship photograph part 2/3. ⛵️🌊🏴☠️#ManOfWar #FlagShip #Navy #NavalHistory #UKHistory #BritishHistory #Historian #antiquephotograph #Cyanotype #DaisyBow #LearnOnTikTok #CarMeets #HalloweenCostume #OutfitsOfTheWeek #Food #ClimateChange #EqualsAlbum #Sailing #WarShip #Print ♬ Scary stories, horror footage, halloween sati – RYOpianoforte
@katharinetjacobs California poppies Cyanotype botanical print on watercolor paper #cyanotype #photography #wildflower #botanical #artist #artprocess #california #sun ♬ I Bleed – Pixies
What surfaces can you Cyanotype on?
You can use basically any absorbent surface to do cyanotype. Here's a non-exhaustive list to get you started.
Paper:
- Generic watercolor paper
- Bond paper
- Japanese washi
- Recycled paper
- Hand-made paper
- Fabriano
Pre-coated paper:
- Jacquard Cyanotype Pretreat Sheets
- Nature Print Paper
- SunPrint Paper Kit
- SunCreations Cyanotype paper
- TEDCO Sun Art Paper Kit
Fabric:
- Silk
- Cotton
- Linen
- Hemp
- Rayon
- Silk
- Viscose velvet
- Denim
- Leather
- Wool
Other surfaces:
- Glass
- Eggshells
- Clay
- Wood
What fabric is best for cyanotype?
Natural fabrics like linen, cotton, and hemp are the best fabrics to print cyanotype. However, you can use any material, such as denim or viscose velvet.
Can you cyanotype a shirt?
Yes, you can print cyanotype on any fabric. This means that you can cyanotype a shirt, a pair of pants, a jacket, and even a pair of sneakers.
What paper can I use for cyanotype?
The most common paper used for cyanotypes is watercolor paper. However, you can use any type of paper. Some cyanotype artists use paper as thin as Japanese washi. Others prefer thicker paper that it's easier to handle while wet. You can use archival-quality paper to make it last longer.
A Note on Sealing and Preserving Cyanotypes
Cyanotypes are original pieces. So, you should take special care in preserving them. I do suggest that you make a photograph or a scan to keep a digital version for your archive.
Can you wash cyanotype fabric?
Yes, you can wash fabrics with cyanotype. Just check that your detergent doesn't have bleach, phosphate, or sodium in it. In any case, it's always recommended to try it on a small part of the fabric before washing the whole piece.
How long does it take cyanotype to dry?
Once you've coated the cyanotype chemicals on the paper, it should take about 30 minutes to dry. The time can vary depending on the thickness of the paper and how many layers of coating you did.
Do cyanotypes fade over time?
Cyanotypes are permanent, but they can turn yellowish and fade over time if they are exposed to alkaline environments.
How do you frame a cyanotype print?
You need archival materials to protect your cyanotype over time. Look for an unbuffered acid-free mat board to mount your print. Then, use UV glass or UV plexiglass on top.
Final Words
As you can see, it's very easy to print cyanotypes at home. You can use all sorts of objects and techniques. This makes it a wonderful way to exercise your creativity.
It's also an excellent project to do with kids and spend some family time together. You can also paint on top of cyanotypes or make a collage. Give it a try, and let us know how it goes. Have fun!

Check out these 8 essential tools to help you succeed as a professional photographer.
Includes limited-time discounts.

Ana Mireles is a Mexican researcher that specializes in photography and communications for the arts and culture sector.

👋 WELCOME TO SHOTKIT!
🔥 Popular NOW:
